
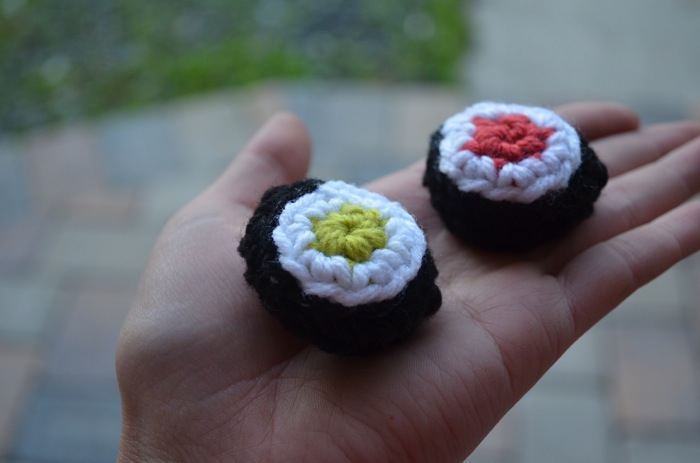
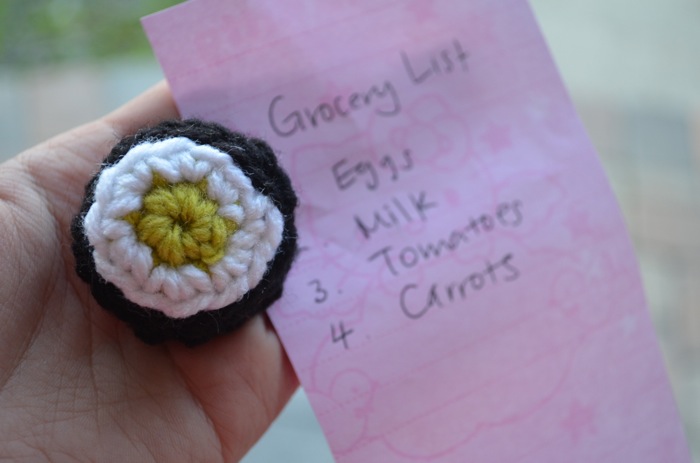
The Crochet Sushi Magnet is such a quick and fun pattern to do. And they have such endless uses you can come up with. If you add in a magnet, you can stick it on the fridge with notes attached. I like to use my sushi magnets to hang up my photos or postcards. If you don’t want to use magnets, you can just have them be play food items or decor. I even made one into a keychain. And they’d make great party favors, especially if they are foodie themed!
Alright so let’s get to it!
*Disclosure: This post contains affiliate links. This means I may receive a small commission if you decide to purchase anything by clicking on one of these links. There is no extra cost to you and it helps me keep creating free content and patterns for you guys on this blog. Thank you for your support!
LEVEL: Easy
HOOK SIZE: 5.0mm hook
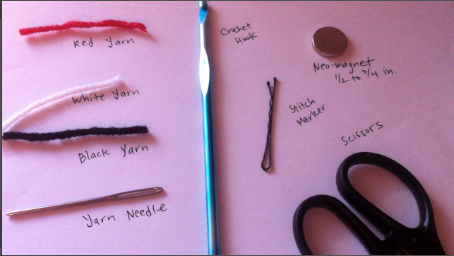
YARN:
Red Heart Super Saver (acrylic, worsted weight)
Red
White
Black
NOTIONS:
Neodymium Magnet aka Super Rare Earth Magnet.
Yarn Needle
Stitch marker
Scissors
Abbreviations
Ch – chain
Sc – single crochet
Sl St – slip stitch
Sc2tog – single crochet 2 together aka single crochet decrease
PATTERN
Round 1: With Red yarn, Ch 2, 6 sc into 2nd ch from hook.
Round 2: With White yarn, 2 sc in each st around — 12 sc.
Round 3: With Black yarn and in Back Loop, sl st in each st around.
Round 4: In Back Loop [2 sc in next st, sc in next 5 st] around — 14 sc.
Round 5: [Sc2tog, sc in next 5 st] around — 12 sc.
Round 6: (with White yarn and in Back Loop) Sc2tog all around — 6 sc.
Finish off leaving a long tail.
Insert Neo-magnet and sew closed.
Crochet Sushi Magnet Video Tutorial
And finally for those visual learners out there, here’s a crochet tutorial video that takes you step by step through each Round in the pattern. It assumes you already know how to crochet! I plan on coming out with basic crochet video tutorials very soon, so I’ll keep you posted!
Extra notes:
You want to be sure to get the extra strong magnets or it won’t be able to be powerful to stick through the yarn. If you get a weaker magnet, I’d recommend glueing it to the outside of of the sushi. A good strong glue to use is E-6000.
Let me know how yours turns out! You can tag me on my Instagram or Facebook.
3 Comments
Wacky Wednesday! | Tinker, Tailor, Sweater, Sigh!
January 20, 2015 at 1:11 pm[…] things anime and Japanese…..SUSHI! You have to have Sushi involved. Here is a tutorial for Crocheted Sushi Magnets from Amiamour. You can also find […]
Kelly
June 30, 2017 at 11:50 pmHello AmiAmour,
I’m relatively new to crotcheting and I’m trying this sushi pattern out, and I have a query in regards to the number of stitches per round when the colour change occurs. When I finished my first round (6 sc) then did the colour change (insert hook, yarn over, pull through, finish sc with new colour) I got 7 sc in the round. I also watched the video tutorial and it seems that you did the same as I did, except you got 6 sc in a round rather than 7 sc. Is there something I missed?
Thank you!
Ami Amour
July 1, 2017 at 4:53 amTry doing the color change on the last stitch of the first round. And then make sure you’re doing your sc increase for Round 2 in the next stitch and not in the same stitch as before. And also it’s ok, if you still have 7 sc. Just skip over one stitch. It shouldn’t make too big of a difference. Hope that can help!