
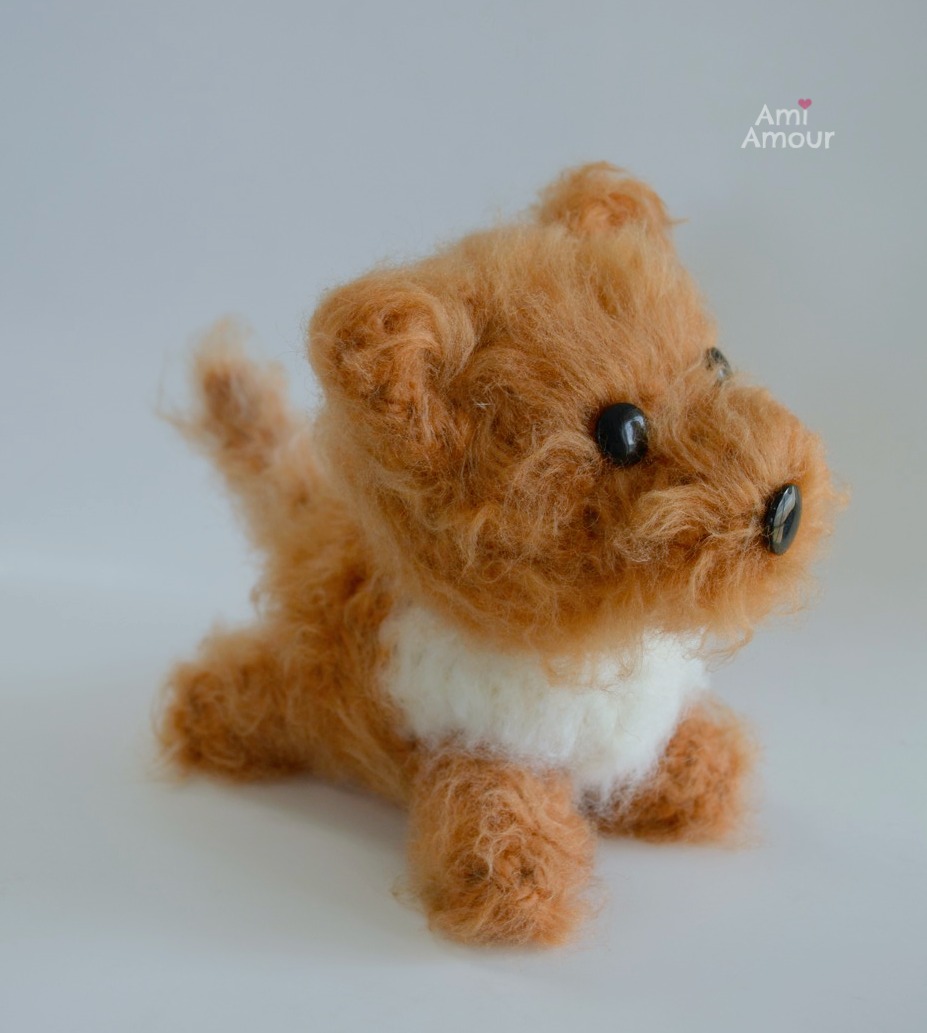
Here’s a Dog Amigurumi pattern, but with a twist! I use Brush Crochet Technique to create a very fluffy dog!
It was my first time experimenting with brushing out yarn, but I had great fun with it and love the realistic furry effect that this technique gives.

First let’s talk about yarn. When doing Brush Crochet, natural fibers work best. This means yarn such as wool, alpaca, mohair, etc. (all coming from fuzzy animals!) will give you the best fluffy amigurumis.
You can even go meta for this pattern and use chiengora (aka dog yarn, yes there is such a thing!).
You can use acrylic too, but the effect will be less fuzzier. For my doll, I used this yarn blend that was 50% wool and 50% acrylic and it was still quite fluffy.
But if you use a 100% natural fiber yarn, you should be able to work up an even greater amount of fluffiness.
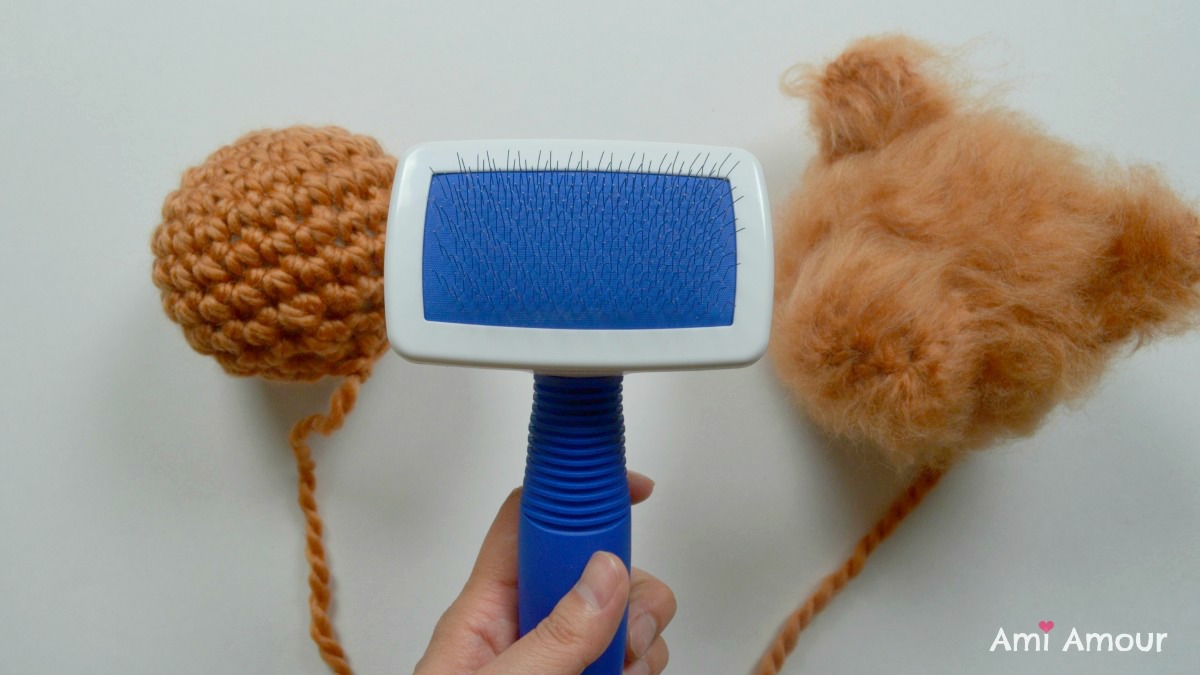
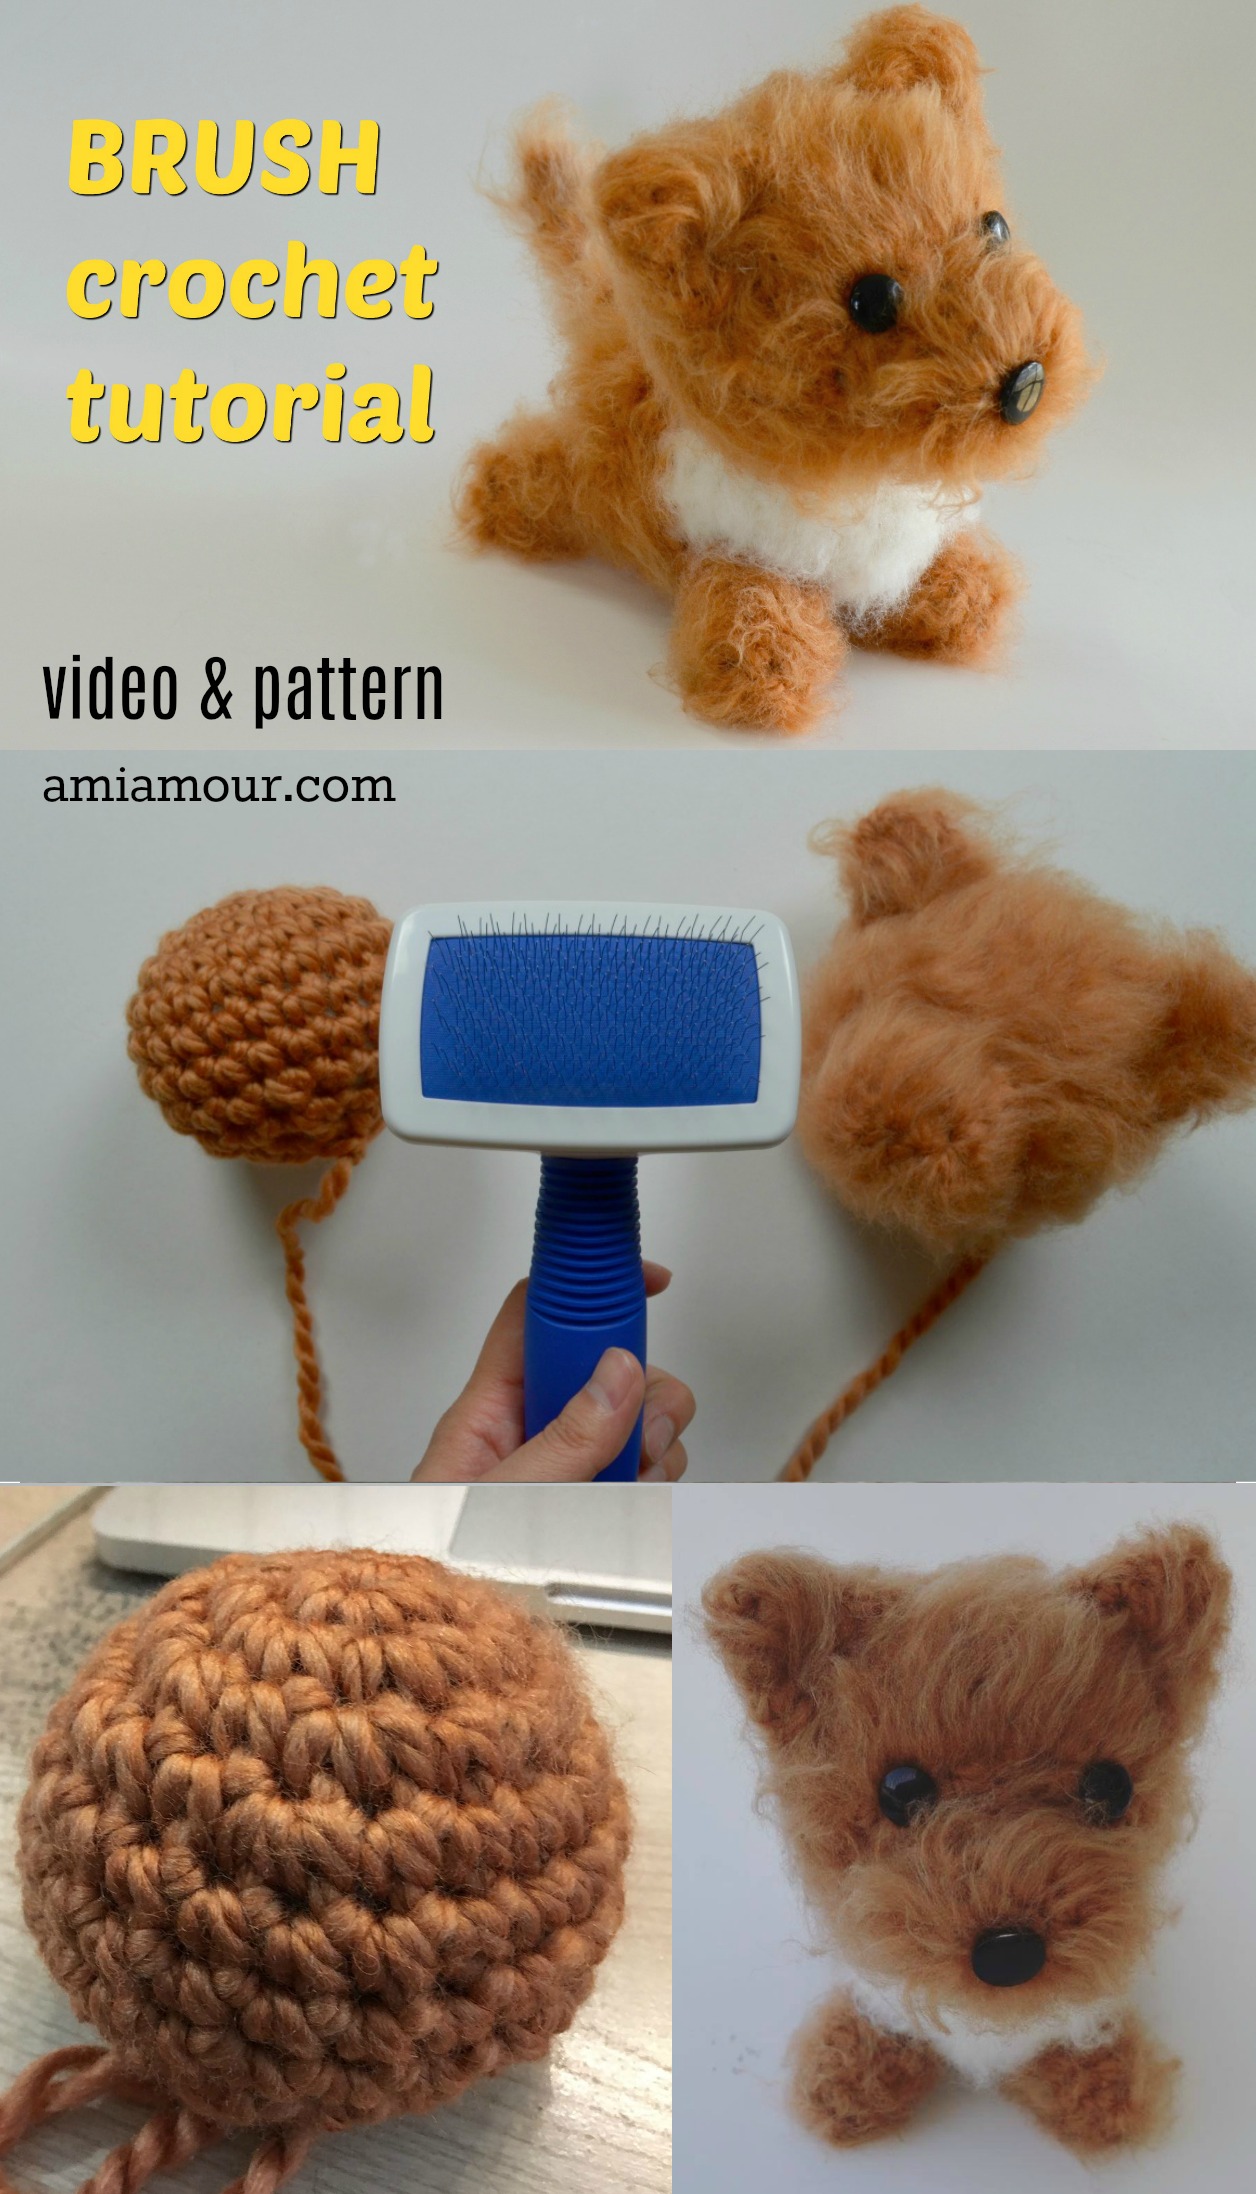
Next, your handy tool is the Pet Slicker Brush. This brush can be found in pet stores or in almost any pet section. The sharp metal bristles help to release the fibers and fluff them up.
When you’re brushing, you’ll need to brush quite vigorously. Don’t be afraid of the fibers, you won’t hurt it, and you can’t mess up, so just brush it quite hard.
Have patience because it does take some time.
The motto to remember about Brush Crochet is “Just Keep Brushing.” And yes you can sing it like Dory does in Finding Nemo :P. “Just Keep Brushing, Just Keep Brushing!”
I’ve created a video tutorial so you can see the Crochet Brush technique in action, and I give you more tips on how I go about brushing my amigurumi.
It is quite the workout!
Video Tutorial
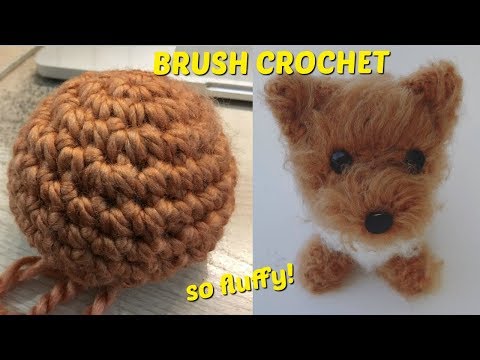
You can also find the full video crochet tutorial for the dog itself on my YouTube channel. Let me know if you experiment with Brush Crochet. I’d love to hear all about your experience and how your project came out!
Don’t forget to subscribe to my blog to get all my latest pattern updates!
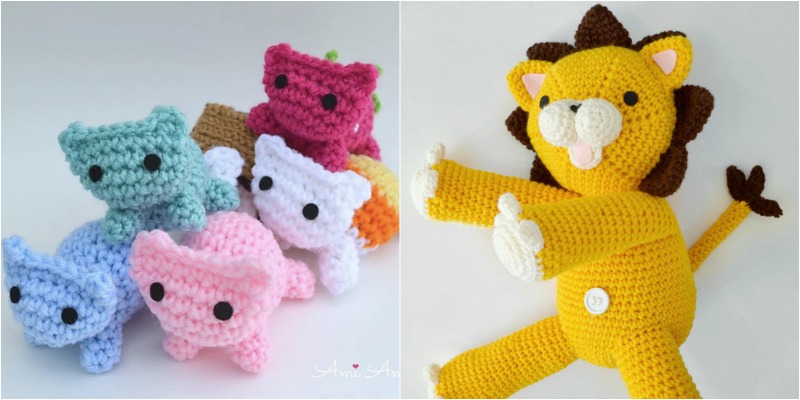
If you like this pattern, you may also enjoy my other FREE patterns:
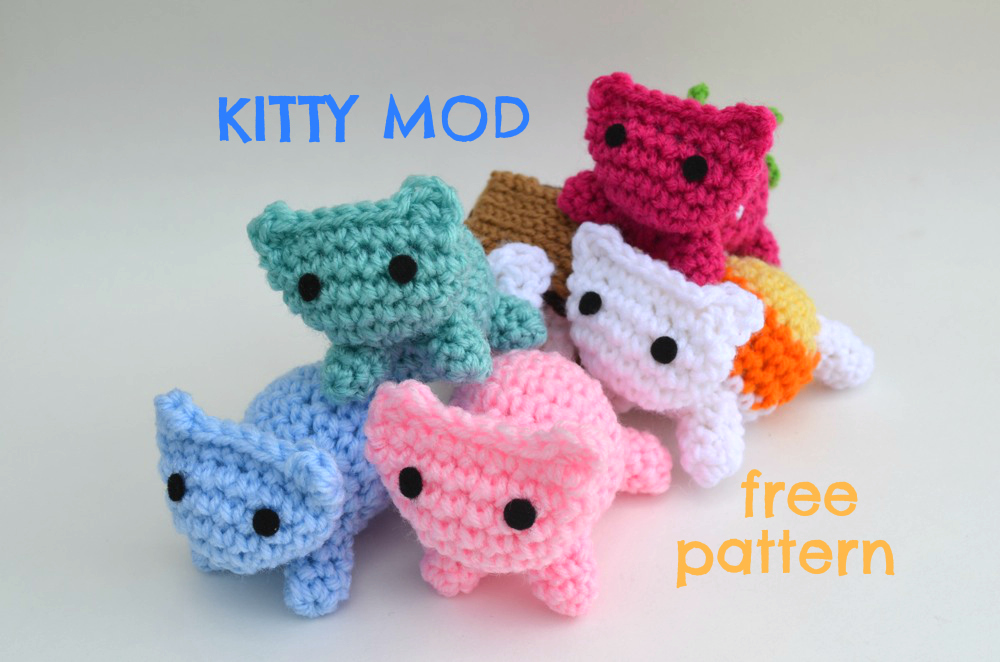
1. Kitty Mod Pattern / 2. Crochet Lion Amigurumi
*Disclosure: This post contains affiliate links. This means I may receive a small commission if you decide to purchase anything by clicking on one of these links. Thanks for your support!


DOG AMIGURUMI PATTERN – BRUSH CROCHET
LEVEL: Easy
HOOK SIZE: 6.5mm hook
YARN:
Loops & Thread, Cozy Wool (wool 50% and acrylic 50%, chunky weight):
Harvest
Fleece
NOTIONS:
Pet Slicker Brush
Yarn Needle
Eyes: 16mm Shank Button in Black or Safety Eyes (2)
Nose: 19mm Shank Button in Black or Safety Eye (1)
Scissors
Polyester Fiberfill
Stitch Marker
FINISHED SIZE:
Approximately 7in/18cm tall, 6in/15cm long
HEAD
With Harvest color yarn (brown)
Round 1: 6 sc into magic ring
Round 2: 2 sc in each st around – 12 sc.
Round 3: [2 sc in next st, sc in next st] around – 18 sc.
Round 4: [2 sc in next st, sc in next 2 st] – 24 sc.
Round 5-7: Sc in each st around.
Round 8: [Sc2tog, sc in next 2 st] around – 18 sc.
Round 9: [Sc2tog, sc in next st] around – 12 sc.
Round 10: [Sc2tog, sc in next st] around – 8 sc.
Fasten off, leaving a long tail.
SNOUT
With Harvest color yarn (brown)
Round 1: Ch 5, Sc in next 4 ch, on other side of ch, sc in next 4 ch – 8 sc
Round 2: [2 sc in next 2 st, sc in next 2 st] around – 12 sc.
Round 3: Sc in each st around.
Fasten off, leaving a long tail.
EAR (make 2)
With Harvest color yarn (brown)
Round 1: 4 sc into magic ring
Round 2: [2 sc in next st, sc in next st] around – 6 sc.
Round 3: [2 sc in next st, sc in next 2 st] around – 8 sc.
Round 4: [2 sc in next st, sc in next st] around – 12 sc.
Fasten off, leaving a long tail.
Do not stuff.
BODY
Round 1: With Fleece color yarn (aran), 6 sc into magic ring.
Round 2: 2 sc in each st around – 12 sc.
Round 3: [2 sc in next st, sc in next st] around – 18 sc.
Round 4: [2 sc in next st, sc in next 8 st] around – 20 sc.
Round 5-7: Sc in each st around – 20 sc.
Round 8-11: With Harvest color yarn (brown), sc in each st around – 20 sc.
Round 12: [Sc2tog, sc in next st 8 st] around – 18 sc.
Note: Begin stuffing, and stuff as you go.
Round 13: [Sc2tog, sc in next st] around – 12 sc.
Round 14: Sc2tog around – 6 sc.
Fasten off, leaving a long tail.
Finish stuffing and sew closed.
LEG (make 4)
Round 1: 4 sc into magic ring.
Round 2: 2 sc in each st around – 8 sc.
Round 3-5: Sc in each st around – 8 sc.
Fasten off, leaving a long tail.
TAIL
Round 1: 4 sc into magic ring.
Round 2-8: Sc in each st around – 4 sc.
Fasten off, leaving a long tail.
Do not stuff.
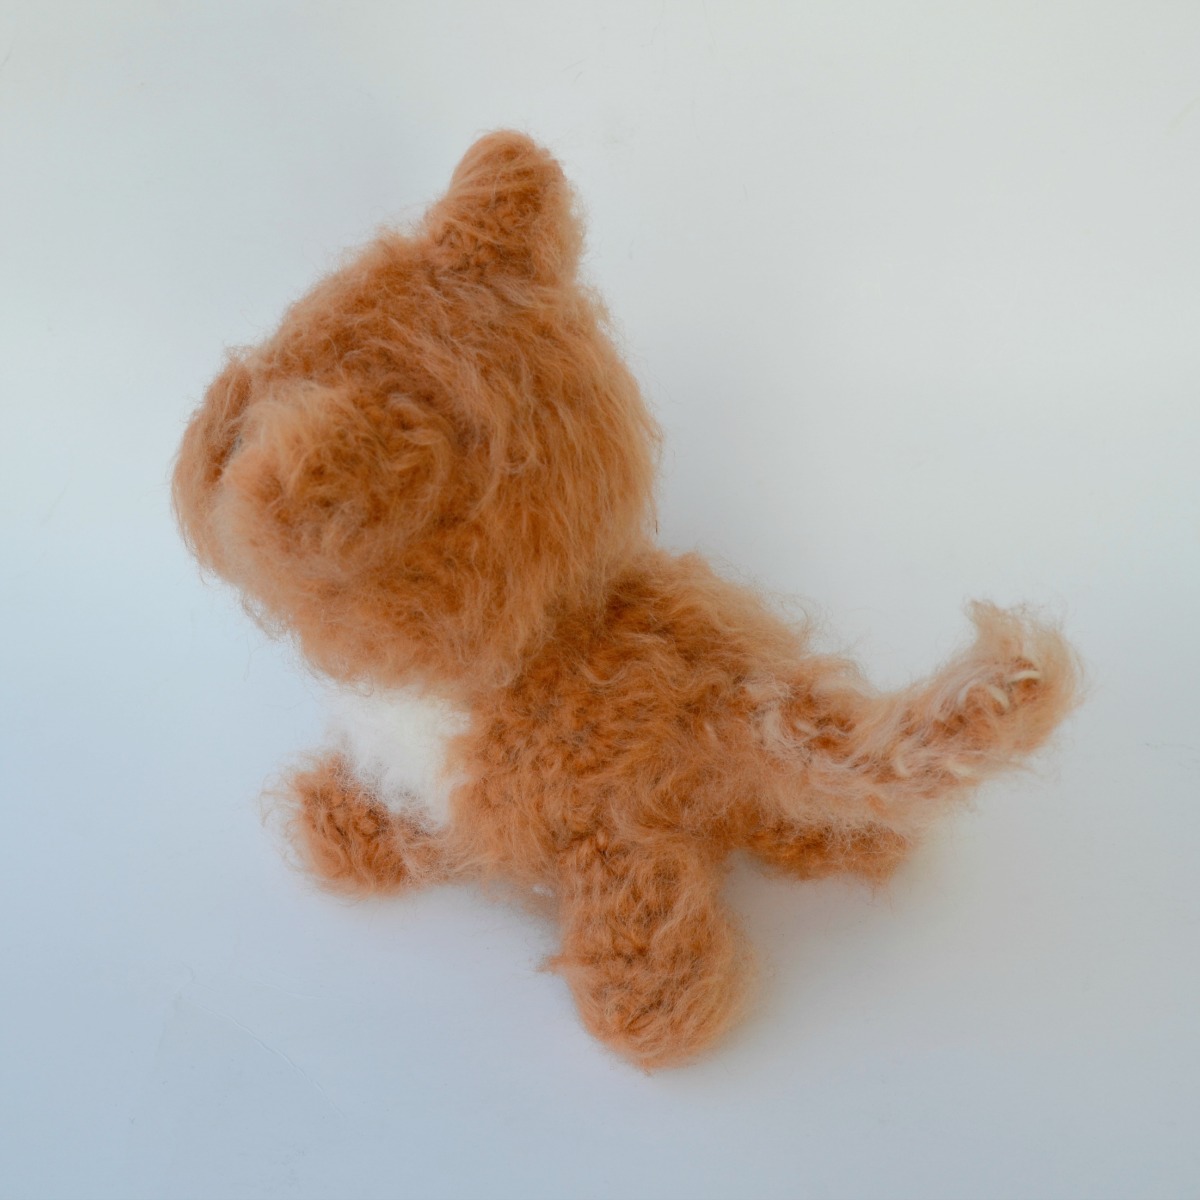
ASSEMBLY
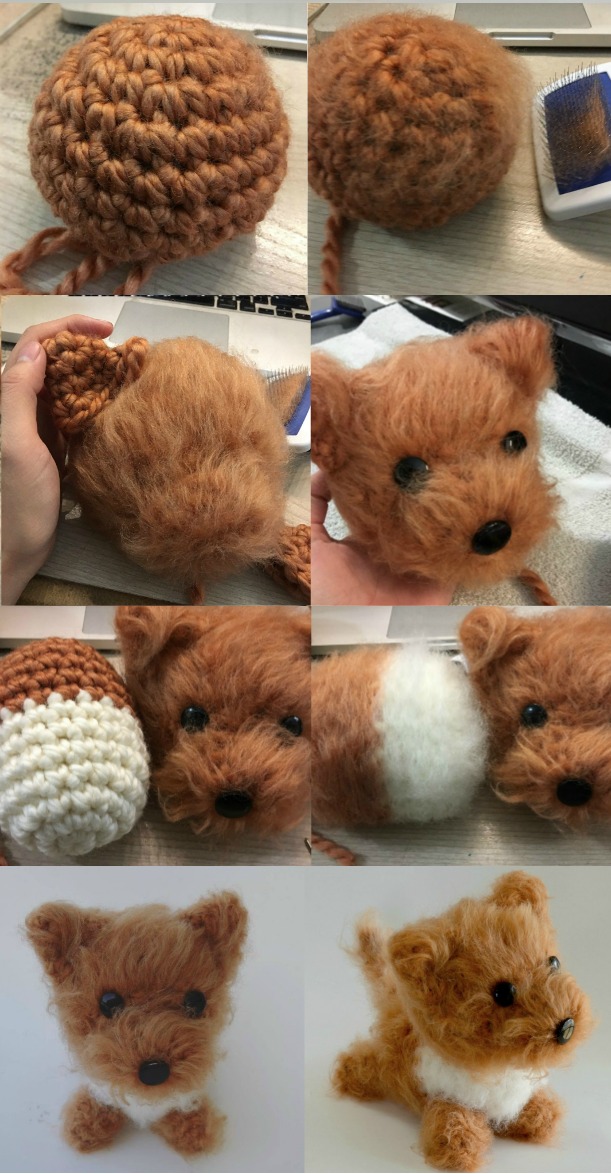
1. Stuff the head lightly. With your Pet Slicker Brush, brush your amigurumi head vigorously and strongly. It will take some time, but you will see a halo start to form. Keep Brushing and the fiber will get more fluffier and longer. See the video tutorial for visual reference. Finish stuffing the head more firmly.
2. Stuff snout lightly and sew onto Head (but if you have a safety nose, you’ll want to place that on before you sew on snout to head). Placement is 3 rounds up from last row of head (count from bottom up). Brush out with Pet Slicker Brush.
3. Sew the Ears to the Head. Then brush out with Pet Slicker Brush. For the top of the head I like to brush upward. On bottom of snout, I like to brush downward. As the fibers get fluffy you can also style the fur to go in the direction you wish.
4. Sew on Eyes to head (16mm shank buttons) or you can use safety eyes. If you haven’t done so, sew on nose (19mm shank button) to middle of snout.
5. Brush out Body. Sew Head to Body.
6. Stuff the Legs. Sew onto Body. Brush out Legs.
7. Brush out tail. Sew onto end of Body.
8. Make sure to hide all ends.
9. Finish brushing out to your satisfaction.
Happy Crocheting and please do tag me with your projects on my Instagram or Facebook! I’d love to see!
Be sure to check out my other FREE PATTERNS! 🙂
47 Comments
Hana
May 12, 2018 at 9:44 pmWay too cute!!!!
So talented. Thank for sharing this adorable fluffy do with us. 🙂
Ami Amour
May 12, 2018 at 11:58 pmThank you! So glad you like!
Jamilynn
April 12, 2019 at 9:22 pmI need tips for brushing i do have a dog brush and its fury but not as yours
Ami Amour
April 13, 2019 at 11:58 amWhat kind of yarn did you use? If you use acrlyic it doesn’t come out as fluffy, but if you use wool or alpaca yarn it should come out a lot more fluffier. And I would recommend to keep brushing and brushing until you get to your desired floofiness.
Y Powell
August 29, 2020 at 7:34 pmLove this idea. Thanks! Q:How do you put the safety eyes and nose in?
Ami Amour
August 30, 2020 at 1:45 pmI used buttons so I just needed to sew mine on, but you can also use safety eyes and noses instead. But if you do, make sure you do it before you sew the doll together, or you won’t be able to get the backing on.
Silvie
May 18, 2018 at 6:32 amYour little dog looks very nice !!!
Thank You for Sharing ?
Ami Amour
May 18, 2018 at 5:15 pmThanks so much! Glad you can enjoy.
Suzij
May 19, 2018 at 11:05 pmCant wait to try thankyou
Ami Amour
May 19, 2018 at 11:43 pmThanks for commenting and I’d love to see if you do!
Melissa de Wavrin
May 20, 2018 at 9:26 pmHi! Can’t wait to make a bunny for a dear friend who’s having a baby! Thanks for the video too! Always good to see it done visually. How much yarn do you need? ???
Ami Amour
May 24, 2018 at 1:00 amHi Melissa, for me I just used 1 skein of the Extra Chunky Loops and Thread, Cozy Wool yarn which was about 3.5oz. Hope that helps! Ooh a bunny would be the perfect animal to try the brush crochet on! Love to see how it turns out.
Sherie Rodrigues
May 24, 2018 at 12:22 amDear Sharon. I love love love your work, and I love your sharing. Both beautiful. Love from Sherie. PS, I am amazed at the talent in our world.
Ami Amour
May 24, 2018 at 1:02 amOh thanks Sherie, hey our names are pretty close lol! Thank you for taking the time to write to me. It really means a lot and motivates me to come out with even more patterns . Thank you for your lovely words and I hope you have a great day too!
June
May 26, 2018 at 5:58 pmIt’s beautiful! Showed my 8yo the finished dog picture and asked her if it’s a real dog? She thinks it’s real xx Gonna give this a try! Will 100% Acrylic yarn not have the same effect then xx Thanks
Ami Amour
May 26, 2018 at 6:33 pmThanks, June! Acrylic yarn won’t be as fuzzy, so I recommend trying it with a yarn that’s at least 50% wool or alpaca. I’d love to see how yours comes out! Happy crocheting!
Crafting cozy
June 5, 2018 at 12:21 amWow it is too cute!!!!! I crochet animals and sell them in school one of my friends wanted me to make her a dog do you mind if I make this same thing and sell it?
Ami Amour
June 5, 2018 at 12:46 amSure, you are free to do as you wish with your finished items. I don’t mind, as long as you give me credit for the Pattern design. Happy crocheting!
Heather
June 25, 2018 at 7:24 amDo you send patterns to email addresses. Love these so much I have a Pomeranian
Ami Amour
June 26, 2018 at 9:31 pmHi Heather, I haven’t made this into a PDF premium pattern, but you can always come back to it by bookmarking the page or emailing yourself the link. Thanks for your interest!
Crafting cozy
June 6, 2018 at 1:10 amThanks will be sure to do sooo. They loveeeed it it was a gift for a baby girl. Thanks again!!!!!!
Michele
September 3, 2018 at 5:00 pmThis is so cute! I hope I get a chance to try it. I am assuming if I want to make the dog smaller I would just use a smaller hook. Have you tried a smaller size?
Ami Amour
September 3, 2018 at 6:26 pmHI Michele, using a thinner yarn and hook will definitely make it smaller. I haven’t tried making the dog in a smaller size yet though!
Lorena
February 6, 2019 at 7:27 amPor favor traducir!!
Ami Amour
February 7, 2019 at 9:30 amHi Lorena, you can actually follow along to the video tutorial on my YouTube channel here: https://youtu.be/OBXeigRom5Q
Beth
March 14, 2019 at 1:38 amI absolutely love this! Do you have any hints on making the pattern larger for a bigger size dog?
Ami Amour
March 14, 2019 at 10:27 amHi Beth, you can try double stranding the yarn to get a larger dog. Also you can try other bigger sized dog patterns and just use the brush technique on it. But make sure you use yarn with wool or other natural fibers in it or it won’t get as fluffy!
Minapia
March 16, 2019 at 2:03 amI try to make this lovely dog the result is a baby fox !! You are rigt the acrylique yarn don’t give a good fluffi look, i would like to send you a picture just for the fun !!!
Thank you for sharing patterns.
Sorry for my bad english
Ami Amour
March 16, 2019 at 5:40 pmI would love to see! Yes you could send it to my email or if you have instagram you can also tag me in the photo: https://www.instagram.com/ami_amour . Email should also be listed there in my Instagram profile.
Ruth Nutter
March 29, 2019 at 10:14 amCan you do this with a smaller hook to make a smaller dog.
Ami Amour
March 29, 2019 at 10:22 amYes, you can just use worsted weight (instead of chunky) wool yarn with a smaller hook and you will get a smaller sized dog.
charlee
April 18, 2019 at 4:58 amAny tips for making a corgi?
Ami Amour
April 18, 2019 at 9:07 amI would recommend finding a corgi pattern that you like and try brushing that one out. Or you can also try to adapt my pattern and make the ears be longer and wider and create a triangle patch for the face. Good luck!
Sara Universe
July 20, 2019 at 11:52 amHi thank you for sharing this pattern ?❤? can we do this with hair brush?
Ami Amour
July 20, 2019 at 10:16 pmIf you don’t have a pet slicker brush, you can try with a regular hair brush. It’ll still get fuzzy but not quite as much as with a pet brush. Good luck!
Jen
July 24, 2019 at 8:10 pmHas anyone tried this technique on a knot pattern rather than crochet? I’m wondering if all the brushing would pull the stitches out of whack on a knit pattern toy…?
Jen
July 24, 2019 at 8:11 pmSorry “knit” pattern not “knot”
Ami Amour
July 24, 2019 at 8:14 pmI believe it should be able to work on a knit pattern as well, but I’ve never tried it myself. Maybe if anyone has tried, they can also chime in.
akira
June 30, 2020 at 12:38 pmBeatiful!!
Ami Amour
June 30, 2020 at 12:45 pmThank you! 🐶
Claudia
August 24, 2020 at 8:18 pmEs demasiado lindo este perrito, me enamoré…
Ami Amour
August 29, 2020 at 6:26 pmGracias!
anonymous
October 17, 2020 at 5:16 pmIs it possible to use a normal brush? thx!
Ami Amour
October 17, 2020 at 6:17 pmHi, I haven’t tried to use a normal brush, so can’t really say. It might help it become fuzzy, but for maximum fuzziness I would definitely recommend using a pet slicker if you can get one.
Anna-Marie Stewart
October 18, 2020 at 1:39 pmI can’t show you right now what I made using this pattern today, as it’s a super secret gift and I’d be scared somebody who shouldn’t see it would see it hahahaha. It turned out brilliantly though, so thank you SO much for the pattern!! I’ll pop onto insta to find your email address and send you a pic if you like? 🙂
Ami Amour
October 19, 2020 at 9:42 pmYes, I’d totally love to see!