
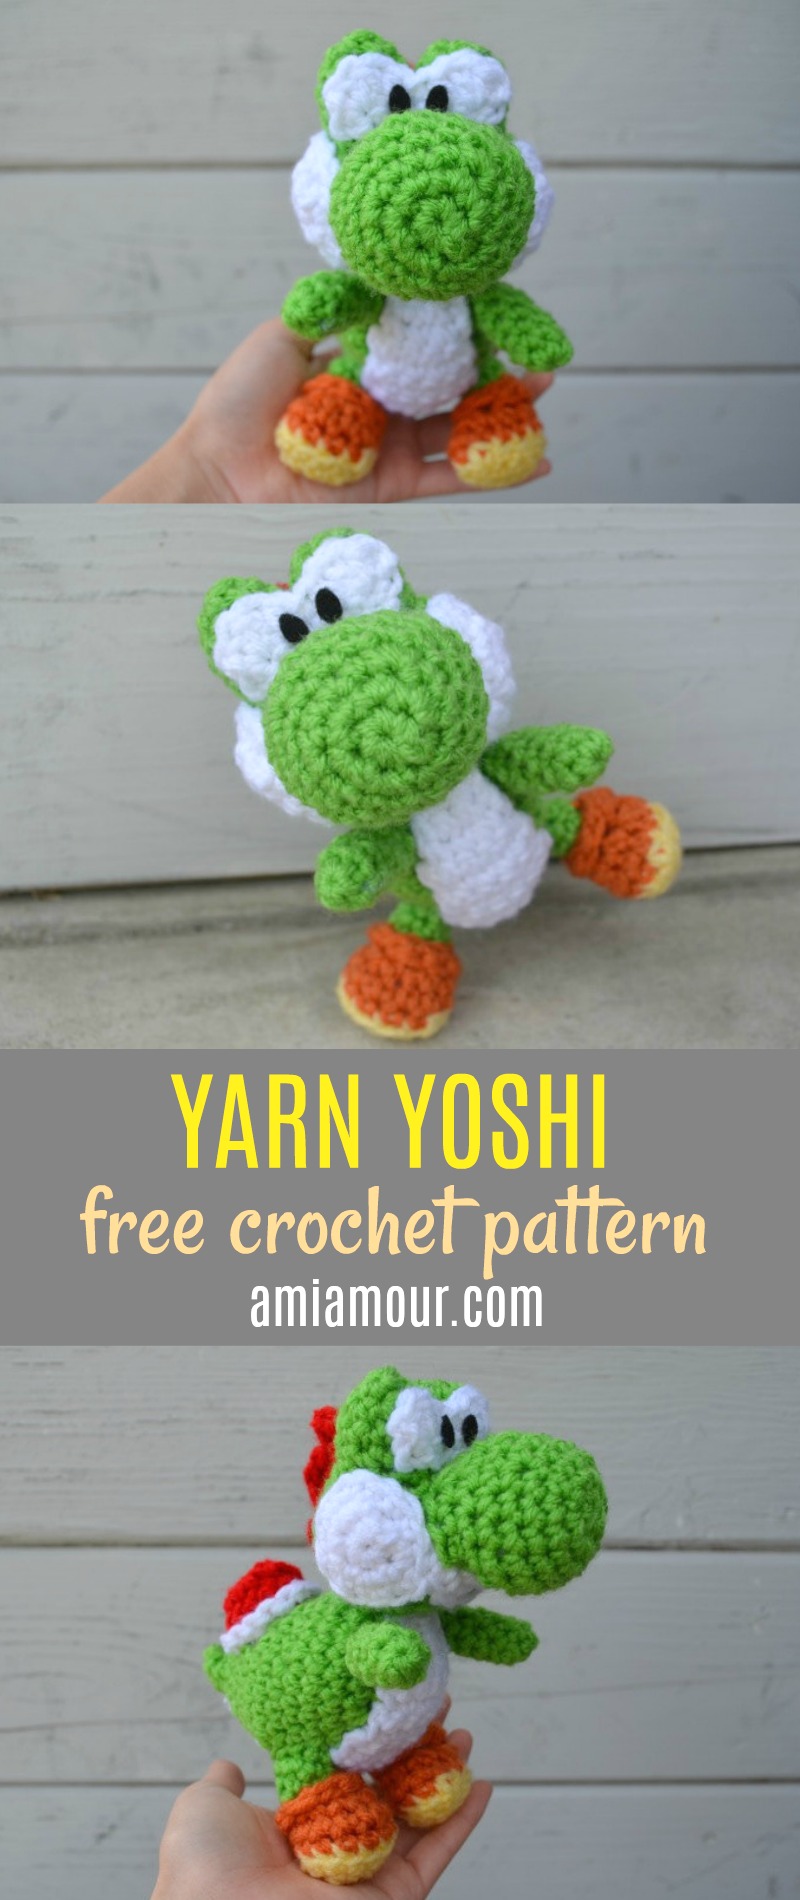
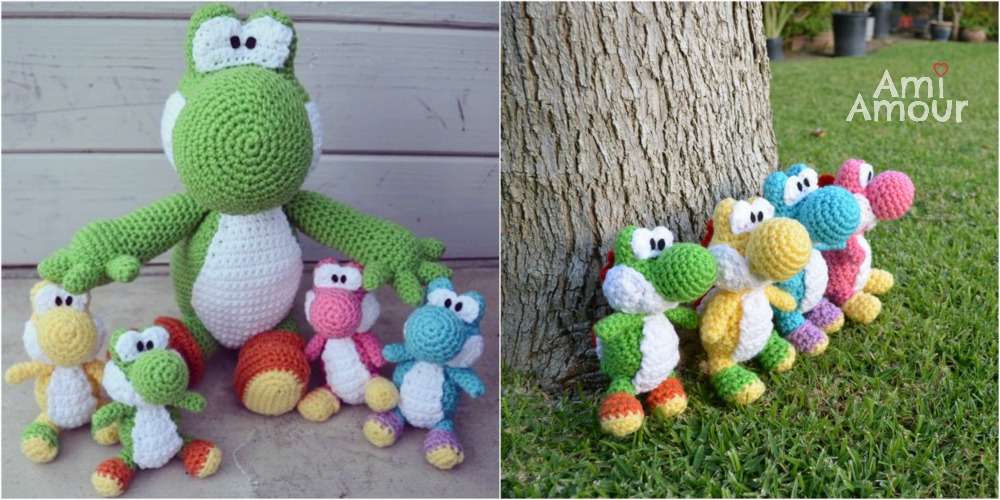
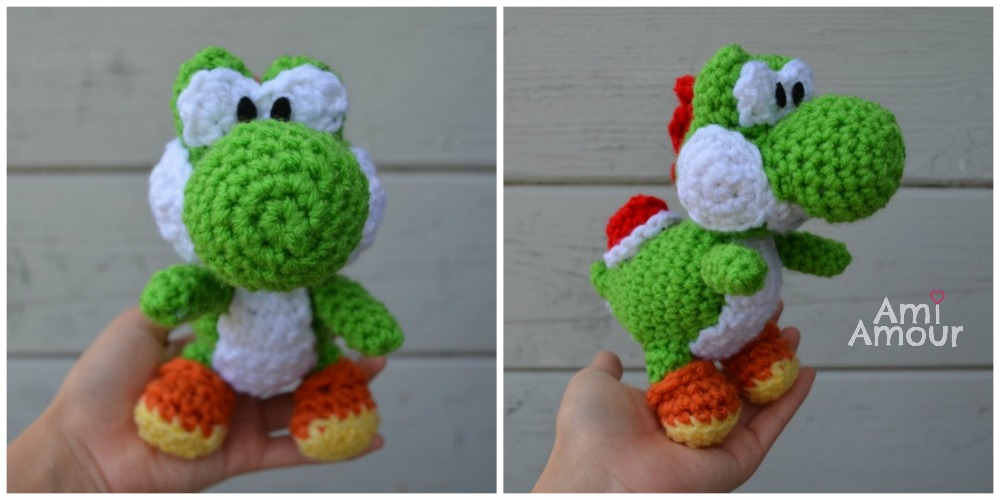
Yoshi has always been cute, but he’s super-duper cute in his yarn yoshi form! Here’s a chibi yoshi amigurumi that I designed using Yoshi’s Wooly World as my inspiration.
I hope you enjoy making him!
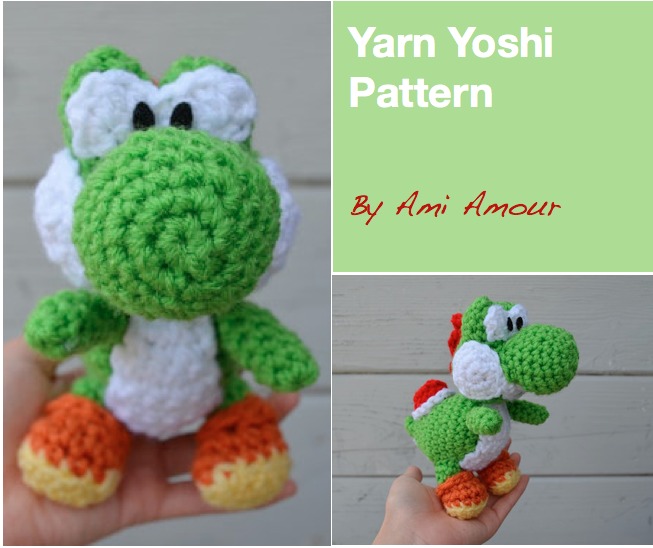
This free Yoshi amigurumi pattern has features that include a cute face with a large nose, a saddleback on his back, spikes on the back of his head, and boots to help him with his jumping skills!
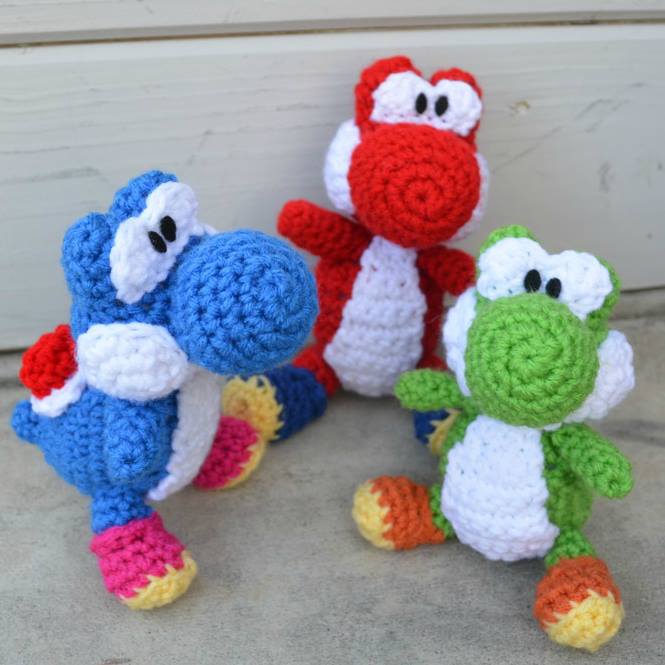
Make him in all different colors to create an entire Yoshi herd! If you like my large Yoshi amigurumi that’s in a great huggable size, you can find that crochet pattern here.

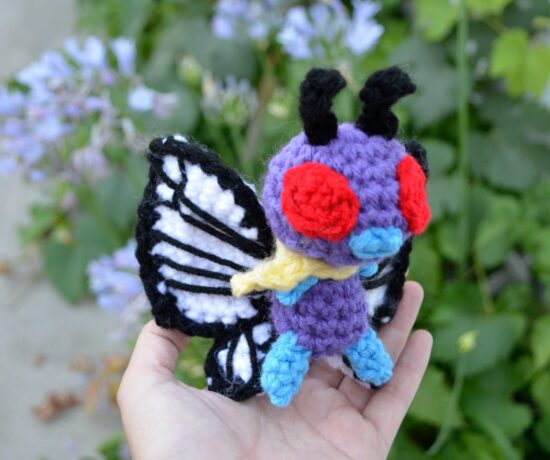
Be sure to also check out my amigurumi collection of all the Pokemon I’ve made throughout the years!
And don’t forget to subscribe to my blog to get all the latest pattern updates!
If you like Yoshi, you may also enjoy these other FREE patterns:
1. Mario Mushroom / 2. Pikachu Amigurumi

Disclosure: This post contains affiliate links. This means I may receive a small commission if you decide to purchase anything by clicking on one of these links.
Yarn Yoshi Amigurumi Pattern
SKILL LEVEL: Easy
CROCHET HOOK: Size H-8 (5 mm)
YARN:
Red Heart Super Saver – worsted weight, acrylic yarn
#672 Spring Green
#311 White
#319 Cherry Red
#235 Lemon
#256 Carrot
NOTIONS:
Polyester Fiberfill
Black Felt
Yarn Needle
Stitch Marker
Fabri-tac Glue
ABBREVIATIONS:
ch – chain
dc – double crochet
hdc – half double crochet
sc – single crochet
sl st – slip stitch
sc2tog – single crochet 2 together (sc dec)
st – stitch
APPROXIMATE SIZE:
Sits at 6in/15cm
Stands at 7in/18cm tall from head to feet
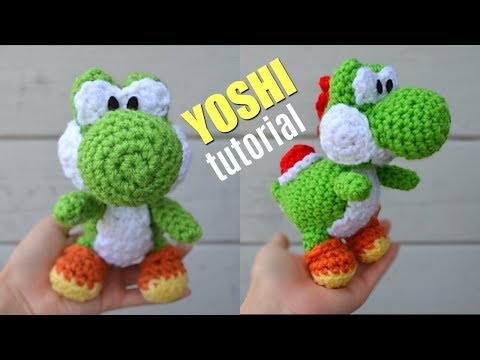
Yoshi Crochet Tutorial Video
See Yoshi in action and crochet with me from beginning to end
YOSHI CROCHET PATTERN
YOSHI HEAD
Round 1: With green, 5 sc into adjustable ring.
Round 2: 2 sc in each st around – 10 sc.
Round 3-5: Sc in each st around.
Fasten off. Cut the yarn. You have just created Part A.
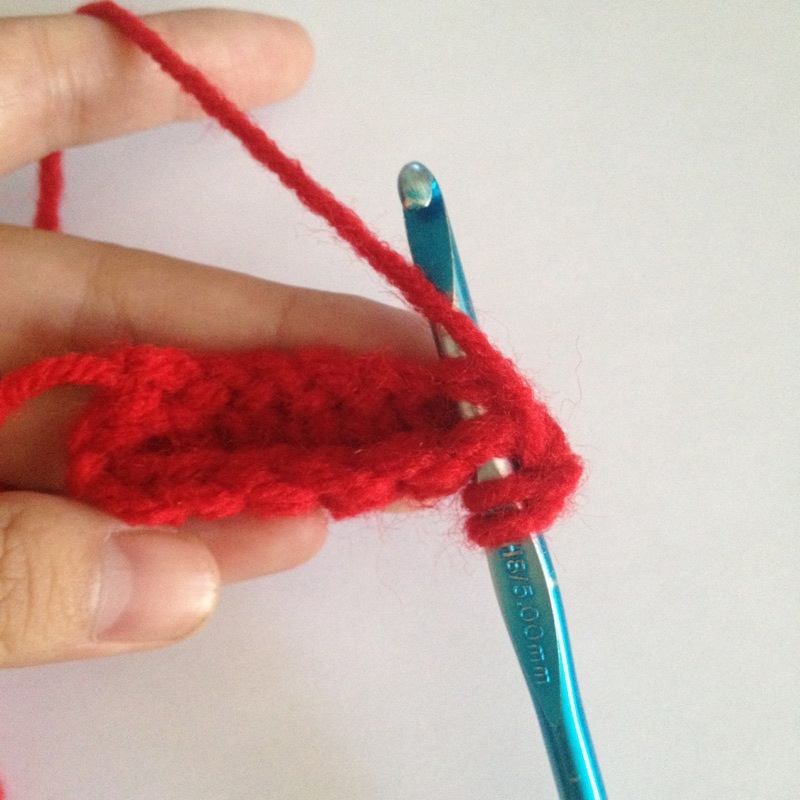
Repeat Rounds 1-5 to create Part B. Do not fasten off or cut off. Join Part A and Part B together across 4 stitches using sc. See photos below.
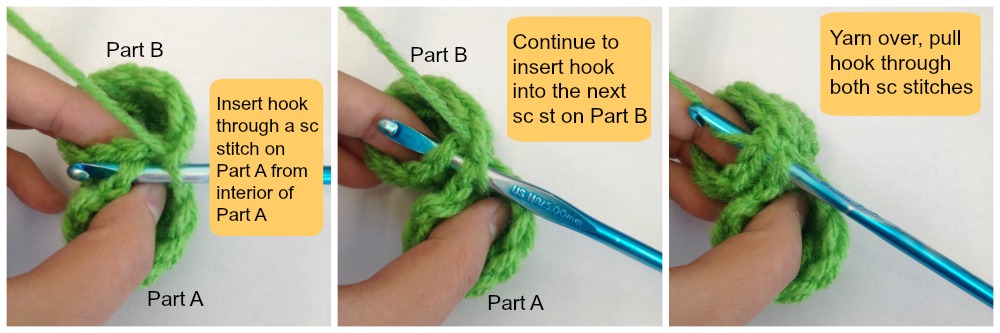
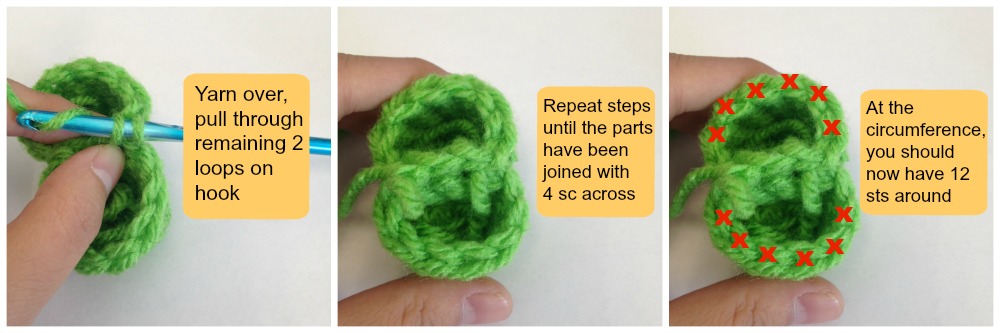
You should now have 12 st around. (Do not count the stitches that are joined). Continue onto Round 6, you will be working the circumference as seen in the last photo.
Round 6: 2 sc in each st around – 24 sc.
Round 7-9: Sc in each st around.
Round 10: [Sc2tog, sc in next 2 st] around – 18 sc.
Round 11: [Sc2tog, sc in next st] around – 12 sc.
Round 12: [Sc2tog, sc in next st] around – 8 sc.
Fasten off, leaving a long tail.
NOSE
Round 1: With green, 6 sc into adjustable ring.
Round 2: 2 sc in each st around – 12 sc.
Round 3: [2 sc in next st, sc in next 3 st] around – 15 sc.
Round 4: Sc in each st around.
Round 5: [2 sc in next st, sc in next 4 st] around – 18 sc.
Round 6: Sc in each st around.
Round 7: [Sc2tog, sc in next 4 st] around – 15 sc.
Round 8: [Sc2tog, sc in next 3 st] around – 12 sc.
Fasten off, leaving a long tail.
CHEEK/MOUTH PATCHES (make 3)
Round 1: With white, 6 sc into adjustable ring.
Round 2: 2 sc in each st around – 12 sc.
Round 3: [2 sc in next st, sc in next 3 st] around – 15 sc.
Fasten off, leaving a long tail.
EYE PATCH
Row 1: With white, Ch 7, sc into 2nd ch from hook, and sc in each st across – 6 sc.
Row 2: Ch 1, turn, (hdc, dc) in first st, hdc in next st, sl st in next st, hdc in next st, (dc, hdc) in next st, sl st in last st. Fasten off leaving a long tail.
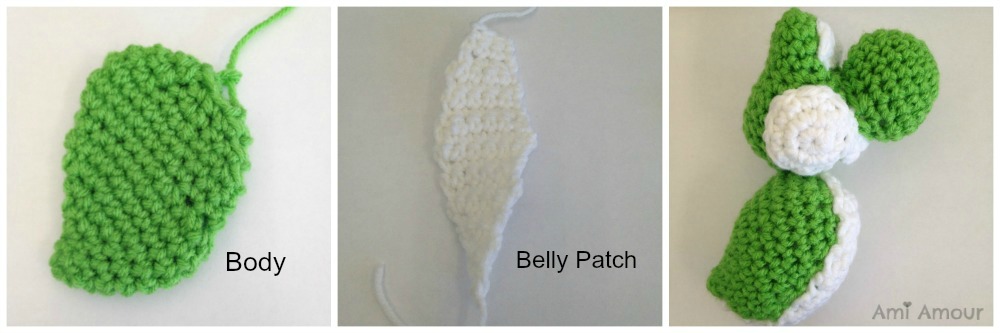
BODY
Note: Pay attention to the increases and decreases in this section!
Round 1: With green, 4 sc into adjustable ring.
Round 2: 2 sc in next 2 st, sc in next 2 st – 6 sc.
Round 3: [2 sc in next st, sc in next st] 2 times, sc in next 2 st – 8 sc.
Round 4: 2 sc in next 4 st, sc in next 4 st – 12 sc.
Round 5: [2 sc in next st, sc in next st] 3 times, sc in next 6 st – 15 sc.
Round 6: [2 sc in next st, sc in next 2 st] 3 times, sc in next 6 st – 18 sc.
Round 7: Sc in next 4 st, 2 sc in next 6 st, sc in next 8 st – 24 sc.
Round 8: Sc in each st around.
Round 9: Sc in next 16 st, sc2tog 4 times – 20 sc.
Round 10: Sc2tog 2 times, sc in next 3 st, 2 sc in next 6 st, sc in next 7 st – 24 sc.
Round 11-12: Sc in each st around.
Round 13: [Sc2tog, sc in next 2 st] around – 18 sc.
Round 14: [Sc2tog, sc in next st] around – 12 sc.
Note: Begin stuffing and stuff as you go.
Round 15: Sc2tog around – 6 sc.
Fasten off, leaving a long tail.
Stuff and sew closed.
BELLY PATCH
Row 1: With white, Ch 2, sc into 2nd ch from hook – 1 sc.
Row 2 : Ch 1, turn, sc in first st – 1 sc.
Row 3: Ch 1, turn, 2 sc in first st – 2 sc.
Row 4: Ch 1, turn, sc in each st across – 2 sc.
Row 5: Ch 1, turn, 2 sc in first st, sc in next st – 3 sc.
Row 6: Ch 1, turn, sc in each st across – 3 sc.
Row 7: Ch 1, turn, 2 sc in first st, sc in next st, 2 sc in last st – 5 sc.
Row 8-10: Ch 1, turn, sc in each st across – 5 sc.
Row 11: Ch 1, turn, 2 sc in first st, sc in next 3 st, 2 sc in last st – 7 sc.
Row 12: Ch 1, turn, sc in each st across – 7 sc.
Row 13: Ch 1, turn, sc2tog, sc in next 3 st, sc2tog – 5 sc.
Row 14-17: Ch 1, turn, sc in each st across – 5 sc.
Row 18: Ch 1, turn, sc2tog, sc in next st, sc2tog – 3 sc.
Row 19-20: Ch 1, turn, sc in each st across – 3 sc.
Fasten off, leaving a long tail.
ARM (make 2)
Round 1: With green, 6 sc into adjustable ring.
Round 2-6: Sc in each st around.
Fasten off, leaving a long tail. Do not stuff (or you can stuff very lightly).
SPIKES
Row 1: With red, Ch 7, sc into 2nd ch from hook, sc in each st across – 6 sc.
Row 2 : Ch 1, turn, (in front loop only) sc in each st across – 6 sc.
Note: Fold fabric in half so row 1 lines up with row 2. We will do the next sts through both rows. See photo below for reference
Row 3: Ch 1, turn, 2 hdc in next st, sl st in next st, (hdc, dc, hdc) in next st, sl st in next st, 2 hdc in next st, sl st in next st.
Fasten off, leaving a long tail.

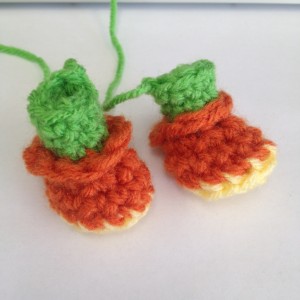
FEET (make 2)
Round 1: With yellow yarn, ch 5, sc into 2nd ch from hook and in each st across. Continue on other side of ch with sc in each ch across – 8 sc.
Round 2: [2 sc in next st, sc in next st] around – 12 sc.
Round 3: With orange yarn and in back loop only, sc in each st around – 12 sc.
Round 4: Sc in each st around.
**Round 5: Sc2tog 3 times, sc in next 4 st, sc2tog – 8 sc.
Round 6a: In front loop only, [2 sc next st, sc in next 3 st] around – 10 sc.
Round 6b: In back loop only of Round 5**, join with green yarn. Sc in each st around – 8 sc.
Round 7-8: Sc in each st around – 8 sc.
Fasten off, leaving a long tail.
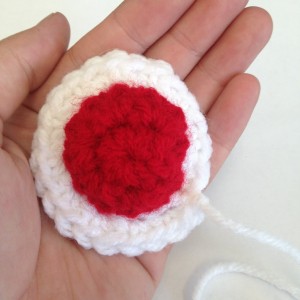
SHELL
Round 1: With red, 6 sc into adjustable ring.
Round 2: 2 sc in each st around – 12 sc.
Round 3: Sc in each st around.
Round 4: With white, sl st around.
Round 5: In back loop only, sc in each st around.
Fasten off, leaving a long tail.
ASSEMBLY
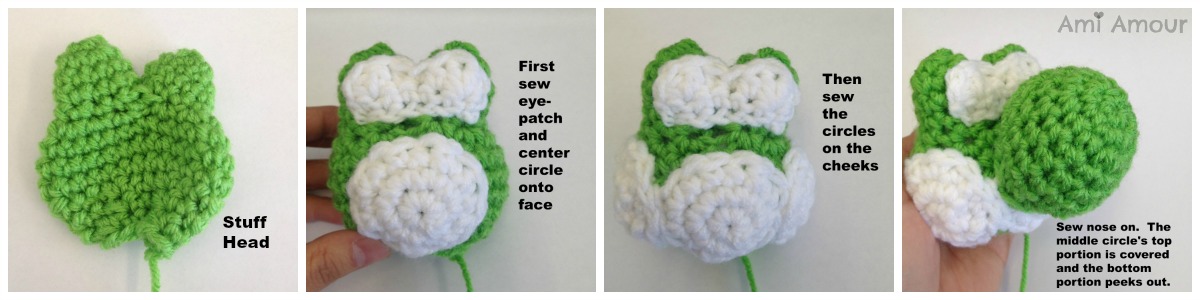
1. Stuff neccessary parts.
2. Sew Eye Patch on Head
3. Sew 3 circles on the bottom of the face. One in the middle first and then on both sides of cheeks. See photos above for reference.
4. Sew Nose on Face. It should be over the middle circle. The top circle should be covered by nose, with the bottom portion of circle peeking out.
5. Sew Head on Body
6. Sew Belly Patch on Body
7. Sew Arms on Body.
8. Sew Legs on bottom part of Body.
9. Sew Spike on back of Head.
10. Sew Shell on back of Body.
11. Cut 2 small oval shapes from black felt and glue/stitch on Eye Patch.
12. Hide and cut all ends.
Be sure to let me know how yours turned out! Make them in all different colors. You can share with me on my Instagram or Facebook.
47 Comments
Cathy
November 17, 2015 at 7:57 amThank you for the pattern! I am really looking good forward to making Yoshi. I love Yoshi!
Margaret Garland
November 17, 2015 at 1:17 pmLove him! I’m on an ami making binge just now. So your little guy is now on my to-be-made list. Thank you.
Elinor Handley
November 18, 2015 at 11:41 pmCan’t wait to make these. The Grandsons already want one. Thanks for posting the pattern.
JoAnn Garland Scarborough
November 22, 2015 at 1:41 amThank you so much for the pattern, this is just precious.
Rachel Davies
December 12, 2015 at 2:17 amYou rock! Is it hard to make a pattern? I have done some free-form crochet before, but not that I could ever reproduce. Thanks for taking the time to troubleshoot through making this little guy and sharing the results!
Jen Z
December 19, 2015 at 5:28 amAwesome pattern, working it up right now for a Christmas gift. Just one little thing I found wrong… Yoshi doesn’t have a shell on his back, he’s wearing a saddle for Mario. I modified mine a bit to look more like a saddle. Other than that, my son is going to love this! Thanks so much for posting!
stella
April 25, 2016 at 2:43 pmDude it’s a shell. Thanks for the great tutorial…I suck at amigurumi but mine actually looks like yours LOL
Sharon P Locking
August 8, 2016 at 5:36 pmHi Ami,
Great pattern, my grandson actually asked for a yarn yoshi, and I am happy to make him one.
Having some trouble with the feet, on Row 6b, to find the back stitch on row 5, is inside the shoe, that isn’t working for me? Mine never curled over like yours is in the picture? Don’t know what I have done wrong?
Lori
August 25, 2016 at 7:10 pm6a I did in the back loop, and 6b I did in the front loop (opposite from what is listed in the pattern) and it turned out looking like the picture.
Sharon P Locking
August 8, 2016 at 5:39 pmHi Ami,
Great pattern, my grandson actually asked me to make him a yarn yoshi. I am happy to do it.
However I am having some difficulty on the feet Row 6b, finding the back stitch on row 5, which would be coming from the inside of the shoe? Mine did roll over on the top like yours did? Any suggestions?
Sharon
Lori
August 25, 2016 at 7:11 pm6a I did in the back loop, and 6b I did in the front loop (opposite from what is listed in the pattern) and it turned out looking like the picture.
A
August 23, 2016 at 6:28 pm“Round 7: Sc in next 4 st, 2 sc in next 6 st, sc in next 8 st – 24 sc.
Round 8: Sc in each st around.
Round 9: Sc in next 16 st, sc2tog 4 times – 18 sc.”
If I decrease 4 times wouldn’t that be 20, instead of 8?
A
August 23, 2016 at 6:29 pm*18
Ami Amour
August 23, 2016 at 6:51 pmYes, that is correct! Thanks for catching that. I’ll go ahead and make the correction.
Lori
August 25, 2016 at 7:04 pmYou just made me the best mom in the world, according to my seven year old. Thank you! It turned out so great- your pattern was wonderful.
Lori
August 25, 2016 at 7:09 pmMy little boy did note, though, that the spikes should be orange. {rolling eyes} I think he’s cute no matter what!
Ami Amour
August 25, 2016 at 7:19 pmYou are the best mom for creating handmade goodies made with love for your child! Hehe and your boy has an eye for details! 😀
KO
August 26, 2016 at 12:39 amCute! How tall is the finished product? I saw the big Yoshi and was hoping for that size.
Thanks!
Ami Amour
August 26, 2016 at 3:19 amThis one is a small one and is only about 6 in tall. The larger Yoshi pattern is available in both my Etsy or Ravelry shop.
Paige
October 11, 2016 at 2:57 amI’m confused about the head section round 10. What does that mean you will have 18 sc? Could you maybe post a picture of what it would look like after that step??
Sylvia Parspns
January 4, 2019 at 7:45 pmThere are no instructions for legs. Are they made like the arms?
Also: feet pattern…when I ch 5, then sc into 2nd ch from hook there are 4 sc across. On other side of ch, when I sc across there would be only 4sc, not 8 sc. This is not a round, its a chain. What am I not understanding?
Ami Amour
January 4, 2019 at 7:53 pmHi Sylvia, no the feet are made differently from the arms. The Feet does start off in a row, but because I do sc on one side of the chain and then the other side of the chain (4 sc + 4 sc), it will be 8 sc all together and I count that as one Round because then you will continue to go around this section like the other parts of the amigurumi. I should also be coming out with a video tutorial for this Yoshi soon as well so hopefully that can clarify any parts of the pattern that may be confusing.
Cleanettte
May 1, 2017 at 7:35 pmThanks a lot for this pattern. I just finished it and it looks very good even if it was my first amigurumi.
Ami Amour
May 4, 2017 at 6:13 pmWow, I’m honored that my Yoshi was chosen for your first amigurumi! 😀 I’m so glad that you enjoyed it!
alisha
October 3, 2017 at 2:06 pmis this in UK terminology or US terminology
Ami Amour
February 4, 2018 at 6:50 amThis is in US terminology.
Laura Baker
December 13, 2017 at 9:22 pmThanks so much for this pattern. I just finished making a rainbow Yoshi for my nephew who loves Yoshi’s Wooly World and rainbows! I think he’ll really love it.
Edileusa
May 24, 2018 at 12:12 pmOi sou brasileira não falo seu idioma estou fazendo o Yoshi , é difícil por ter coisas abreviadas ,mas aos pouco estou conseguindo obrigado e parabéns pelo seu trabalho
Helen
December 6, 2018 at 6:30 pmI have a silly question I hope you can help! Is this pattern worked in the round, or is it Slip Stitched and move up to next row worked, if that makes sense.? This will be my first attempt, finally got my yarn the right color we want it. 🙂
Ami Amour
December 6, 2018 at 6:40 pmHi Helen, it’s not a silly question at all. And no, you do not have to slip stitch at the end of the rounds. I also have some amigurumi video tutorials on my YouTube channel so you can see how I do the complete process from beginning to end. https://www.youtube.com/c/amiamour Hope that helps! Happy crocheting!
Helen
December 6, 2018 at 9:29 pmOkay, thank you for the link. I will check it out. 🙂 glad I went with my gut and didnt slip stitch.
Linda
February 1, 2019 at 6:03 amHi Ami. Thank ypu so much the pattern. My granddaughter is going to love her Yoshi. Your pattern was easy to read but mine didnt come exactly like that one for example, I have a skinny Yoshi. But it does’nt matter this is going to make my little durling so happy. Oh, did ypu say that I did’nt need to slip stitch at the end of each round? This is my first time making a amirgurumi.
Ami Amour
February 5, 2019 at 11:17 amHi Linda, yes for the amigurumis there is no need to make a slip stitch at the end of the rounds. I’d love to see how your first amigurumi comes out!
Margaret
March 24, 2019 at 9:04 amThank you for uploading this pattern and the YouTube video. I had a 14 yr old request one for his 15th birthday, five days later.
The tutorial made everything easier and I didn’t feel overwhelmed with the project.
Ami Amour
March 24, 2019 at 12:21 pmOh I’m so glad to hear the tutorial was helpful. This really motivates me to keep coming out with them. Thanks so much, Margaret!
Michelle
April 23, 2019 at 2:09 pmDo you know about how many ounces of green you need for one Yoshi.
Thank you so much for the pattern. My nephew is going to love it!
Ami Amour
April 23, 2019 at 2:24 pmI would say definitely less than 4.5 oz. You could probably still make several Yoshis with a 4.5 oz skein of worsted weight yarn. Hope that helps!
Mille Voigt Hansen
August 31, 2019 at 1:15 pmWonderfull pattern! Nice and easy to follow. And I have just finished a good looking yoshi. Thanks for sharing!
Ami Amour
August 31, 2019 at 1:38 pmThank you, that’s so lovely to hear! I’d love to see your Yoshi. If you’re on Instagram be sure to tag me!
Tanya
December 8, 2019 at 6:05 pmHow much yarn do you need for each colour? I need to buy some and am wondering how large the skeins need to be for one Yoshi. I’m looking at a multi colour pack but each skein is only 15g (26 meters) and I’m wondering if those are too small.
Thanks for the pattern! I’m excited to try making one. Or three…
Ami Amour
December 8, 2019 at 7:51 pmHi Tanya those mini skeins sound fine for the other colors of Yoshi such as the red, white, yellow, and orange, but for the main green color that skein size might be too little.
smadi
December 25, 2021 at 9:34 amThank you so much for the awesome pattern i’ve tried it and now my teenage son has his first yarn yoshi
Diane
April 27, 2022 at 3:36 pmI am making 2 with different colors using #2 yarn (worsted being #4) and an F hook, as I wanted pocket sized Yoshis for a 5 and an 8 year old. The assembly is throwing me for a loop! Does the belly patch go all the way to the tail tip? Could you post assembly pictures of various views of all parts? Thanks!
Ami Amour
April 27, 2022 at 4:45 pmHi, yes, the belly patch should go all the way to the end of the tail tip. I have a Yoshi Video Tutorial as well so you can see all the different view of the parts during the assembly part of the video right here: https://youtu.be/USnlnQXe3Es?t=2502
Diane
May 5, 2022 at 6:48 amThank you so much for this pattern! It was my 3nd amigurumi project, and I’m hooked! My grandsons loved the Yoshis; I’m glad that I used the cotton/acrylic yarn combo #2 weight. The 8 year old promptly stretched one of the Yoshis so he’s not as compact and the stuffing is visible, however, both Yoshis went to bed last night for snuggles, and to school today! Hopefully I won’t get requests from school, as next on the list is Hobbes, triceratops, Eric Cartman… Love, love, love your website!
Ami Amour
May 28, 2022 at 9:15 pmAww love that the Yoshis are getting a lot of love! Thank you, it makes me so happy to hear that you enjoy my patterns! Happy Crocheting!