
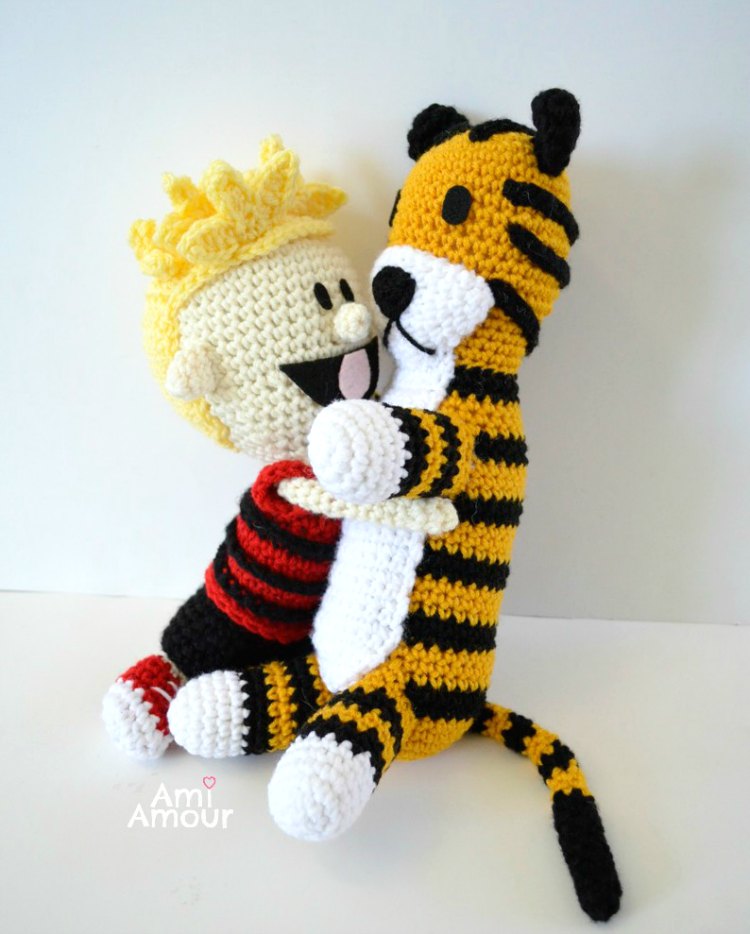
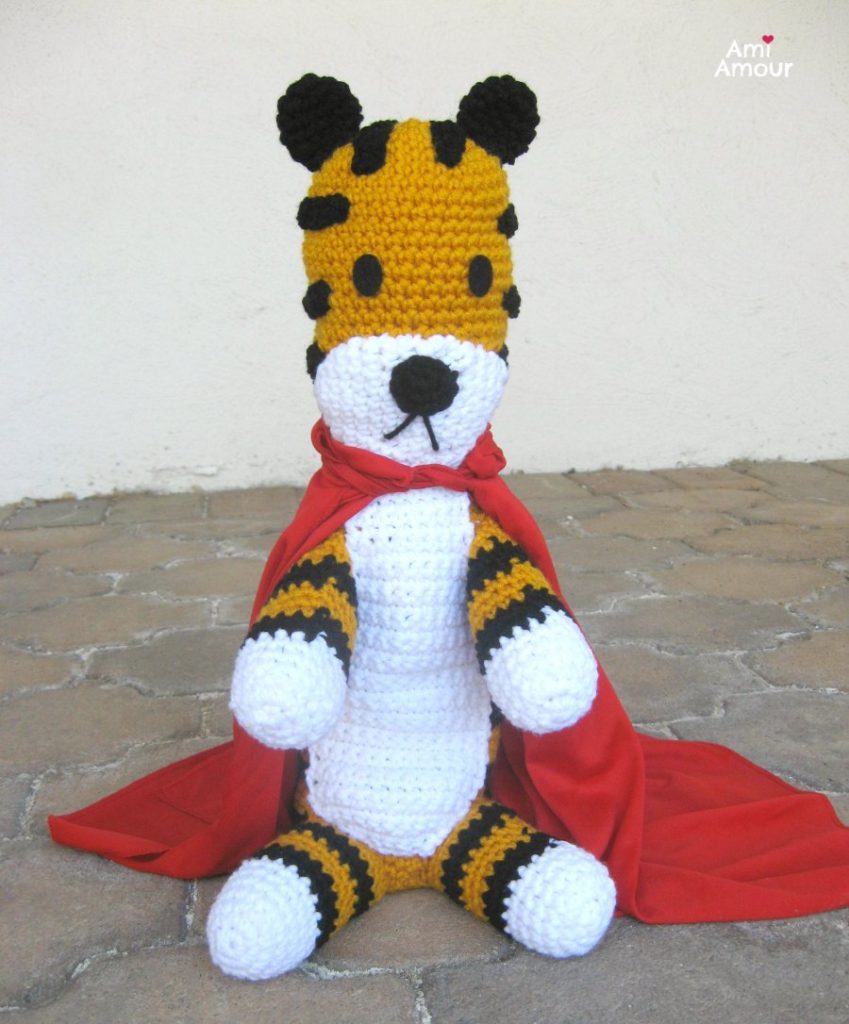
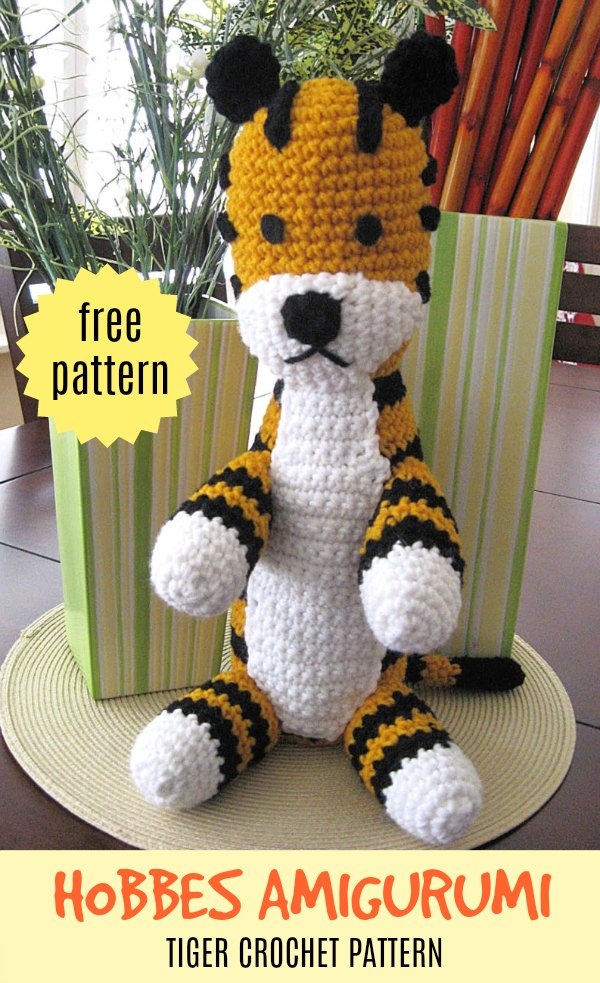
Here is a free Hobbes amigurumi pattern inspired by the incorrigible tiger written so beautifully in the comics of Bill Watterson. He is Calvin’s best playmate and wise tiger all rolled into one. This loveable Hobbes crochet pattern features his gold and black stripes, elongated body, snout, and long tail.

His favorite past time is to go exploring and his favorite food is tuna. Beware, though, the tiger may want to pounce on you the moment you walk through the door!
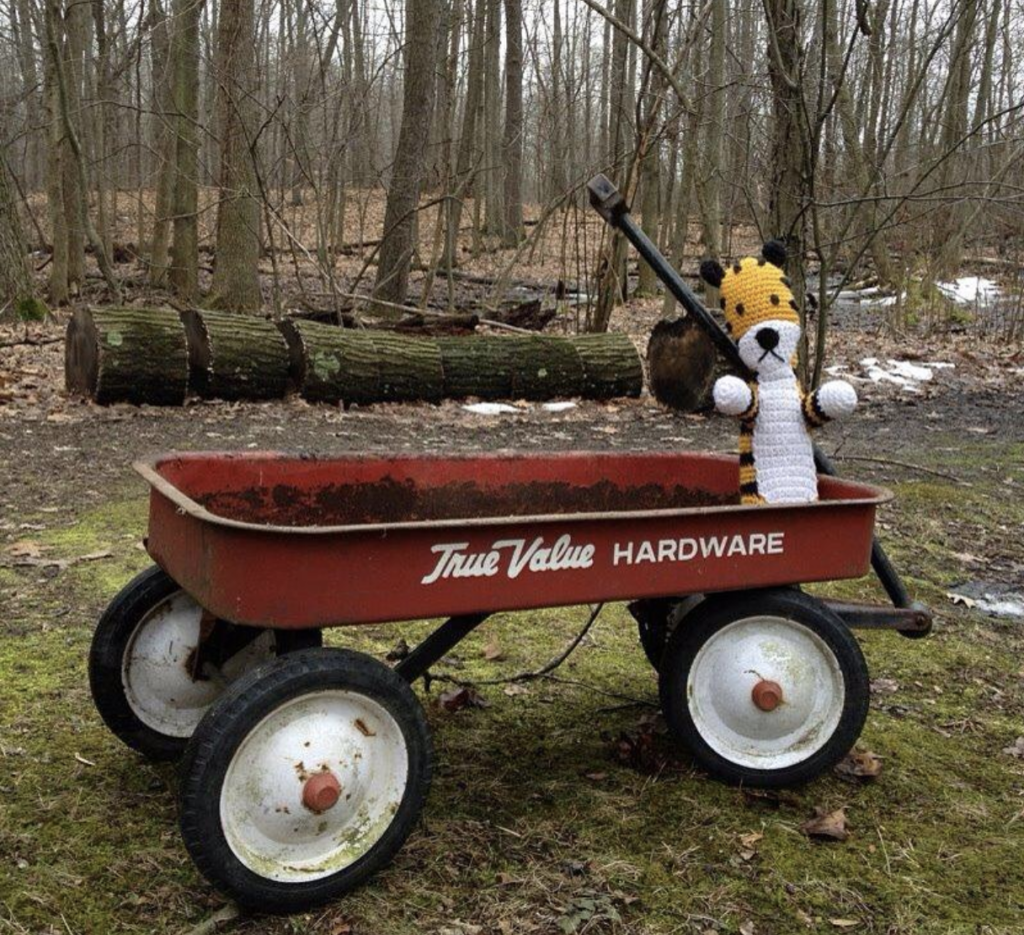
Here’s a picture purrfect shot of Hobbes amigurumi in his classic red wagon. Doesn’t it look straight out of the comic books, right down to the woods? (Photo taken by Christopher Smit)
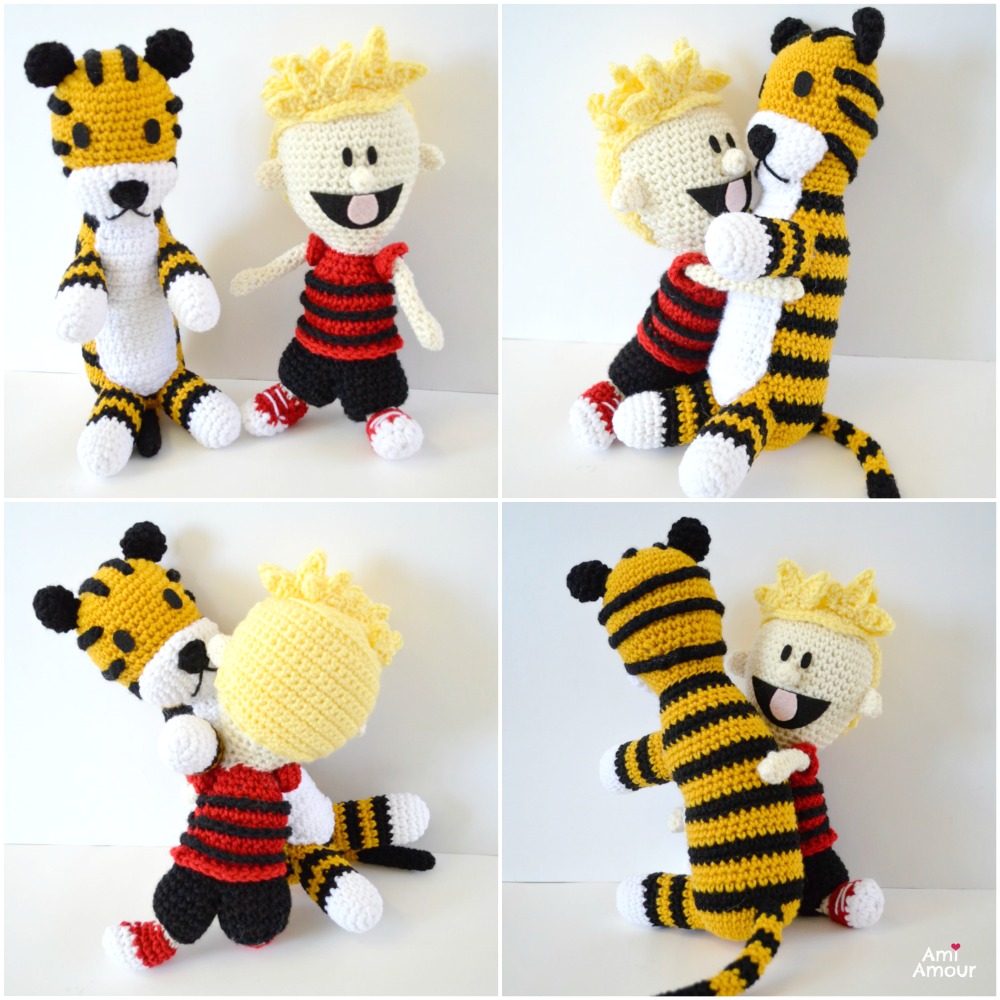
I’ve also created Calvin amigurumi. They’re the best of friends and have so many adventures together! (Update: I’ve also finally written up the pattern for crochet Calvin, hooray!)
Please enjoy and happy crocheting and exploring with your tiger! Don’t forget to subscribe to my blog for all my latest pattern updates!
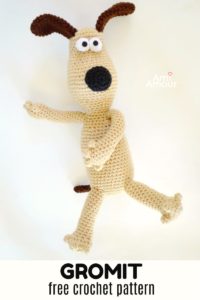
If you like this pattern, here are some other FREE PATTERNS you may enjoy!

*Disclosure: This post contains affiliate links. This means I may receive a small commission if you decide to purchase anything by clicking on one of these links. There is no extra cost to you and it helps me keep creating free content and patterns for you guys on this blog. Thank you for your support!
I’ve also created a video Crochet Tutorial that shows how to create this Hobbes Amigurumi from beginning to end. Crochet along with me!
TIGER CROCHET TUTORIAL

HOBBES AMIGURUMI CROCHET PATTERN
HOOK SIZE: 5.0mm hook
YARN:
Red Heart Super Saver (worsted weight, acrylic)
– #321 Gold
– #312 Black
– #311 White
NOTIONS:
– Polyfill Stuffing
– Yarn Needle
– Black Felt (for eyes)
– Stitch Marker
– Scissors
– Fabri-tac Glue
ABBREVIATIONS:
ch – chain
hdc – half double crochet
sc – single crochet
sc2tog – single crochet 2 together (aka sc dec)
sl st – slip stitch
st – stitch
FINISHED SIZE: Approximately 12in/30cm tall
HEAD
Round 1: With gold yarn, 6 sc into magic ring.
Round 2: 2 sc in each st around – 12 sc.
Round 3: [2 sc in next st, sc in next st] around – 18 sc.
Round 4: [2 sc in next st, sc in next 2 st] around – 24 sc.
Round 5: [2 sc in next st, sc in next 3 st] around – 30 sc.
Round 6: [2 sc in next st, sc in next 4 st] around – 36 sc.
Round 7-15: Sc in each st around.
Round 16: [Sc2tog, sc in next 4 st] around – 30 sc.
Round 17: Sc in each st around.
Round 18: [Sctog, sc in next 3 st] around – 24 sc.
Round 19-21: Sc in each st around.
Fasten off, leaving a long tail.
BODY
Round 1: With gold yarn, 6 sc into magic ring.
Round 2: 2 sc in each st around – 12 sc.
Round 3: [2 sc in next st, sc in next st] around – 18 sc.
Round 4: [2 sc in next st, sc in next 2 st] around – 24 sc.
Round 5: [2 sc in next st, sc in next 3 st] around – 30 sc.
Round 6: [2 sc in next st, sc in next 14 st] around – 32 sc.
Round 7: Sc in each st around.
Round 8-9: With black yarn, sc in each st around.
Round 10-12: With gold yarn, sc in each st around.
Round 13-14: With black yarn, sc in each st around.
Round 15-17: With gold yarn, sc in each st around.
Round 18-19: With black yarn, sc in each st around.
Round 20-22: With gold yarn, sc in each st around.
Round 23-24: With black yarn, sc in each st around.
Round 25-27: With gold yarn, sc in each st around.
Round 28: With black yarn, [Sc2tog, sc in next 14 st] around – 30 sc.
Round 29: [Sc2tog, sc in next 3 st] around – 24 sc.
Round 30-32: With gold yarn, sc in each st around.
Round 33-34: With black yarn, sc in each st around.
Fasten off.
Note: Should finish with 6 black stripes.

LIMBS (make 4)
Round 1: With white yarn, 6 sc into magic ring.
Round 2: 2 sc in each st around – 12 sc.
Round 3: [2 sc in next st, sc in next 3 st] around – 15 sc.
Round 4-6: Sc in each st around.
Round 7-8: With black yarn, sc in each st around.
Round 9-10: With gold yarn, sc in each st around.
Round 11-12: With black yarn, sc in each st around.
Round 13-14: With gold yarn, sc in each st around.
Fasten off, leaving a long tail.
TAIL
Round 1: With black yarn, 6 sc into magic ring.
Round 2-7: Sc in each st around.
Round 8-10: With gold yarn, sc in each st around.
Round 11-12: With black yarn, sc in each st around.
Round 13-15: With gold yarn, sc in each st around.
Round 16-17: With black yarn, sc in each st around.
Fasten off, leaving a long tail.
EAR (make 2)
Round 1: With black yarn, 6 sc into magic ring.
Round 2: 2 sc in each st around – 12 sc.
Round 3: Sc in each st around.
Round 4: [Sctog, sc in next st] around – 8 sc.
Round 5: [Sc2tog, sc in next 2 st] around – 6 sc.
Fasten off, leaving a long tail.
NOSE
Round 1: With black yarn, 5 sc into magic ring.
Round 2: Hdc in next st, [hdc, ch 1, hdc] in next st, hdc in next st, sc in next st.
Fasten off, leaving a long tail.
SNOUT
Round 1: With white yarn, 4 sc into magic ring.
Round 2: 2 sc in each st around – 8 sc.
Round 3: [2 sc in next st, sc in next 3 st] around – 10 sc.
Round 4: [2 sc in next st, sc in next 4 st] around – 12 sc.
Round 5: [2 sc in next st, sc in next 5 st] around – 14 sc.
Round 6: [2 sc in next st, sc in next 6 st] around – 16 sc.
Round 7-10: Sc in each st around.
Round 11: [Sc2tog, sc in next 6 st] around – 14 sc.
Round 12: [Sc2tog, sc in next 5 st] around – 12 sc.
Round 13: [Sc2tog, sc in next 4 st] around – 10 sc.
Round 14: [Sc2tog, sc in next 3 st] around – 8 sc.
Round 15: Sc2tog around – 4 sc.
Fasten off, leaving along tail. Sew closed without stuffing.
BELLY PATCH
Row 1: With white yarn, ch 5, sc in 2nd ch from hook and in each remaining ch across – 4 sc.
Row 2: Ch 1, turn, 2 sc in first st, sc in next 2 st, 2 sc in last st – 6 sc.
Row 3: Ch 1, turn, 2 sc in first st, sc in next 4 st, 2 sc in last st – 8 sc.
Row 4: Ch 1, turn, 2 sc in first st, sc in next 6 st, 2 sc in last st – 10 sc.
Row 5-16: Ch 1, turn, sc in each st across.
Row 17: Ch 1, turn, sc2tog, sc in next 6 st, sc2tog – 8 sc.
Row 18-20: Ch 1, turn, sc in each st across.
Row 21: Ch 1, turn, sc2tog, sc in next 4 st, sc2tog – 6 sc.
Row 22-26: Ch 1, turn, sc in each st across.
Fasten off, leaving a very long tail.
TIGER STRIPS FOR THE HEAD
With black yarn
Stripe A (make 2)
Row 1: Ch 11, sl st back across – 10 sl st.
Fasten off, leaving a long tail.
Stripe B (make 2)
Row 1: Ch 31, sl st back across – 30 sl st.
Fasten off, leaving a long tail.
Stripe C
Row 1: Ch 26, sl st back across – 25 sl st.
Fasten off, leaving a long tail.
ASSEMBLY
1. Stuff the parts firmly with polyfill.
2. Sew the HEAD onto the BODY.
3. Sew the snout onto the face. The bottom of the snout lines up with where the head and body meets up. Make sure the snout is directly above the line of color changes on the body.
4. Sew the belly patch onto the body and snout. The belly patch should cover the line of color changes on body. The top part of the belly patch lines up with the bottom of the snout.
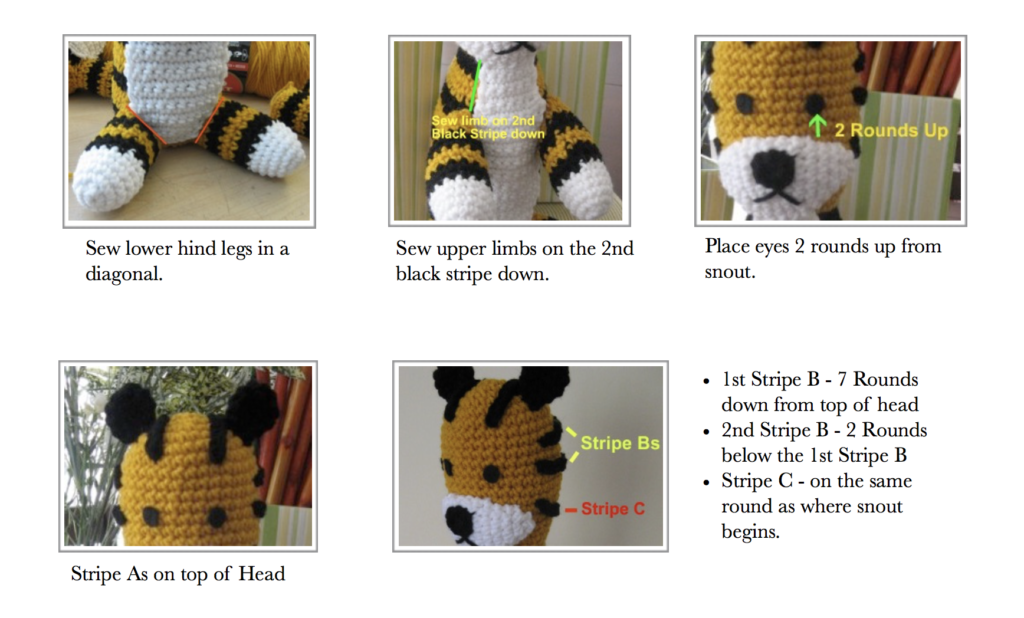
5. Sew the two lower hind legs onto the body. The leg should be sewn against the same line as the belly patch near the bottom of the body. It will look like a diagonal line (See photo).
6. Sew the upper limbs to the body. Placement: Sew where the second black stripe begins on the body. Sew as a vertical going down against the line of the belly patch.
7. Sew nose onto snout and embroider the mouth.
8. Cut 2 black felt circles for the eyes. Glue on with Fabri-tac. You can also sew on instead if you prefer. Placement: 2 rounds above the snout.
9. Sew on ears on top of the head.
10. Sew the Stripe As onto top of head. Placement: Between the ears.
11. Sew the Stripe Bs onto the head. The first B stripe placement: sew on Round 7. The second B stripe placement: sew 2 Rounds below the first B Stripe.
12. Sew Stripe C onto head. Placement: Sew onto the round where the snout begins. 13. Sew tail on the back of the tiger.
13. Hide all ends.
14. Be sure to crochet his best pal Calvin with this pattern!
I’d love to see how your Hobbes turned out or if you cosplayed with Hobbes!
Just pair with a red and black striped tee 😉
Don’t forget to tag me on my Instagram or Facebook.


11 Comments
Gromit Amigurumi Pattern - Ami Amour
October 23, 2018 at 12:09 am[…] Hobbes Doll Amigurumi- Tiger Crochet Pattern – Ami Amour […]
Luna
June 23, 2020 at 10:46 pmIf using the same yarn and hook, what is the finished size of the hobbes?
Ami Amour
June 24, 2020 at 11:19 amHe should be about 14in/35cm tall.
Sue Bryson
July 24, 2020 at 11:27 amI’d love to have the Calvin pattern when you write it up.
Megan
September 6, 2020 at 8:49 pmthis is such a cute pattern, thank you for sharing 🙂
Ami Amour
September 11, 2020 at 11:11 amSo glad you like! Happy Crocheting!
Marney Burchill
October 22, 2020 at 9:08 pmOh, please let me know when you write the pattern for Calvin. I made Hobbes for my Granddaughter 4 years ago and she still has him and loves him. I now have another grandchild coming and have been asked to make them a Calvin and Hobbes. So if and when please keep me in mind.
MicioGatta
November 24, 2020 at 10:01 amThank you, great pattern. My Hobbes is 18 cm tall, I made it with smaller yarn and crochet. I’d really love to have the Calvin’s pattern!
Theresa
May 30, 2021 at 8:24 amI am half way through my Hobbes to give to my grandson Calvin who is due in July–already it is so cute!! I echo those above I would love to see a Calvin pattern to match–yours in the picture is absolutely adorable!!
Shirley
September 6, 2021 at 12:59 pmPlease, Please, Please waiting anxiously for the Calvin pattern. I looked in case you had posted it but found only this reference.
Ami Amour
September 20, 2021 at 8:18 pmI’m working on writing up the pattern right now, so hopefully soon!