
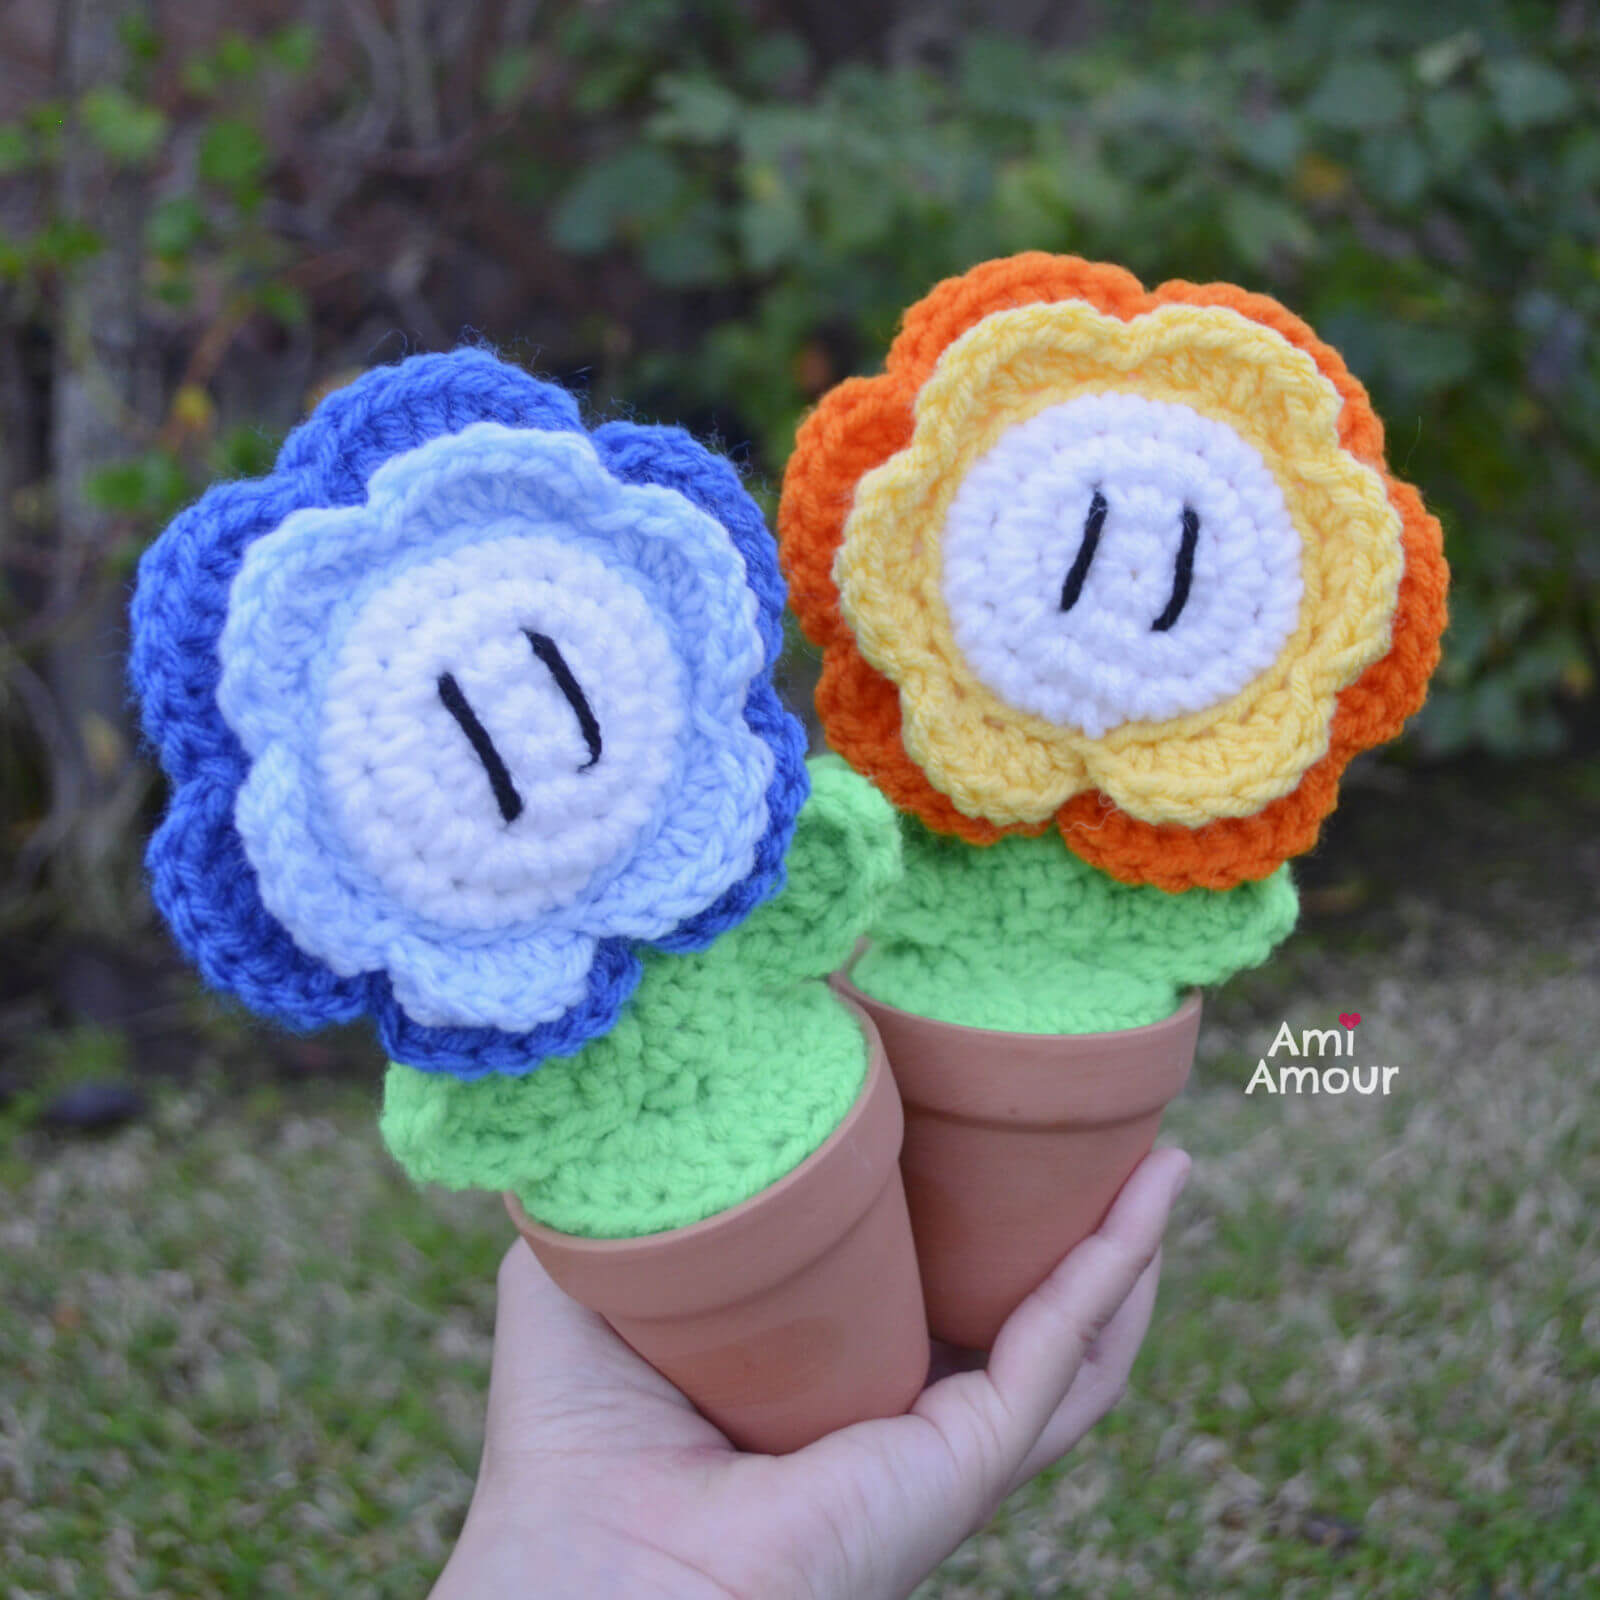
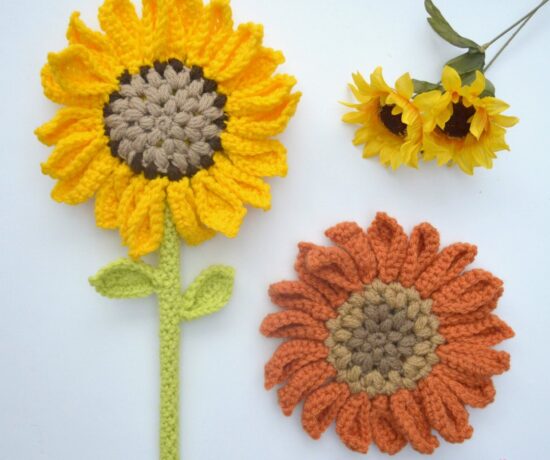
Mama Mia, are you ready for some Flower Power? Well, here’s a fun and free Fire Flower crochet pattern that’s sure to fire up the heart of any Super Mario fan.
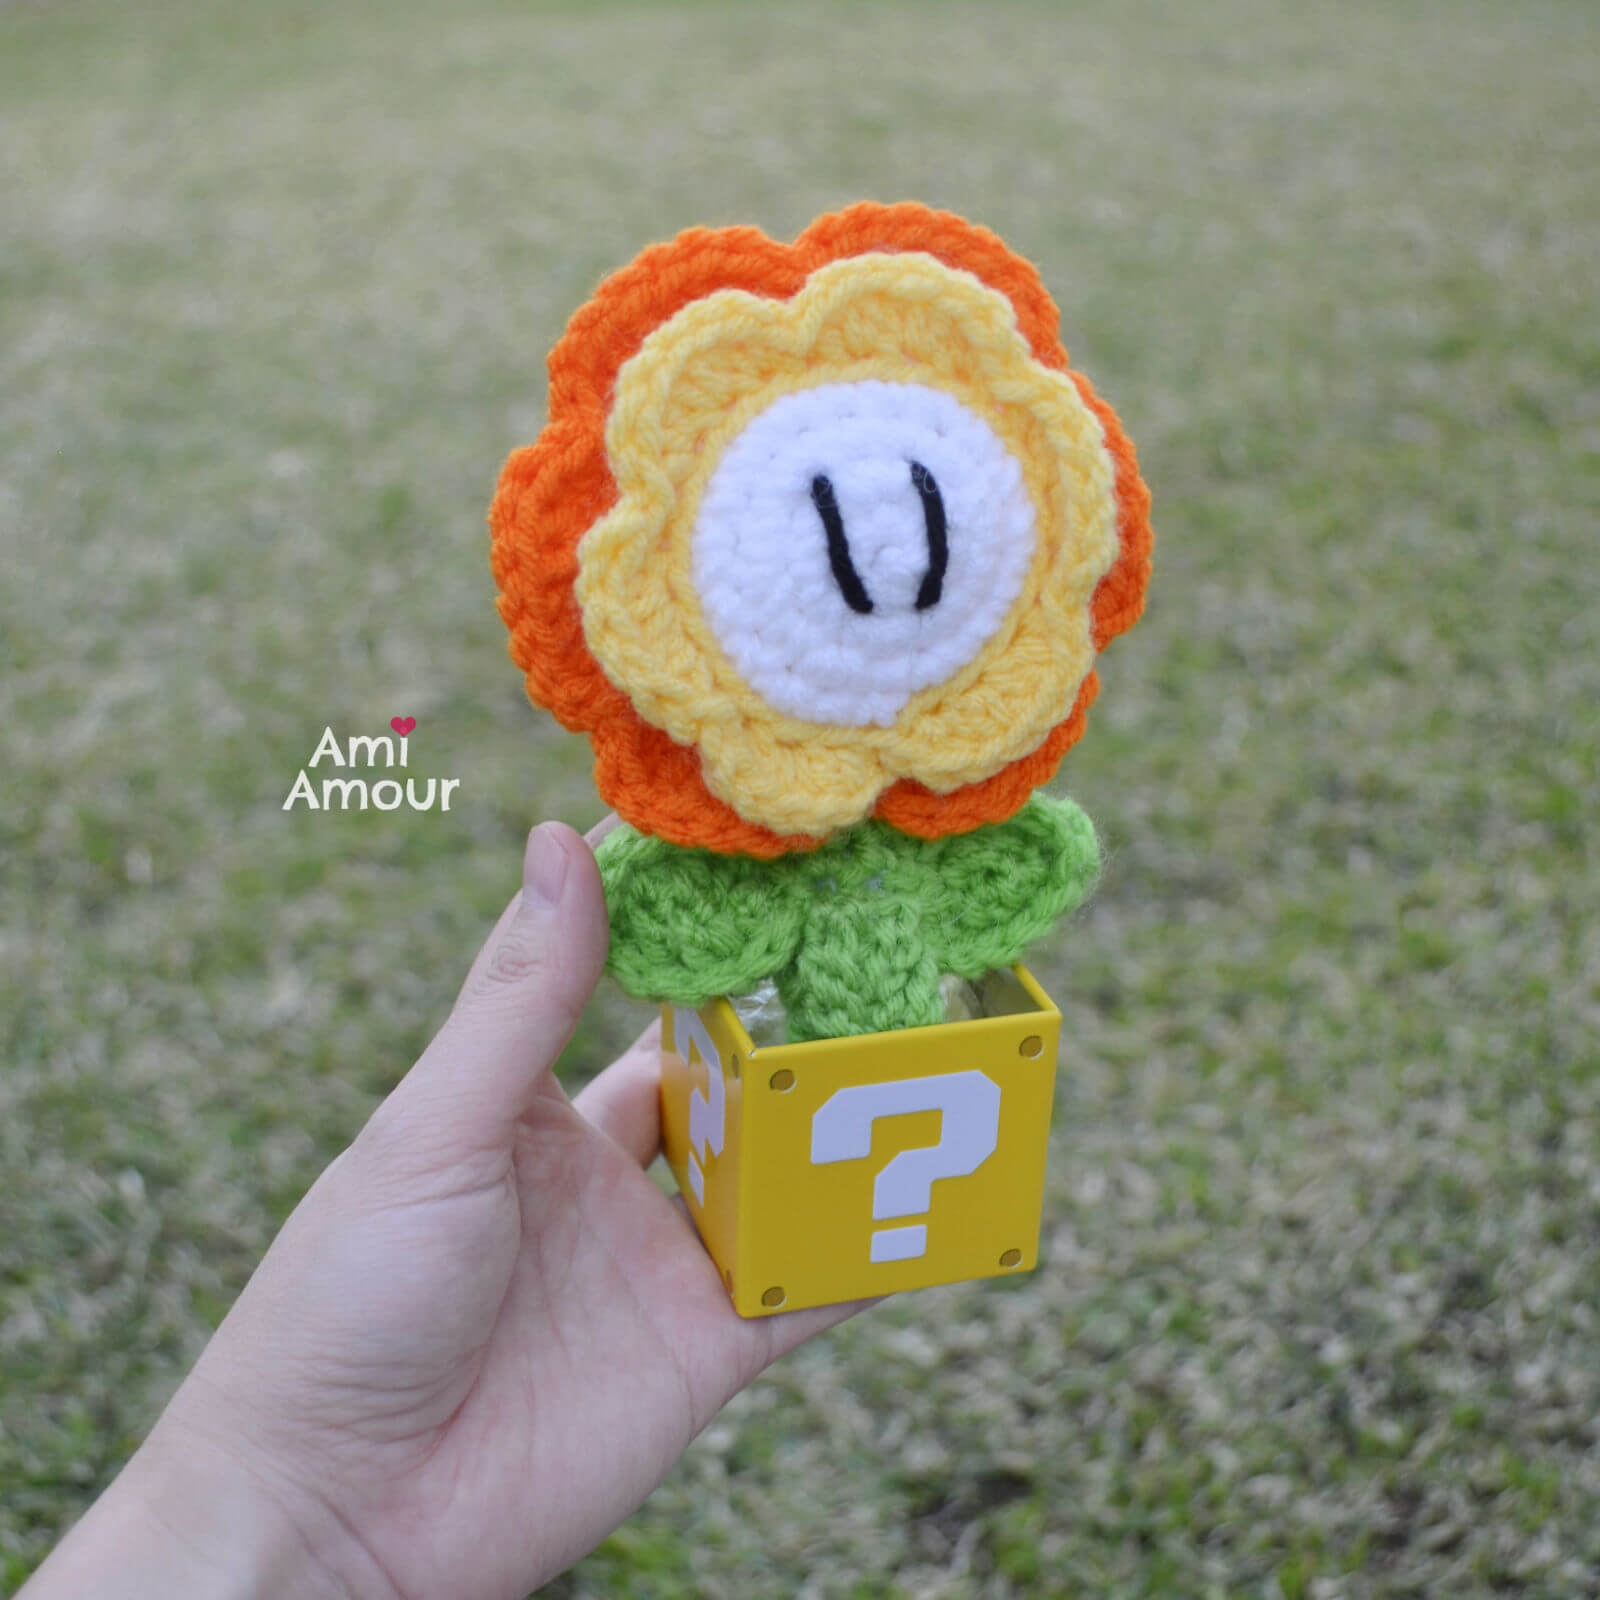
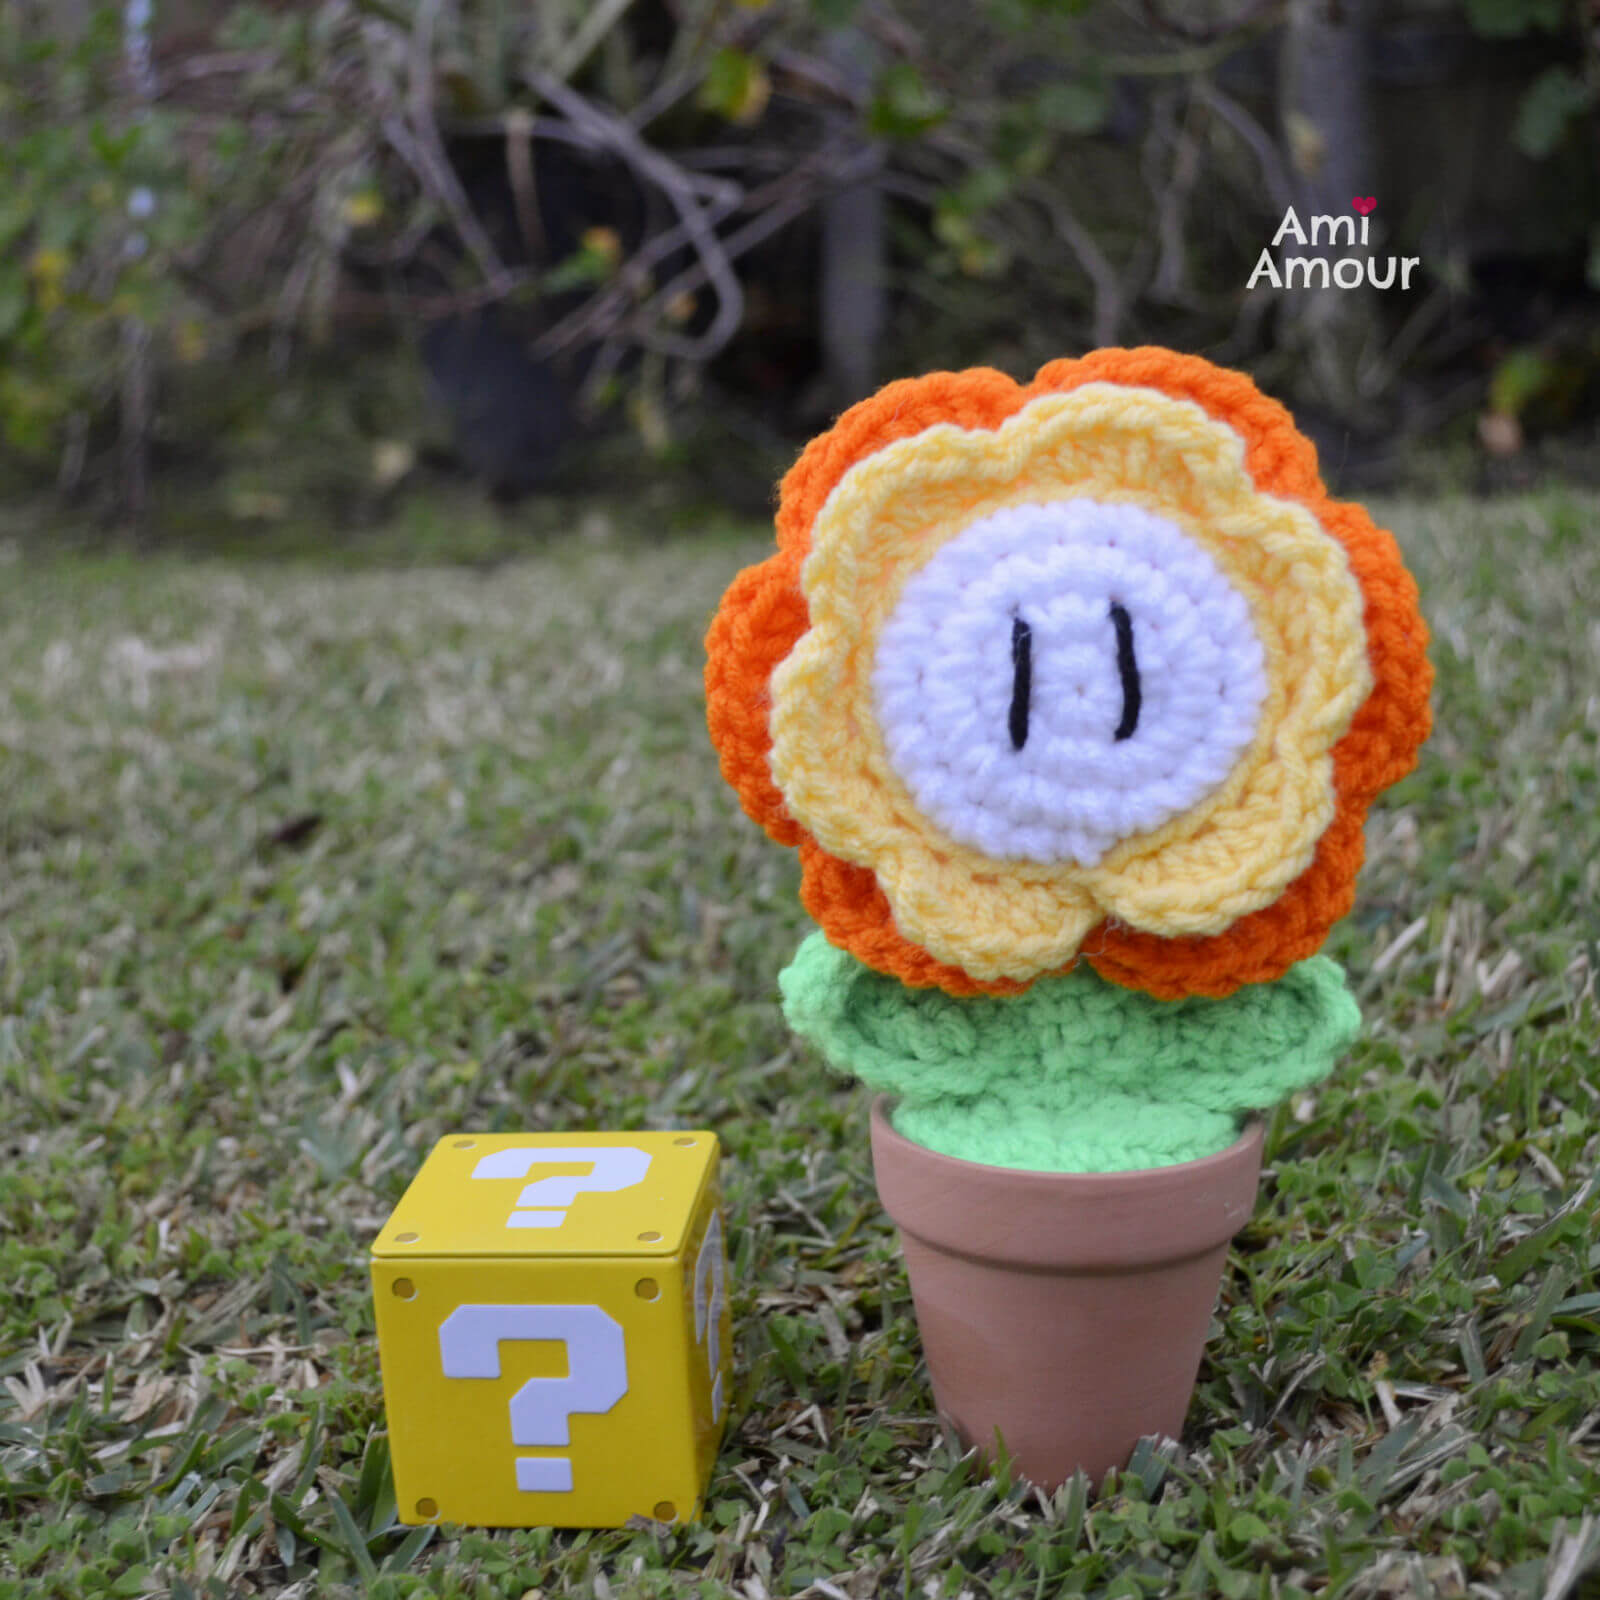
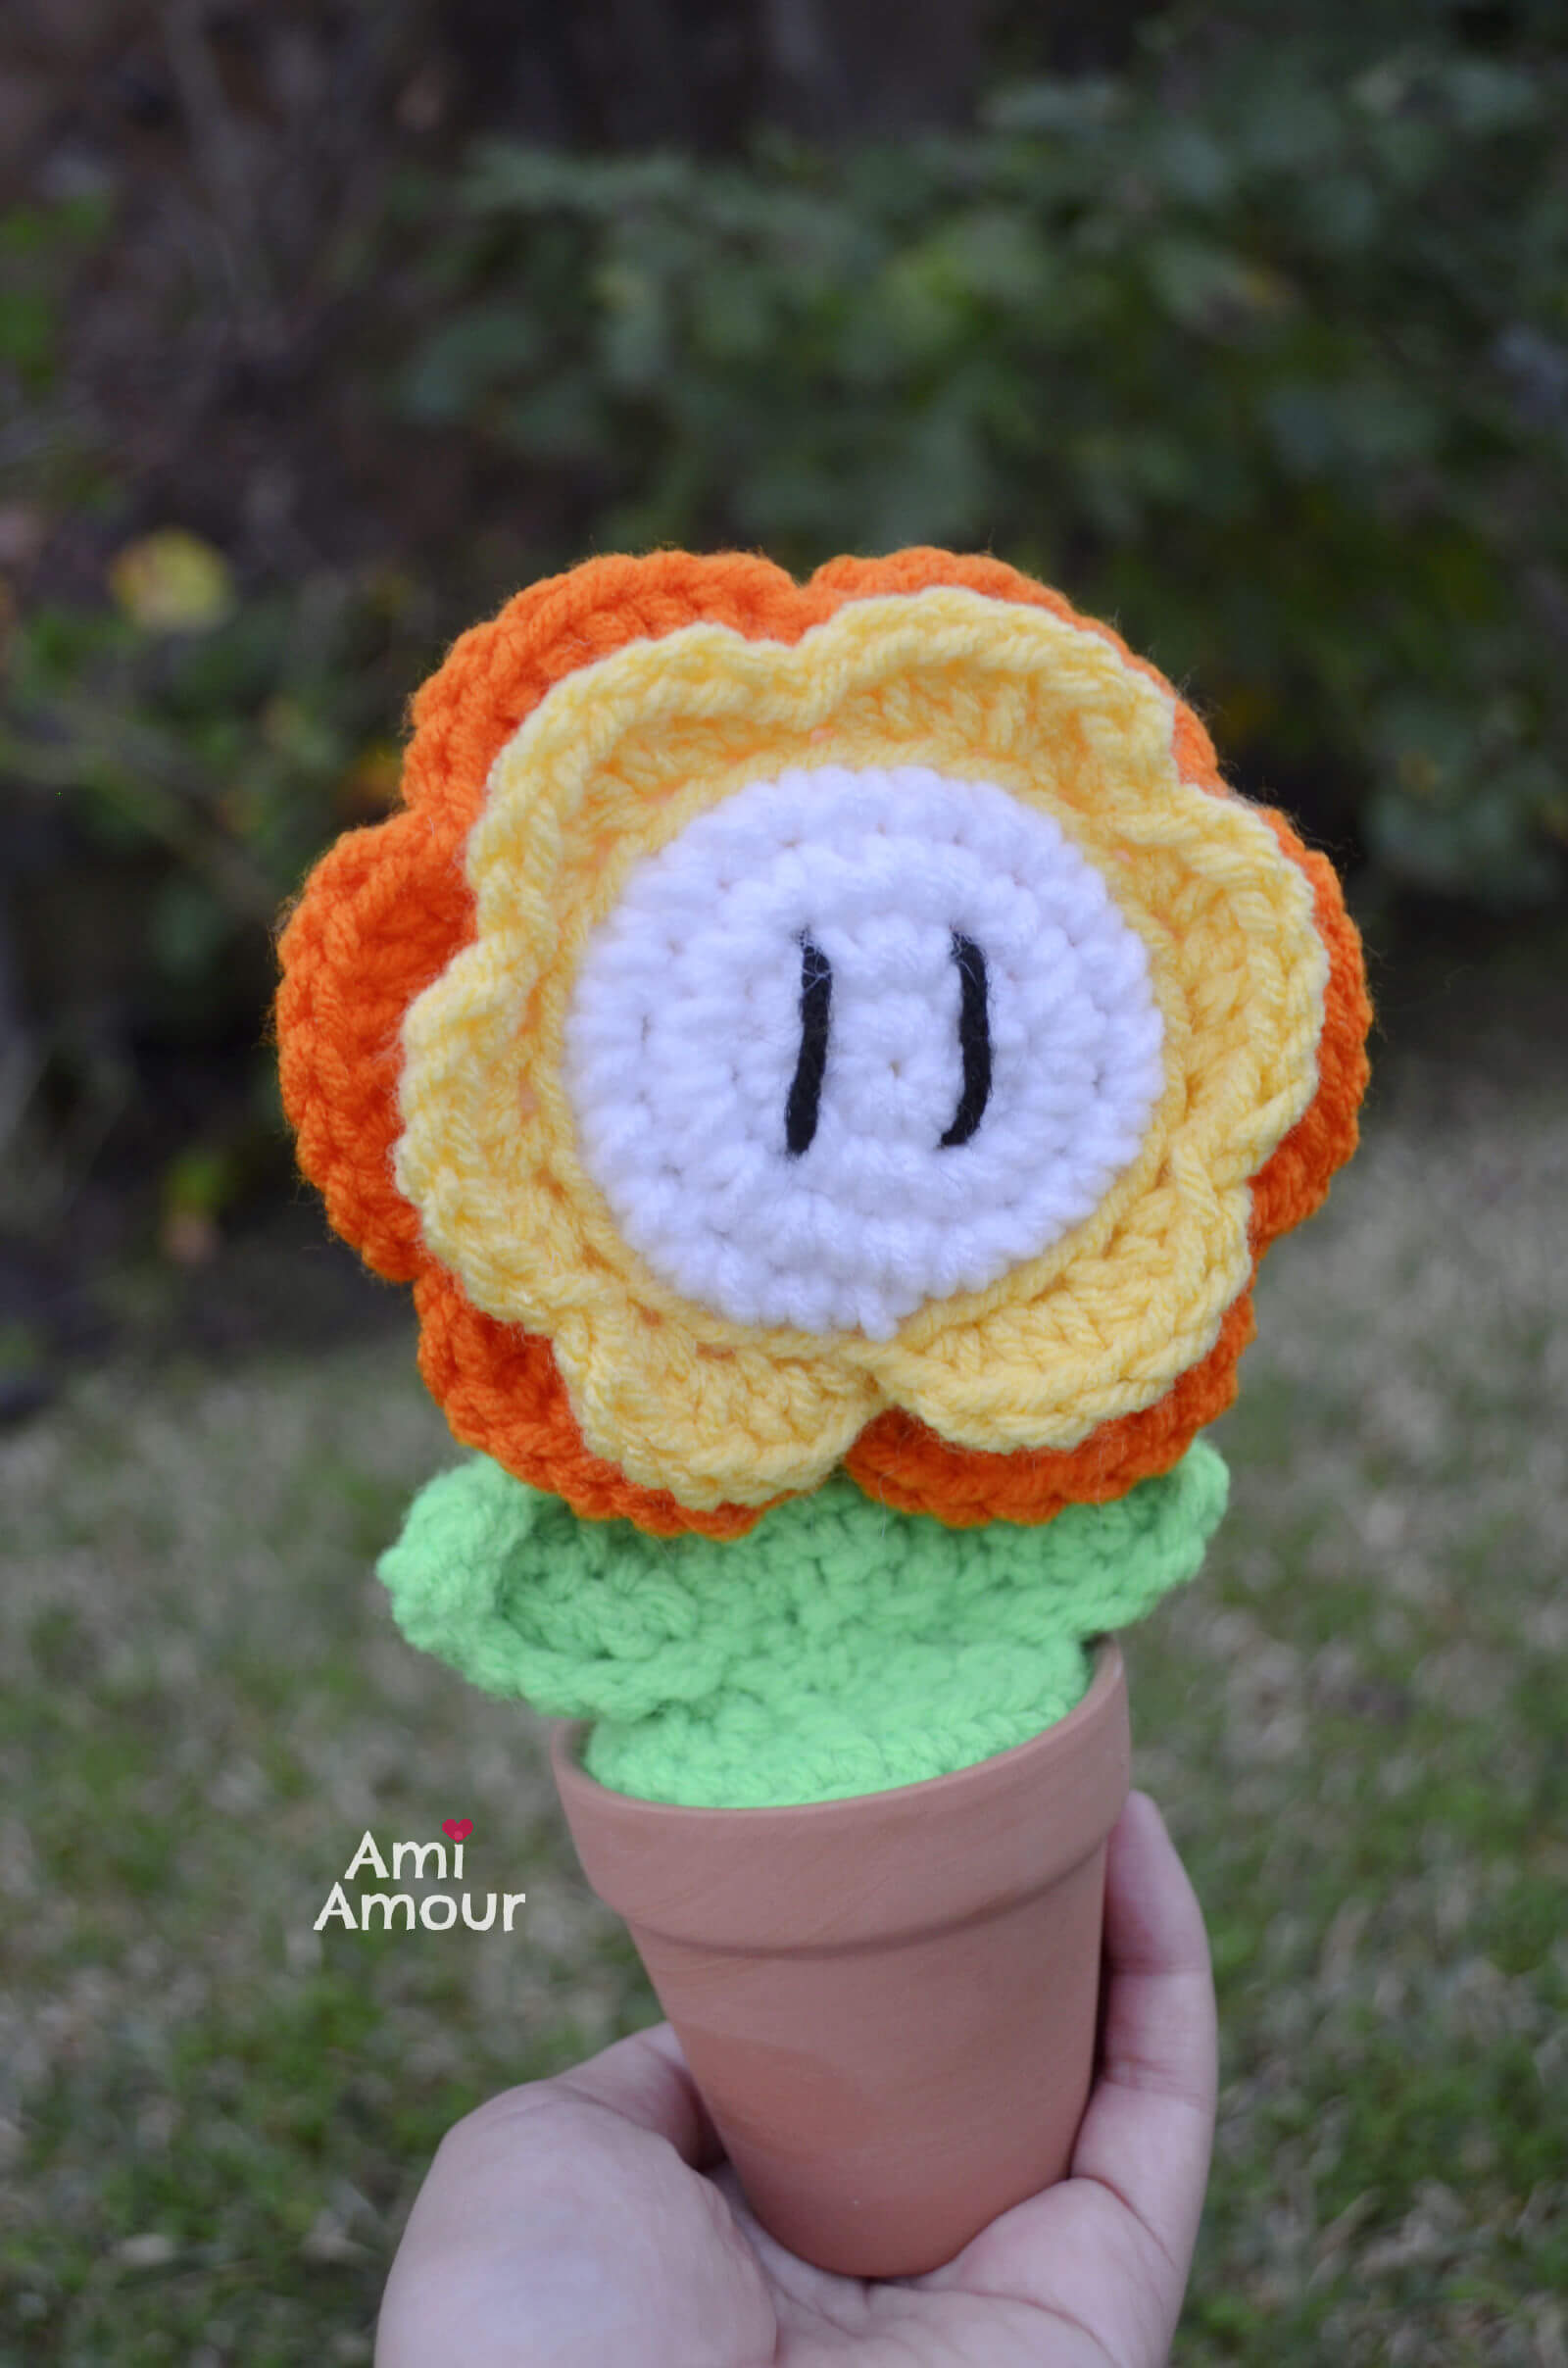
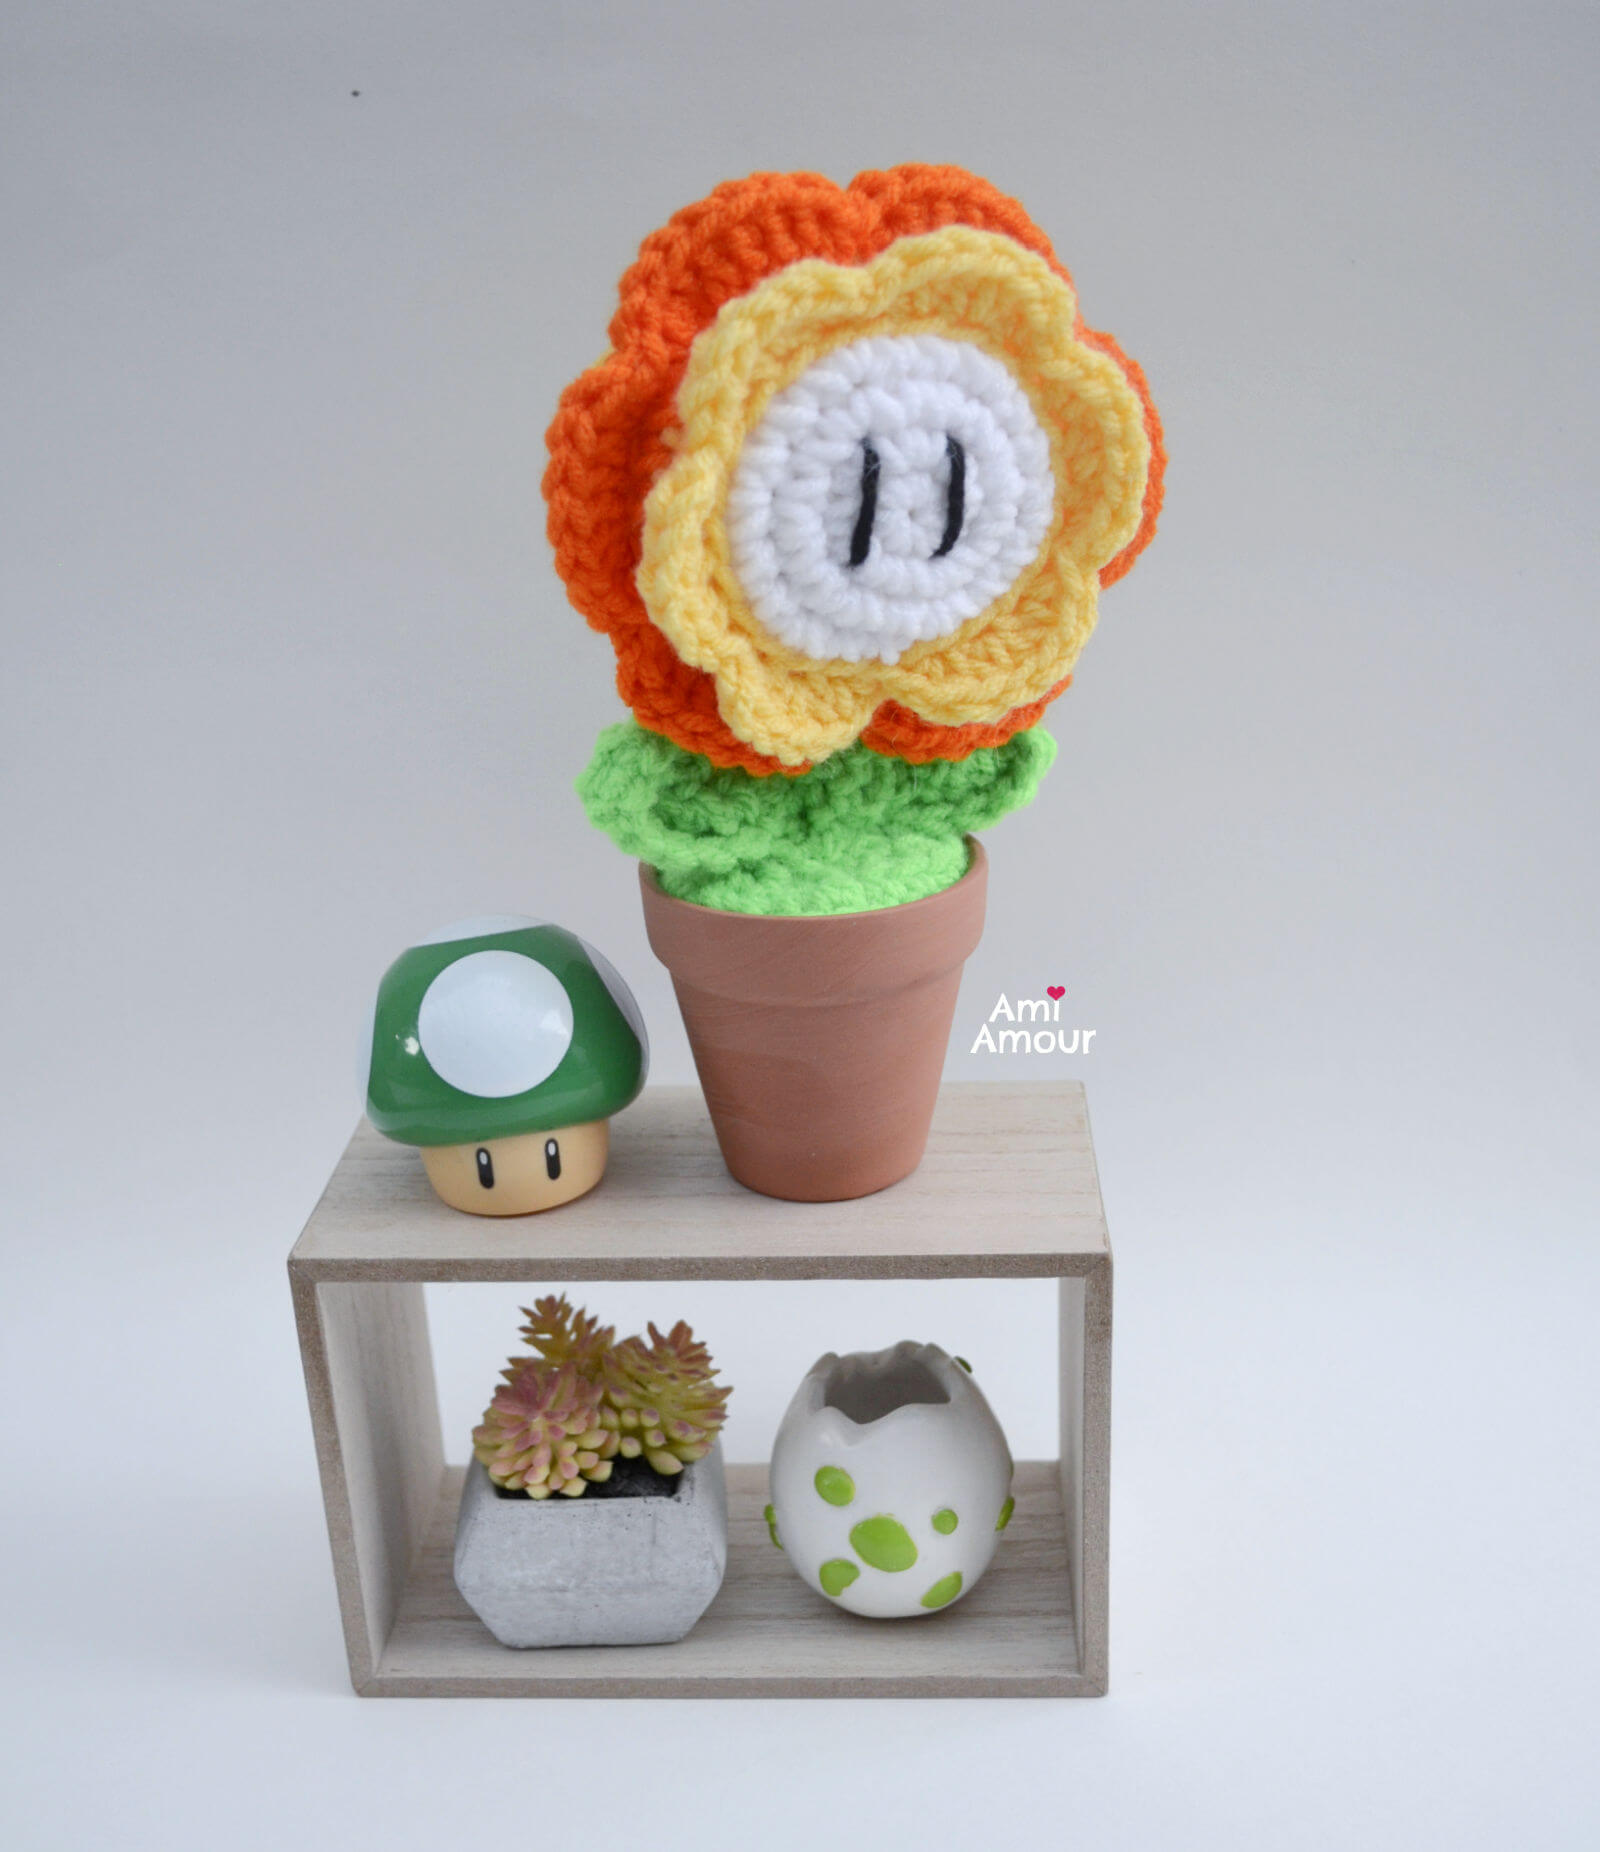
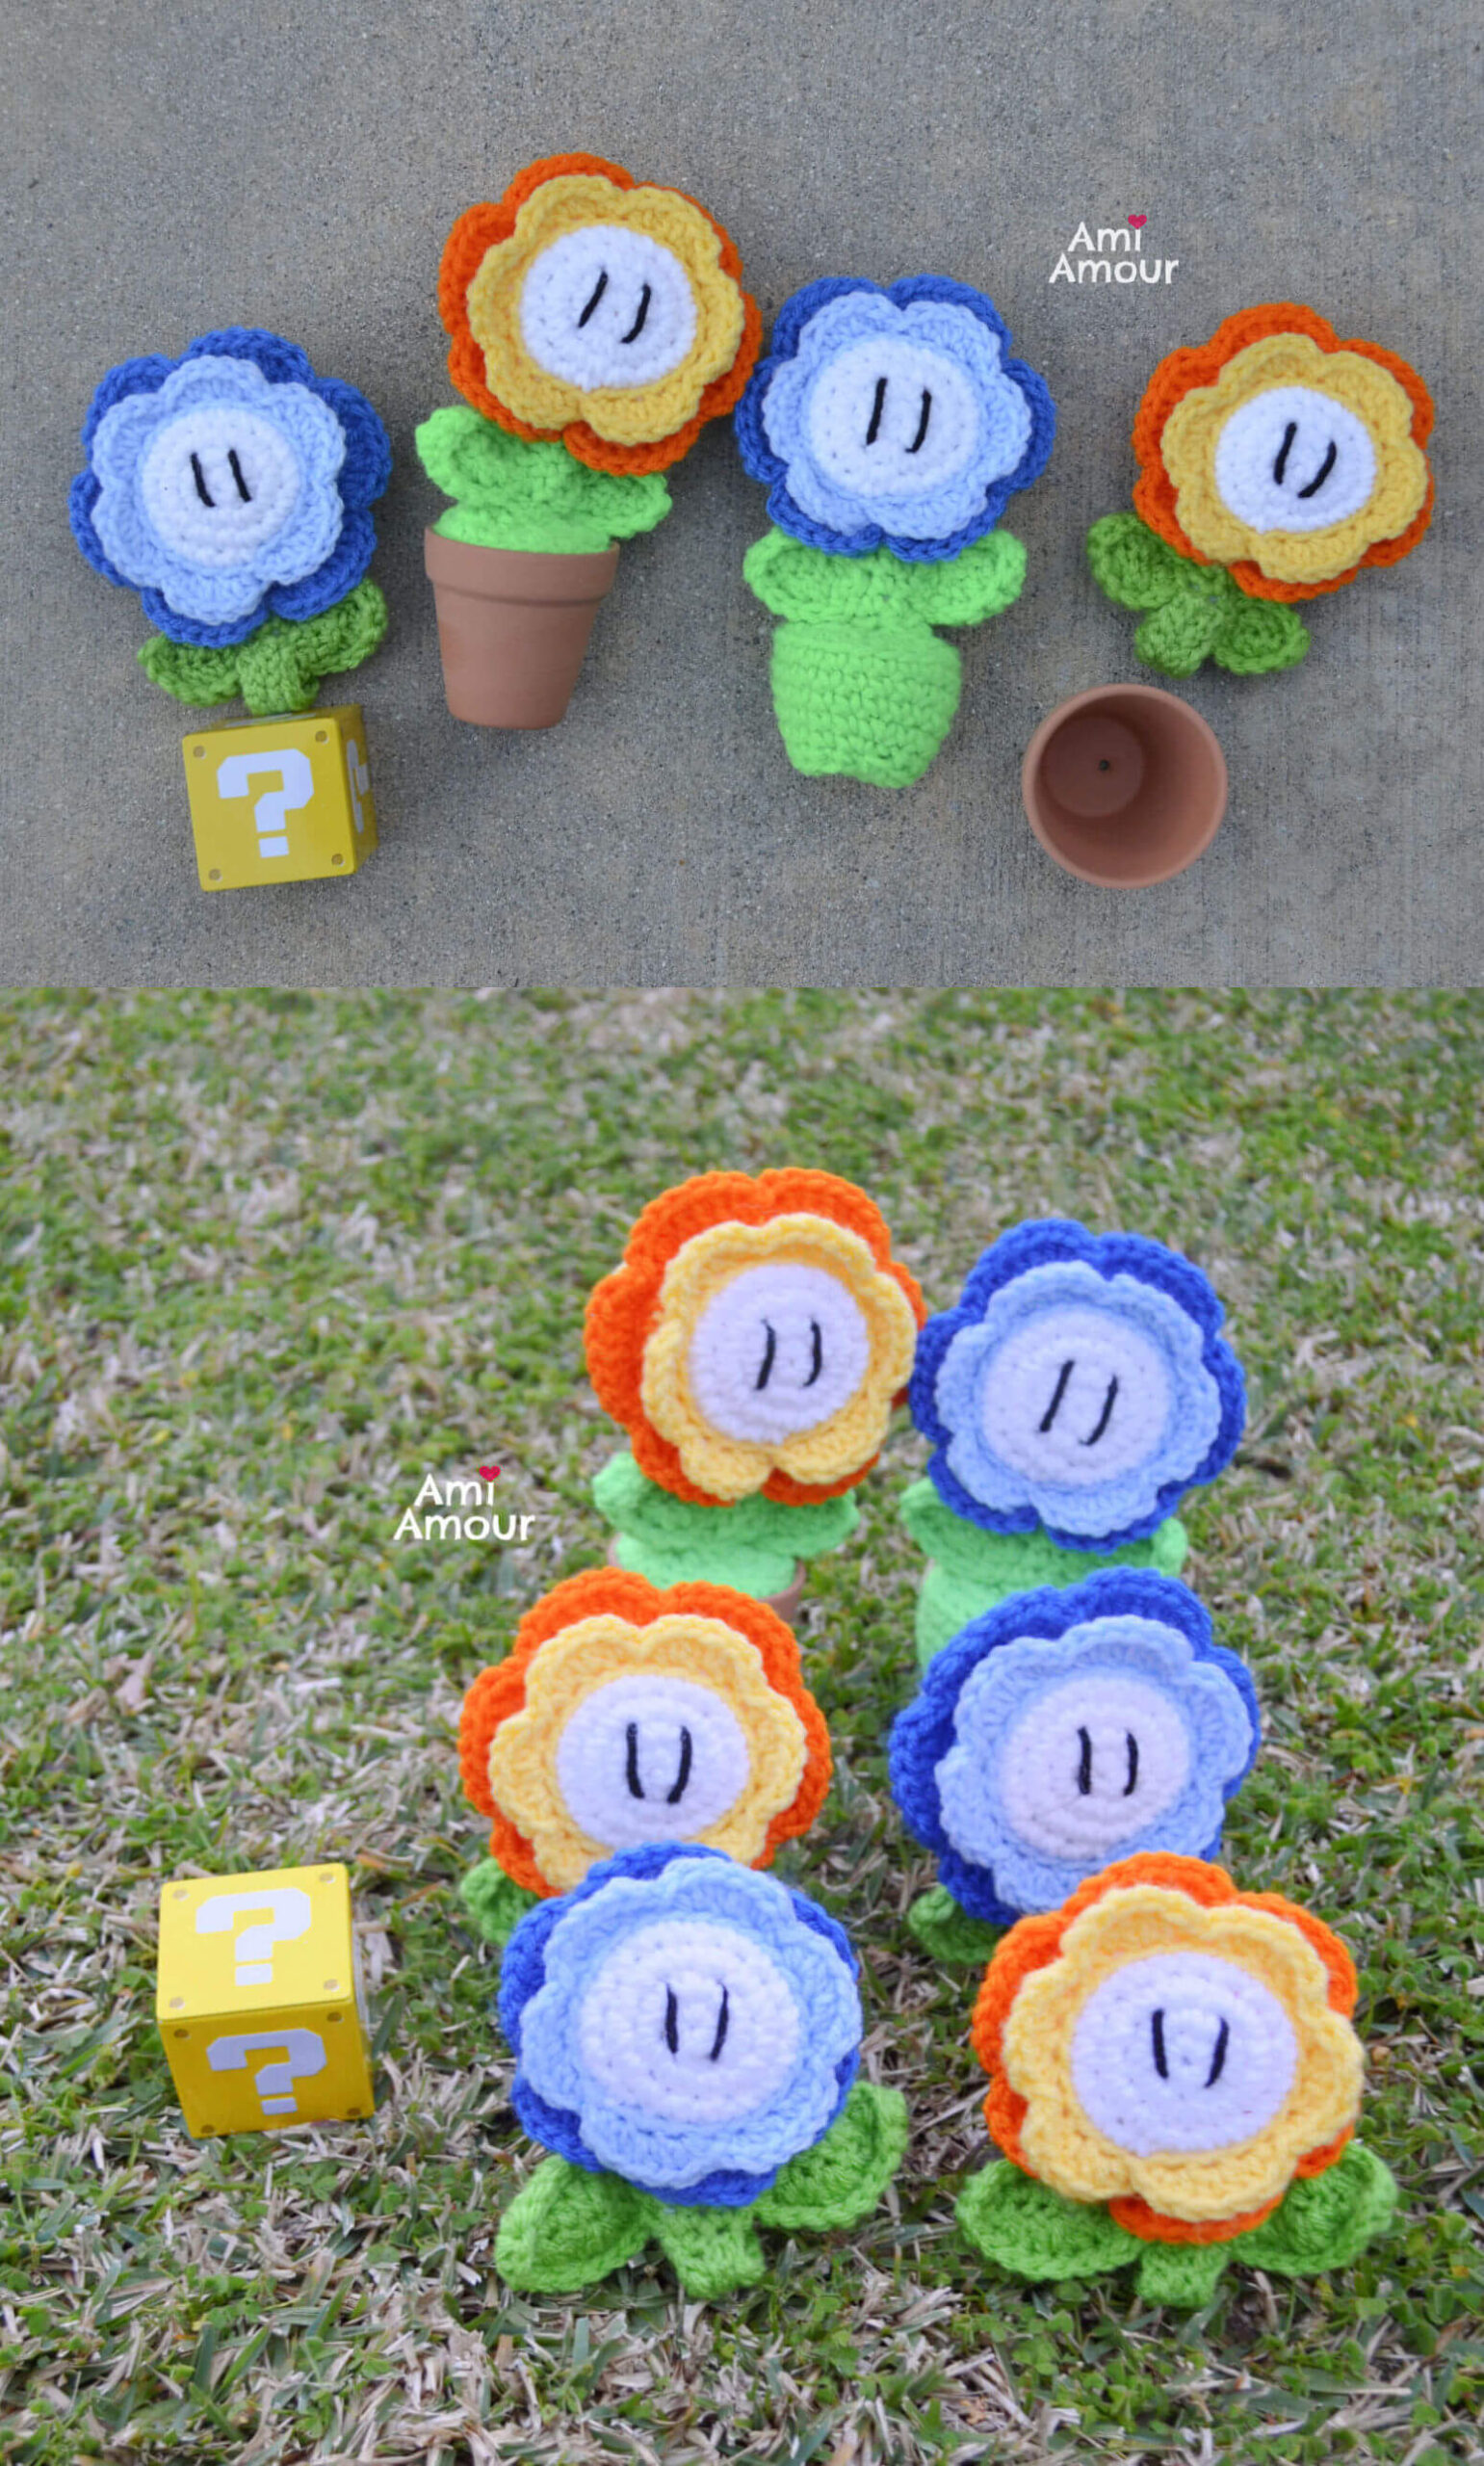
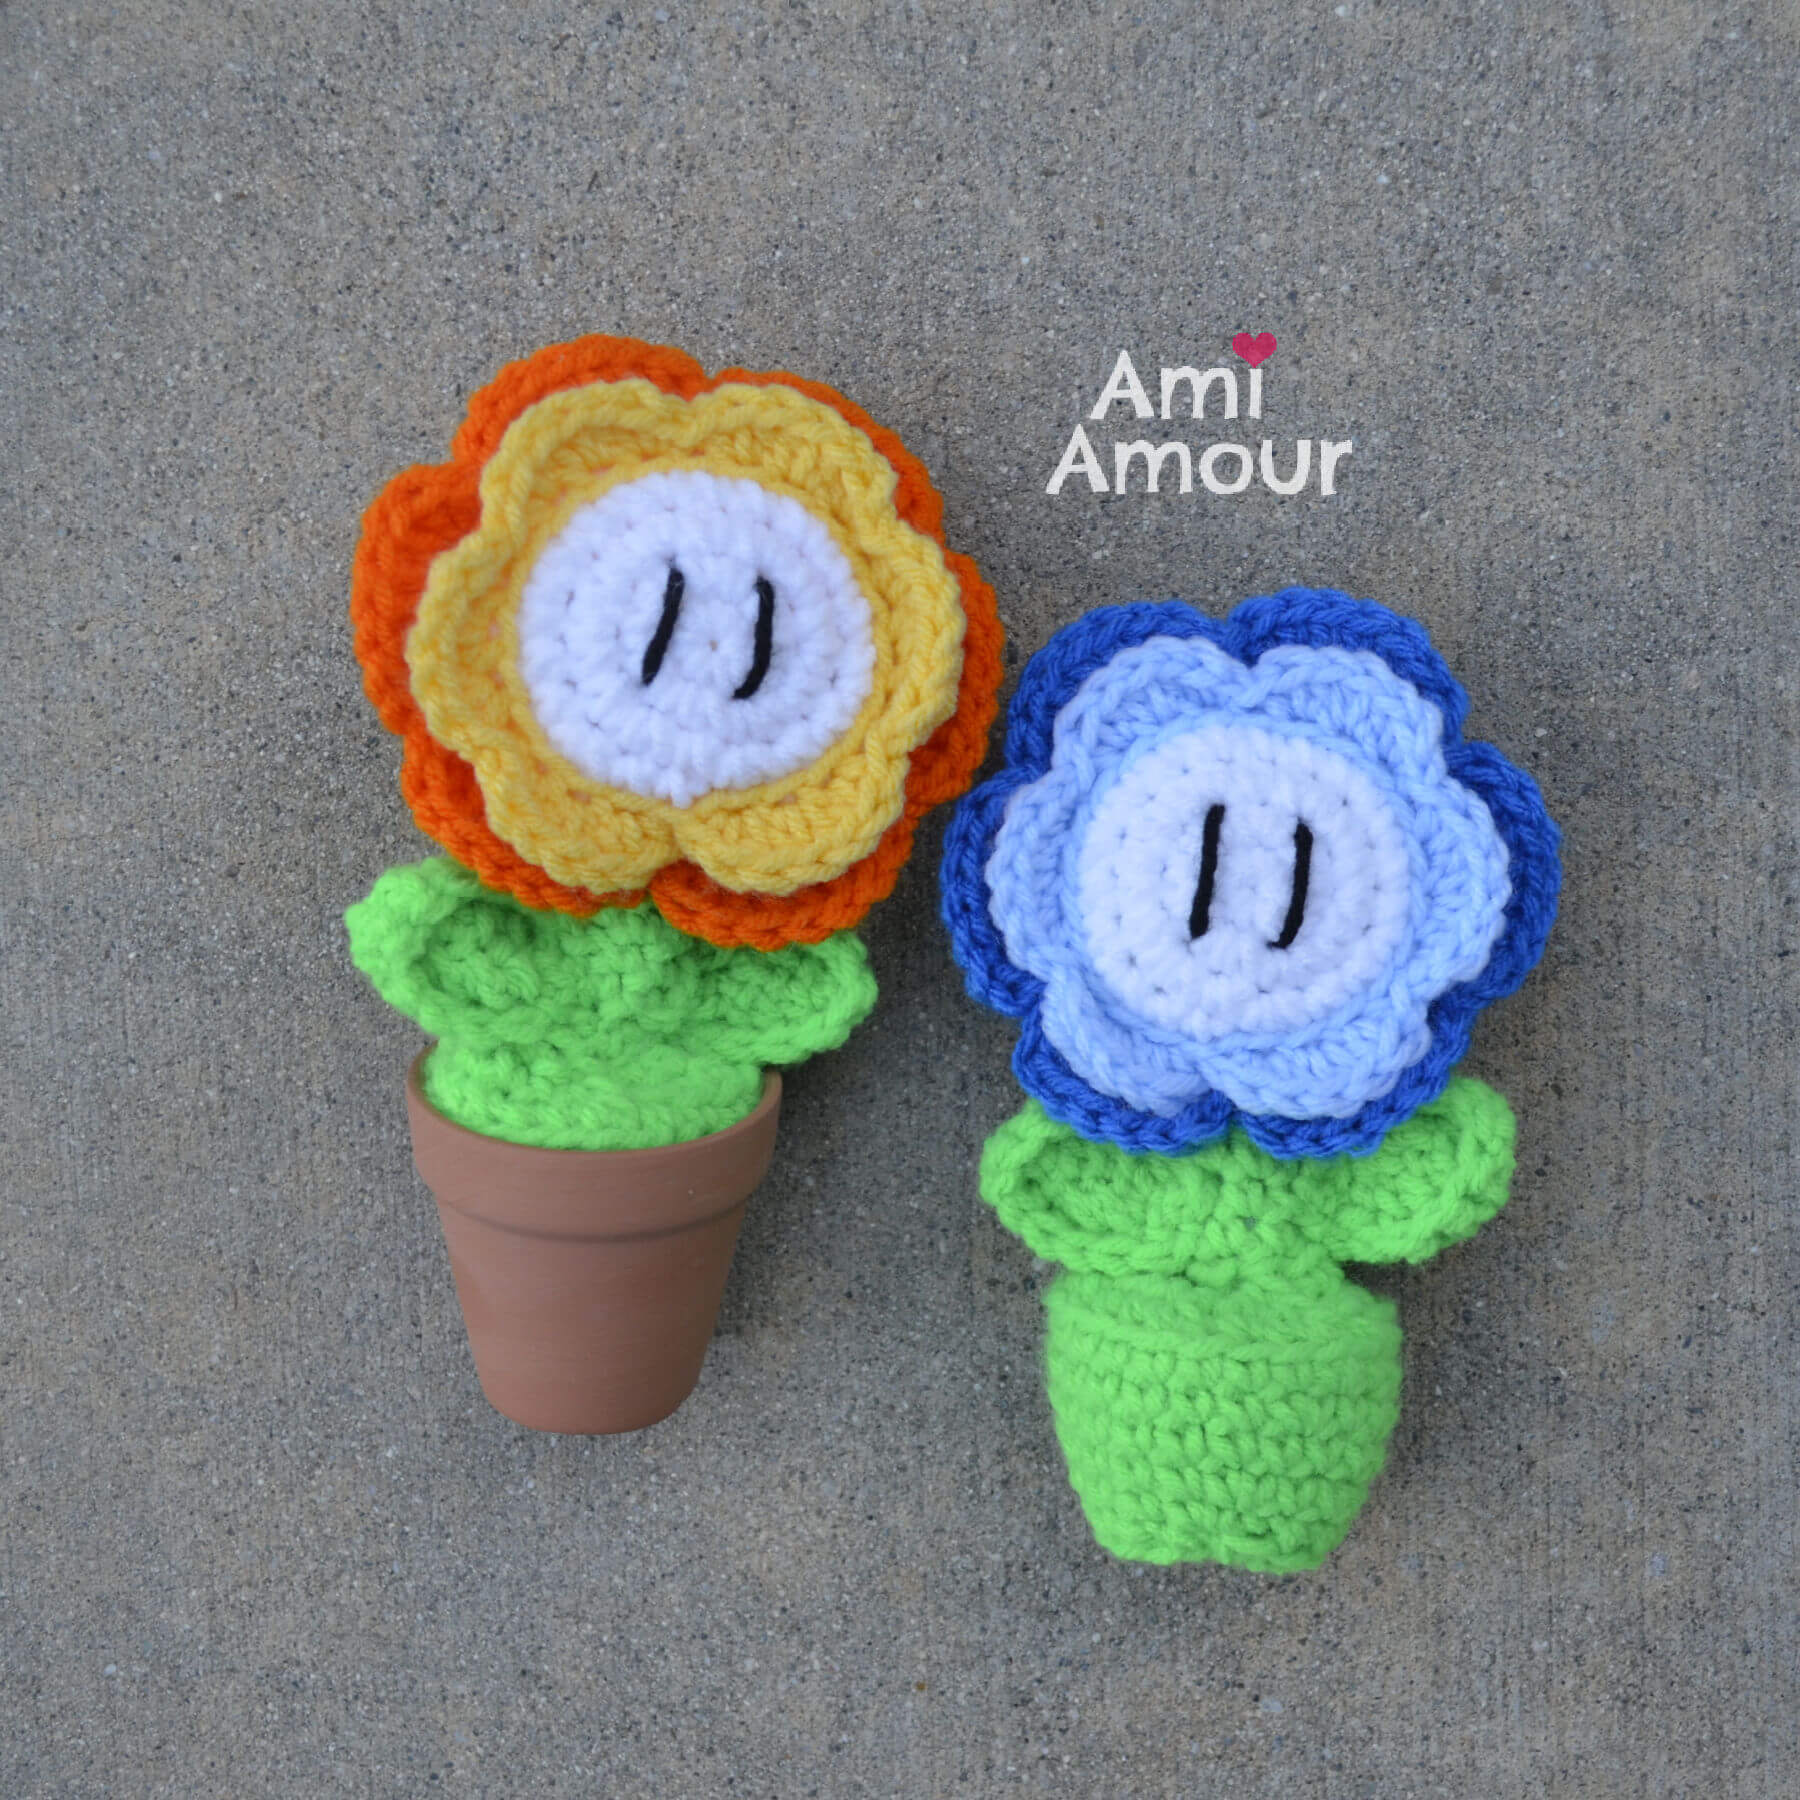
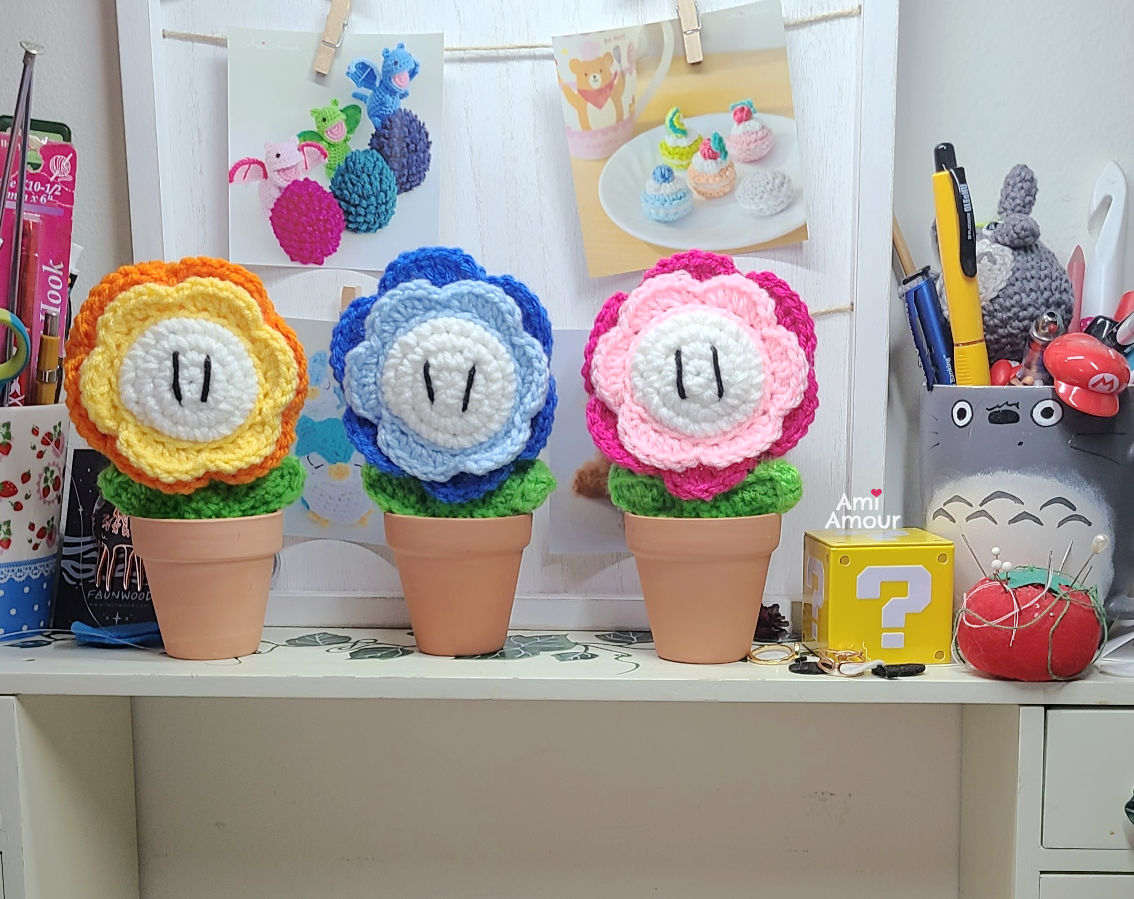
The Fire Flower Amigurumi petals are made in the colors of yellow and orange, and it also has lines for its eyes at the white center. Touch this flower and you’ll gain the power-up of throwing fireballs from your hands.
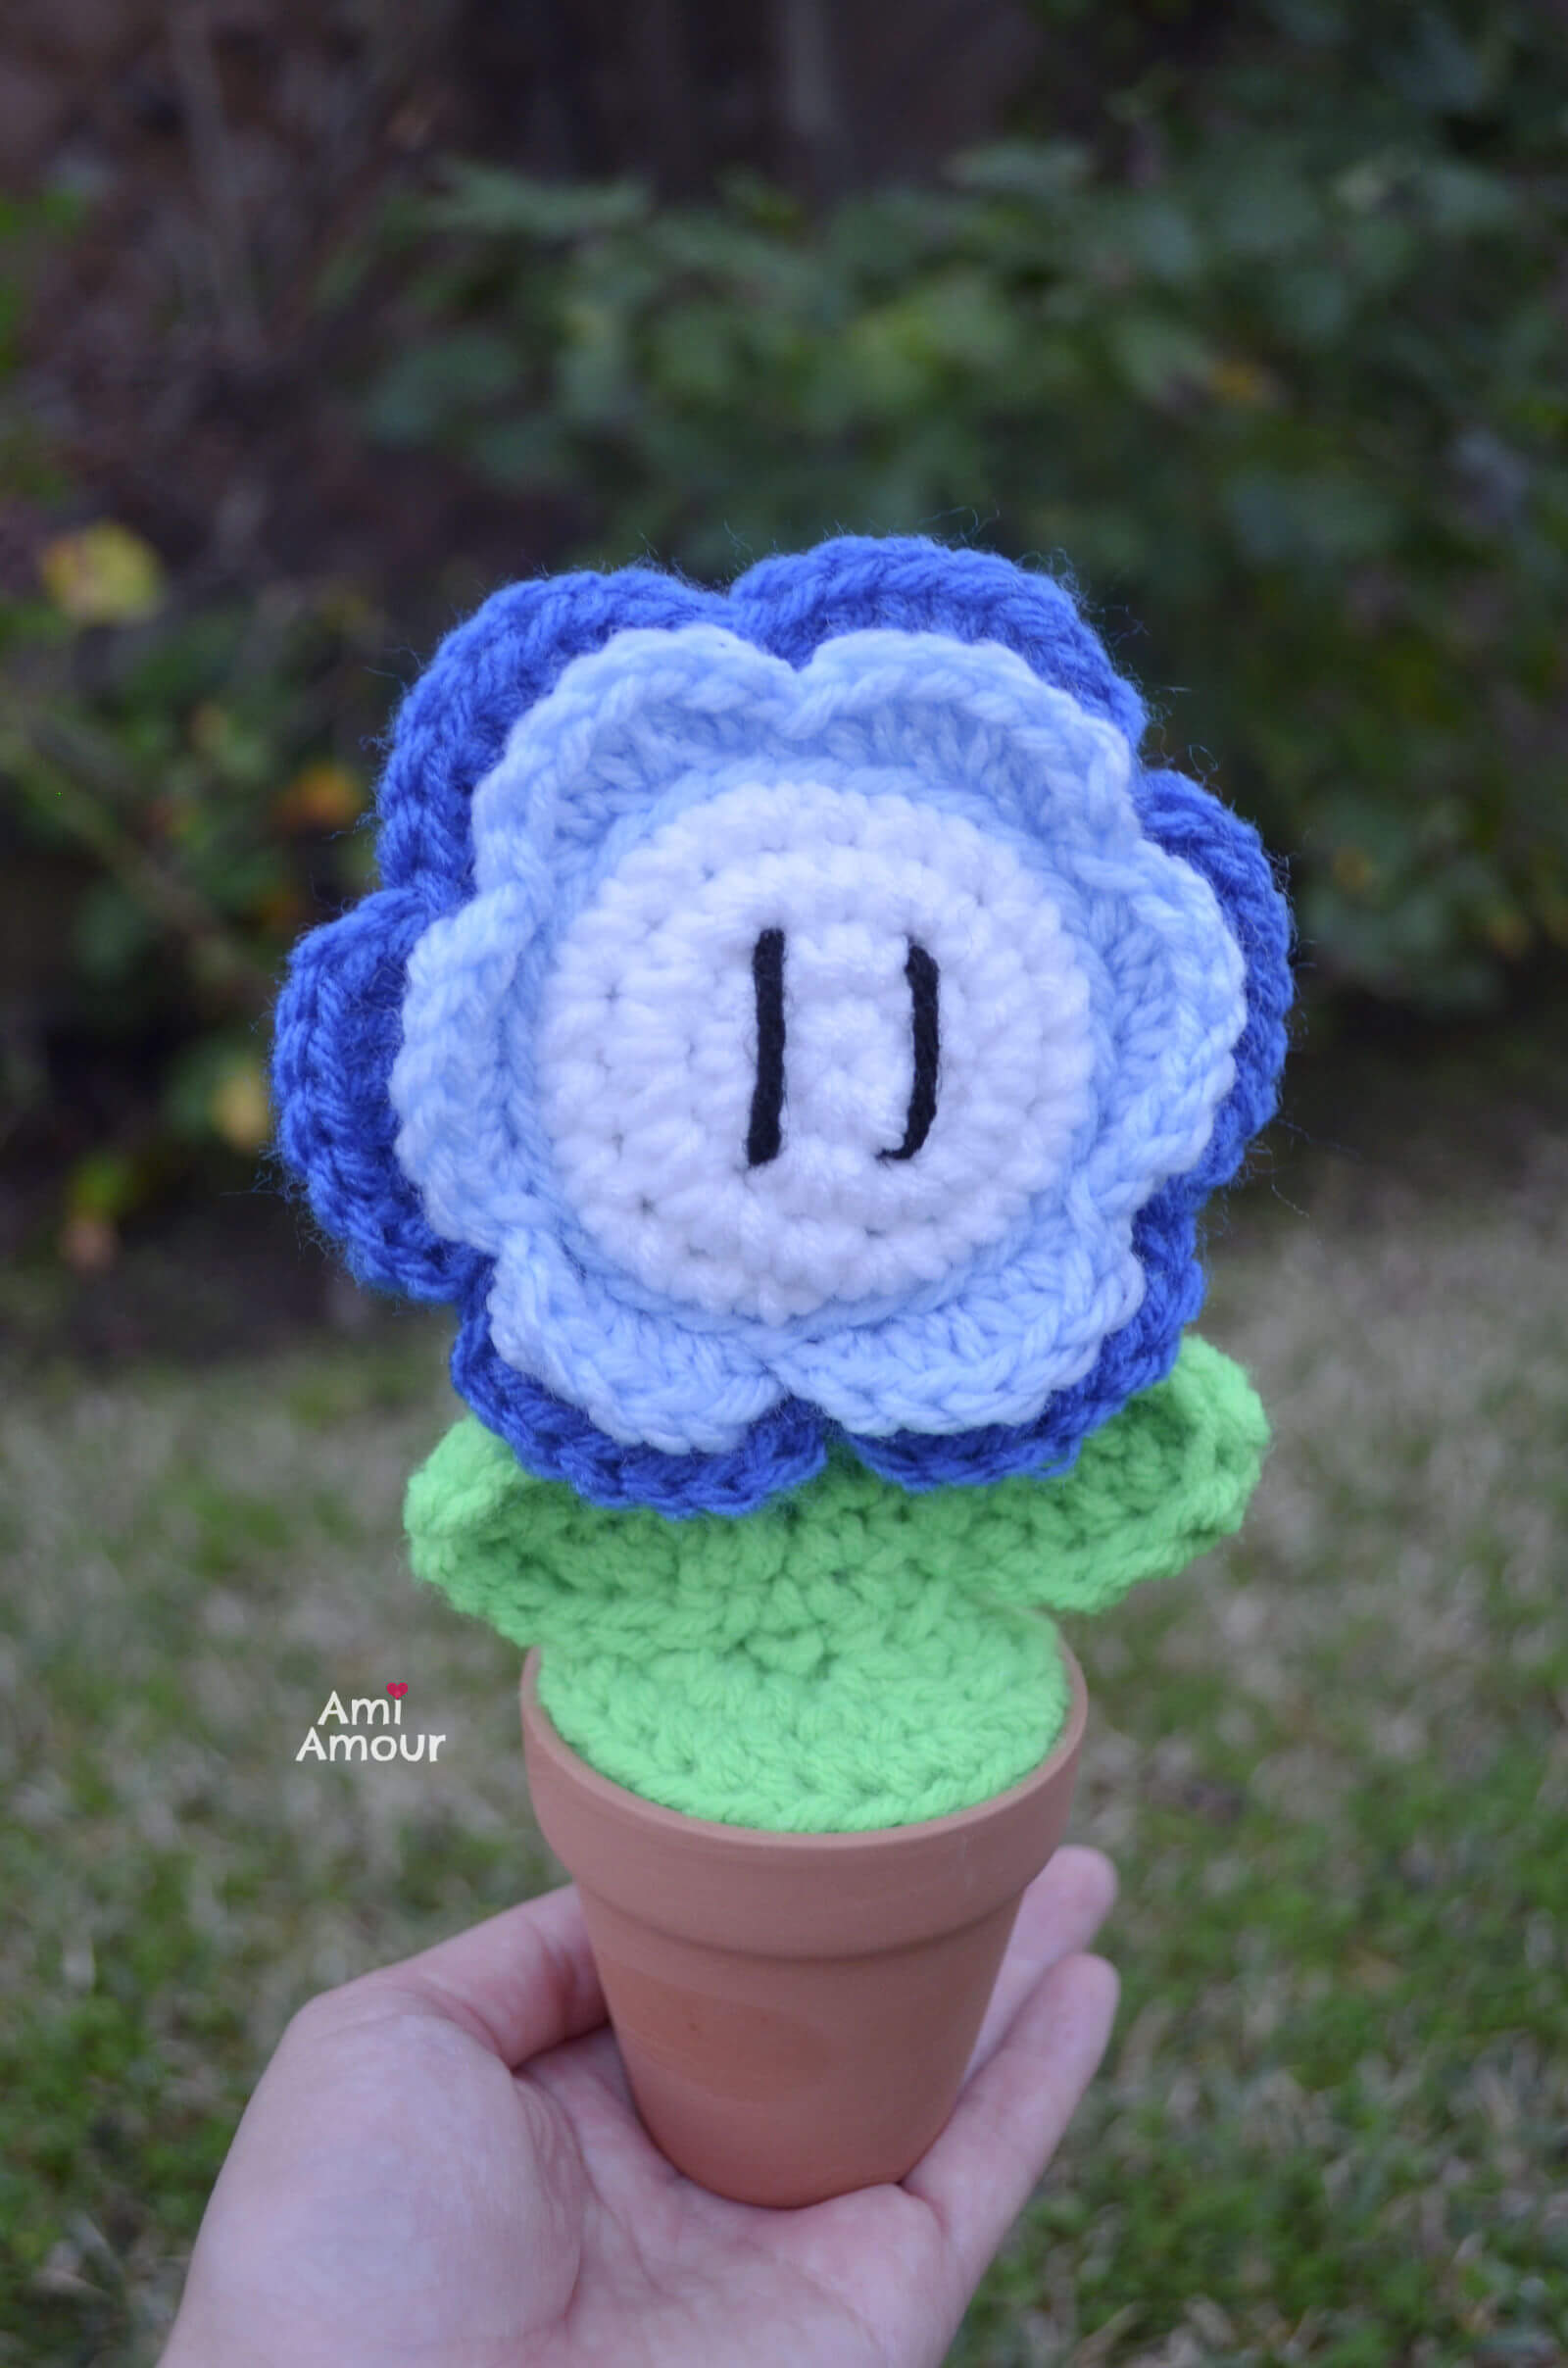
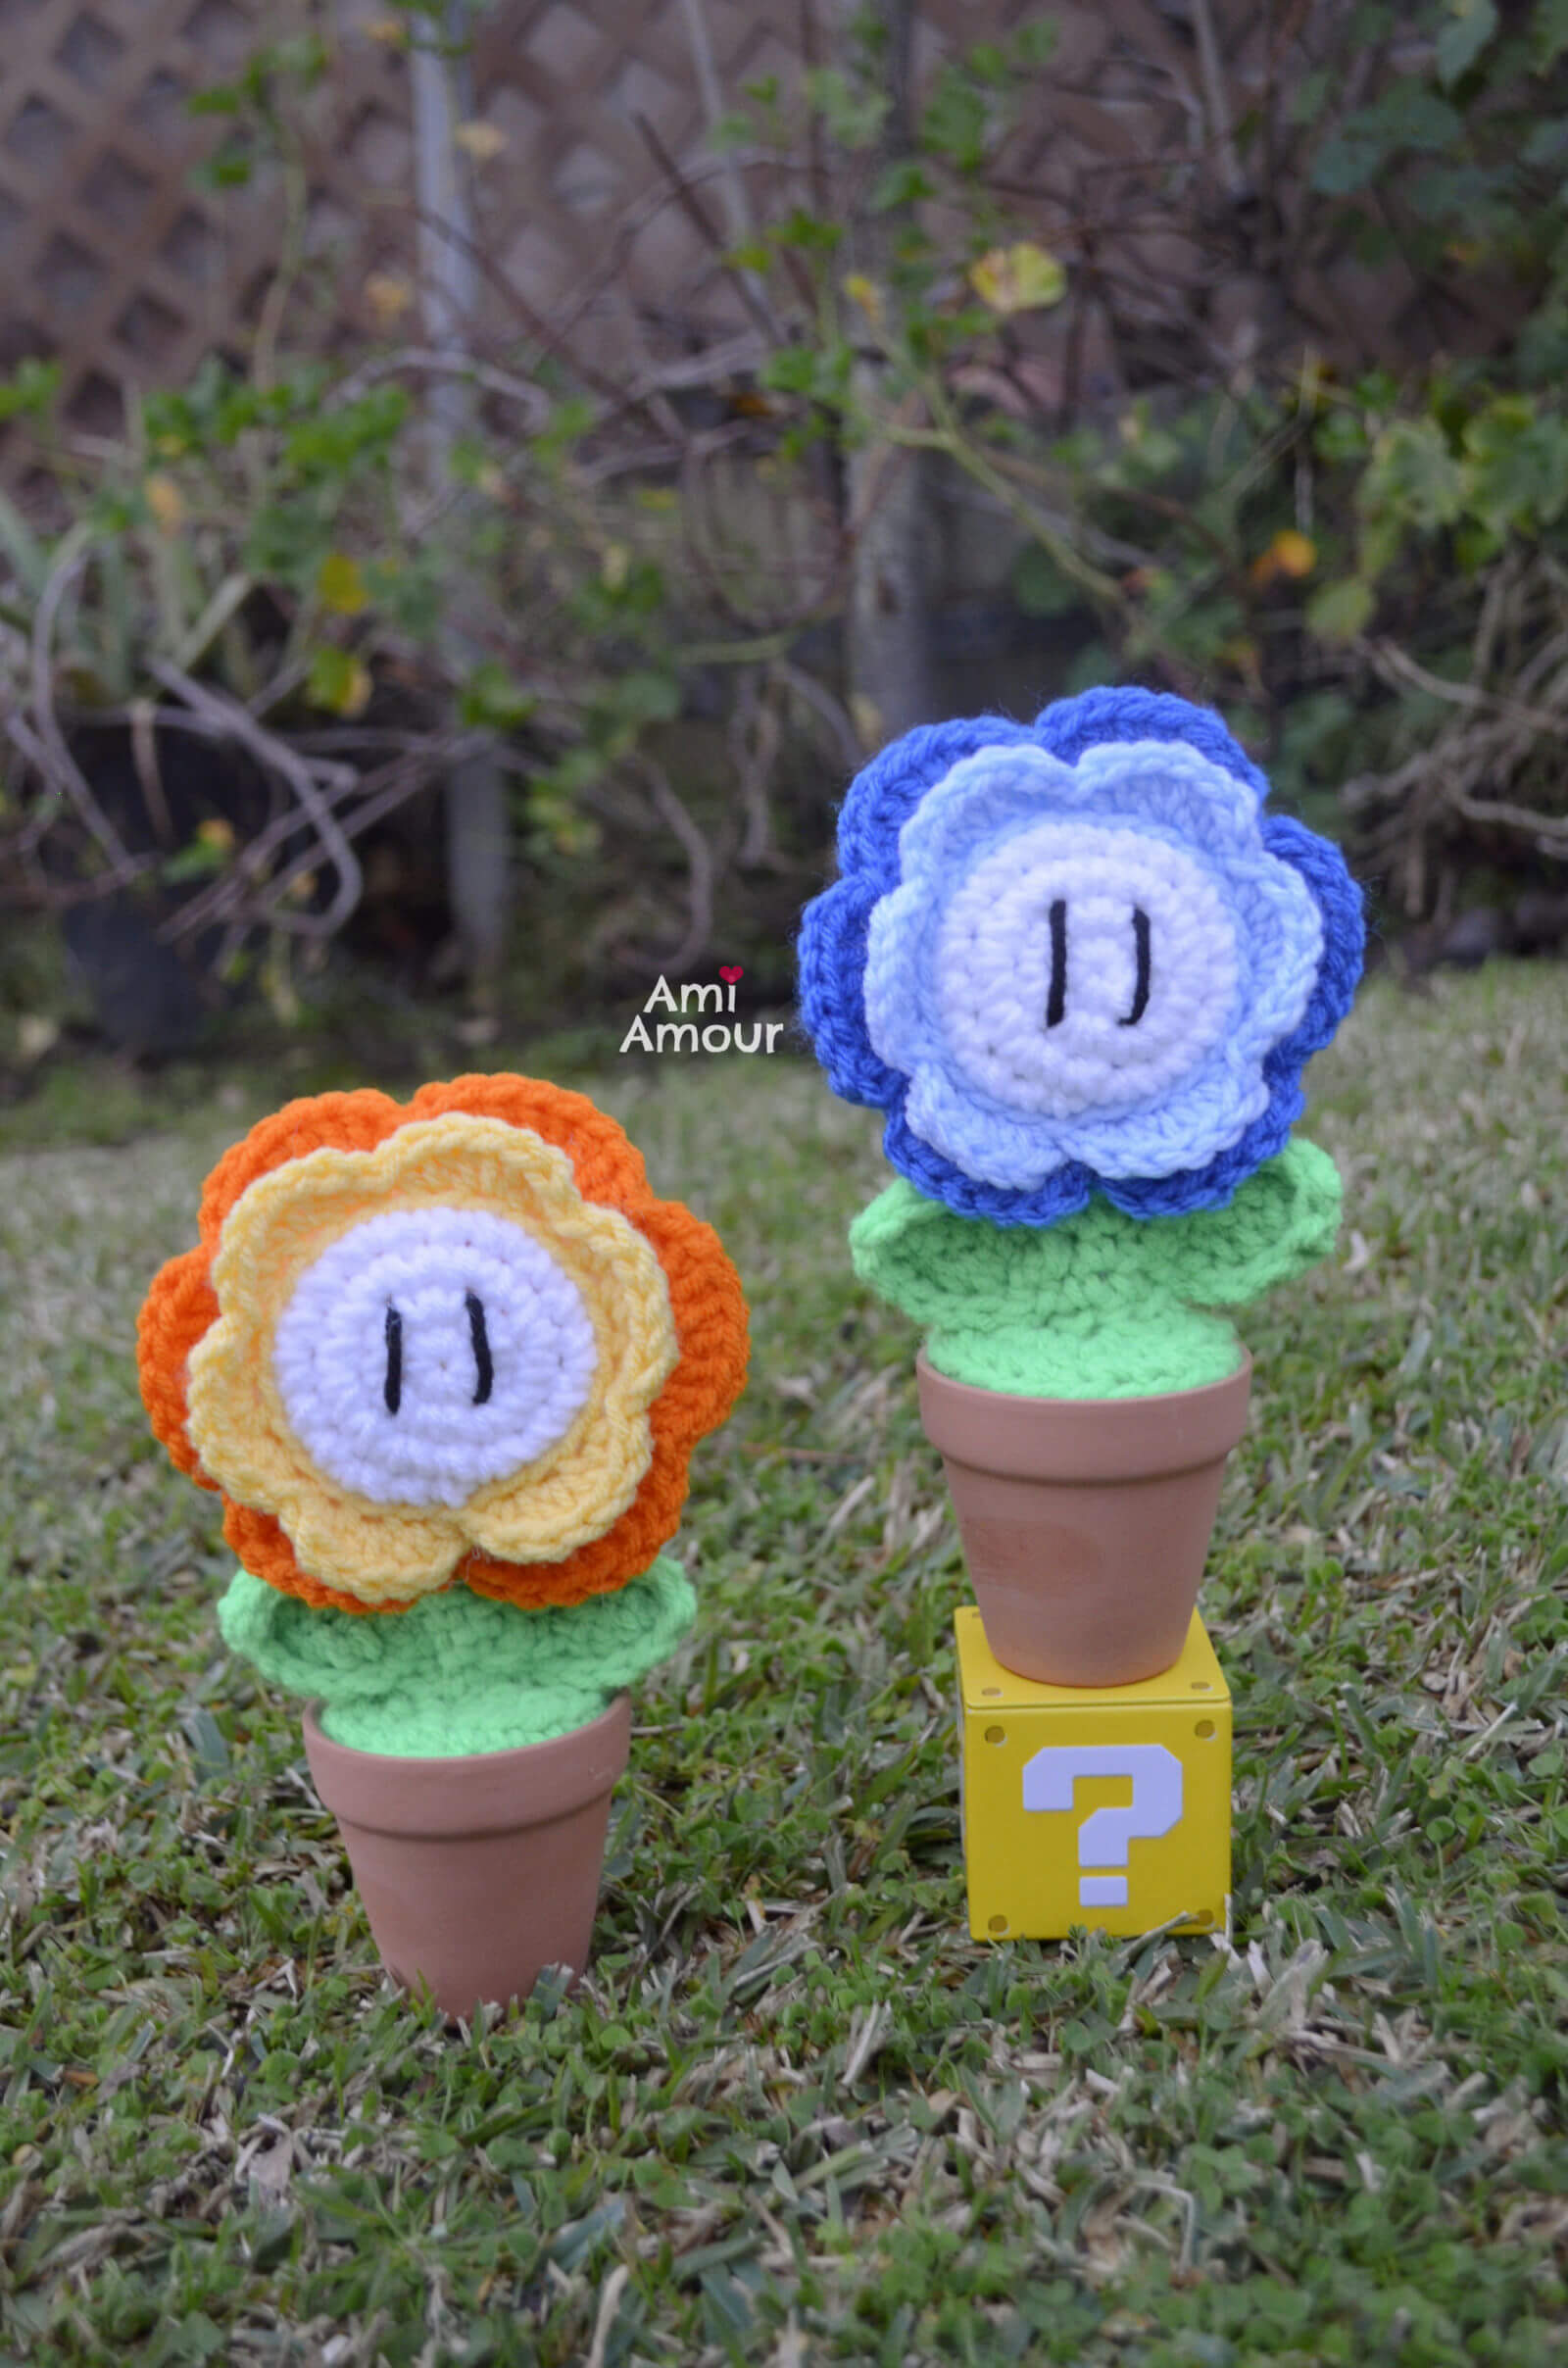
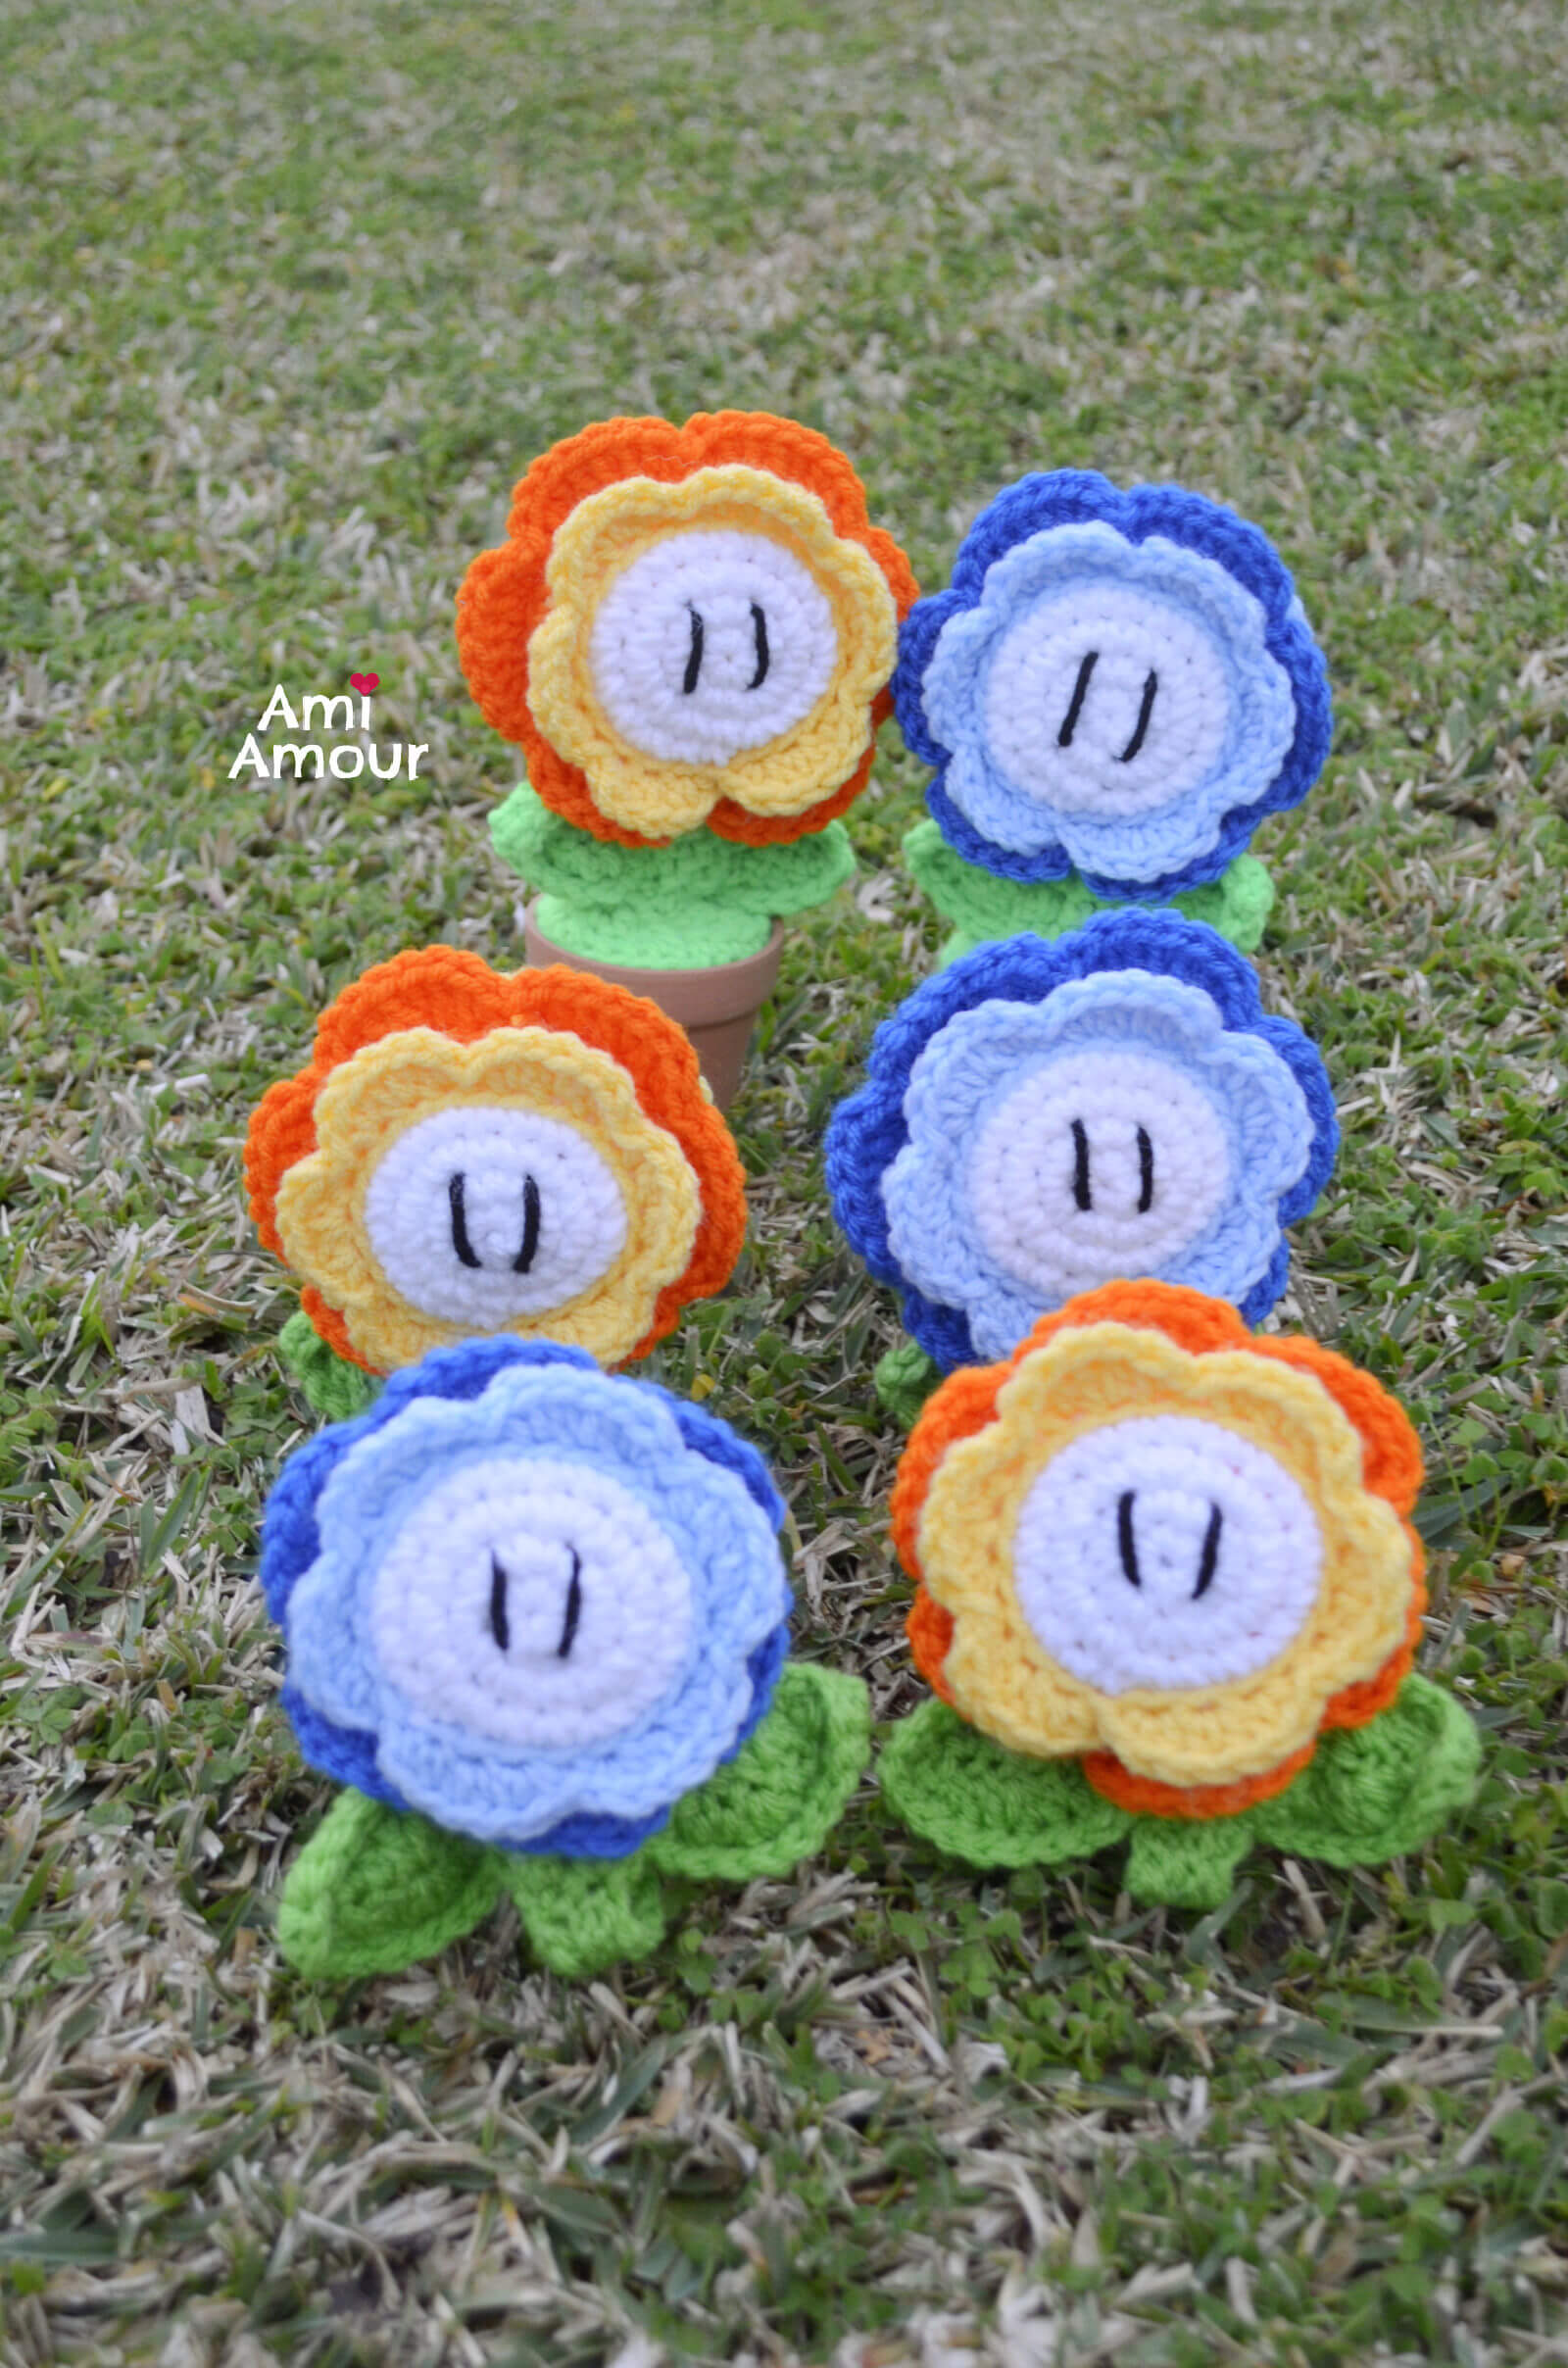
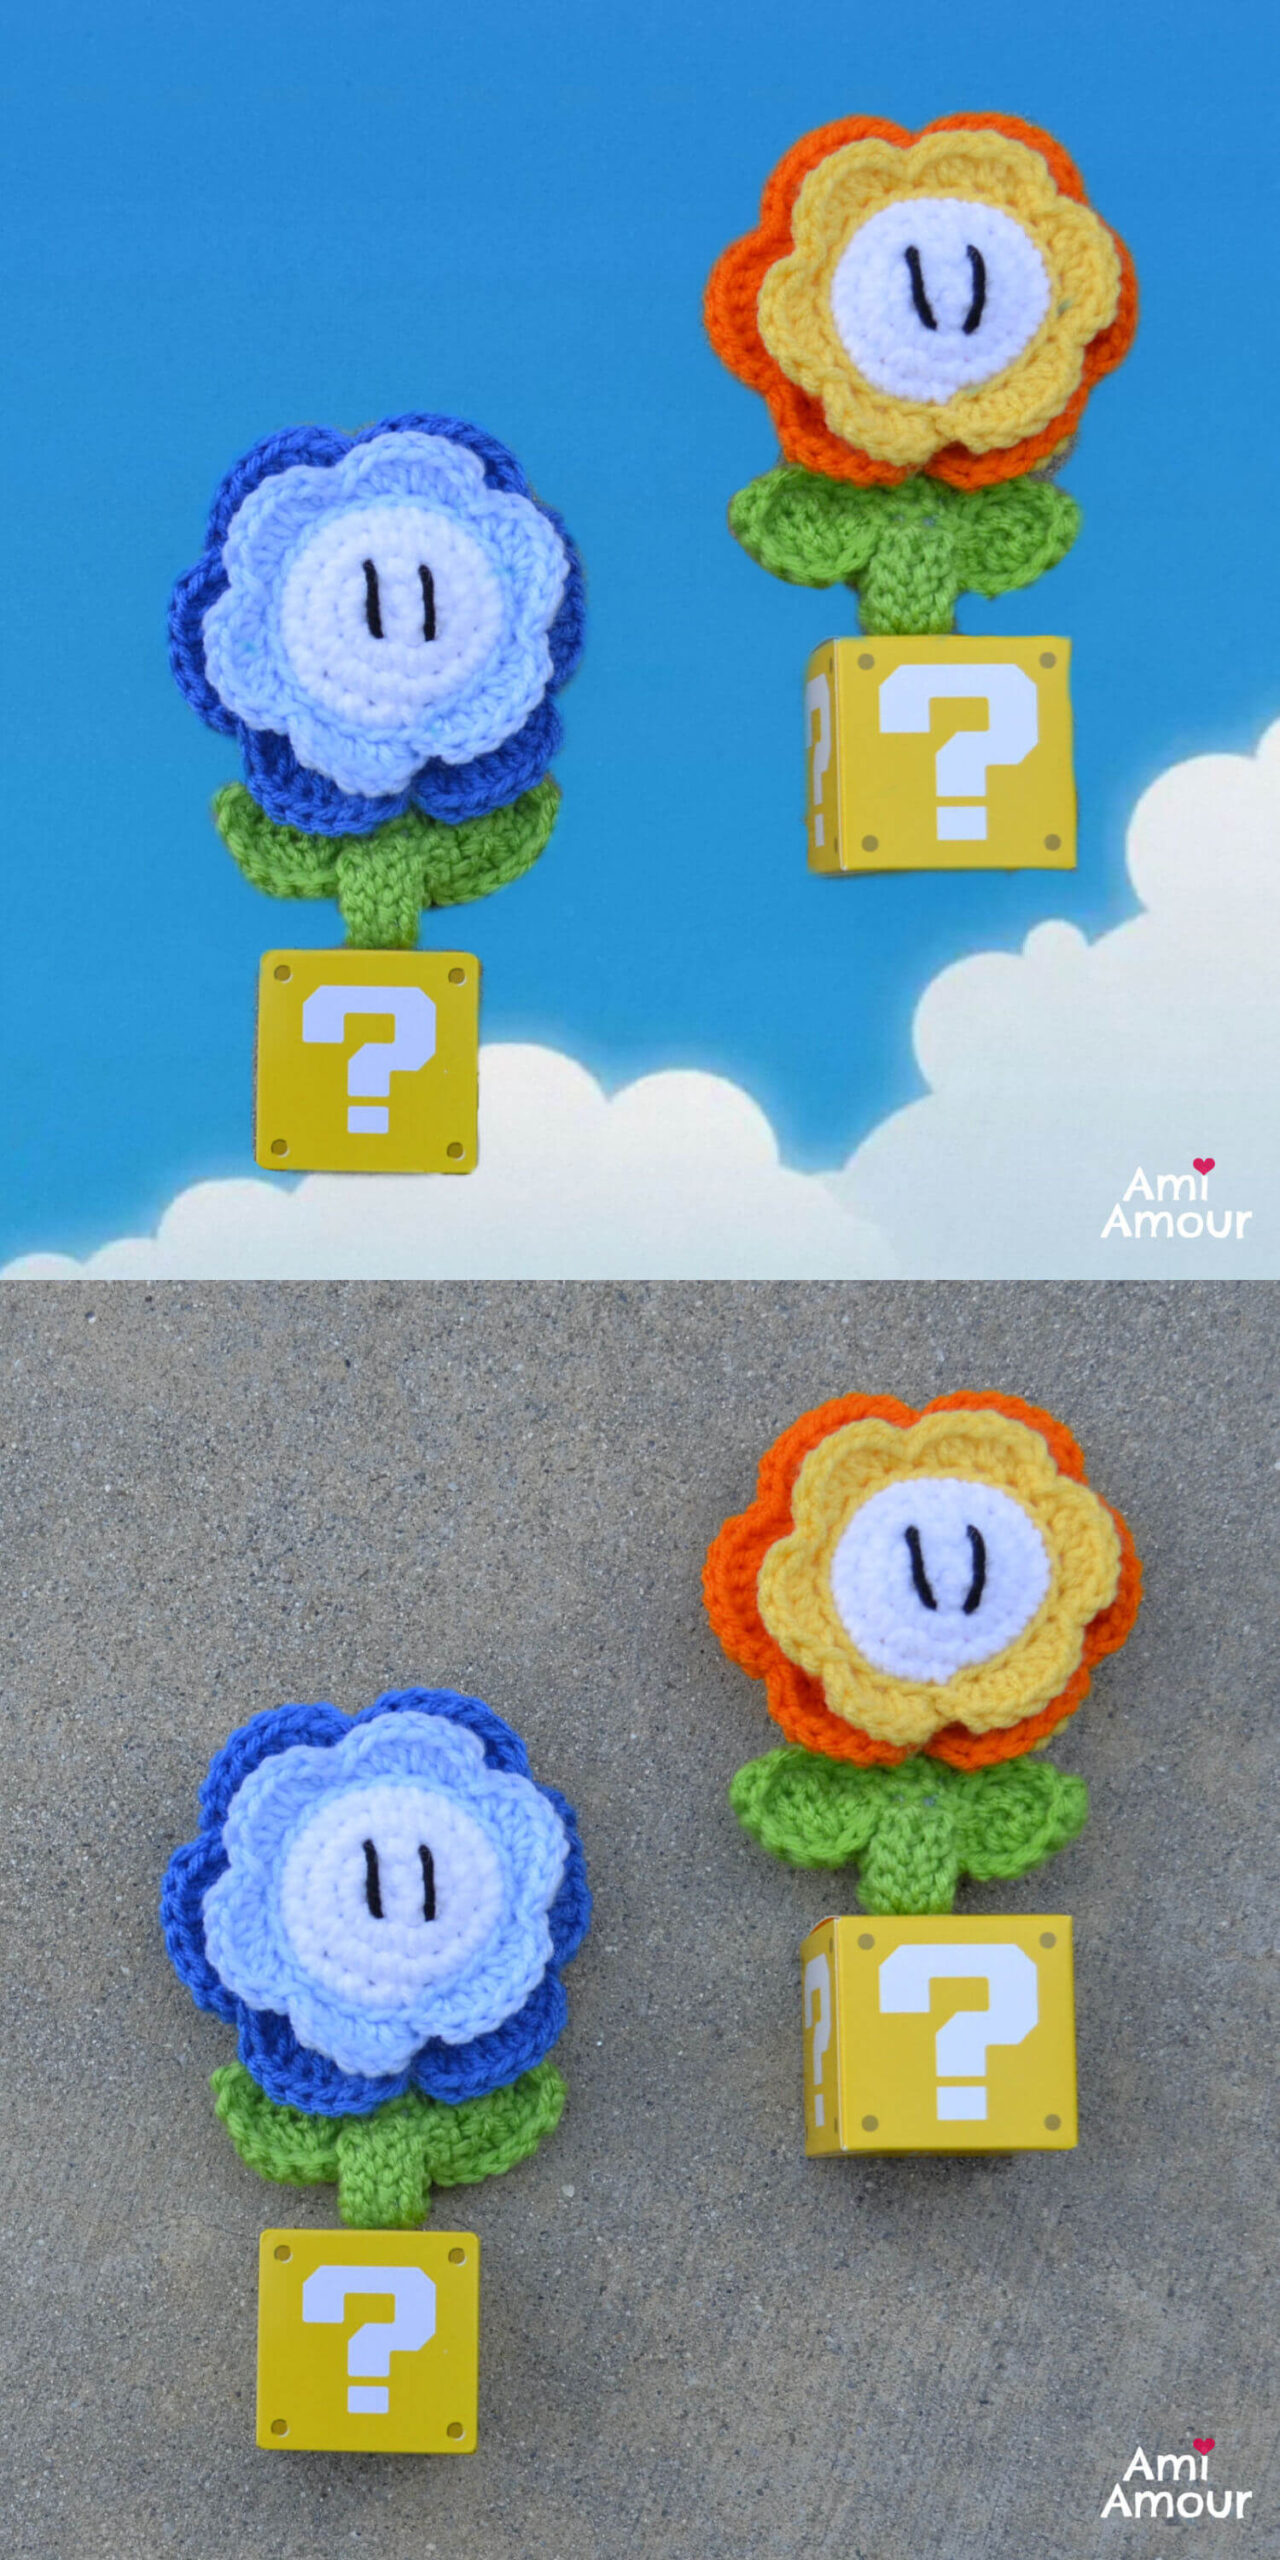
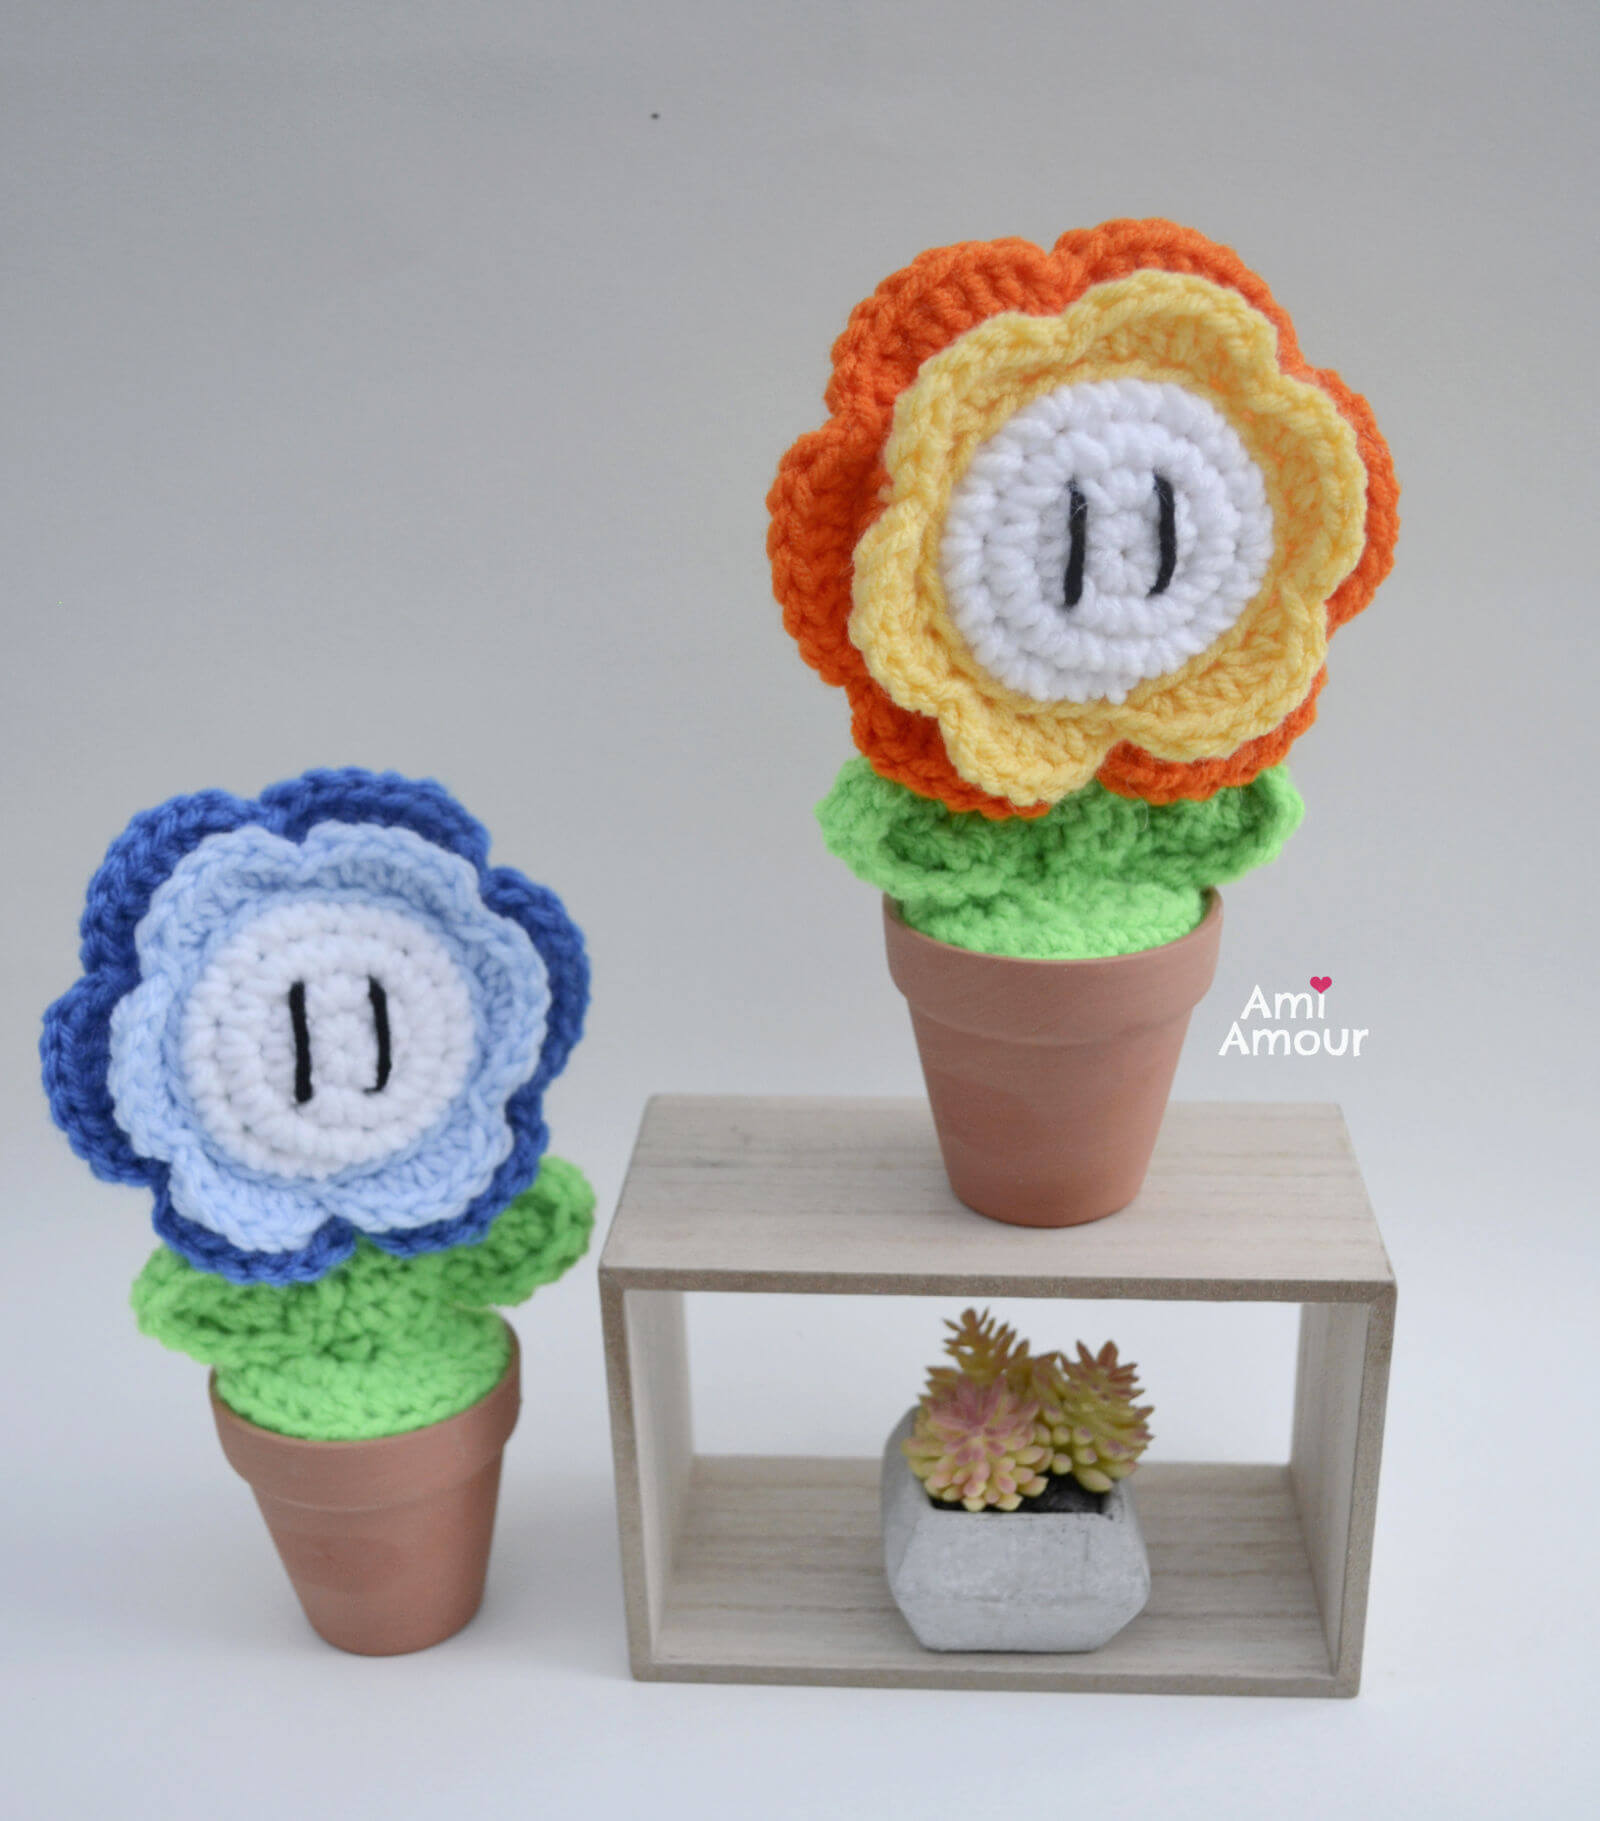
You can also make an Ice Flower amigurumi by changing the petal colors to light blue and cobalt blue. Now you have the power to throw ice balls!
With this design, I was influenced by the visuals in the Super Mario Bros movie where we see a beautiful field of Fire Flowers in all their splendor.
I can just imagine Mario or Princess Peach plucking one of the flowers and potting it into a cute clay pot. They’ll display it nicely in their home or castle, readily available in case of an emergency.
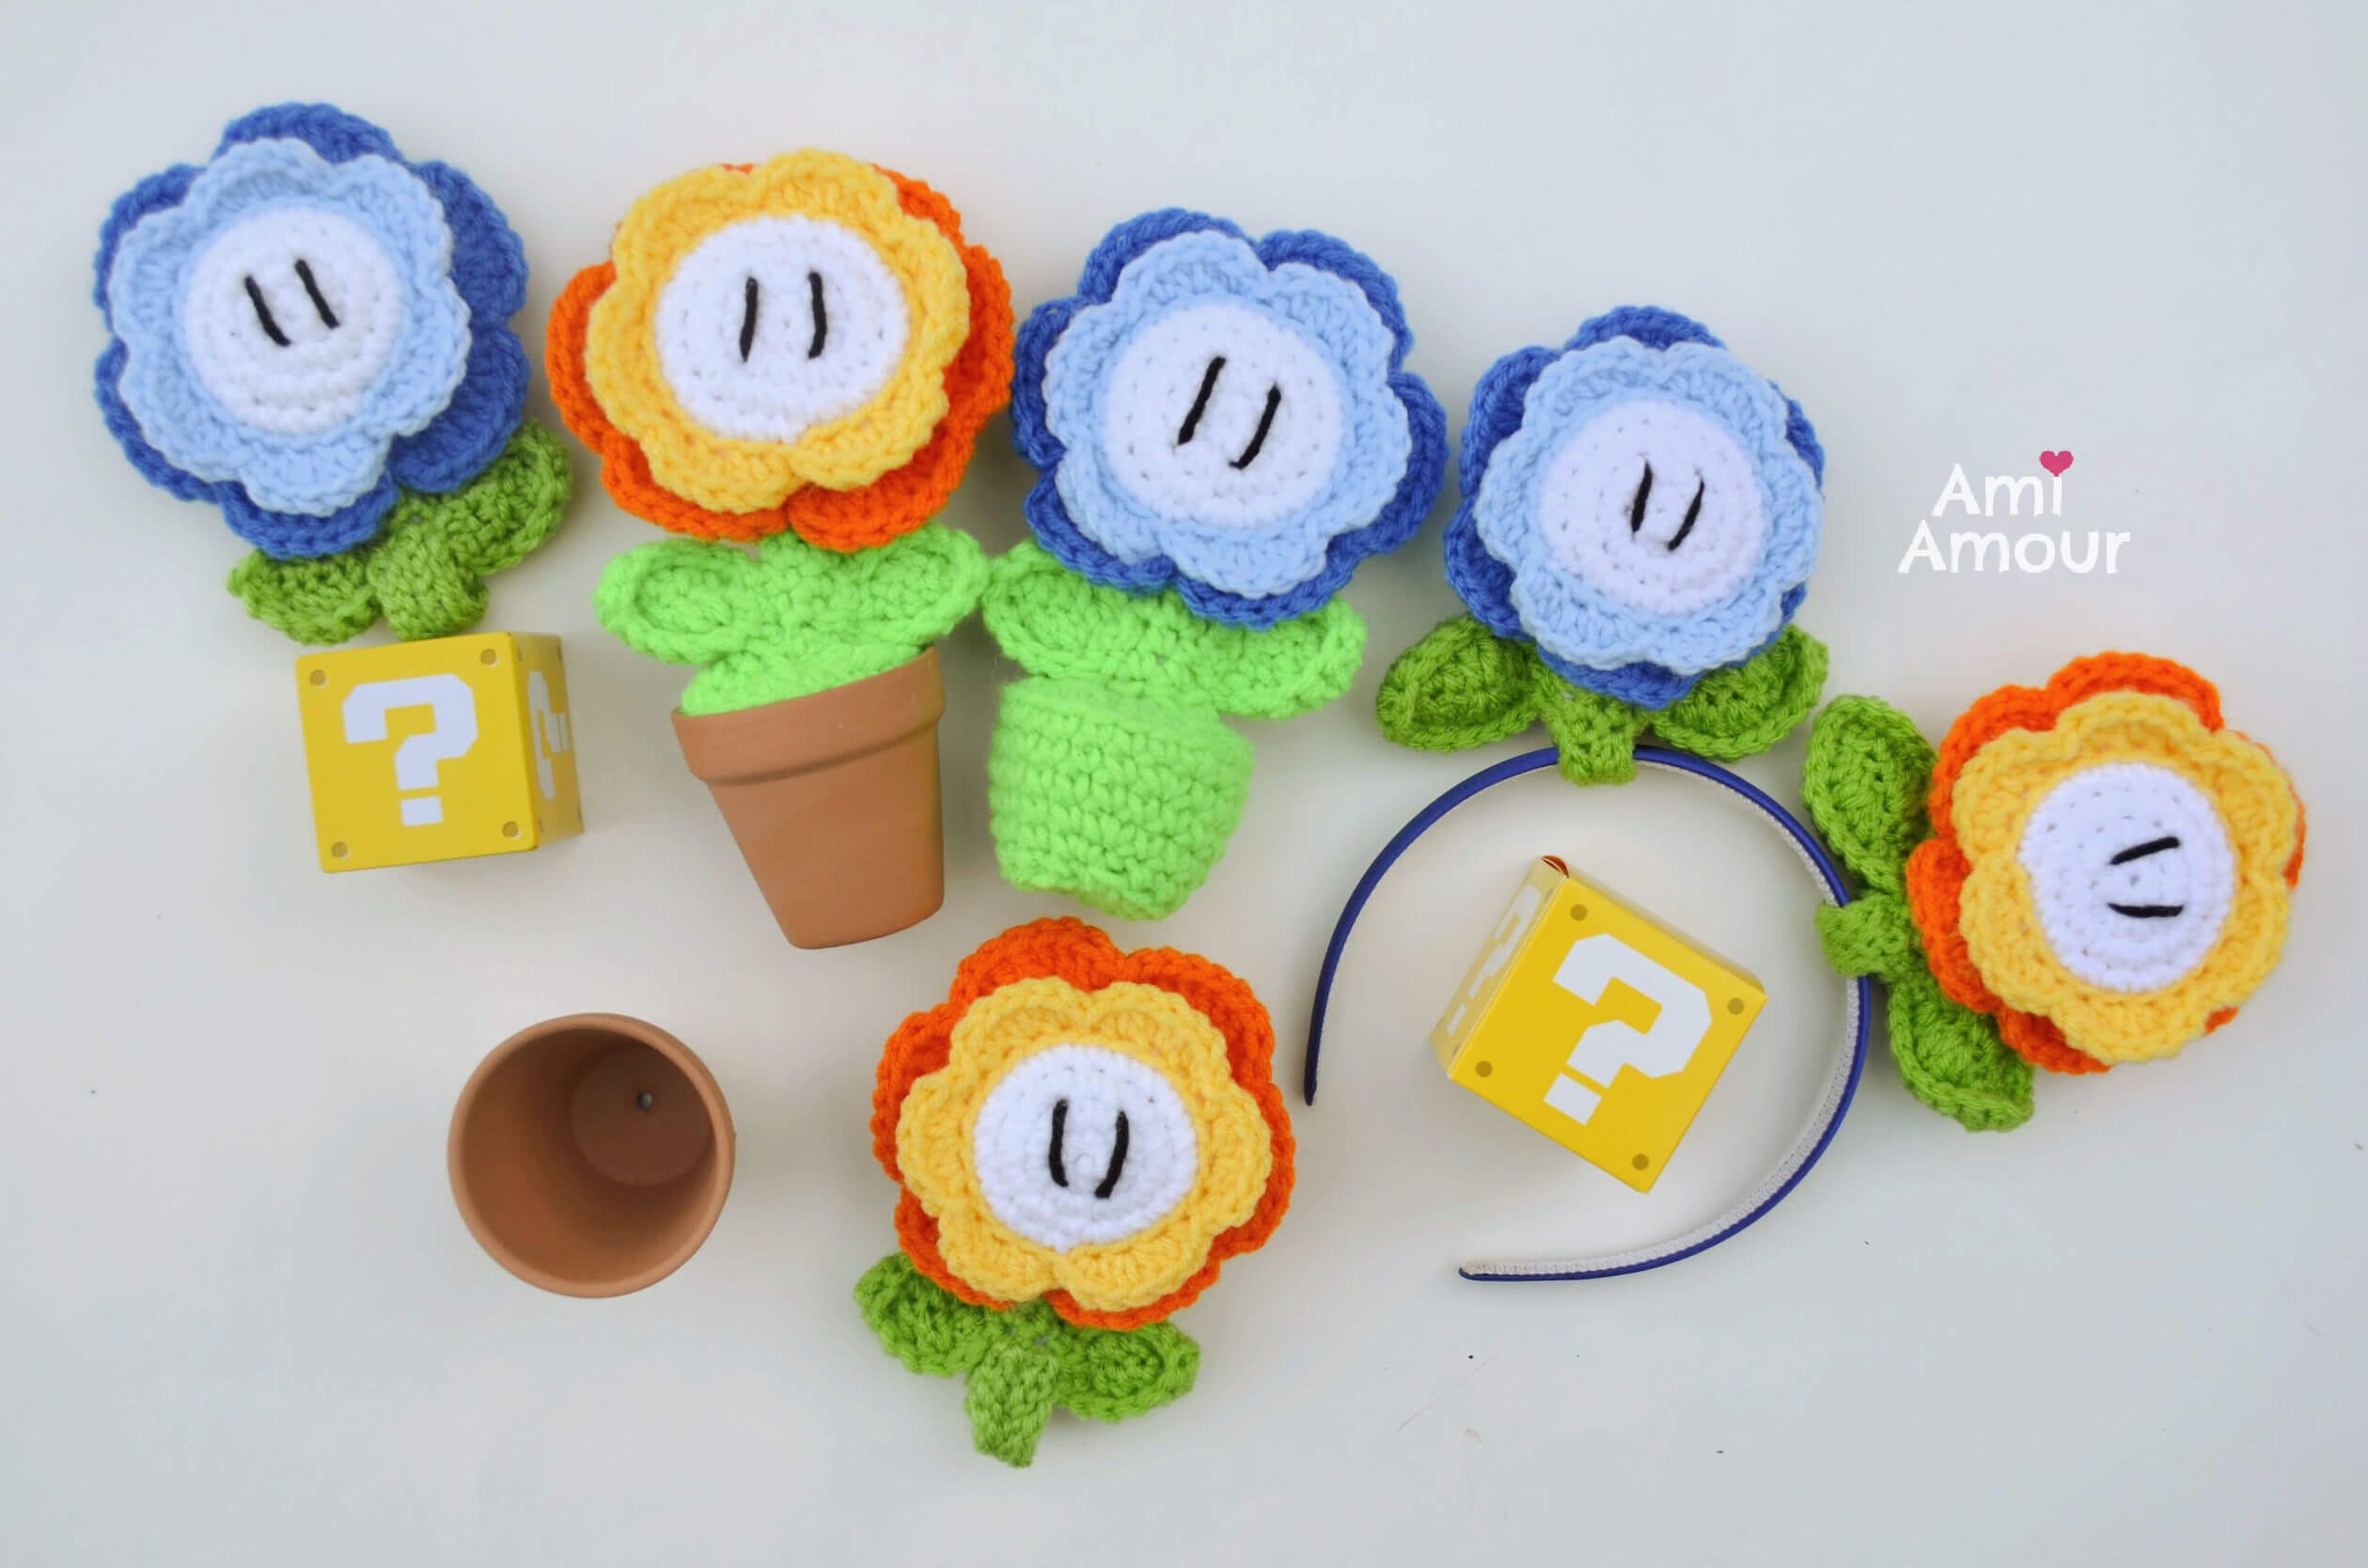
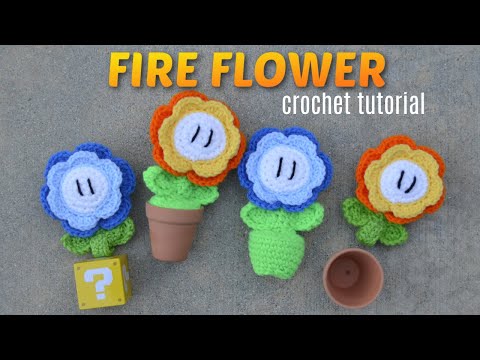
There’s 3 ways I’ve used this Fire Flower amigurumi. First, you can just stop at the flower, stem, and leaves portion and you will have the classic Fire Flower or Ice Flower. Use thinner yarn and these would make cute earrings or a keychain!
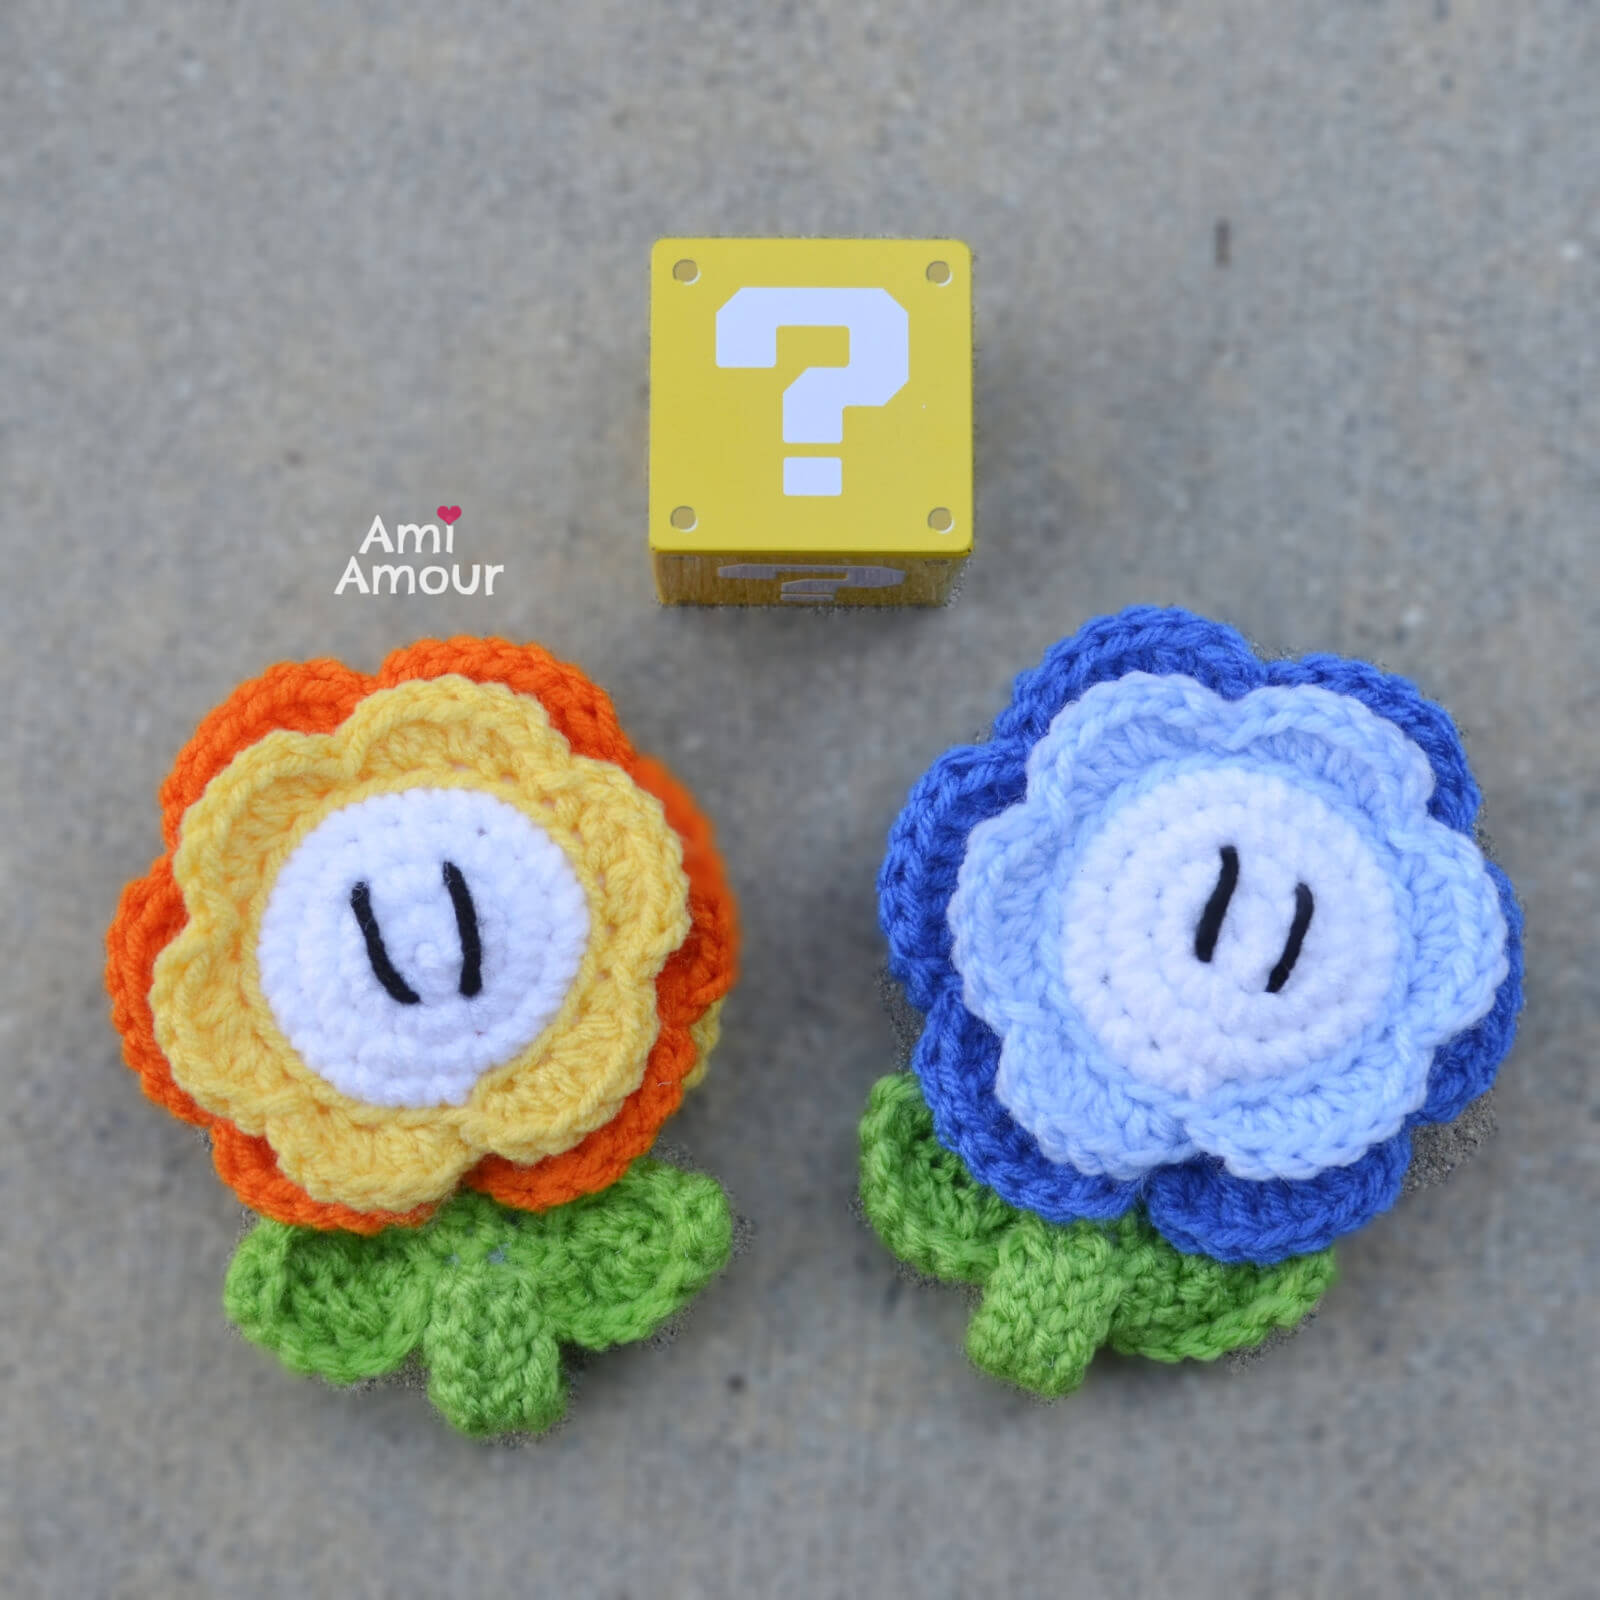
Secondly, if you continue to crochet the flower base, you can turn the Fire Flower amigurumi into a potted plant. Add a clay pot to elevate the look. You can also use of course the Question Block as a classic base as well.

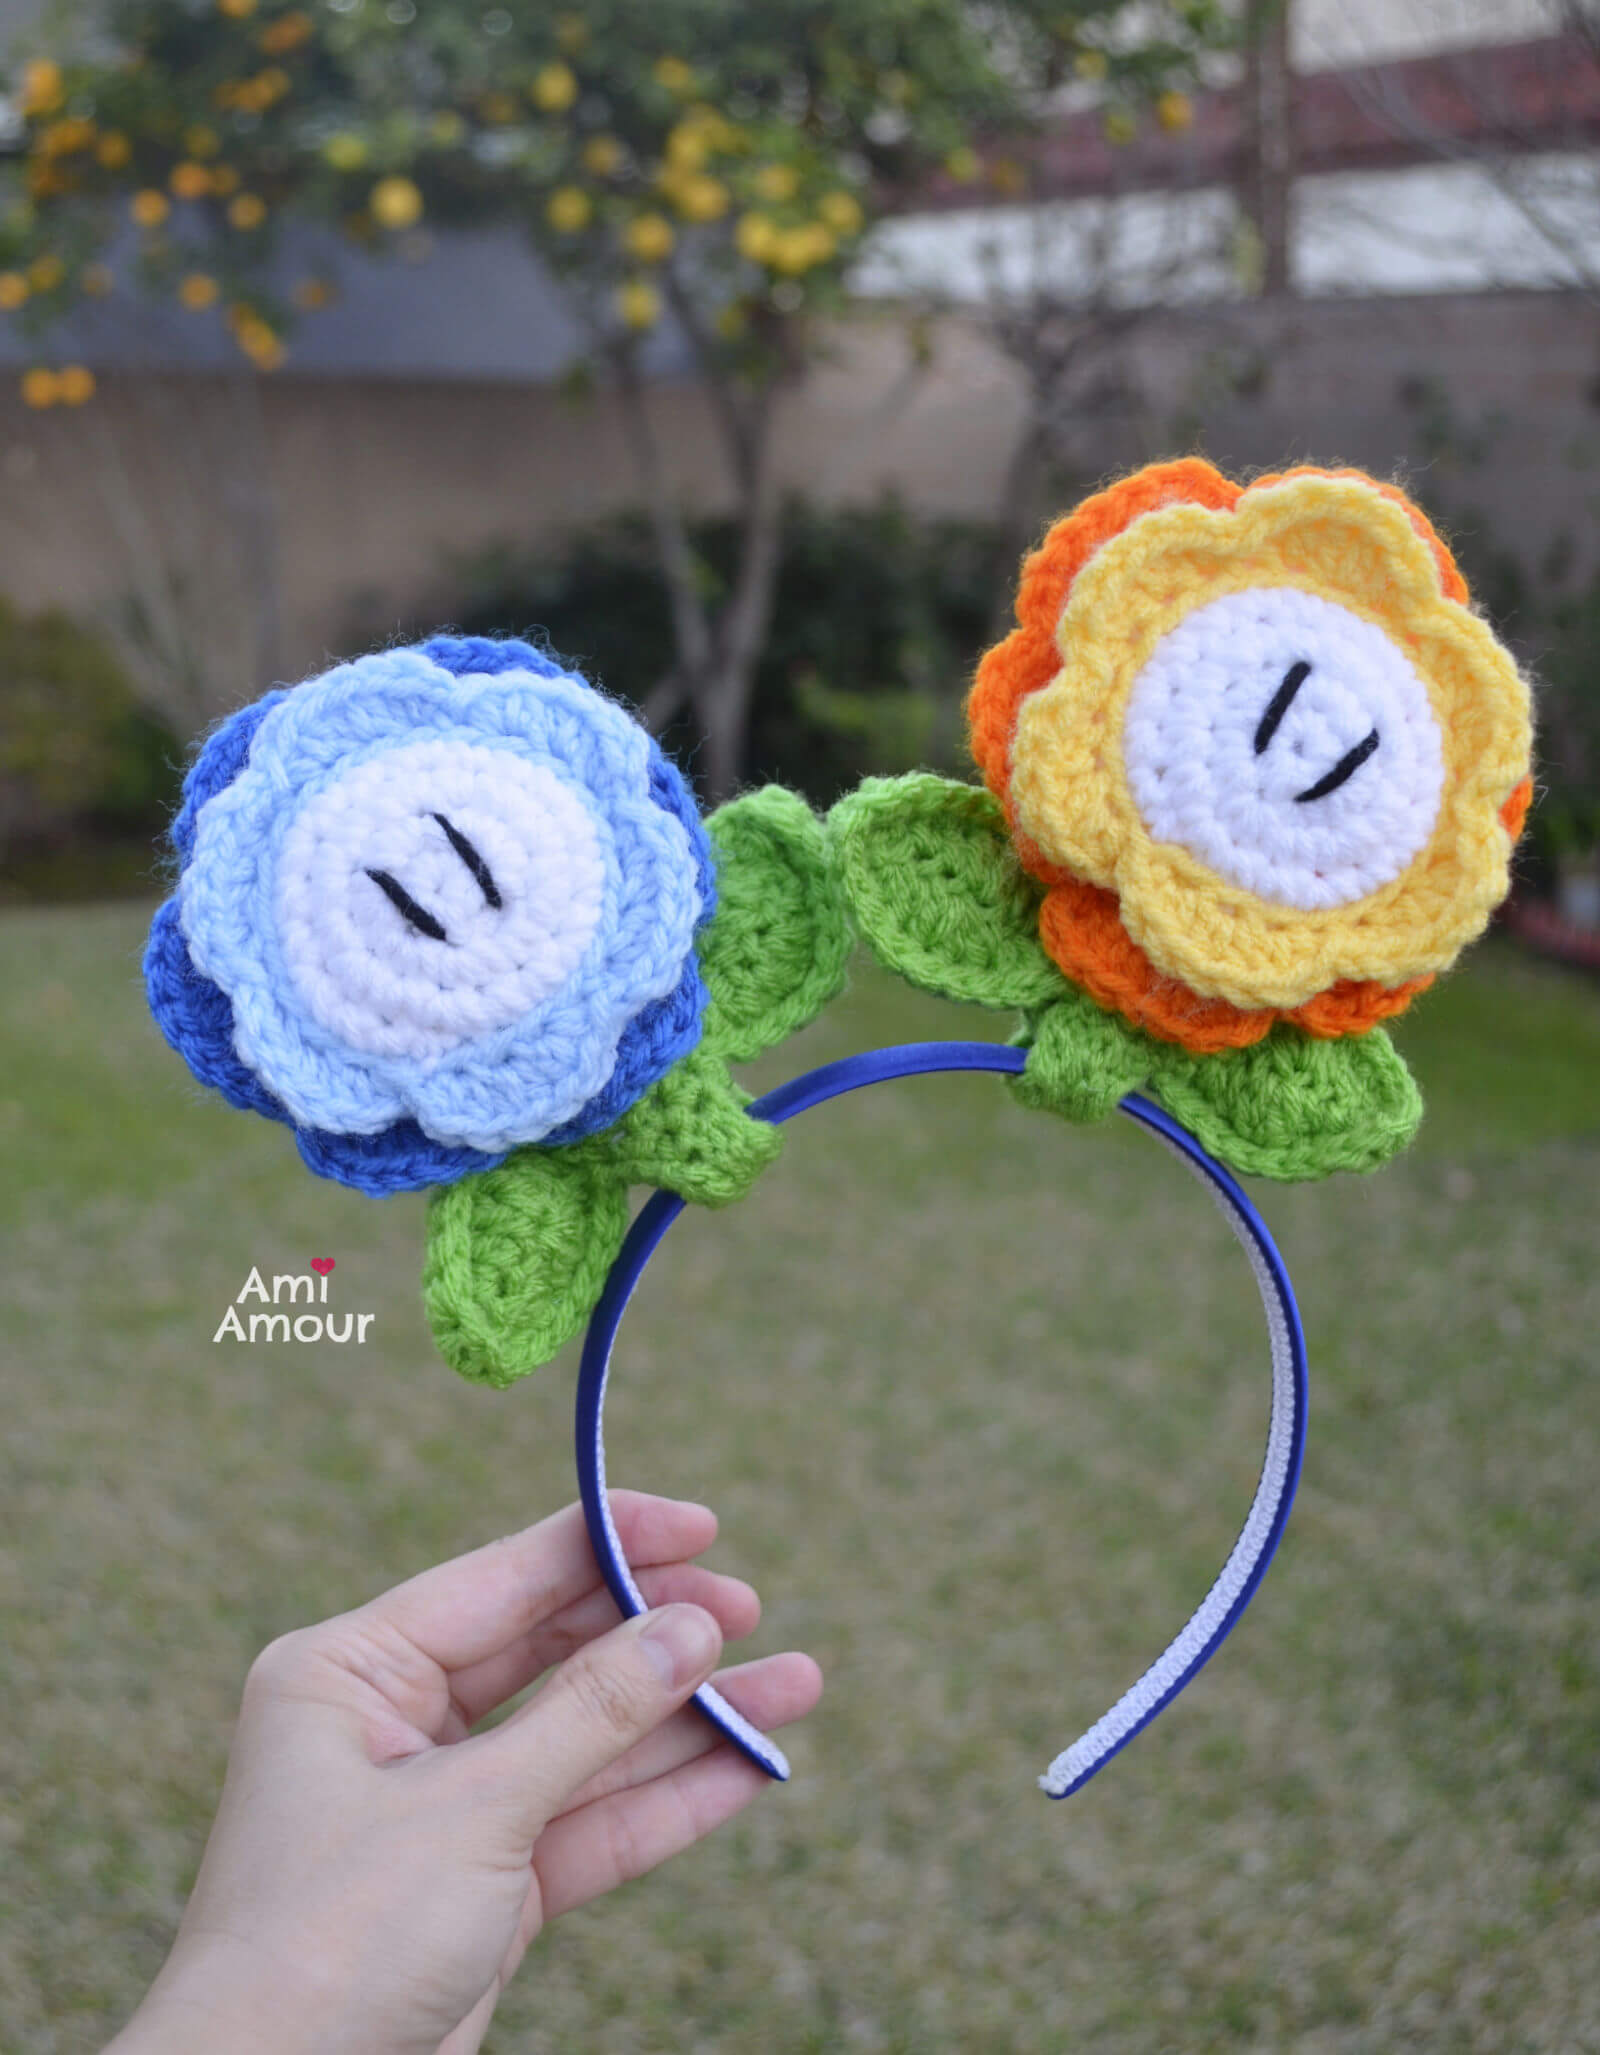
And lastly, I’ve also used the flowers to make a unique Super Mario headband. Perfect for an outing to Super Nintendo Land!
Anyways, this Fire Flower Amigurumi pattern is one of my favorite and satisfying crochet patterns I’ve written up in a while. There’s something very symmetrical about this pattern and design that really makes it fun to crochet up. I hope you’ll give it a try! The free crochet pattern and video tutorial can be found below.
Don’t forget to tag me with your projects on my Instagram @ami_amour or on TikTok at @_amiamour_.
Here are some of my other Super Mario crochet patterns you may enjoy!

1. Yet Another Mario Mushroom pattern
2. Invincible Star
3. Yarn Yoshi Amigurumi
Fire Flower Crochet Tutorial Video
See the Fire Flower amigurumi in action and crochet along with me!
Disclosure: This post contains affiliate links. This means I may receive a small commission if you decide to purchase anything by clicking on one of these links.
FIRE FLOWER AMIGURUMI – FREE CROCHET PATTERN
LEVEL: Easy Intermediate
CROCHET HOOK: 4.0mm size
YARN:
Red Heart Super Saver Yarn (worsted weight, acrylic yarn)
– White
– Lemon
– Pumpkin
– Spring Green
NOTIONS:
Polyfil Stuffing
Yarn Needle
Stitch Marker
Scissors
2.5in Clay Pot (optional)
Question Block (optional)
ABBREVIATIONS (American English crochet)
ch – chain
dc – double crochet
hdc – half double crochet
sc – single crochet
sc2tog – single crochet 2 together (sc dec)
sl st – slip stitch
st – stitch
APPROXIMATE SIZE: 6 in (15cm) tall

MARIO FIRE FLOWER
With 4.0mm hook
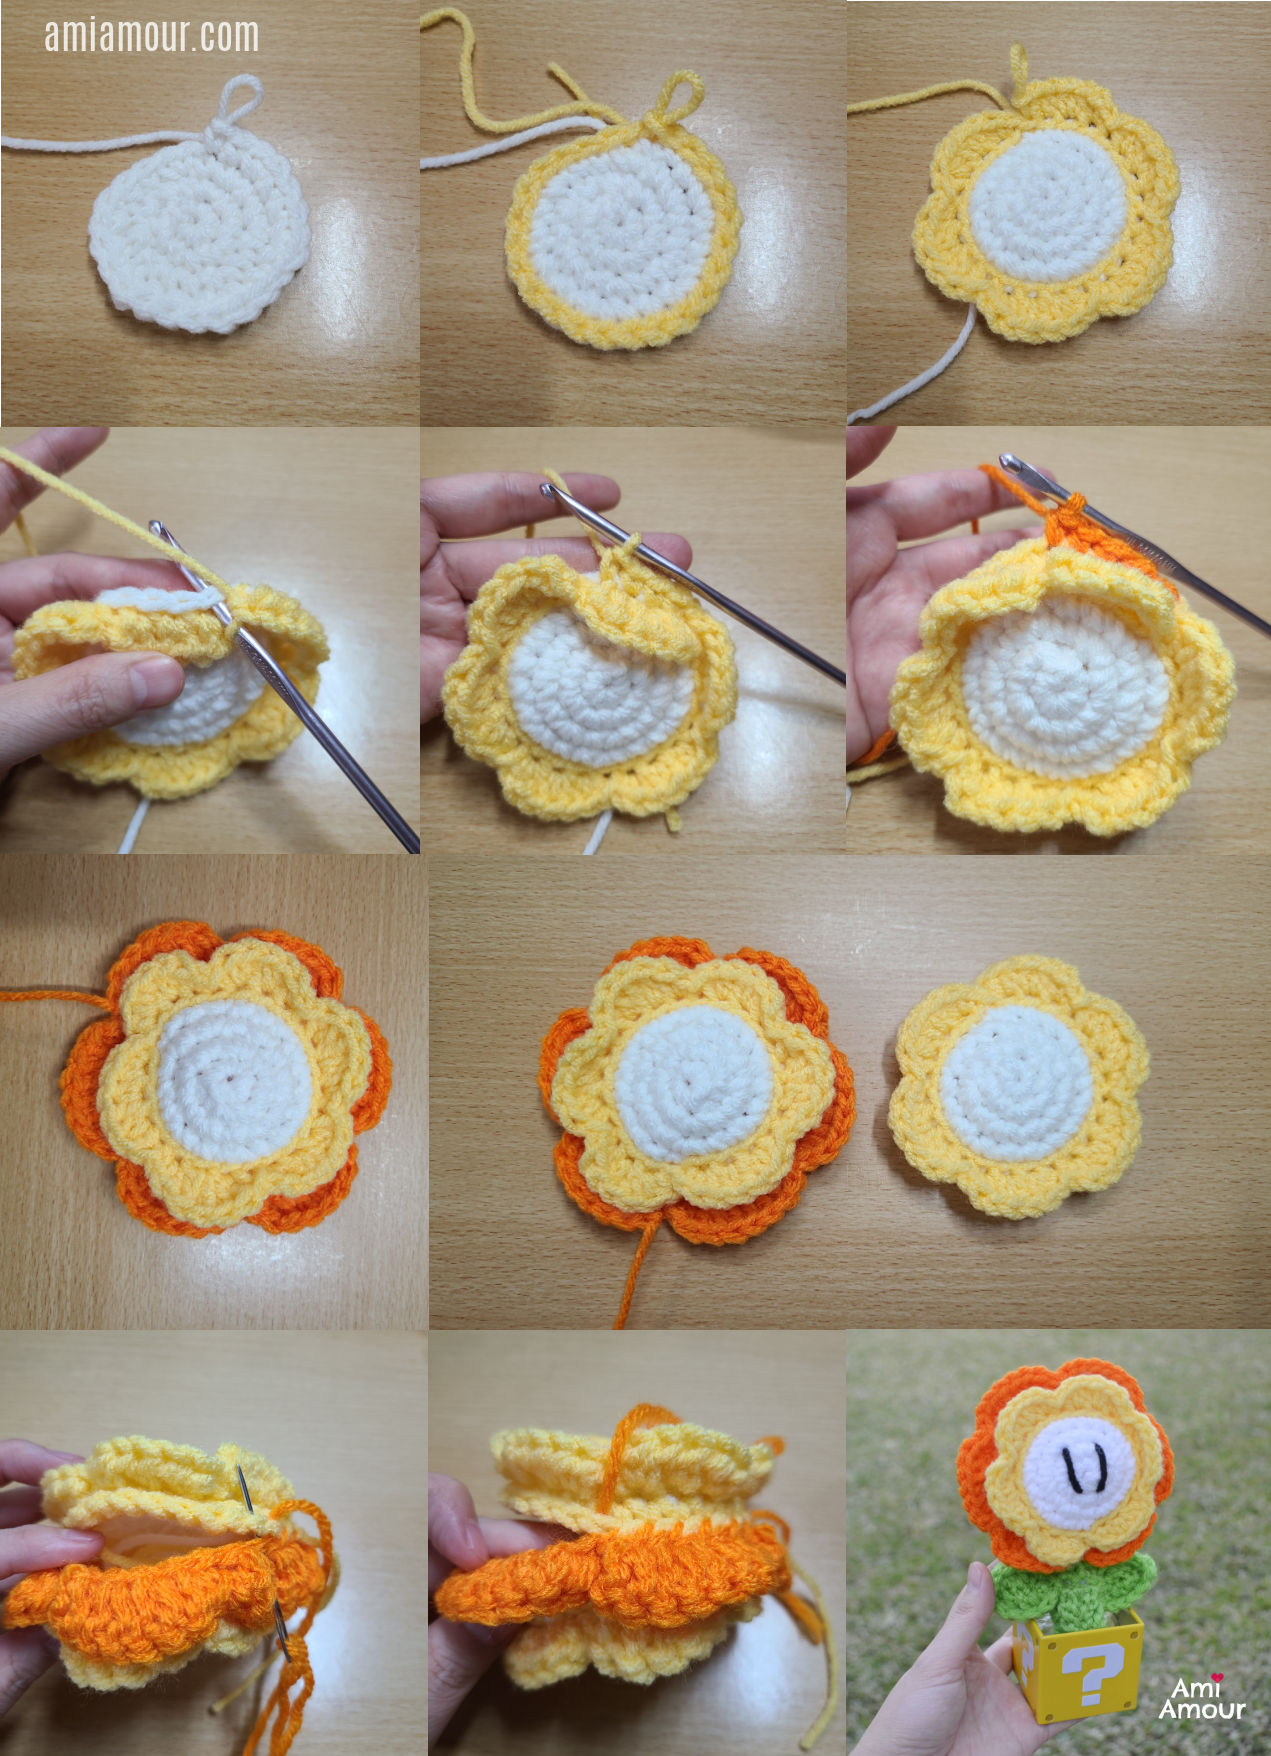
Round 1: With white yarn, 6 sc into magic ring.
Round 2: 2 sc in each st around – 12 sc.
Round 3: [2 sc in next st, sc in next st] around – 18 sc.
Round 4: [2 sc in next st, sc in next 2 st] around – 24 sc.
Round 5: With yellow yarn, 24 sl st in each st around, sl st to first st – 24 sl st.
Round 6a: In Back Loop only, [(sc, hdc) in next st, 2 hdc in next 2 st, sl st in next st] 6 times.
Note: You will now have 6 petals. See video tutorial here if you need a visual reference.
Round 6b: Through Both Loops of white, [2 sc in next st, sc in next 3 st] around – 30 sc.
Round 7: With orange yarn, sc in each st around – 30 sc.
Round 8: Sl st in each st around – 30 sl st.
Round 9: In Back Loop only, [(hdc, dc) in next st, 2 dc in next 3 st, sl st in next st] 6 times.
Note: You will 6 petals.
Fasten off, leaving a long tail. You have finished Flower Part A.
Repeat Rounds 1-6b only to create Flower Part B. Sl st to next st and fasten off, leaving a super long tail. Place the flowers back to back and sew closed. Don’t forget to stuff as you go, and finish stuffing, before sewing closed completely.
STEM
With green yarn
Round 1: 6 sc into magic ring.
Round 2-7: Sc in each st around.
Fasten off, leaving a long tail.
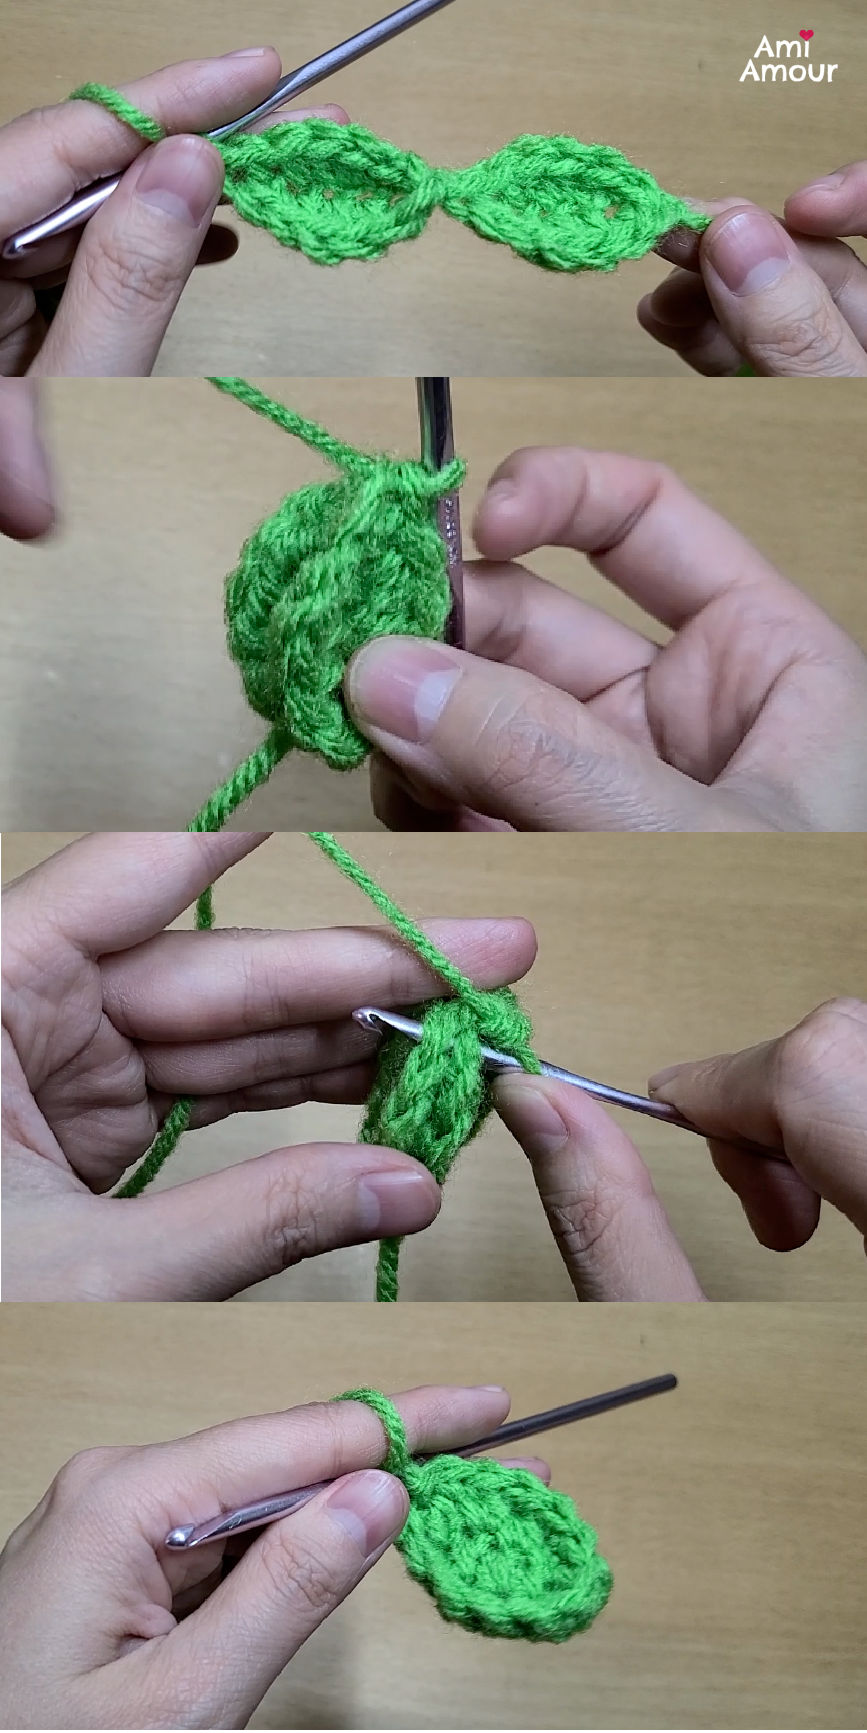
LEAF (make 2)
With green yarn
Round 1: Ch 7, sl st into previous ch, sc in next ch, hdc in next 2 ch, sc in next ch, sl st in last ch.
On other side of ch, sl st in first ch, sc in next ch, hdc in next 2 ch, sl st in next 2 ch).
Do not fasten off.
Repeat Round 1 again. You will now have 2 leaves connected. Place them back to back and join with sc border around. You now have 1 completed leaf. (You can also see the video tutorial for the leaf)
POT BASE
With green yarn
Round 1: 6 sc into magic ring.
Round 2: 2 sc into each st around – 12 sc.
Round 3: [2 sc in next st, sc in next 3 st] around – 15 sc.
Round 4: In Back Loop only, sc in each st around – 15 sc.
Round 5: [2 sc in next st, sc in next 4 st] around – 18 sc.
Round 6: [2 sc in next st, sc in next 8 st] around – 20 sc.
Round 7: Sc in each st around – 20 sc.
Round 8: [2 sc in next st, sc in next 9 st] around – 22 sc.
Round 9: [2 sc in next st, sc in next 10 st] around – 24 sc.
Round 10: In Back Loop only, [Sc2tog, sc in next 2 st] around – 18 sc
Round 11: [Sc2tog, sc in next st] around – 12 sc.
Round 12: Sc2tog 4 times only – 8 sc.
Fasten off, leaving a long tail.
Stuff the Base.
MARIO FLOWER ASSEMBLY
1. Sew Stem to bottom of flower.
2. Sew Leaves to sides of the Stem.
3. With black yarn, embroider 2 straight lines in the white flower center for the eyes.
4. Sew Flower to Pot Base. When finished sewing the stem to the pot base, do not fasten off but use the yarn needle to go through the inside of the pot of the base, and out through the very bottom of the pot base. Then couple stitches over (and not through the same spot you came in), go back through the bottom of the pot base and back out through the top of the pot base, pulling tightly. Secure a knot and fasten off. Hide all ends. This will create a small inward groove at the bottom of the base which will help the flower to stand on its own. You can also see the video tutorial here.
4. Optional: Place finished Mario Flower into a 2.5in Clay Pot or a Question Block
5. Tag me with your projects on Instagram @ami_amour or on TikTok @_amiamour_

Fire Flower - Super Mario Crochet Pattern
Ready for some flower power-up? This Fire Flower amigurumi makes for a cute flower pot!
Materials
- Yarn
Red Heart Super Saver Yarn (worsted weight, acrylic yarn)
- White
- Lemon
- Pumpkin
- Spring Green
- Black (very small amount, used only for the eyes)
Tools
- Crochet Hook - 4.0mm size
- Polyfil Stuffing
- Yarn Needle
- Scissors
- Stitch Marker
- Optional: 2.5in Clay Pot
Instructions
MARIO FIRE FLOWER
With 4.0mm hook
Round 1: With white yarn, 6 sc into magic ring.
Round 2: 2 sc in each st around - 12 sc.
Round 3: [2 sc in next st, sc in next st] around - 18 sc.
Round 4: [2 sc in next st, sc in next 2 st] around - 24 sc.
Round 5: With yellow yarn, 24 sl st in each st around, sl st to first st - 24 sl st.
Round 6a: In Back Loop only, [(sc, hdc) in next st, 2 hdc in next 2 st, sl st in next st] 6 times.
Note: You will now have 6 petals. See video tutorial here if you need a visual reference.
Round 6b: Through Both Loops of white, [2 sc in next st, sc in next 3 st] around - 30 sc.
Round 7: With orange yarn, sc in each st around - 30 sc.
Round 8: Sl st in each st around - 30 sl st.
Round 9: In Back Loop only, [(hdc, dc) in next st, 2 dc in next 3 st, sl st in next st] 6 times.
Note: You will 6 petals.
Fasten off, leaving a long tail. You have finished Flower Part A.
Repeat Rounds 1-6b only to create Flower Part B. Sl st to next st and fasten off, leaving a super long tail. Place the flowers back to back and sew closed. Don't forget to stuff as you go, and finish stuffing, before sewing closed completely.
STEM
With green yarn
Round 1: 6 sc into magic ring.
Round 2-7: Sc in each st around.
Fasten off, leaving a long tail.
LEAF (make 2)
With green yarn
Round 1: Ch 7, sl st into previous ch, sc in next ch, hdc in next 2 ch, sc in next ch, sl st in last ch.
On other side of ch, sl st in first ch, sc in next ch, hdc in next 2 ch, sl st in next 2 ch.
Do not fasten off.
Repeat Round 1 again. You will now have 2 leaves connected. Fold them back to back and join with sc border around. You now have 1 completed leaf.
POT BASE
With green yarn
Round 1: 6 sc into magic ring.
Round 2: 2 sc into each st around - 12 sc.
Round 3: [2 sc in next st, sc in next 3 st] around - 15 sc.
Round 4: In Back Loop only, sc in each st around - 15 sc.
Round 5: [2 sc in next st, sc in next 4 st] around - 18 sc.
Round 6: [2 sc in next st, sc in next 8 st] around - 20 sc.
Round 7: Sc in each st around - 20 sc.
Round 8: [2 sc in next st, sc in next 9 st] around - 22 sc.
Round 9: [2 sc in next st, sc in next 10 st] around - 24 sc.
Round 10: In Back Loop only, [Sc2tog, sc in next 2 st] around - 18 sc
Round 11: [Sc2tog, sc in next st] around - 12 sc.
Round 12: Sc2tog 4 times only - 8 sc.
Fasten off, leaving a long tail.
Stuff the Base.
MARIO FLOWER ASSEMBLY
1. Sew Stem to bottom of flower.
2. Sew Leaves to sides of the Stem.
3. With black yarn, embroider 2 straight lines in the white flower center for the eyes.
4. Sew Flower to Pot Base. When finished sewing the stem to the pot base, do not fasten off but use the yarn needle to go through the inside of the pot of the base, and out through the very bottom of the pot base. Then couple stitches over (and not through the same spot you came in), go back through the bottom of the pot base and back out through the top of the pot base, pulling tightly. Secure a knot and fasten off. Hide all ends. This will create a small inward groove at the bottom of the base which will help the flower to stand on its own. You can also see the video tutorial.
4. Optional: Place finished Mario Flower into a clay pot.
5. Tag me with your projects on Instagram @ami_amour or TikTok @_amiamour_

No Comments