
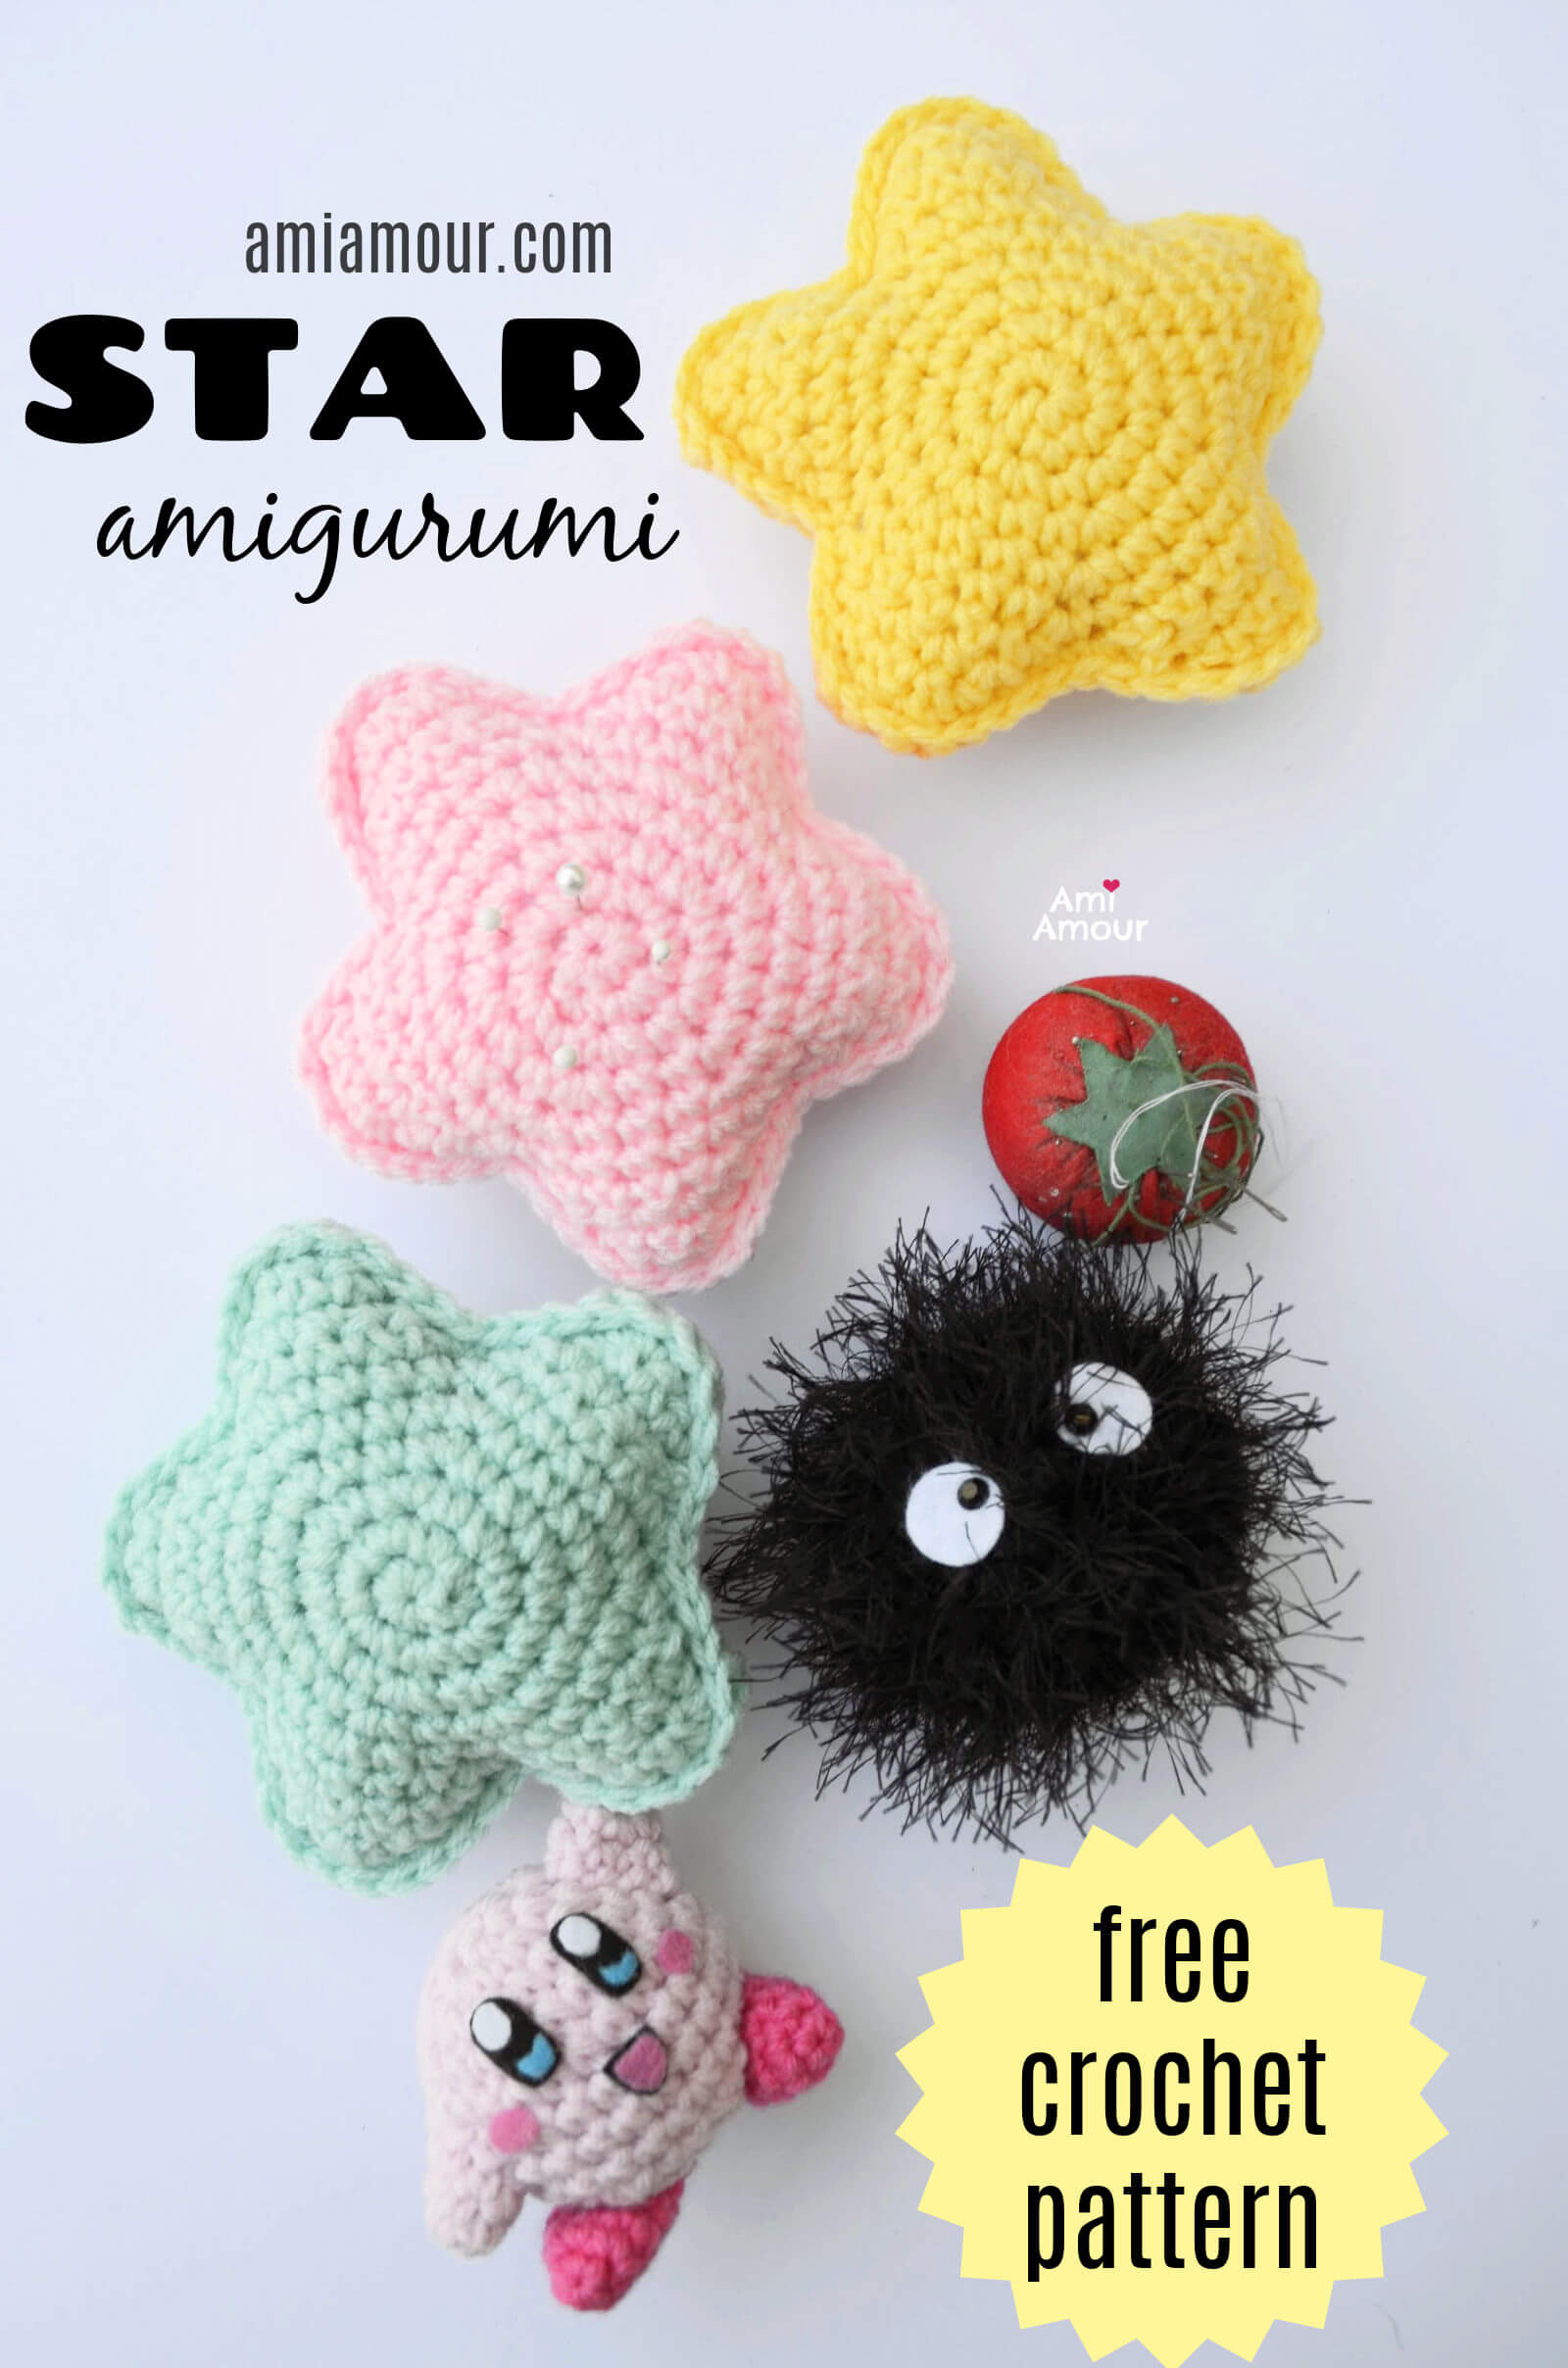
This is a fun 2D to 3D Star Amigurumi! This free and easy Star Crochet Pattern is super fast to work up. This star has rounded points rather than sharp ones for a cute look.
The pattern can be worked as a stand-alone star applique. Or continue on to create the 3D Star version for more amigurumi fun. You can also use this technique to make any applique into a 3D counterpart.
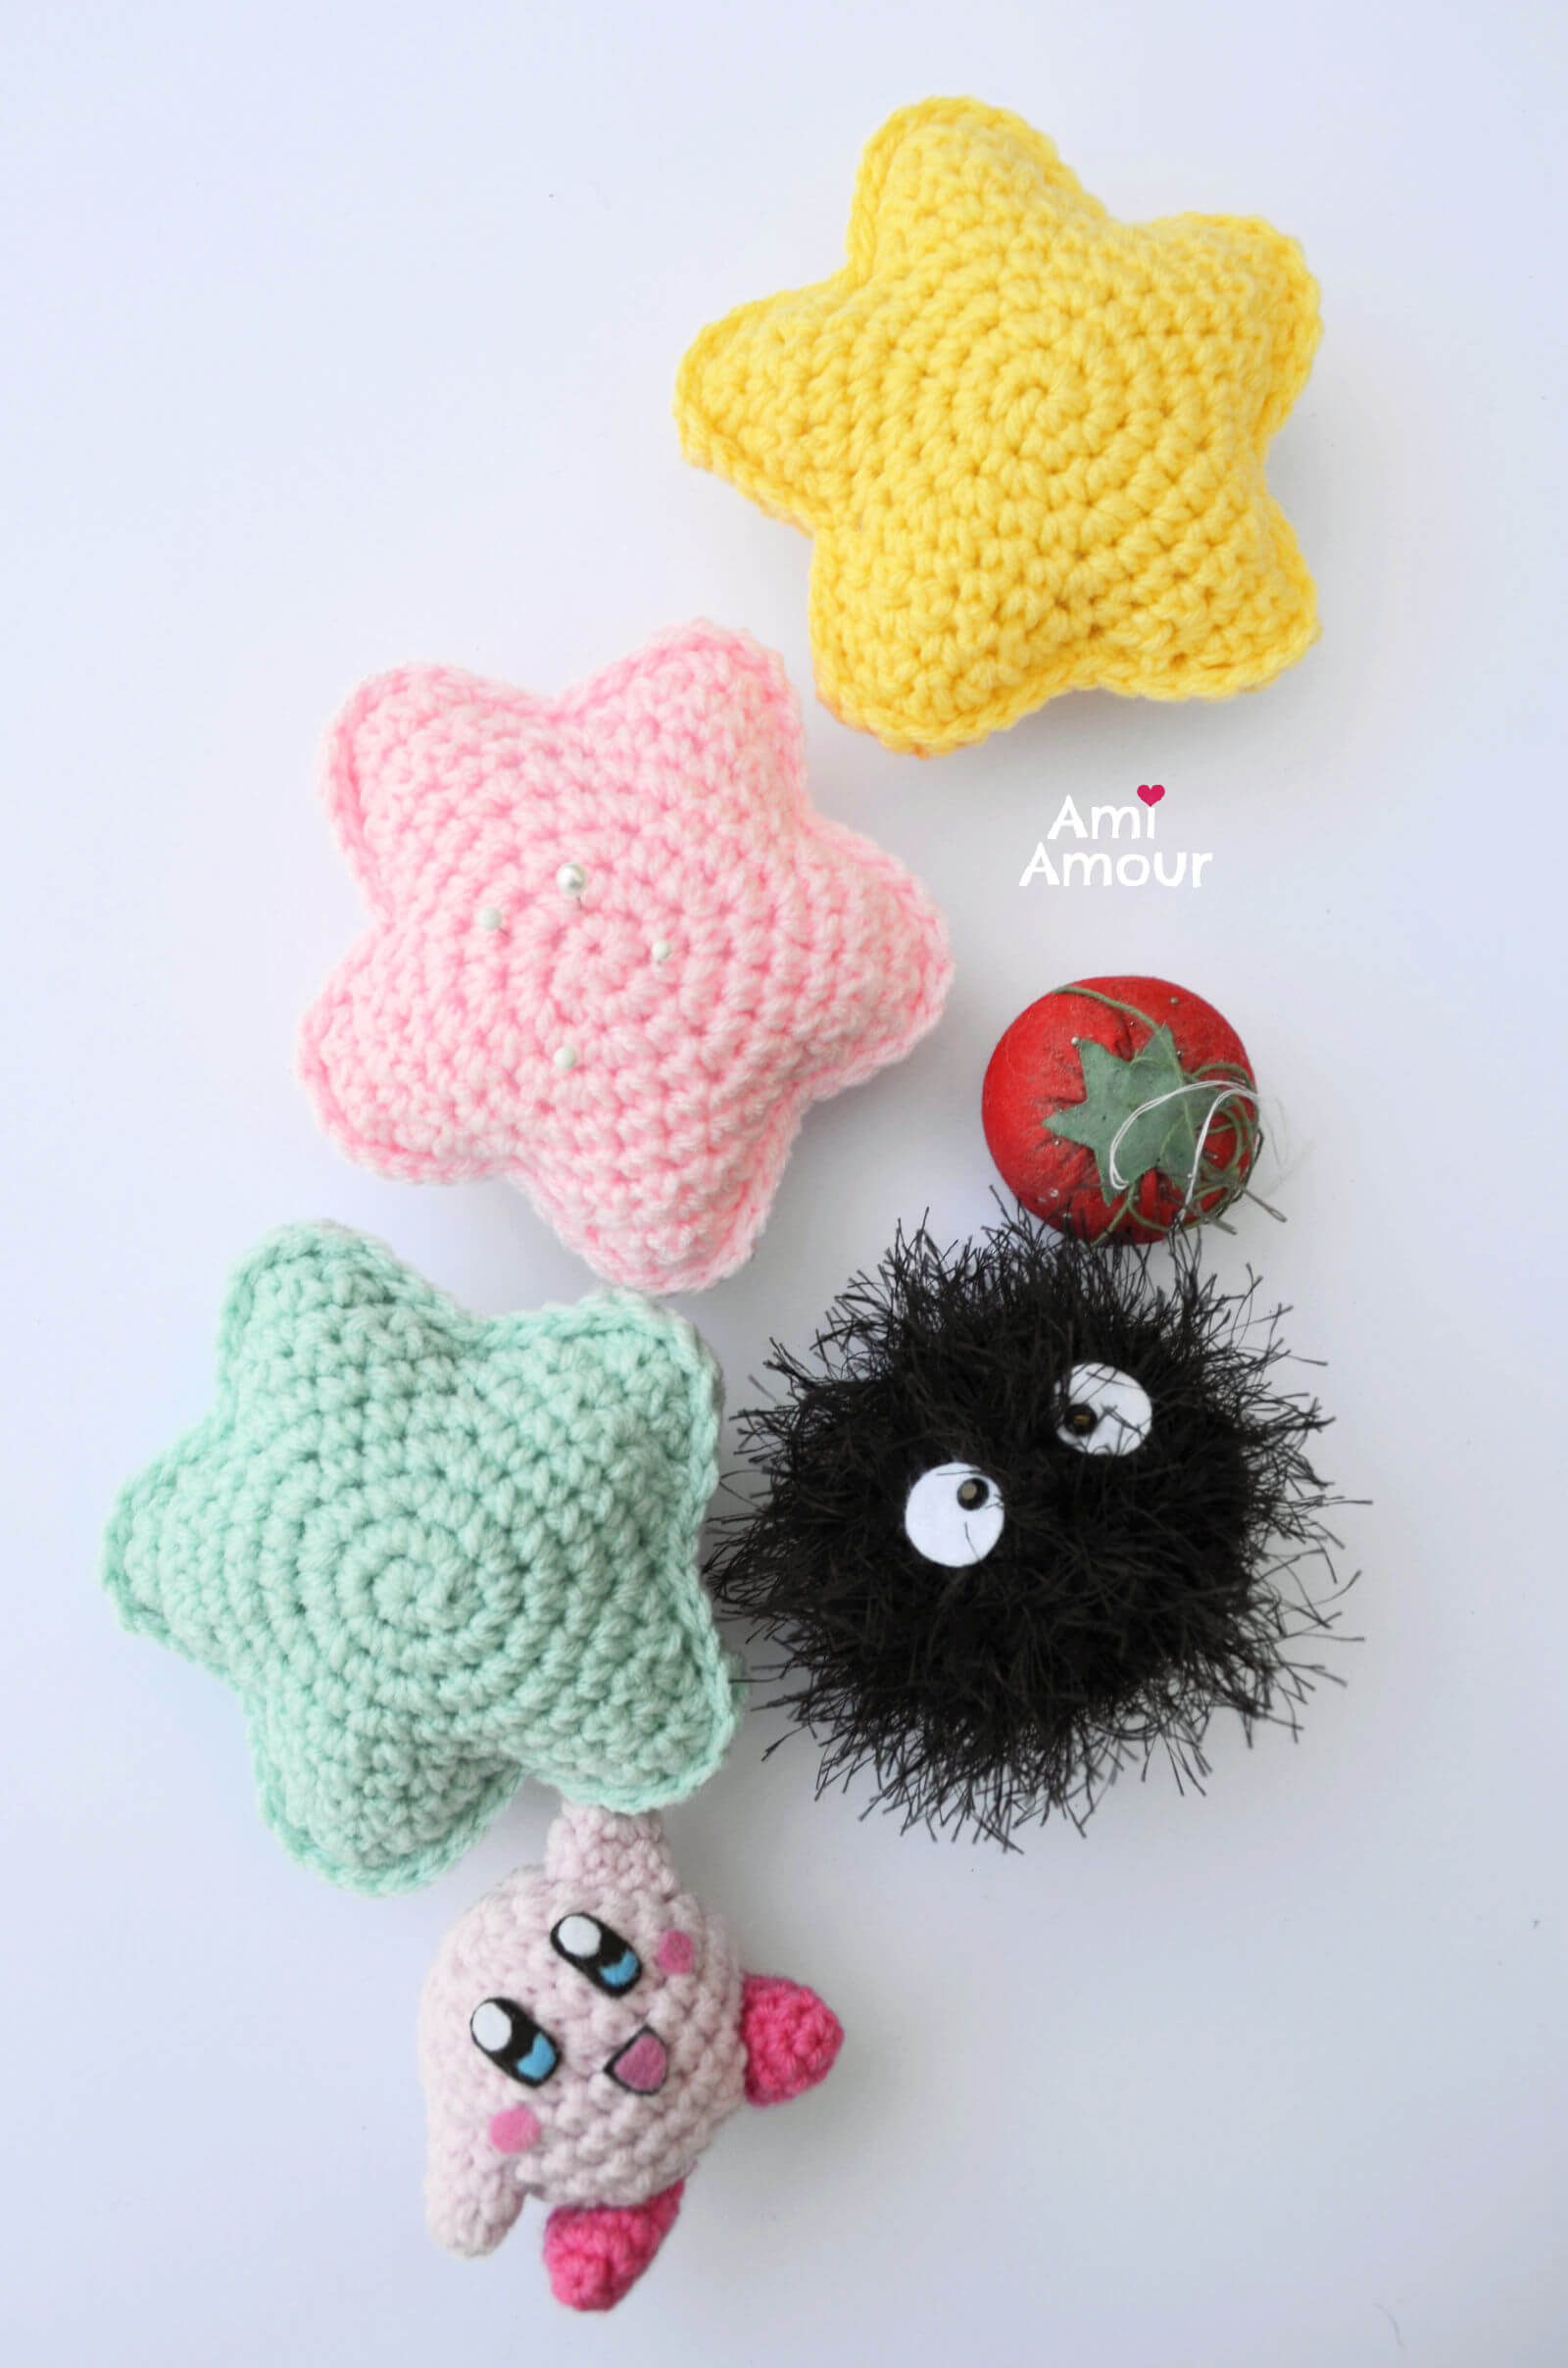
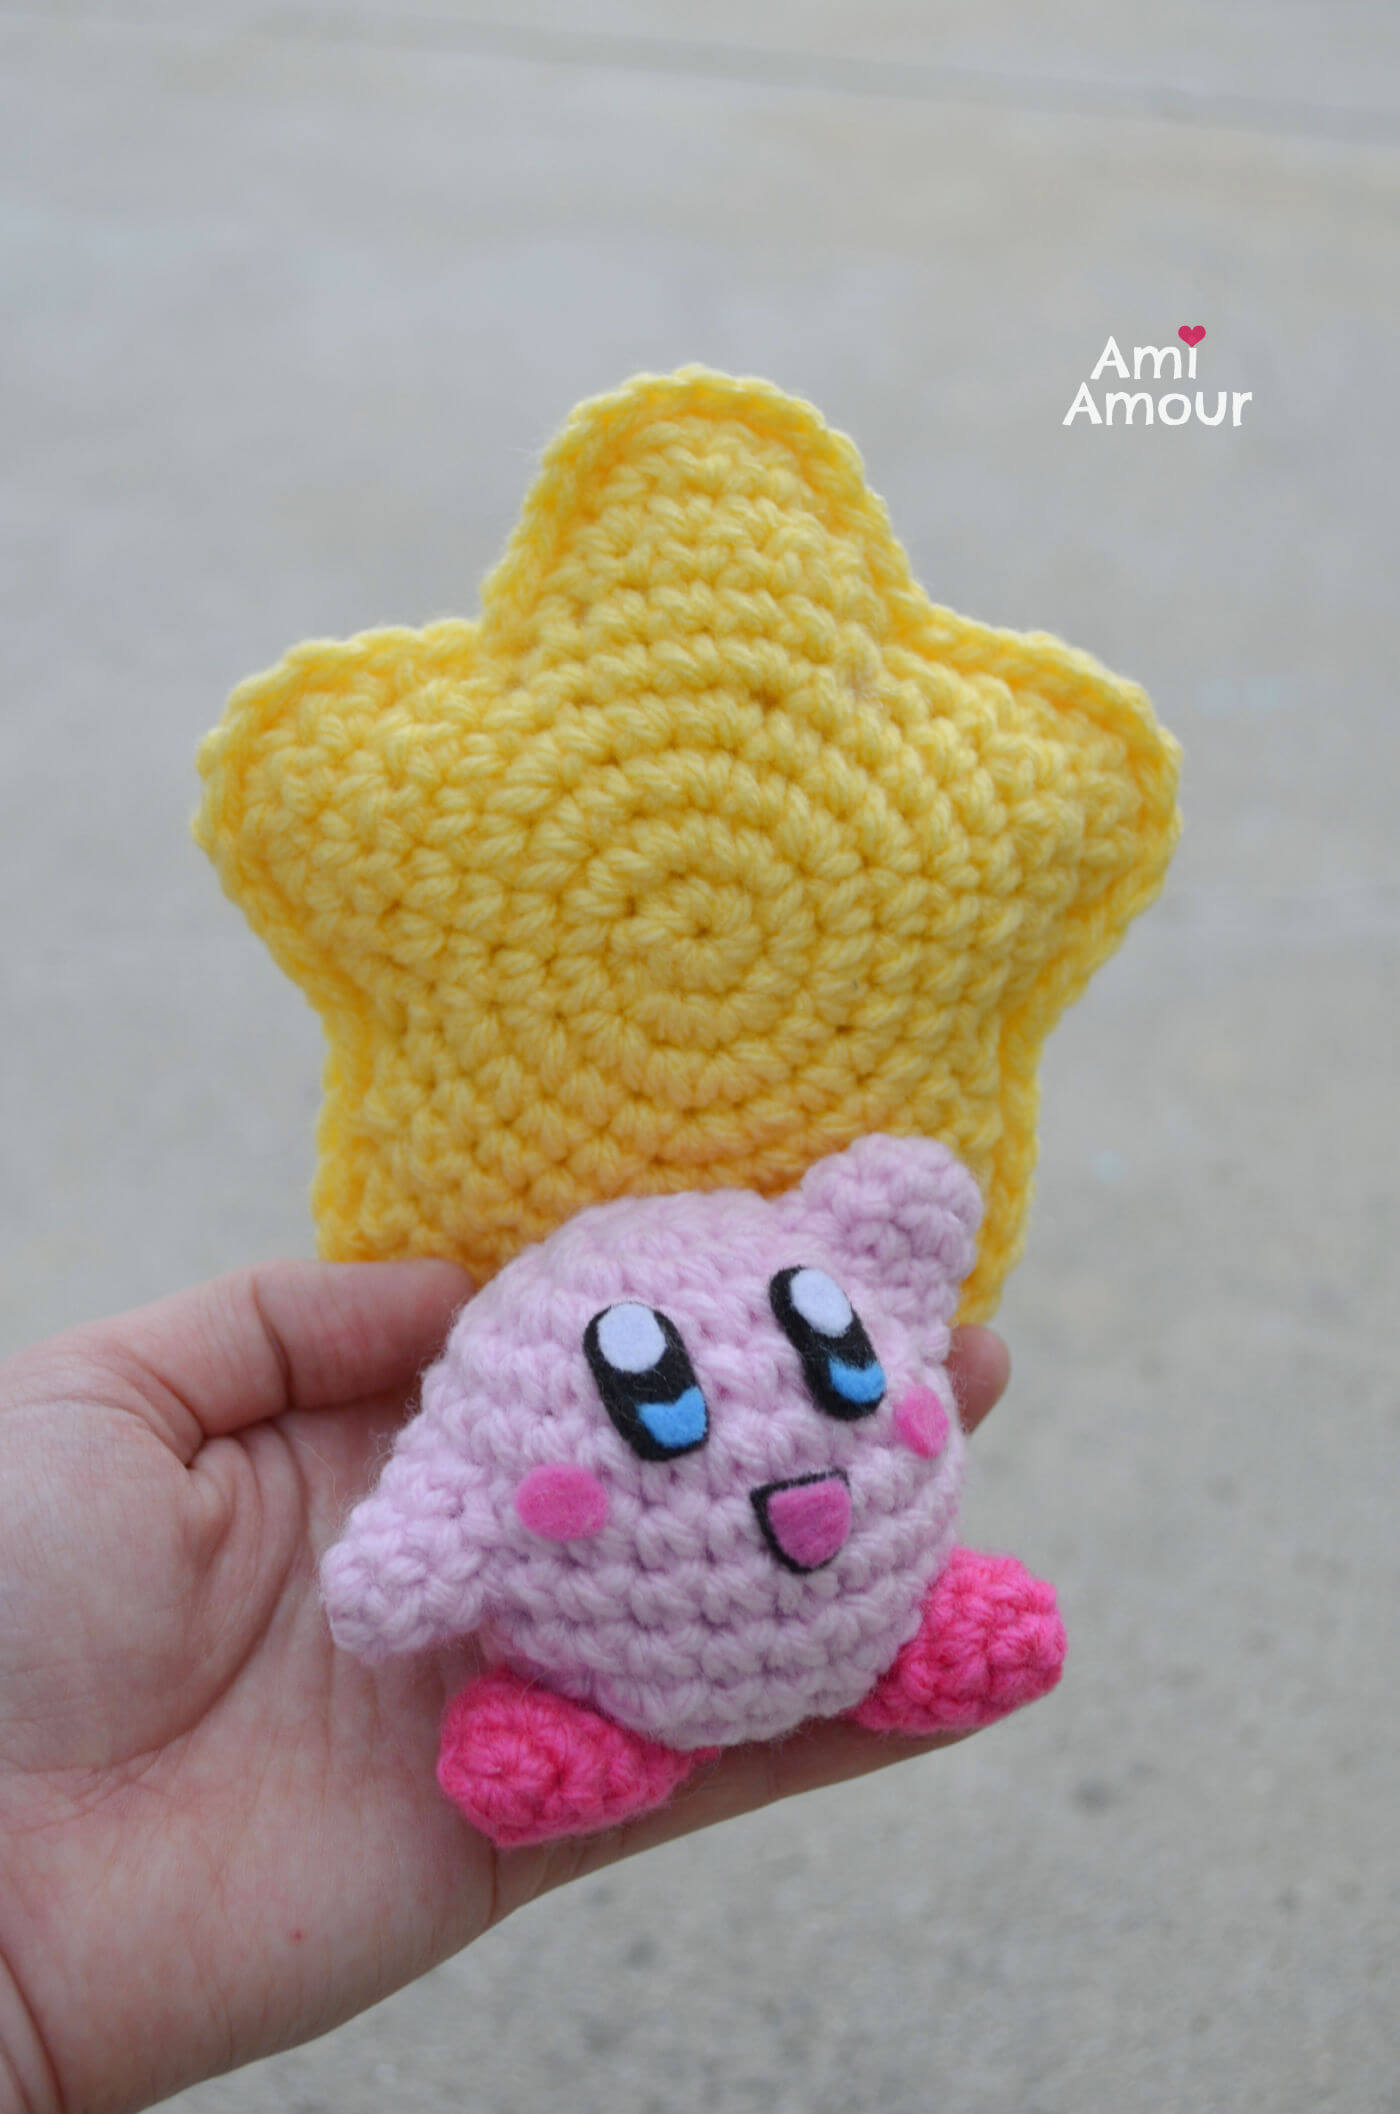
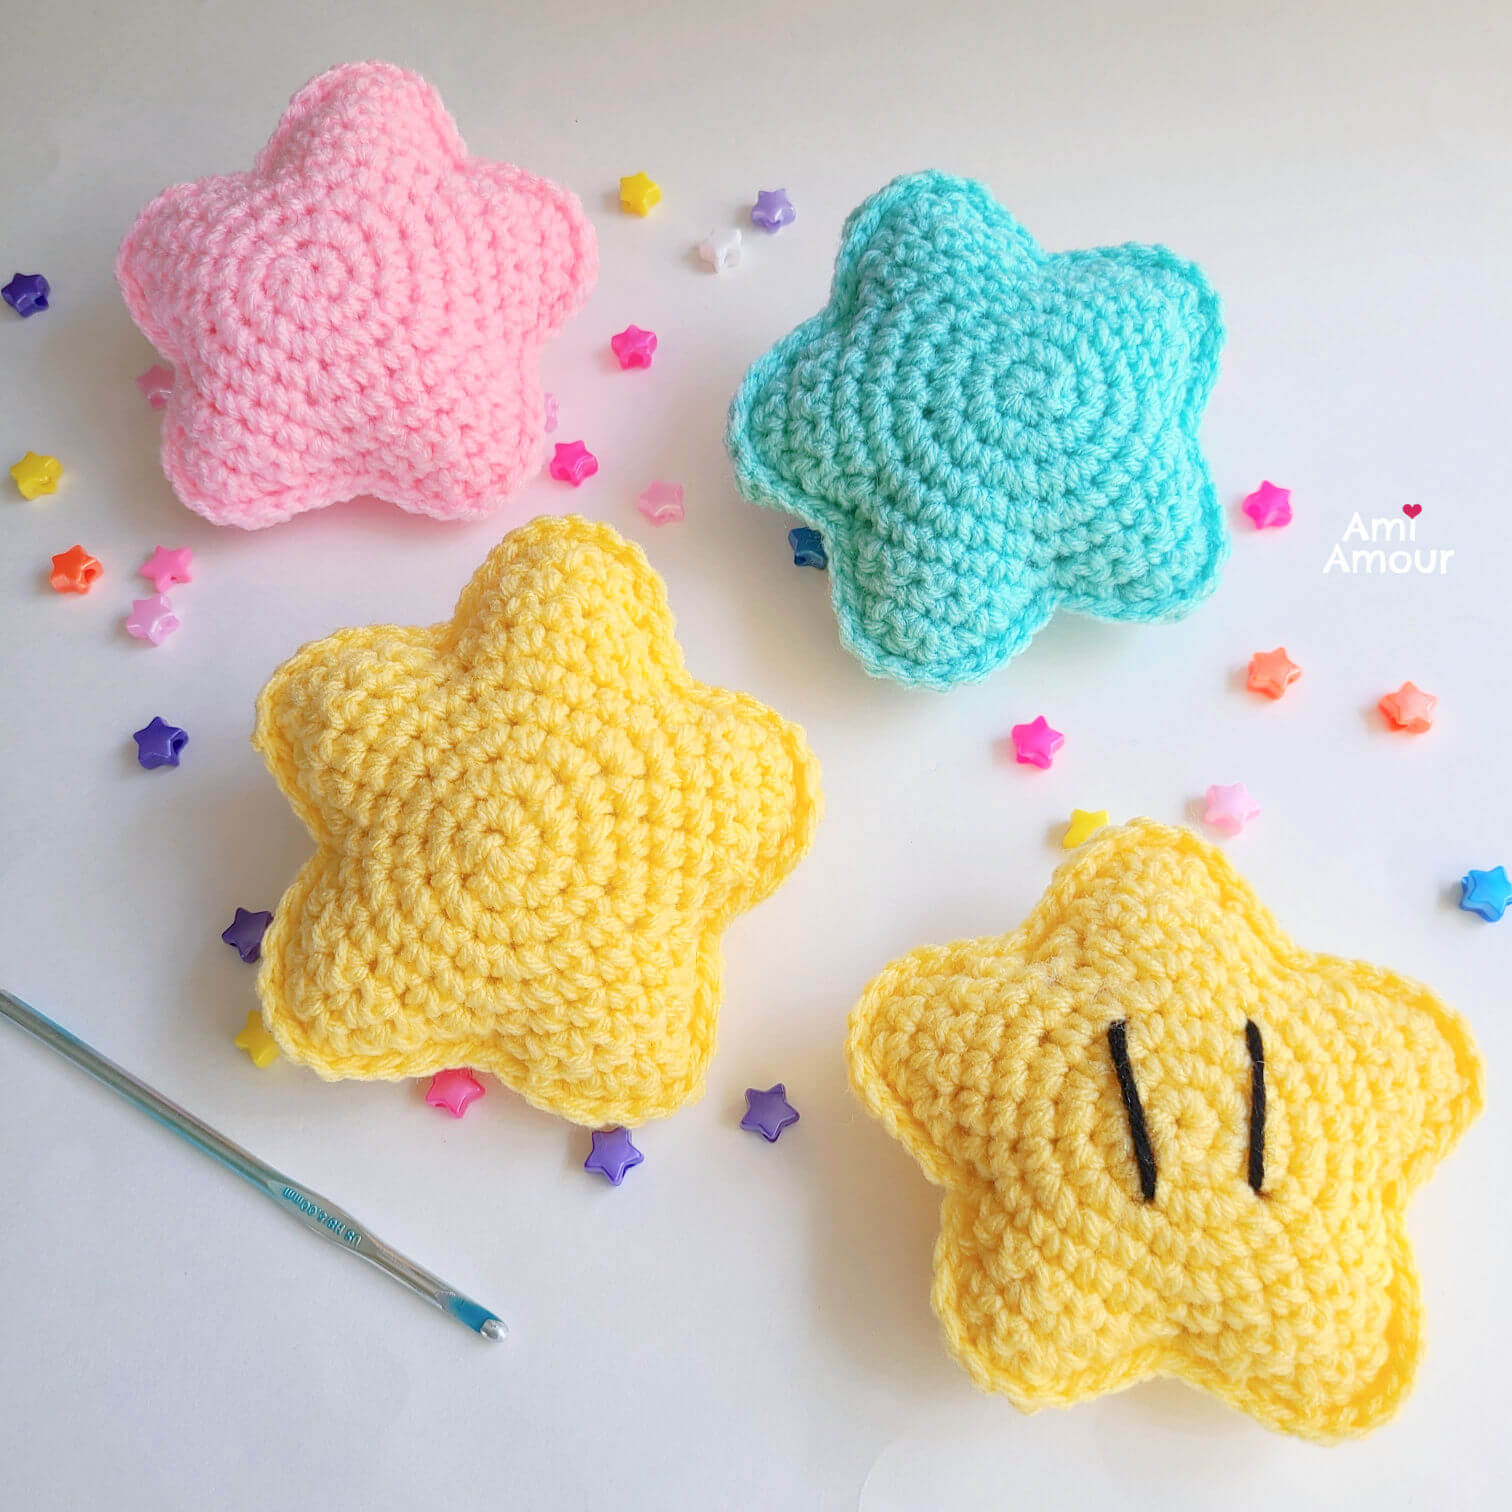
So, I originally made this crochet Star amigurumi as a companion piece to my Kirby amigurumi as his Warp Star.
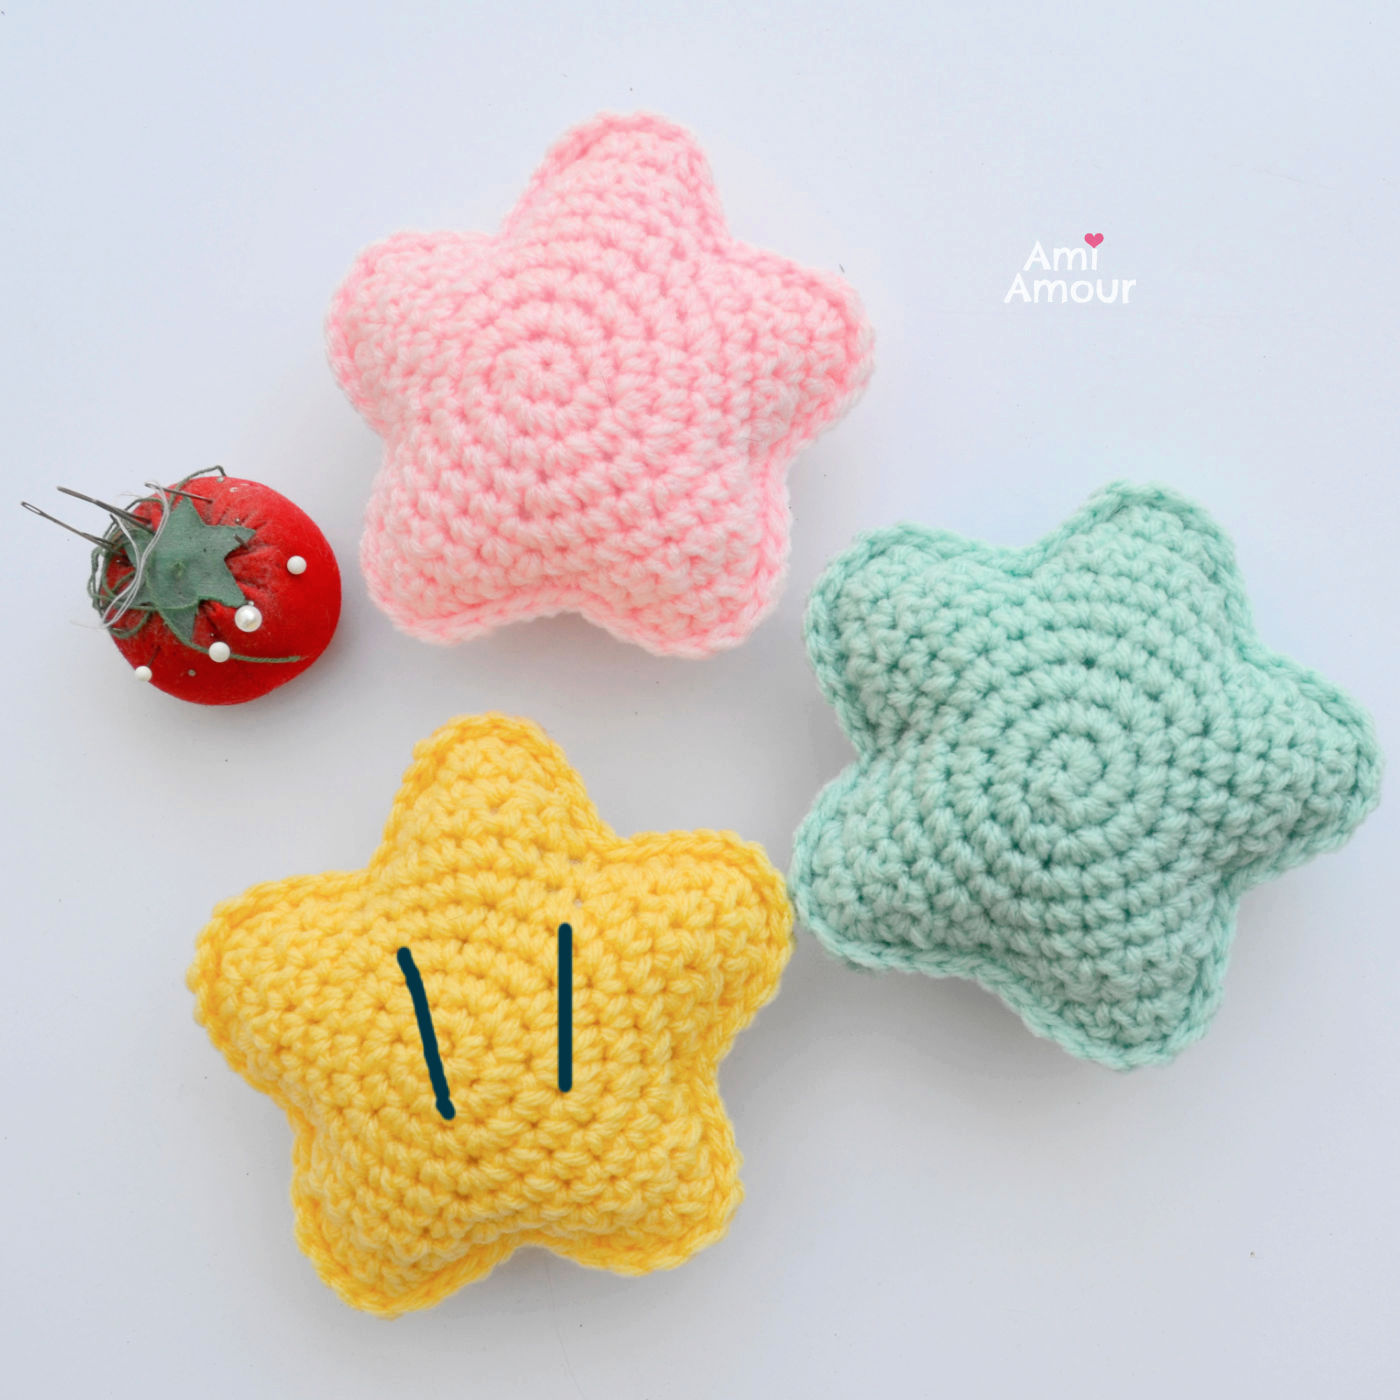
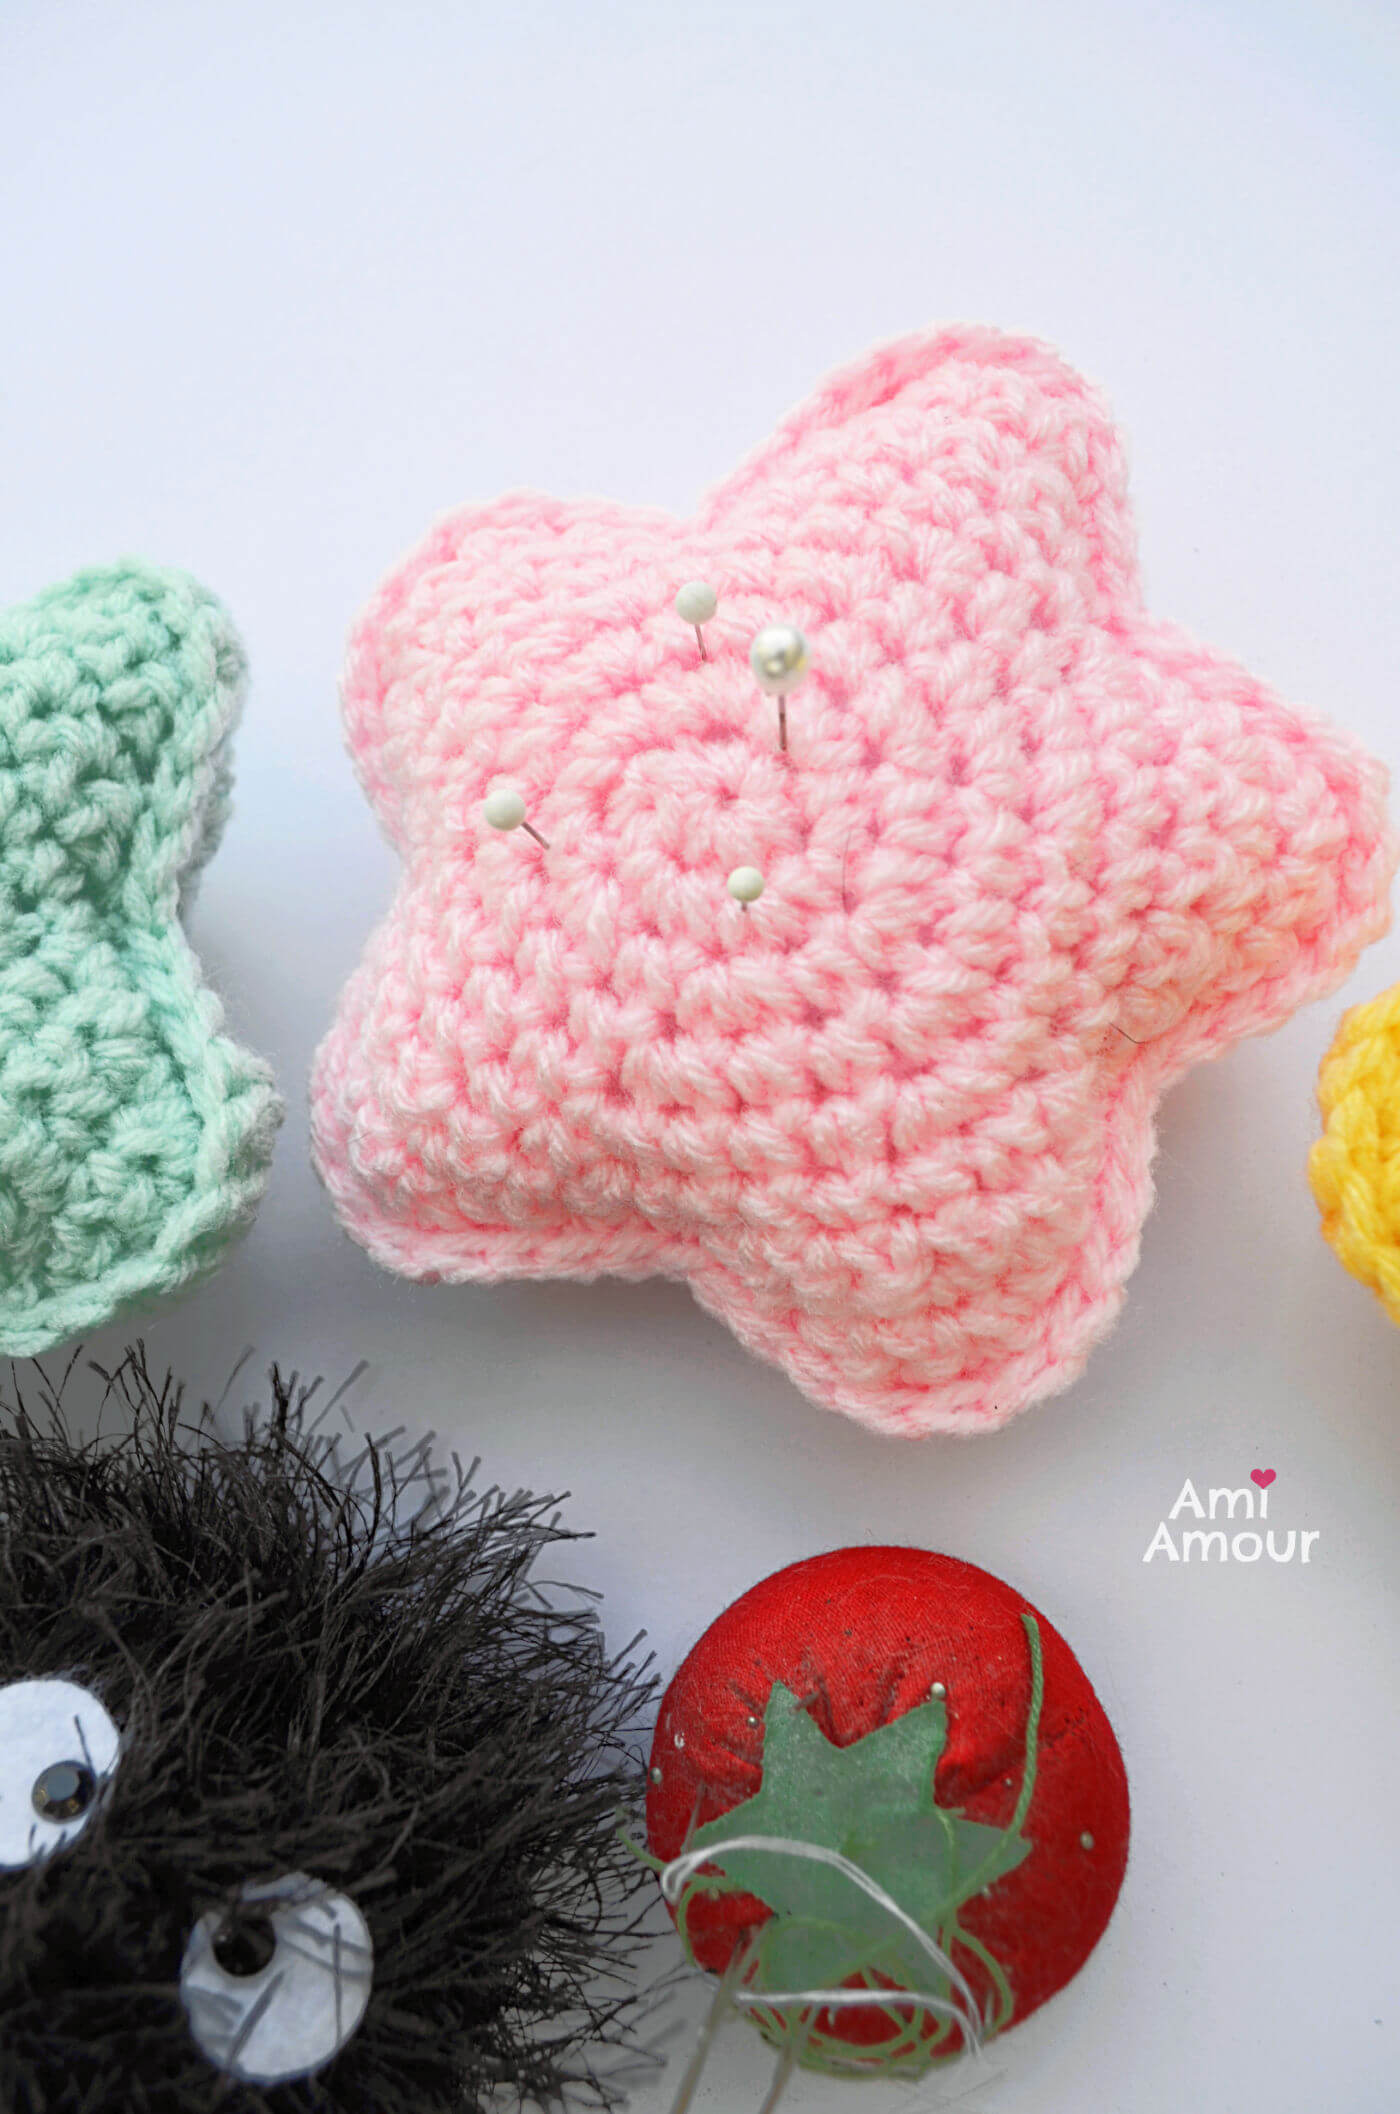
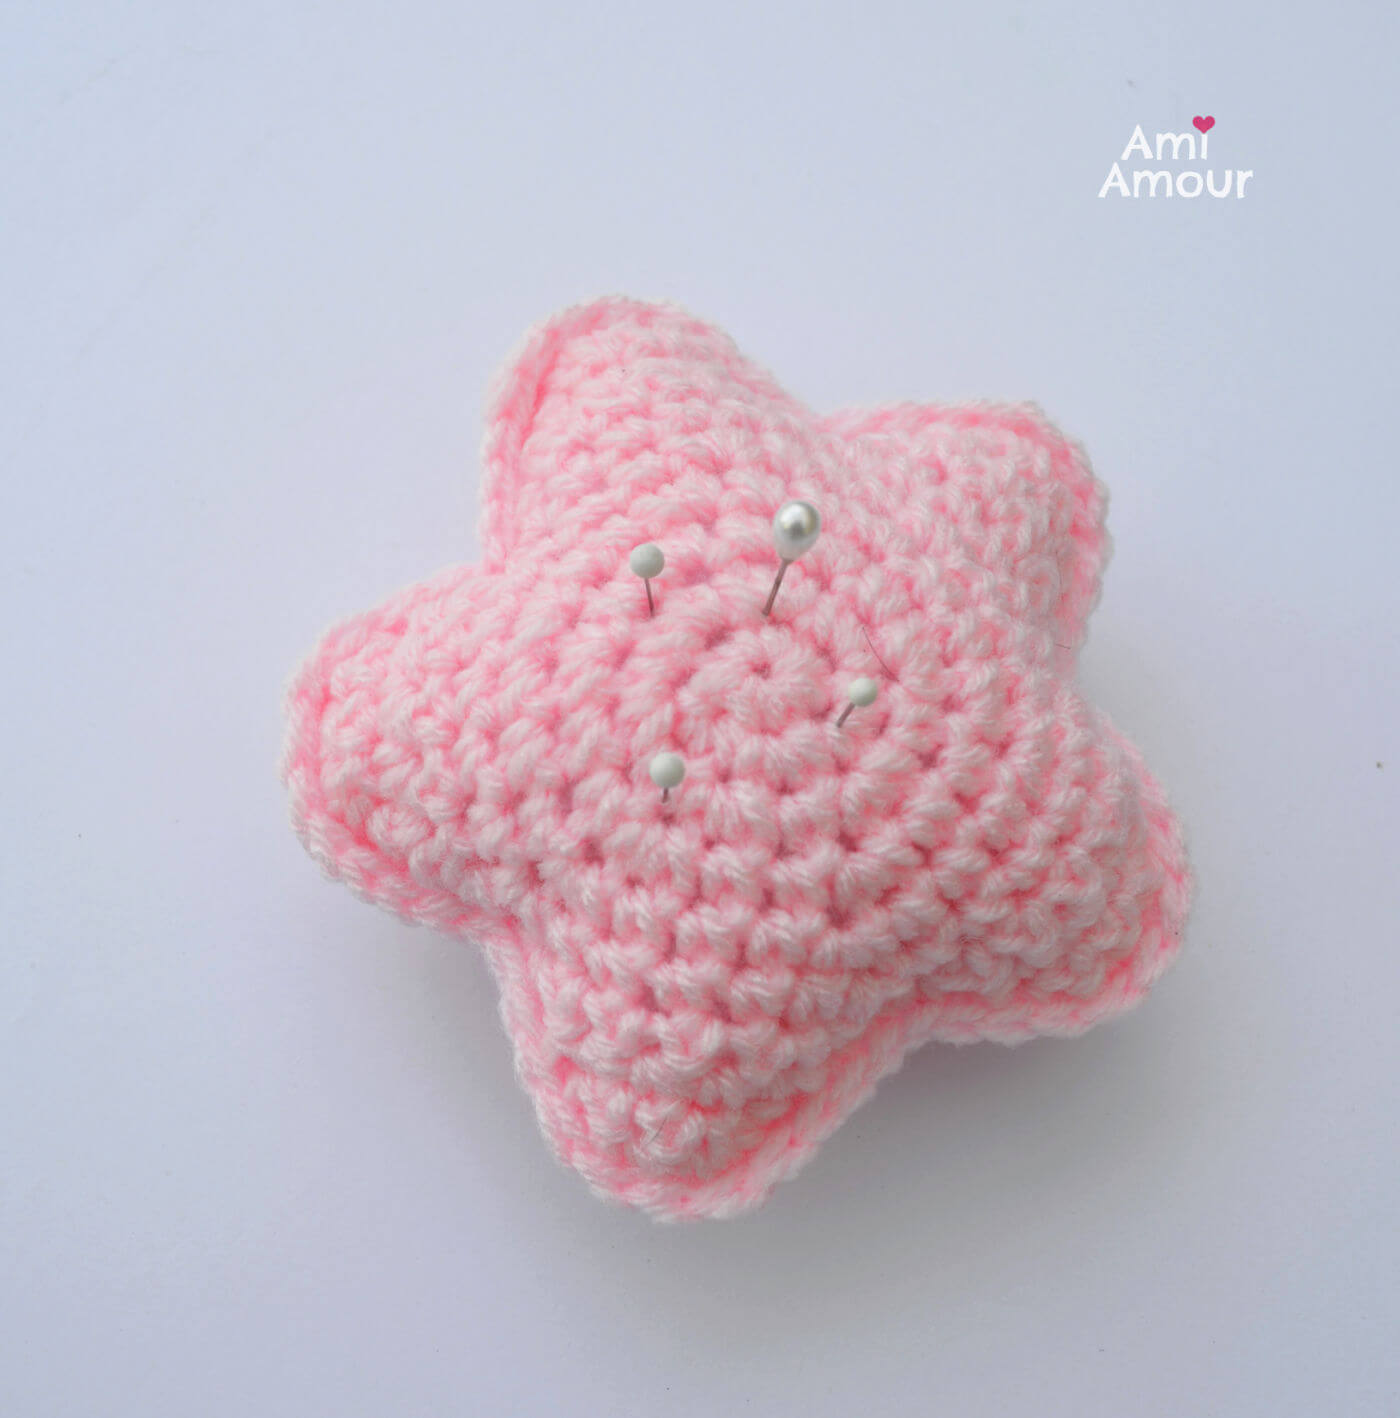
But this Star can have so many other functions as well. You can use it as a pin cushion.
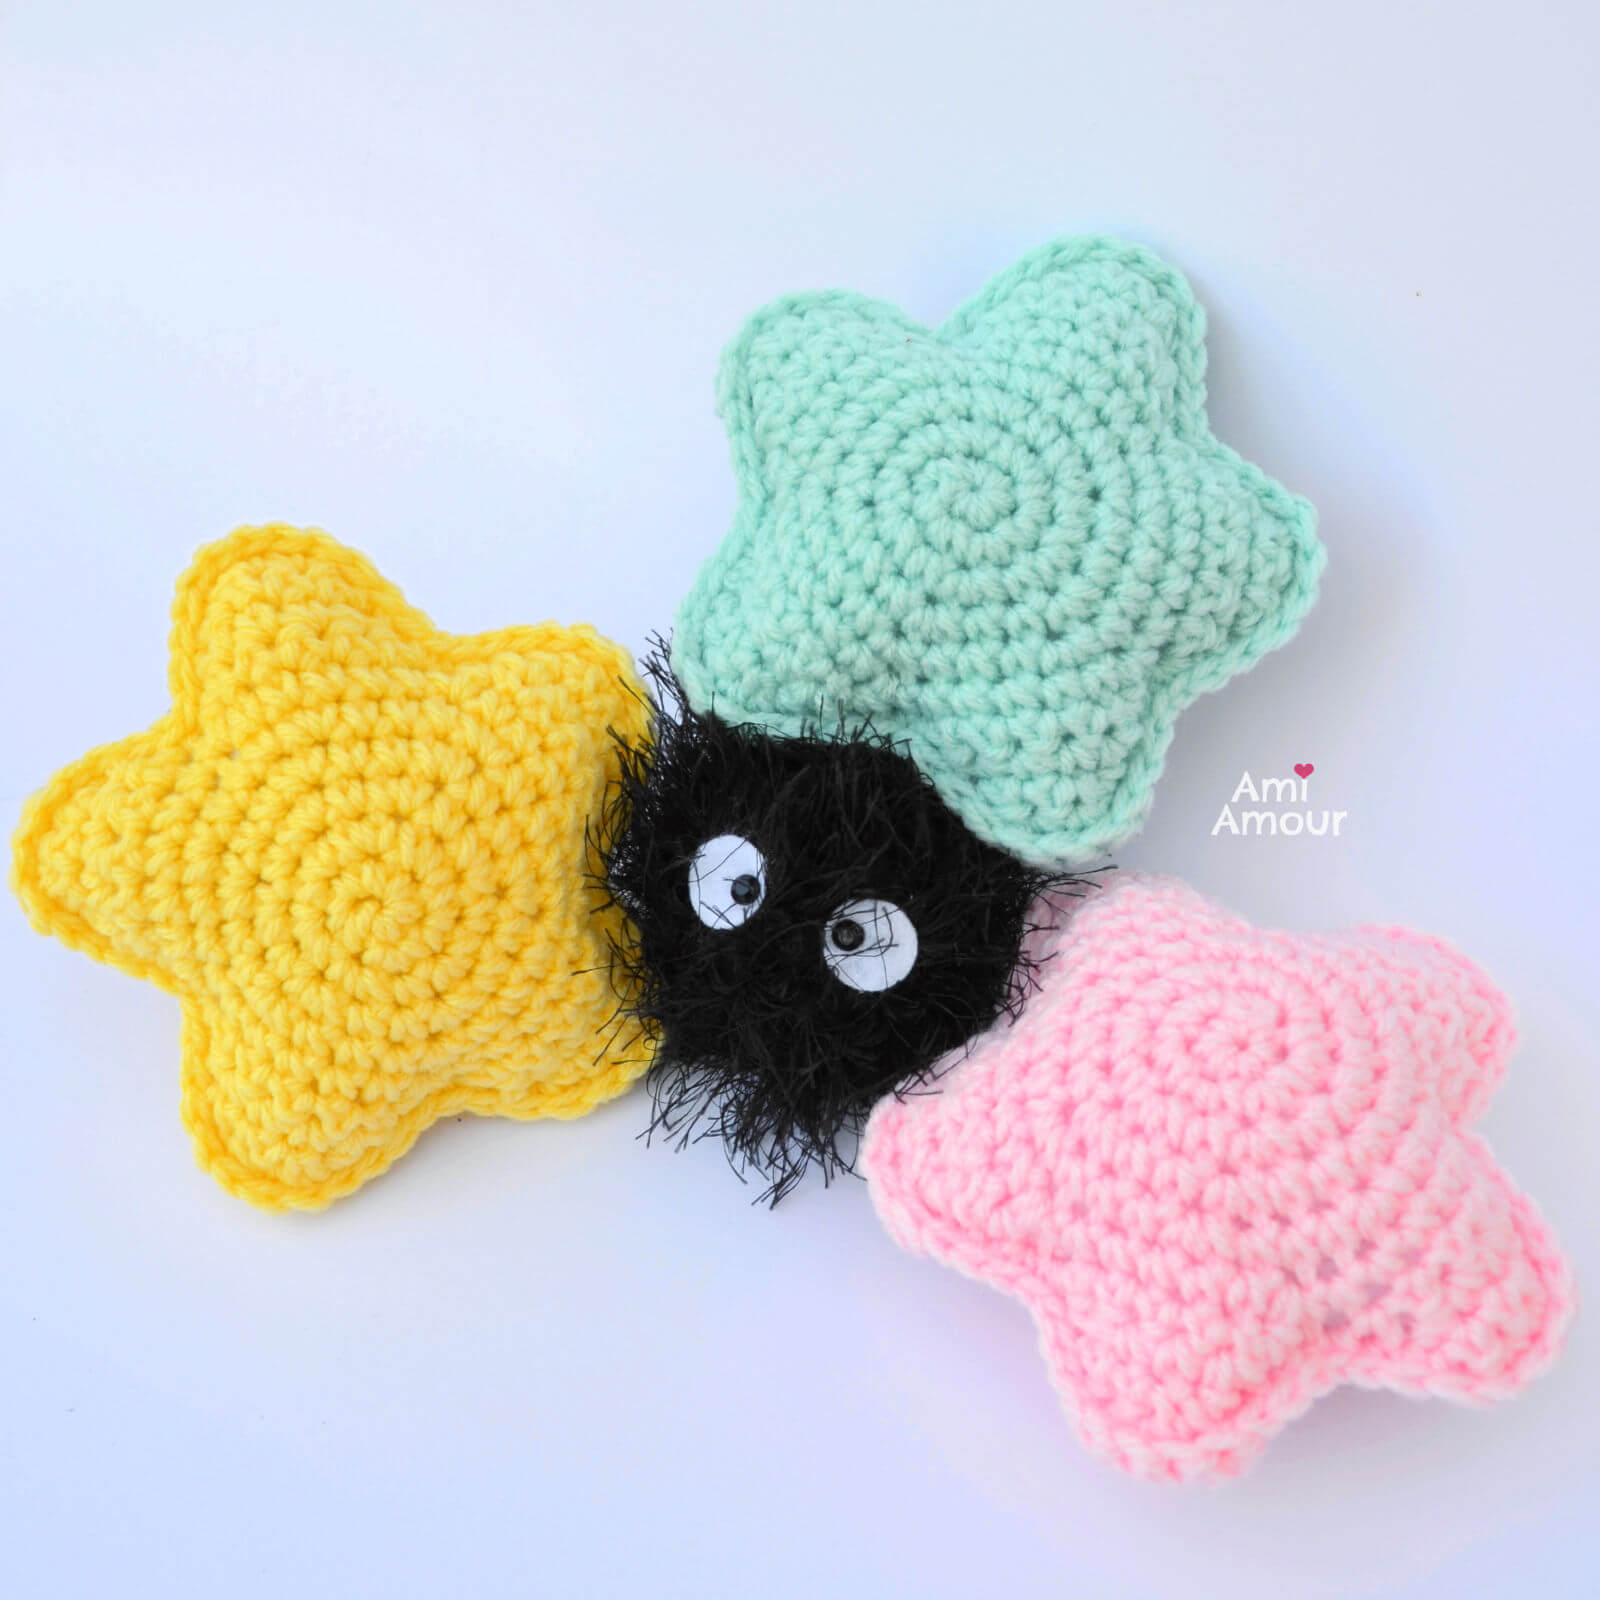
Or give it as some delicious Star Candy for a Soot Sprite amigurumi! How lucky he is to get such huge treats!
![]()
If you add 2 lines to the Star amigurumi, they become its eyes and you’ve anthropomorphized it into a cute Starfish. It also reminds me of the invincible star from the Mario Bros games. If you make it into a Super Star, don’t forget to crochet all the other Mario Power-Ups including the Mario Mushroom and the Fire Flower.
So now onto the technique! Basically the concept is very simple. We just take 2 star appliques, and then we hold them back to back, and we do a single crochet border around the stars by going through both layers.
With this method, we are joining the 2 stars together to create a 3-D Star. Once we get towards the last point of the star, through the opening, we can begin stuffing our star. And you will magically see the Star begin to balloon up and transform into a 3-D star!
I hope you enjoy making this star and let me know how you end up using your star. The free written pattern and video tutorial can be found below. Be sure to tag me with your project on Instagram @ami_amour.
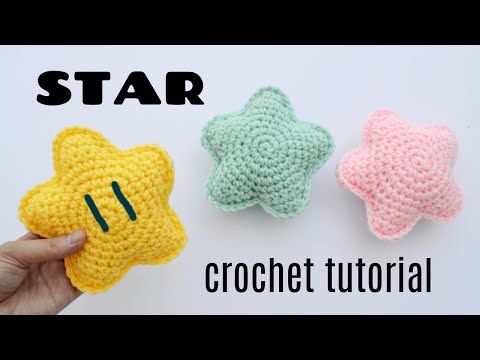
Star Crochet Tutorial Video
See the star in action and crochet along with me!
*Disclosure: This post contains affiliate links. This means I may receive a small commission if you decide to purchase anything by clicking on one of these links.
Amigurumi Star Crochet Pattern
LEVEL: Easy
CROCHET HOOK: 5.0mm size
YARN:
Impeccable Loops & Threads Yarn (worsted weight, acrylic yarn)
NOTIONS:
Stitch Marker
Scissors
Star Applique
With yarn color of choice
Round 1: 6 sc into magic ring.
Round 2: 2 sc in each st around – 12 sc.
Round 3: [2 sc in next st, sc in next st] around – 18 sc.
Round 4: [2 sc in next st, sc in next 2 st] around – 24 sc.
Round 5: [2 sc in next st, sc in next 3 st] around – 30 sc.
Now for the Star Points, we will start working in rows
Row 6: Sc in next 6 st only.
Row 7: Ch 1, turn, skip first sc, sc in next 5 st – 5 sc.
Row 8: Ch 1, turn, skip first sc, sc in next 4 st – 4 sc.
Row 9: Ch 1, turn, skip first sc, sc in next 3 st – 3 sc.
Row 10: Ch 1, turn, skip first sc, sc in next 2 st – 2 sc.
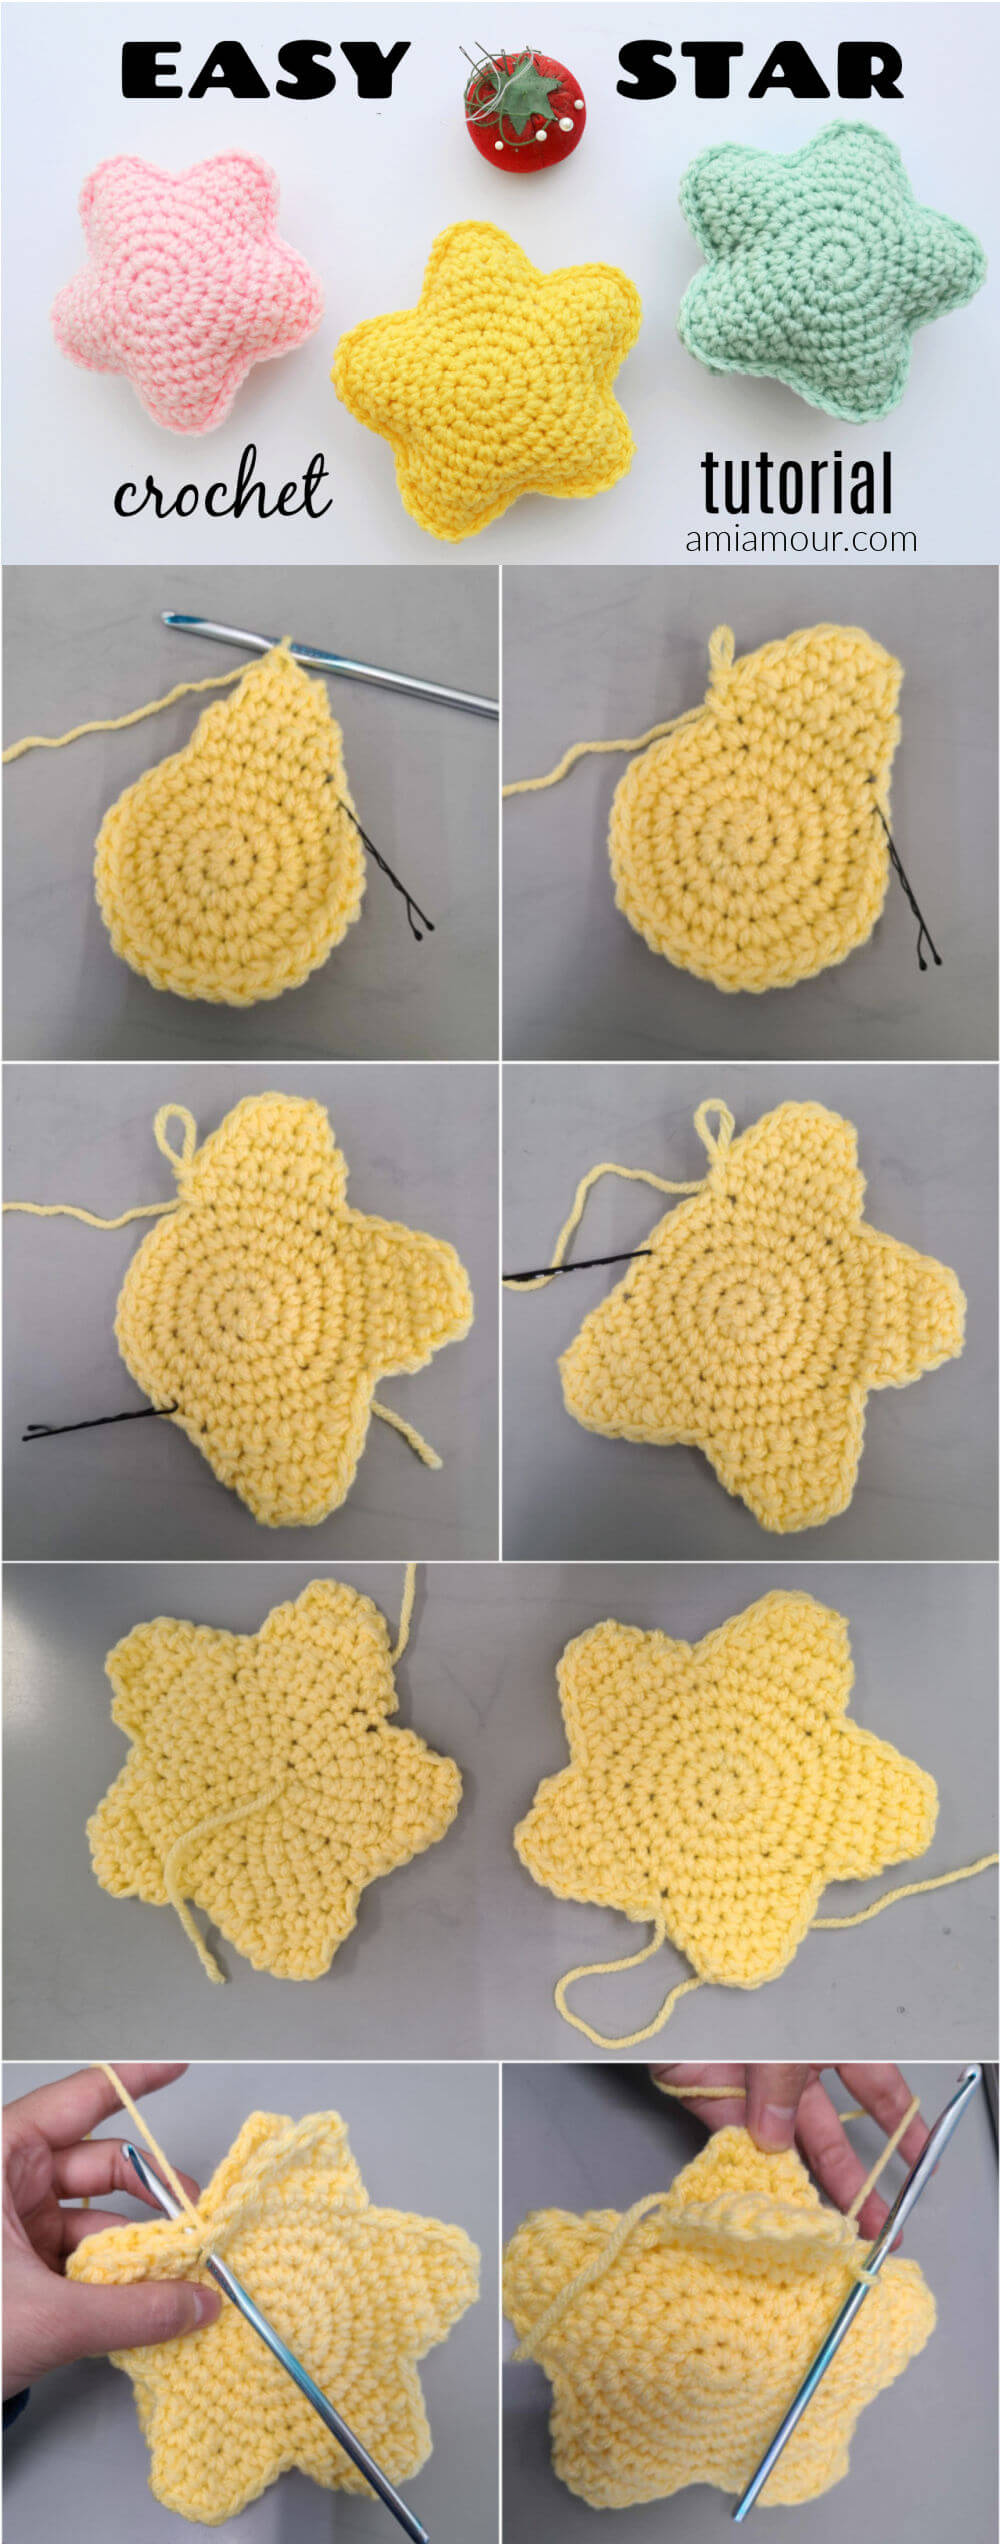
We will single crochet back down the side of the star point to get back down to the circle area. It should take about 5 sts. You can see the video tutorial here to see how I do this part.
Repeat the Star Point pattern from Rows 6-10 (including the sc down the side) for a total of 5 times. This way you will create the 5 points for the star.
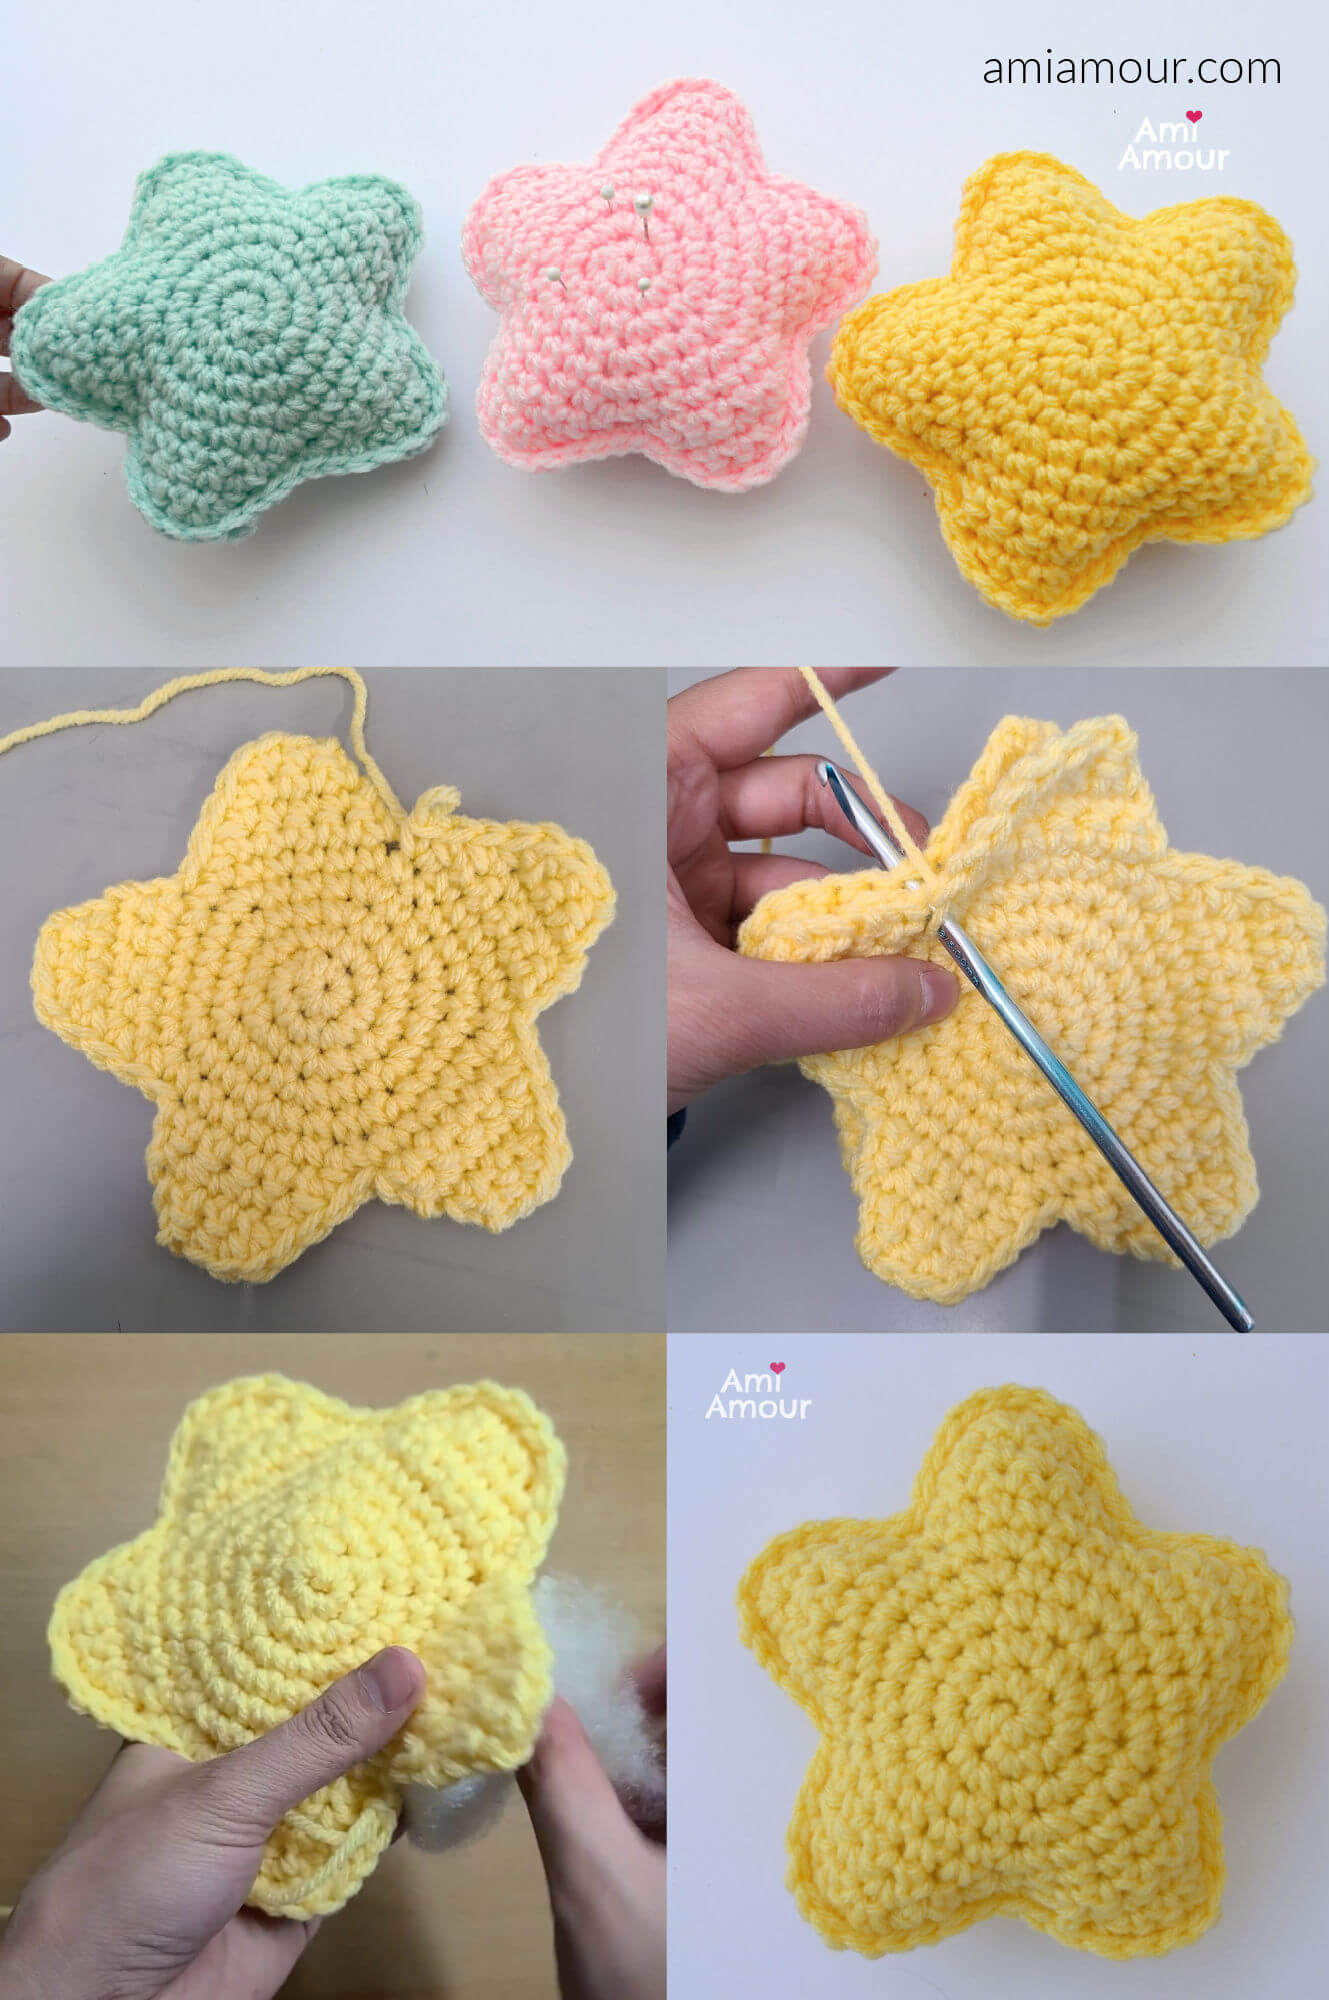
You should now have a complete 2-D Star Applique. You can now cut and fasten off the yarn for the first star applique.
3D Star Assembly
Now repeat the entire pattern one more time so that you create a second star applique. But DO NOT fasten off the yarn for the second star applique.
To create a 3-D Star, we will now join 2 Star Appliques together by joining them together with a single crochet border all around. You can see how to do that with my video tutorial here.
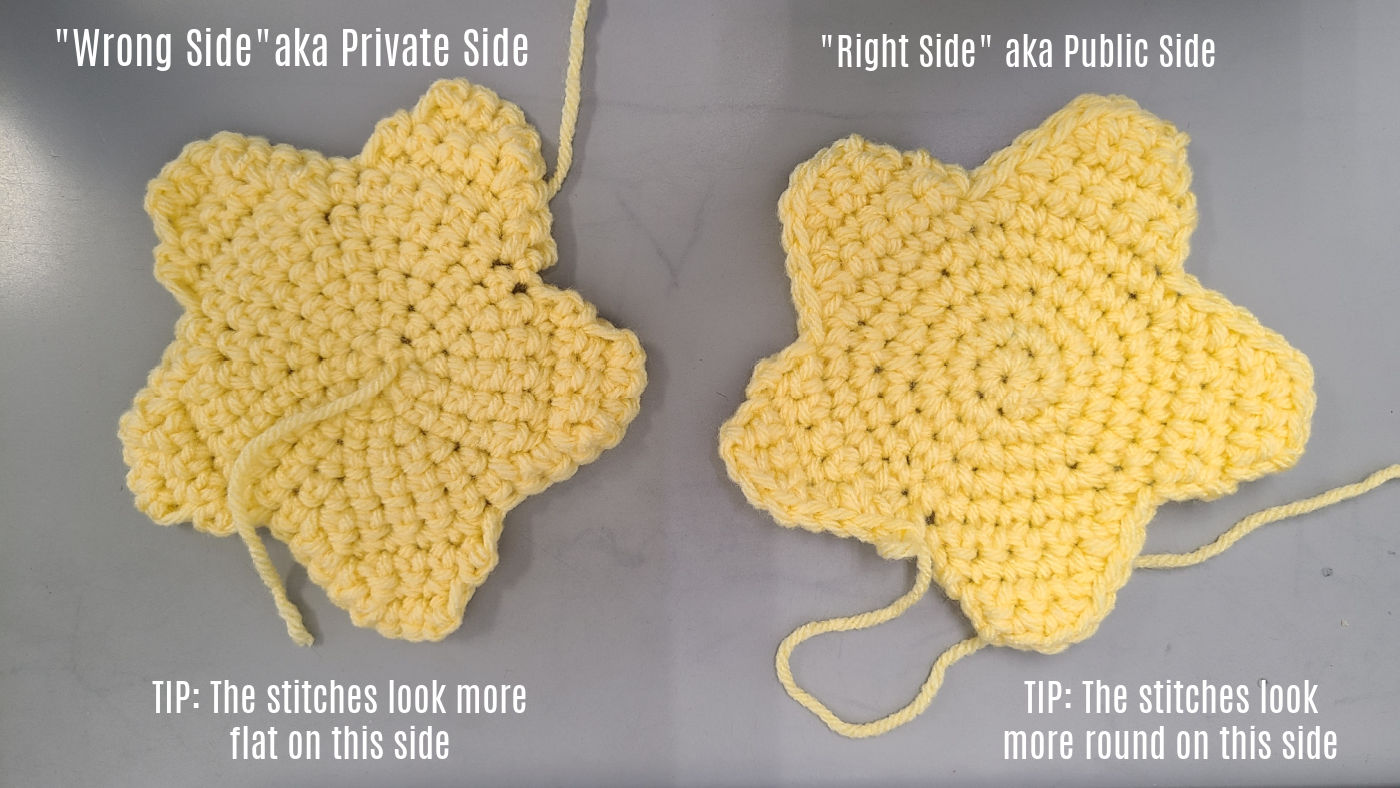
Make sure that when you are joining them together, you have the “wrong side” of the appliques facing each other. This way when the Star is finished, you will be sure to have the “right side” or the public side facing outwards.
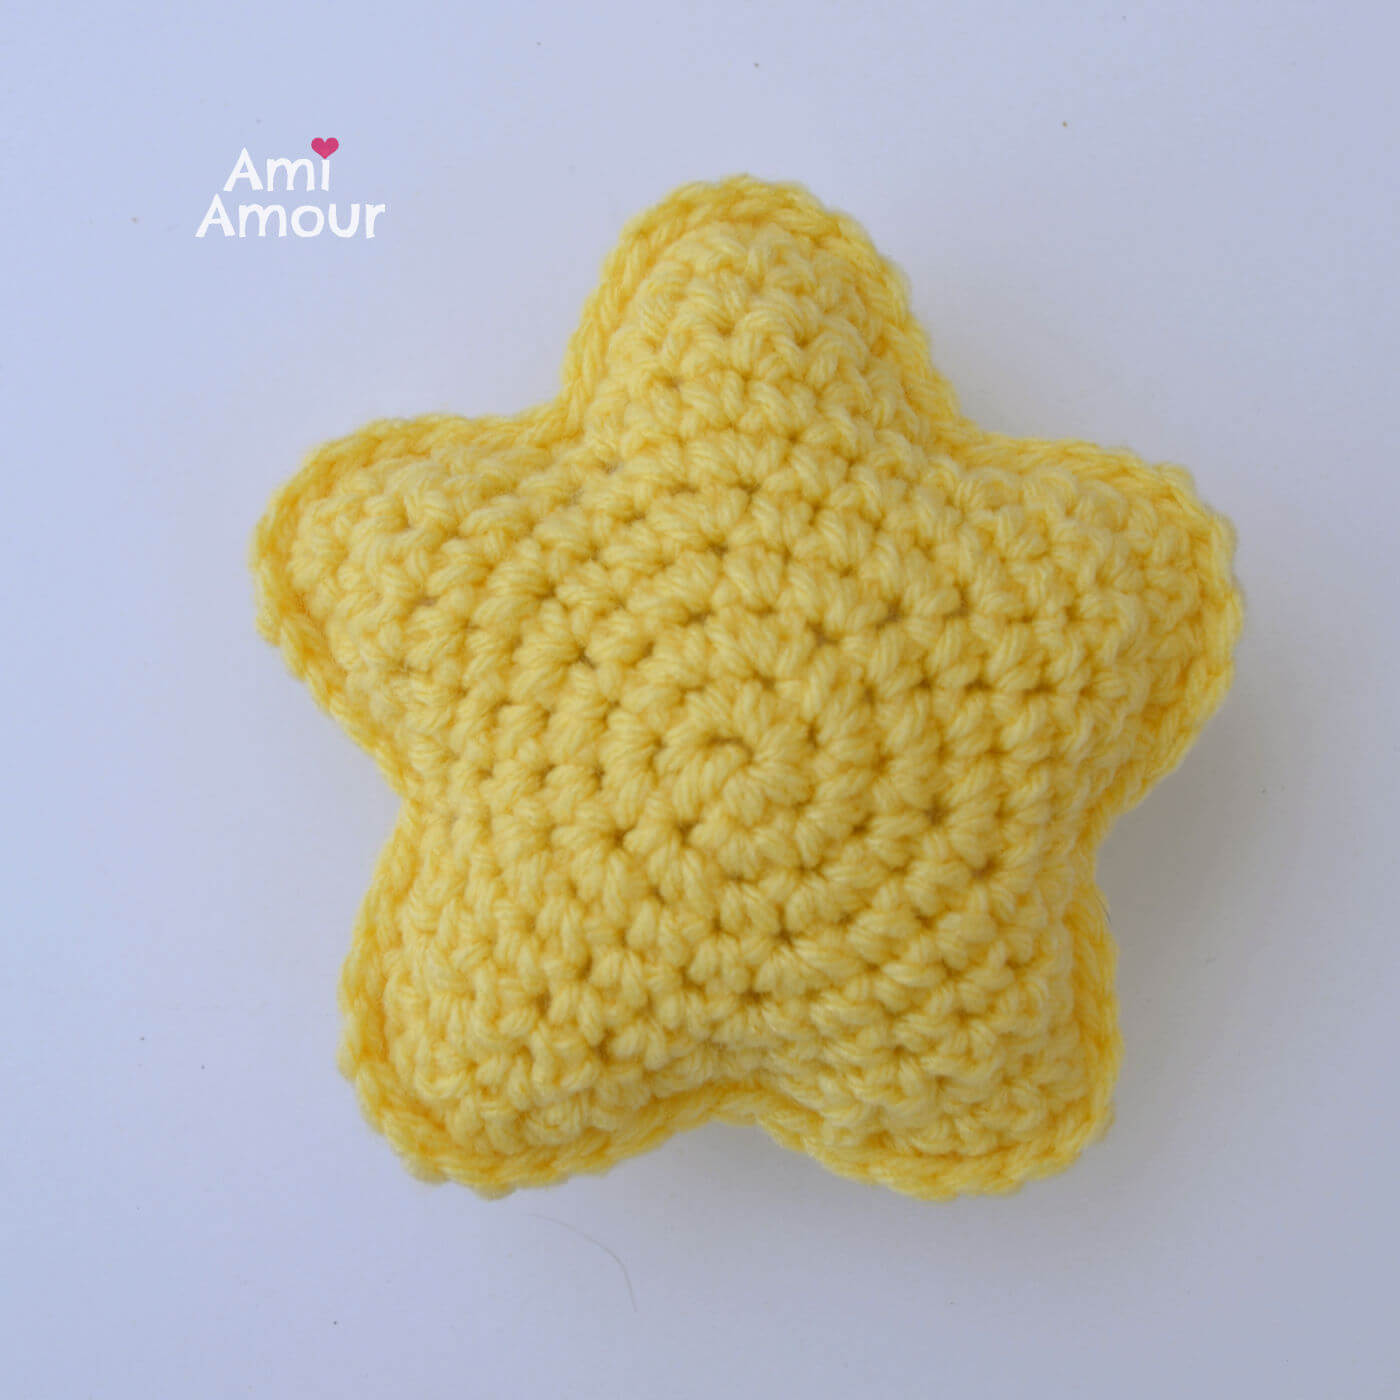
When joining the 2 stars together with the single crochet border, leave the last star point open so that you can stuff your star to transform it from 2-D to 3-D. After stuffing, finish up the last of the single crochet border to complete your star. Make sure to hide all ends. For an even cuter look, you can embroider eyes onto it using black yarn.
I’d love to see how your project turns out! Make sure to tag me with your photo on Instagram @ami_amour.

3D Star Amigurumi Crochet Pattern
Transform a 2D Star Applique into a 3D Star with this fun and easy to follow crochet pattern. This star has rounded points rather than sharp ones for a cute look.
Materials
- - Impeccable, Loops and Threads Yarn (worsted weight, acrylic)
- - Polyfil Stuffing
Tools
- - 5.0mm Crochet Hook
- - Yarn Needle
- - Stitch Marker
- - Scissors
Instructions
STAR APPLIQUE
With yarn color of choice
Round 1: 6 sc into magic ring.
Round 2: 2 sc in each st around - 12 sc.
Round 3: [2 sc in next st, sc in next st] around - 18 sc.
Round 4: [2 sc in next st, sc in next 2 st] around - 24 sc.
Round 5: [2 sc in next st, sc in next 3 st] around - 30 sc.
Now for the Star Points, we will start working in rows.
Row 6: Sc in next 6 st only.
Row 7: Ch 1, turn, skip first sc, sc in next 5 st - 5 sc.
Row 8: Ch 1, turn, skip first sc, sc in next 4 st - 4 sc.
Row 9: Ch 1, turn, skip first sc, sc in next 3 st - 3 sc.
Row 10: Ch 1, turn, skip first sc, sc in next 2 st - 2 sc.
We will single crochet back down the side of the star point to get back down to the circle area. It should take about 5 sts. You can see the video tutorial here.
Repeat the Star Point pattern from Rows 6-10 (including the sc down the side) for a total of 5 times. This way you will create the 5 points for the star.
You should now have a complete 2-D Star Applique.
You can cut and fasten off for the first Star Applique.
3-D STAR ASSEMBLY
Now repeat the entire pattern one more time so that you create a second star applique. But DO NOT fasten off or cut off the yarn for the 2nd Star Applique because we will continue on with the yarn.
To create a 3-D Star, we will now join the 2 star appliques together by crocheting a single crochet border all around their edges. You can also see how in this video tutorial here.
Make sure that when you are joining them together, have the "wrong side" of the applique facing each other. This way when the Star is finished, you will be sure to have the "right side" or public side facing outwards.
When joining the 2 stars together with the single crochet border, leave the last star point open so that you can stuff your star to transform it from 2-D to 3-D. After stuffing, finish crocheting the sc border to complete the star. Make sure to hide all ends. For an even cuter look, you can embroider eyes onto it using black yarn.
Make sure you tag me with your projects on my Instagram @ami_amour. I'd love to see!

No Comments