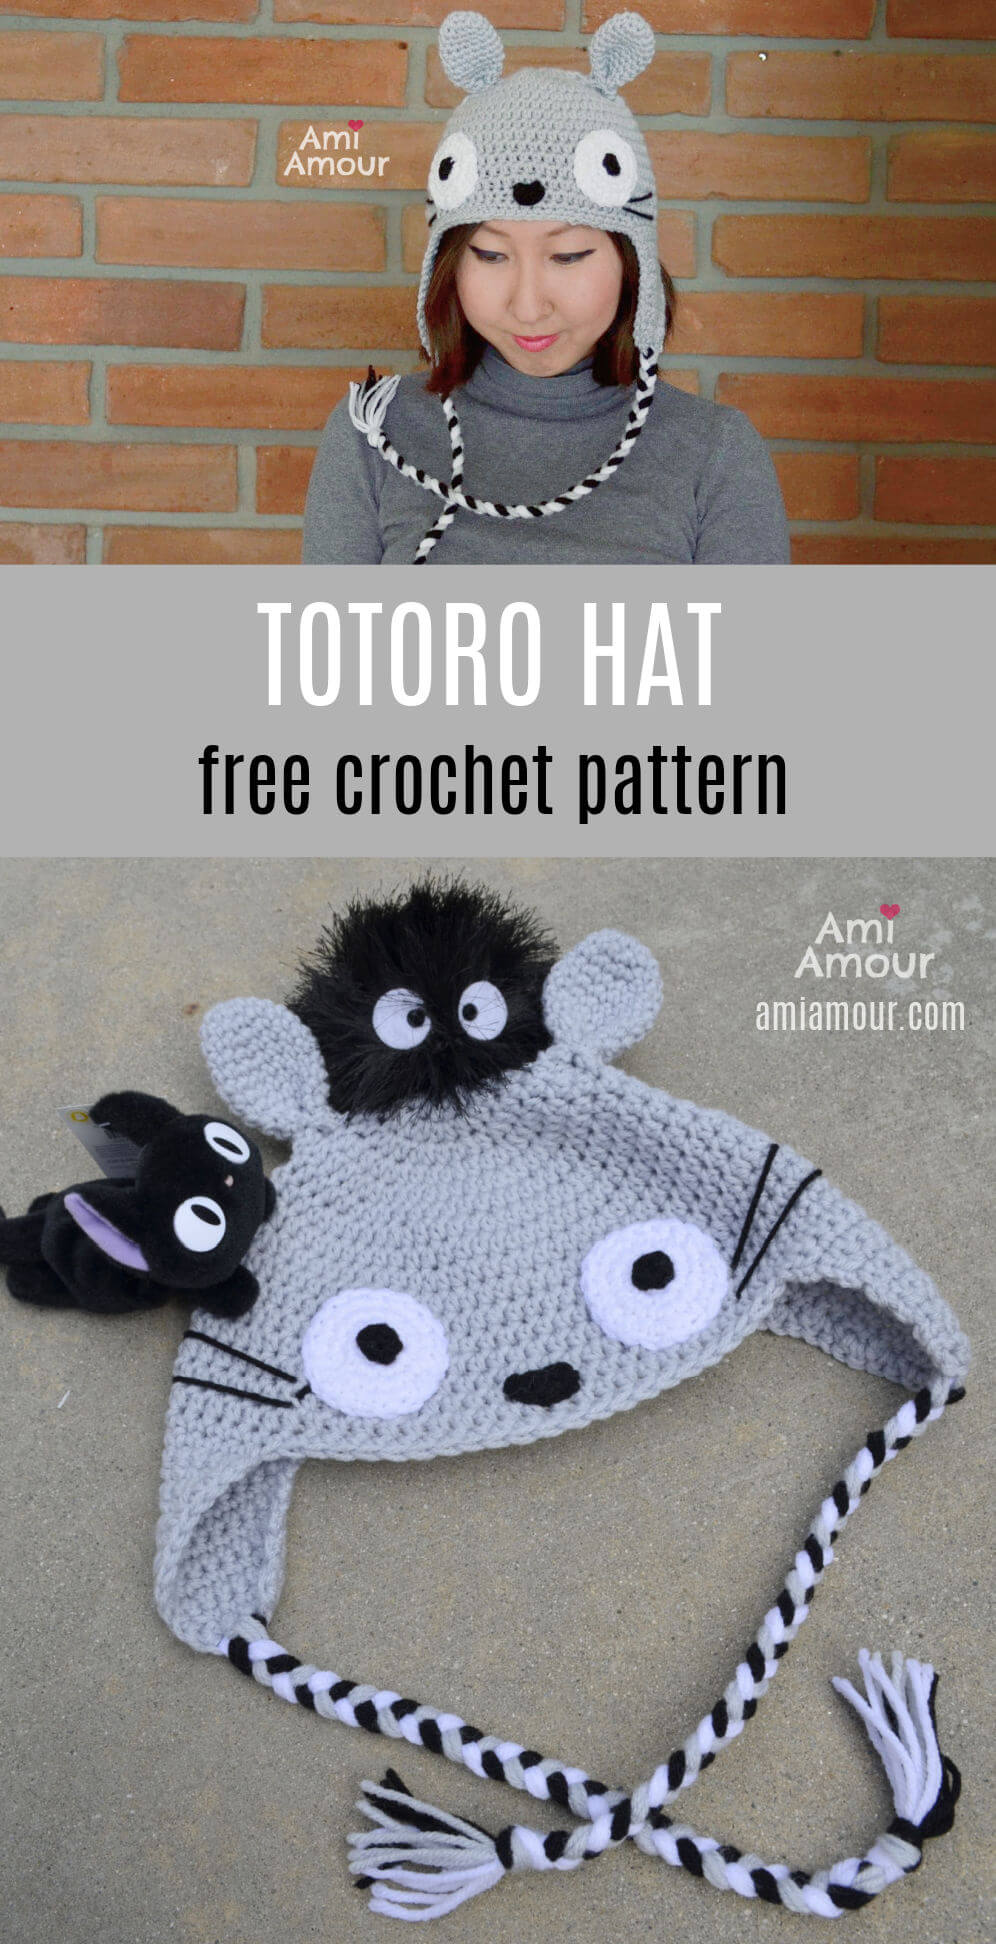
I present to you my cozy crochet Totoro Hat, now available as a free pattern! I had originally crocheted the hat as a beanie, but I thought that during winter days, it would also look cute with earflaps and braided cords.
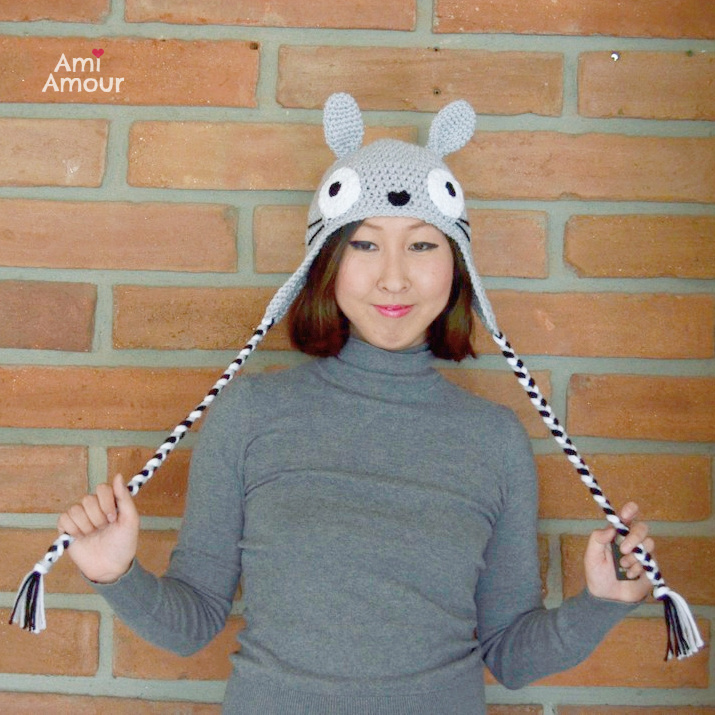
It’s fun transforming into a Totoro! The hat works up quickly and can make for a quick and fun cosplay or for a cute Studio Ghibli bounding outfit.
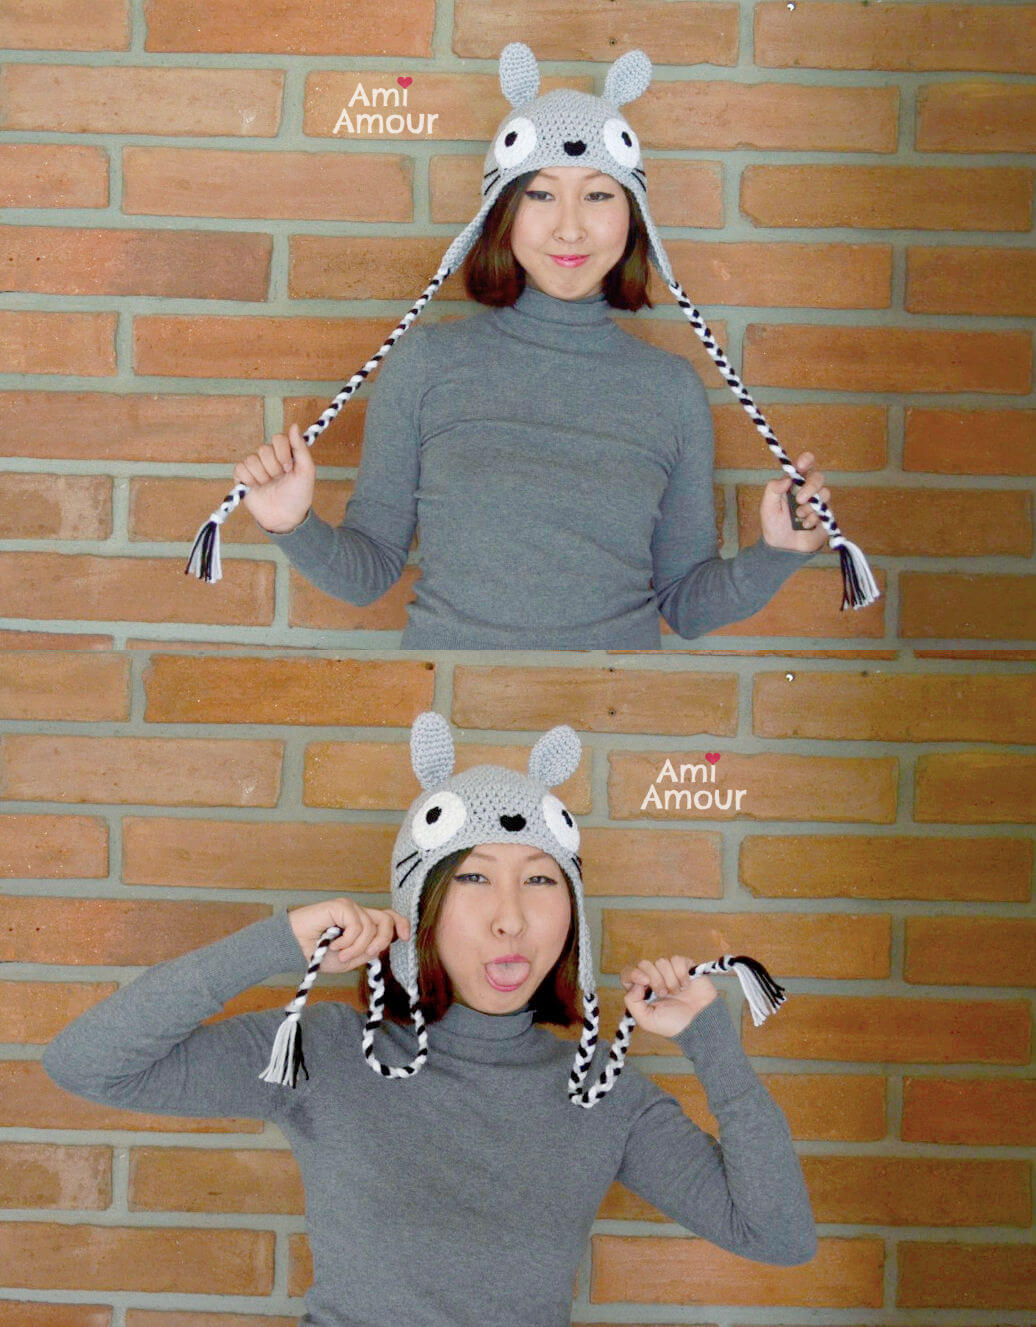
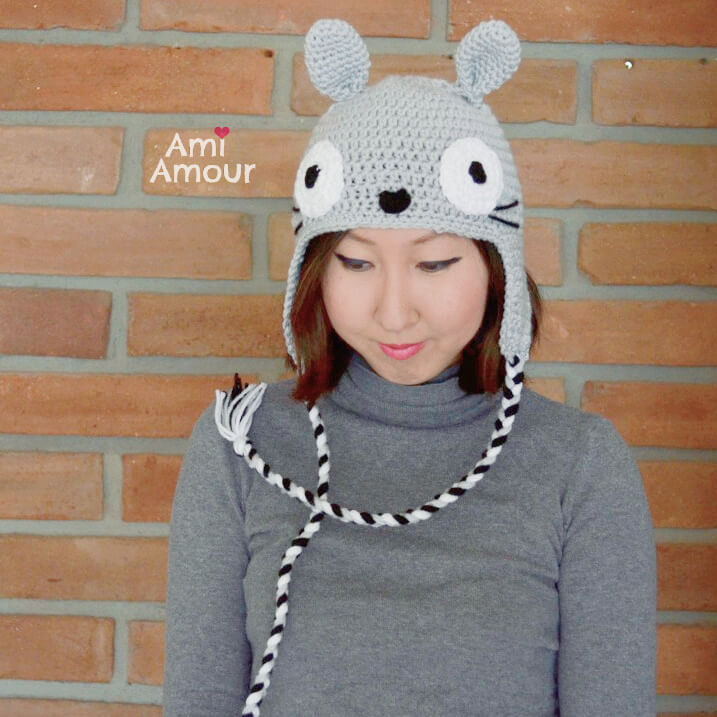


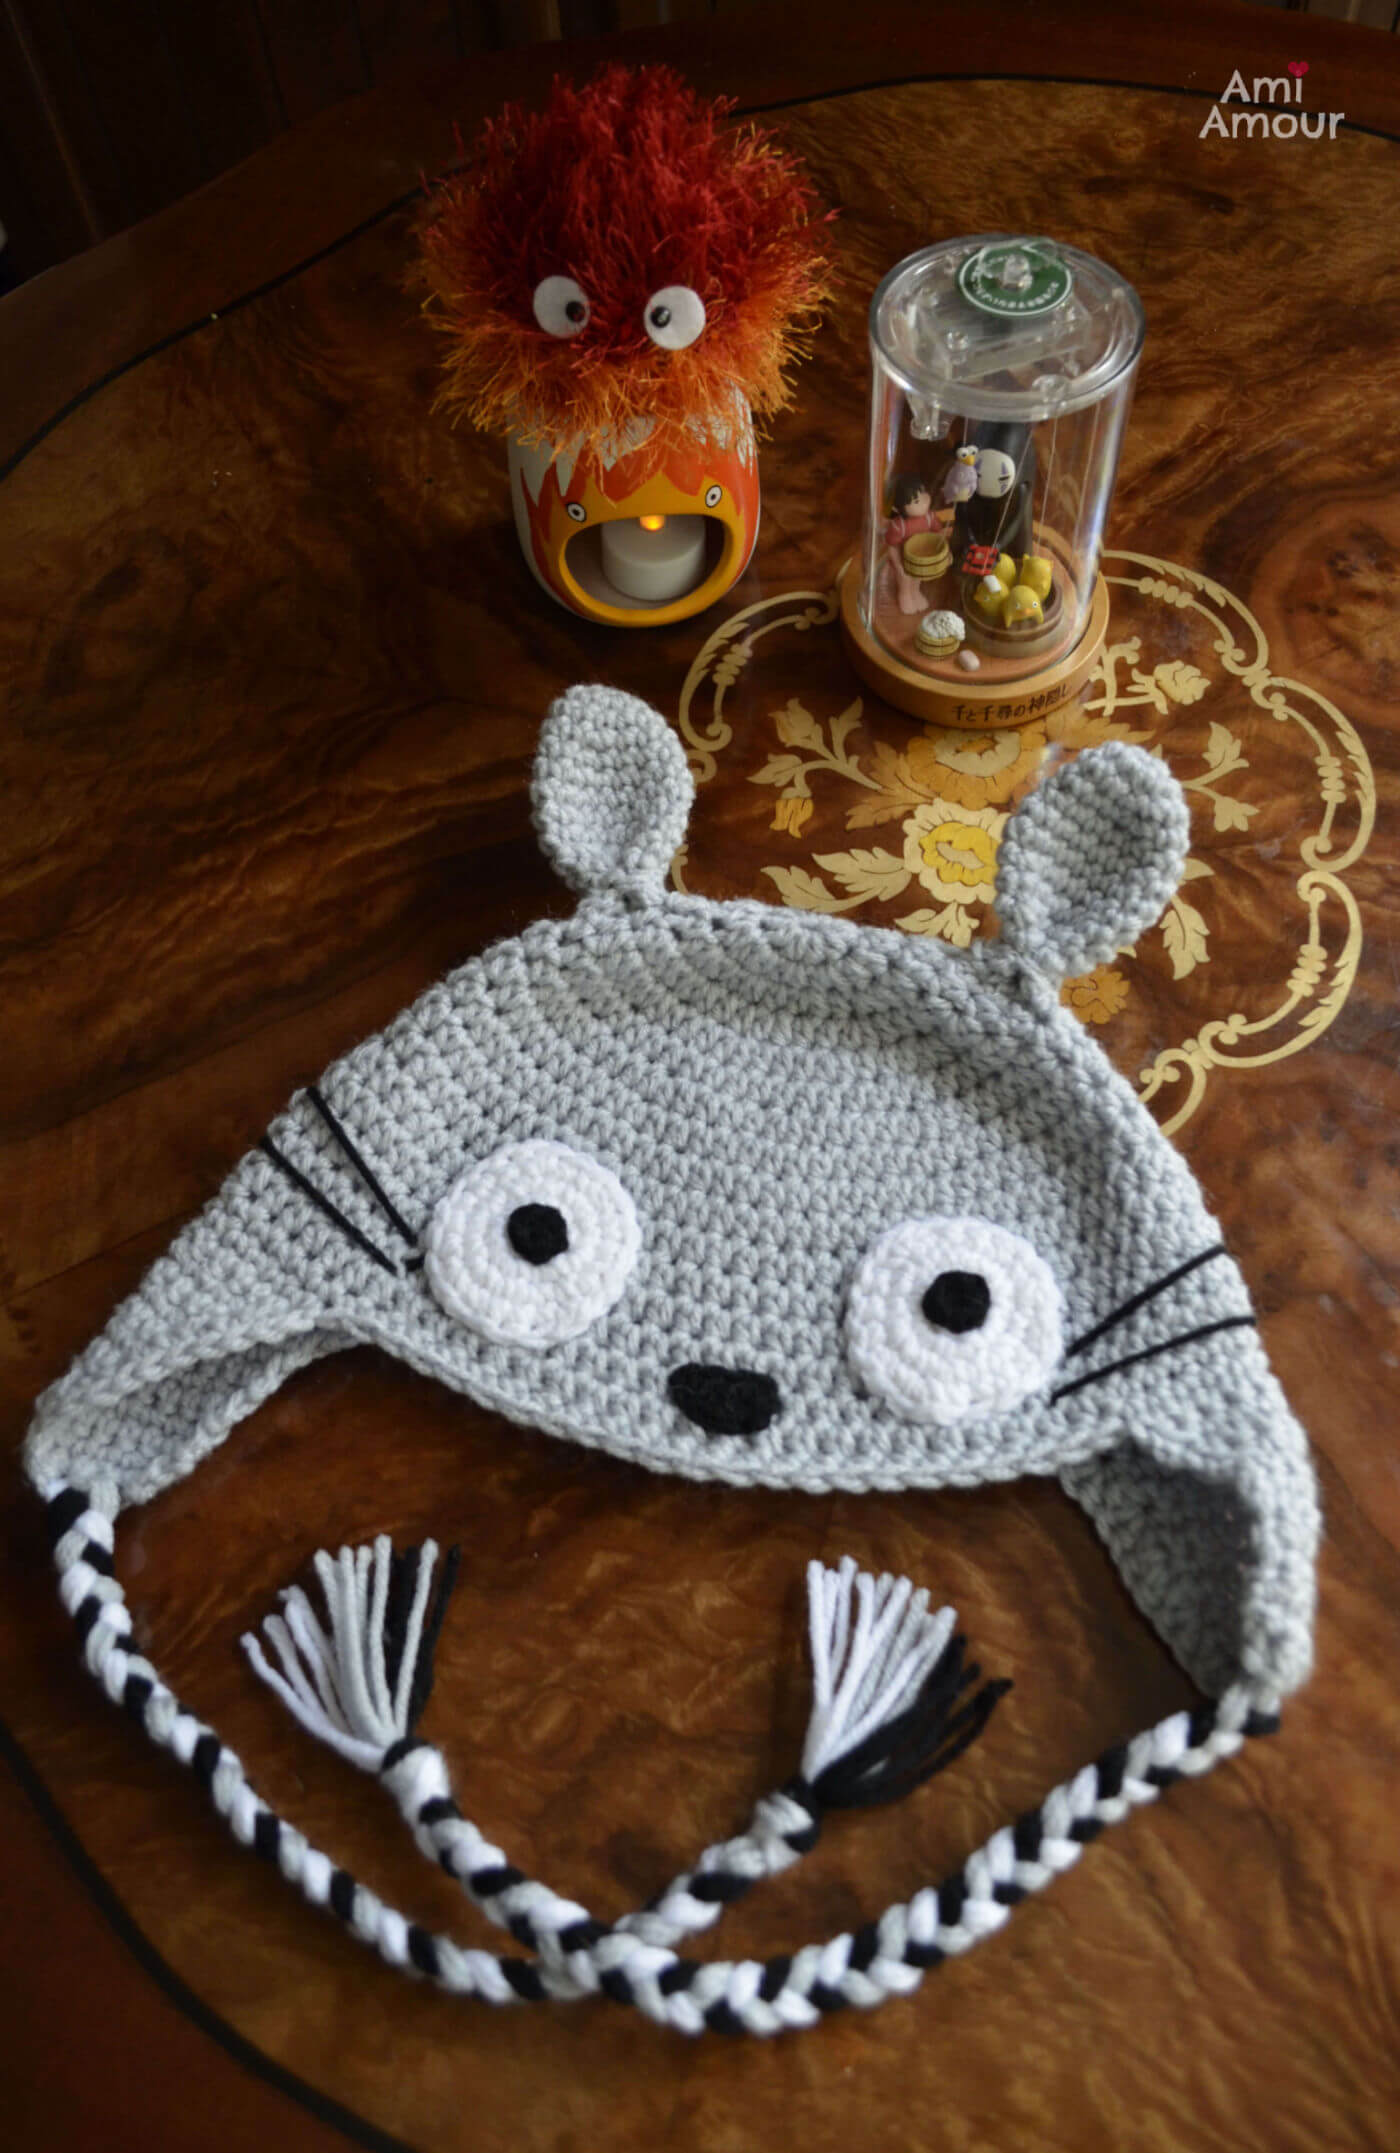
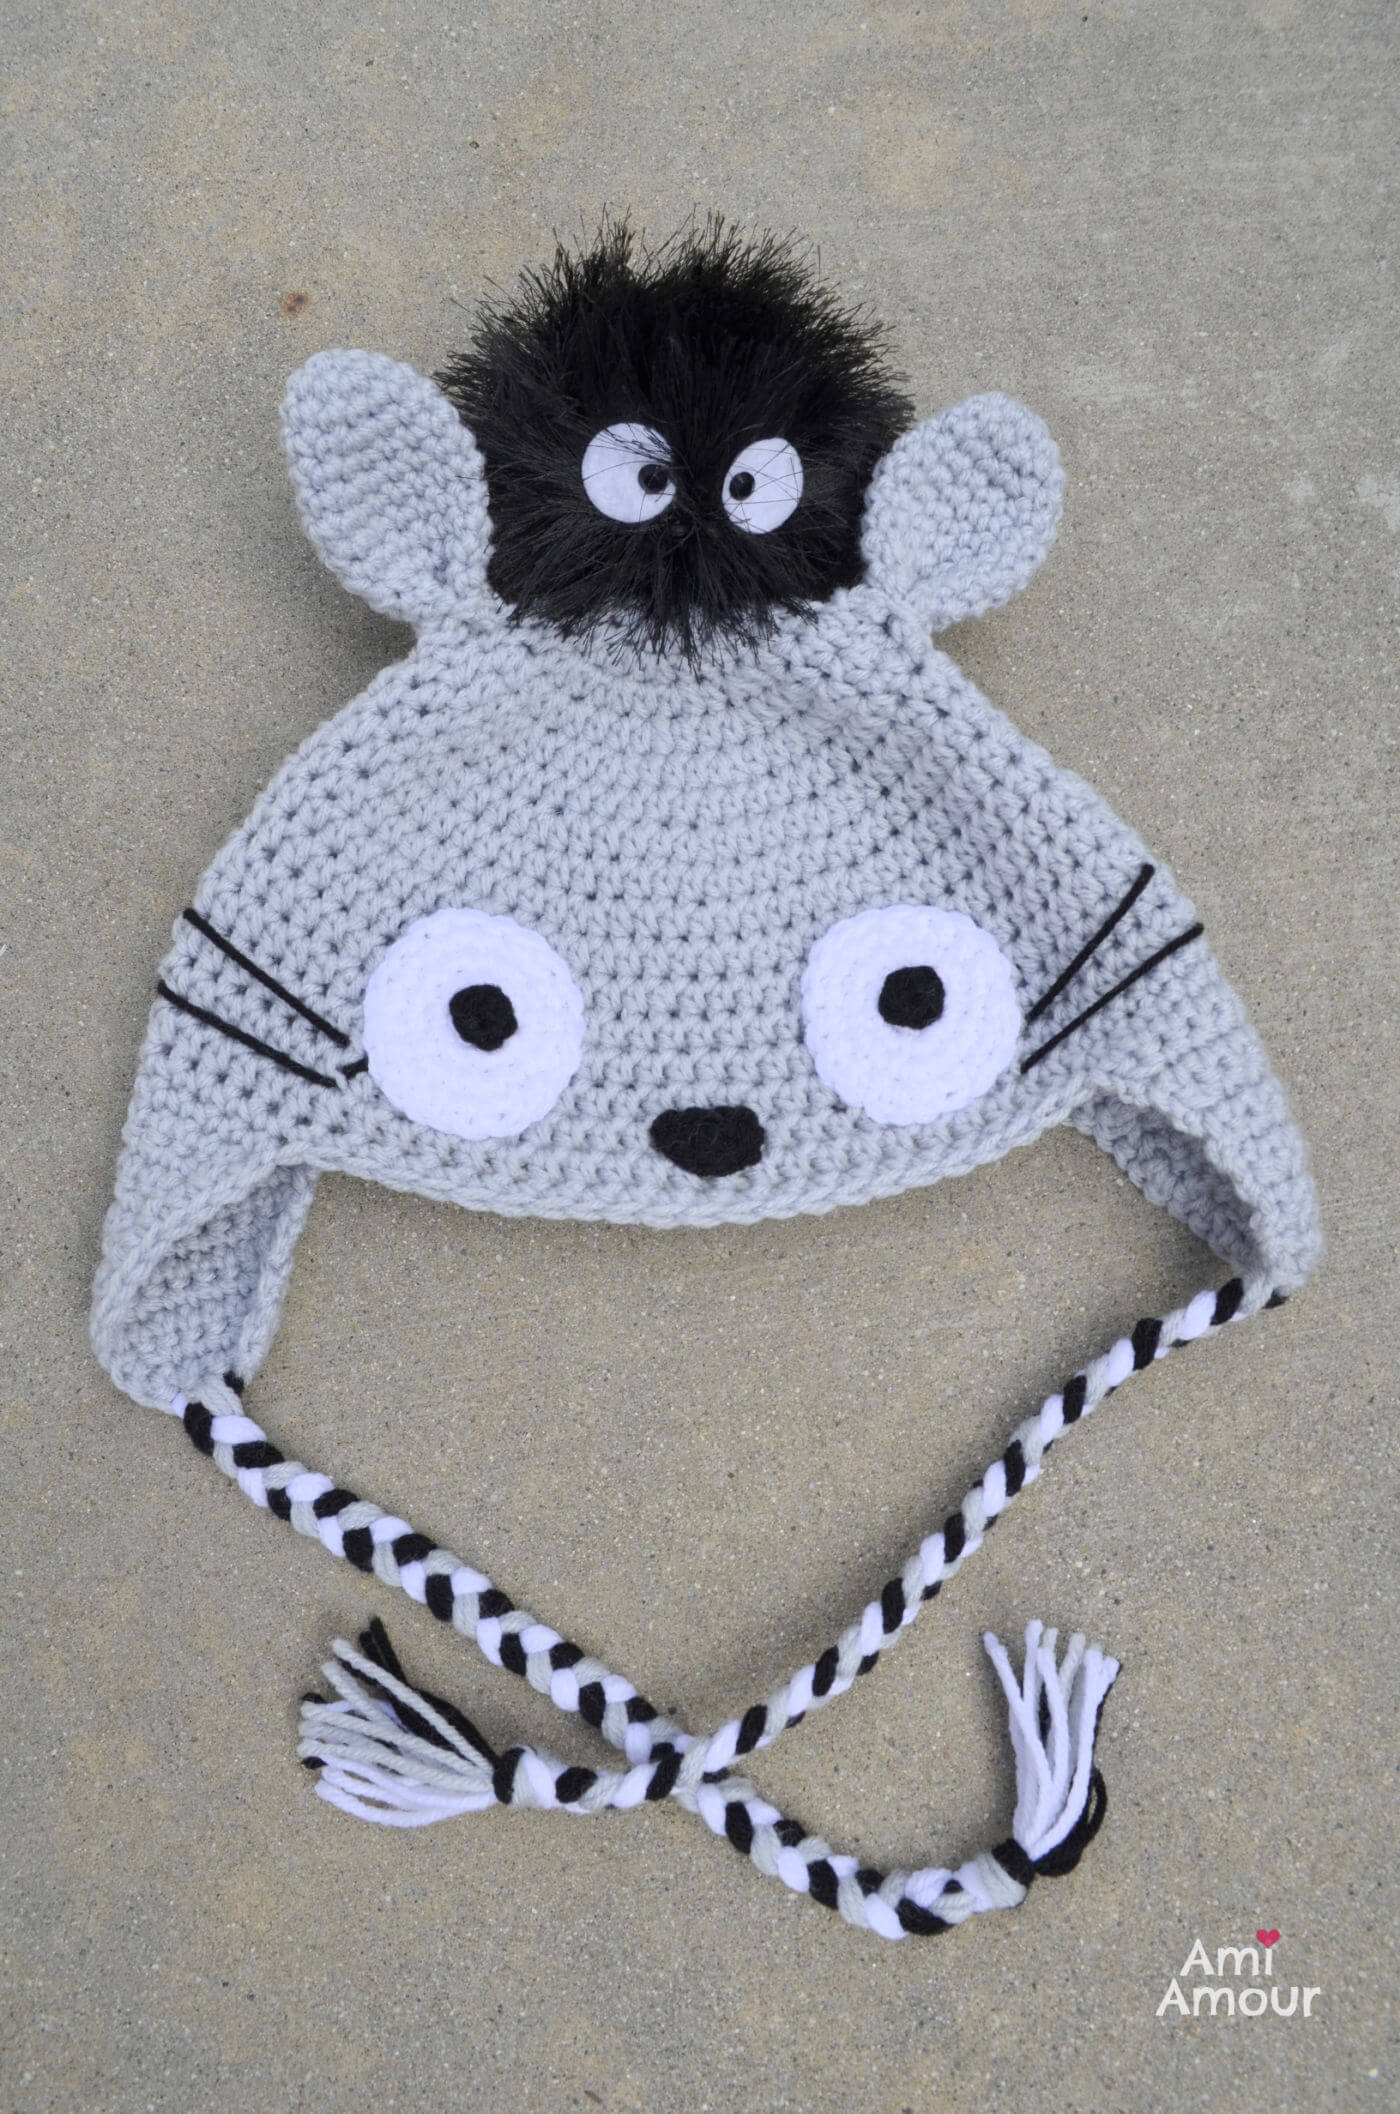
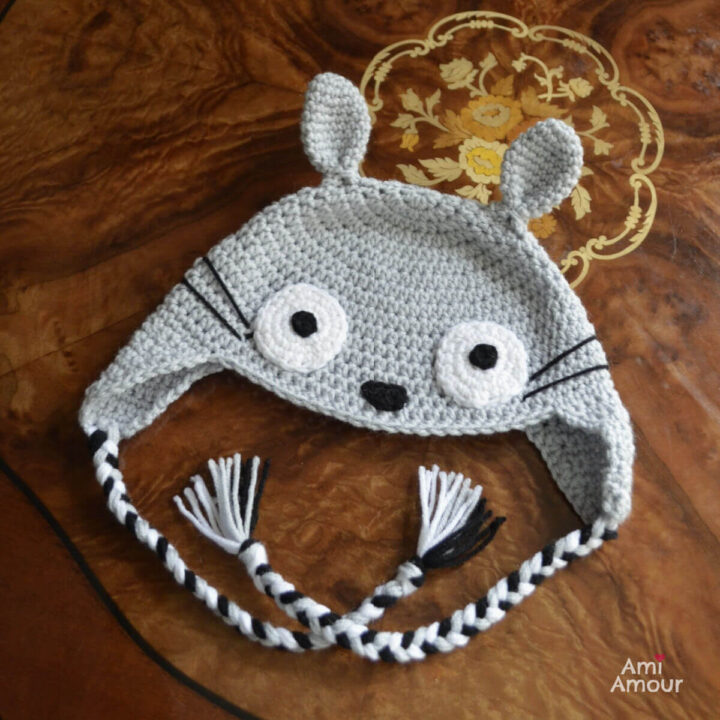
The crochet Totoro Hat has huge eyes as well as fun whiskers embroidered into the base of the hat.
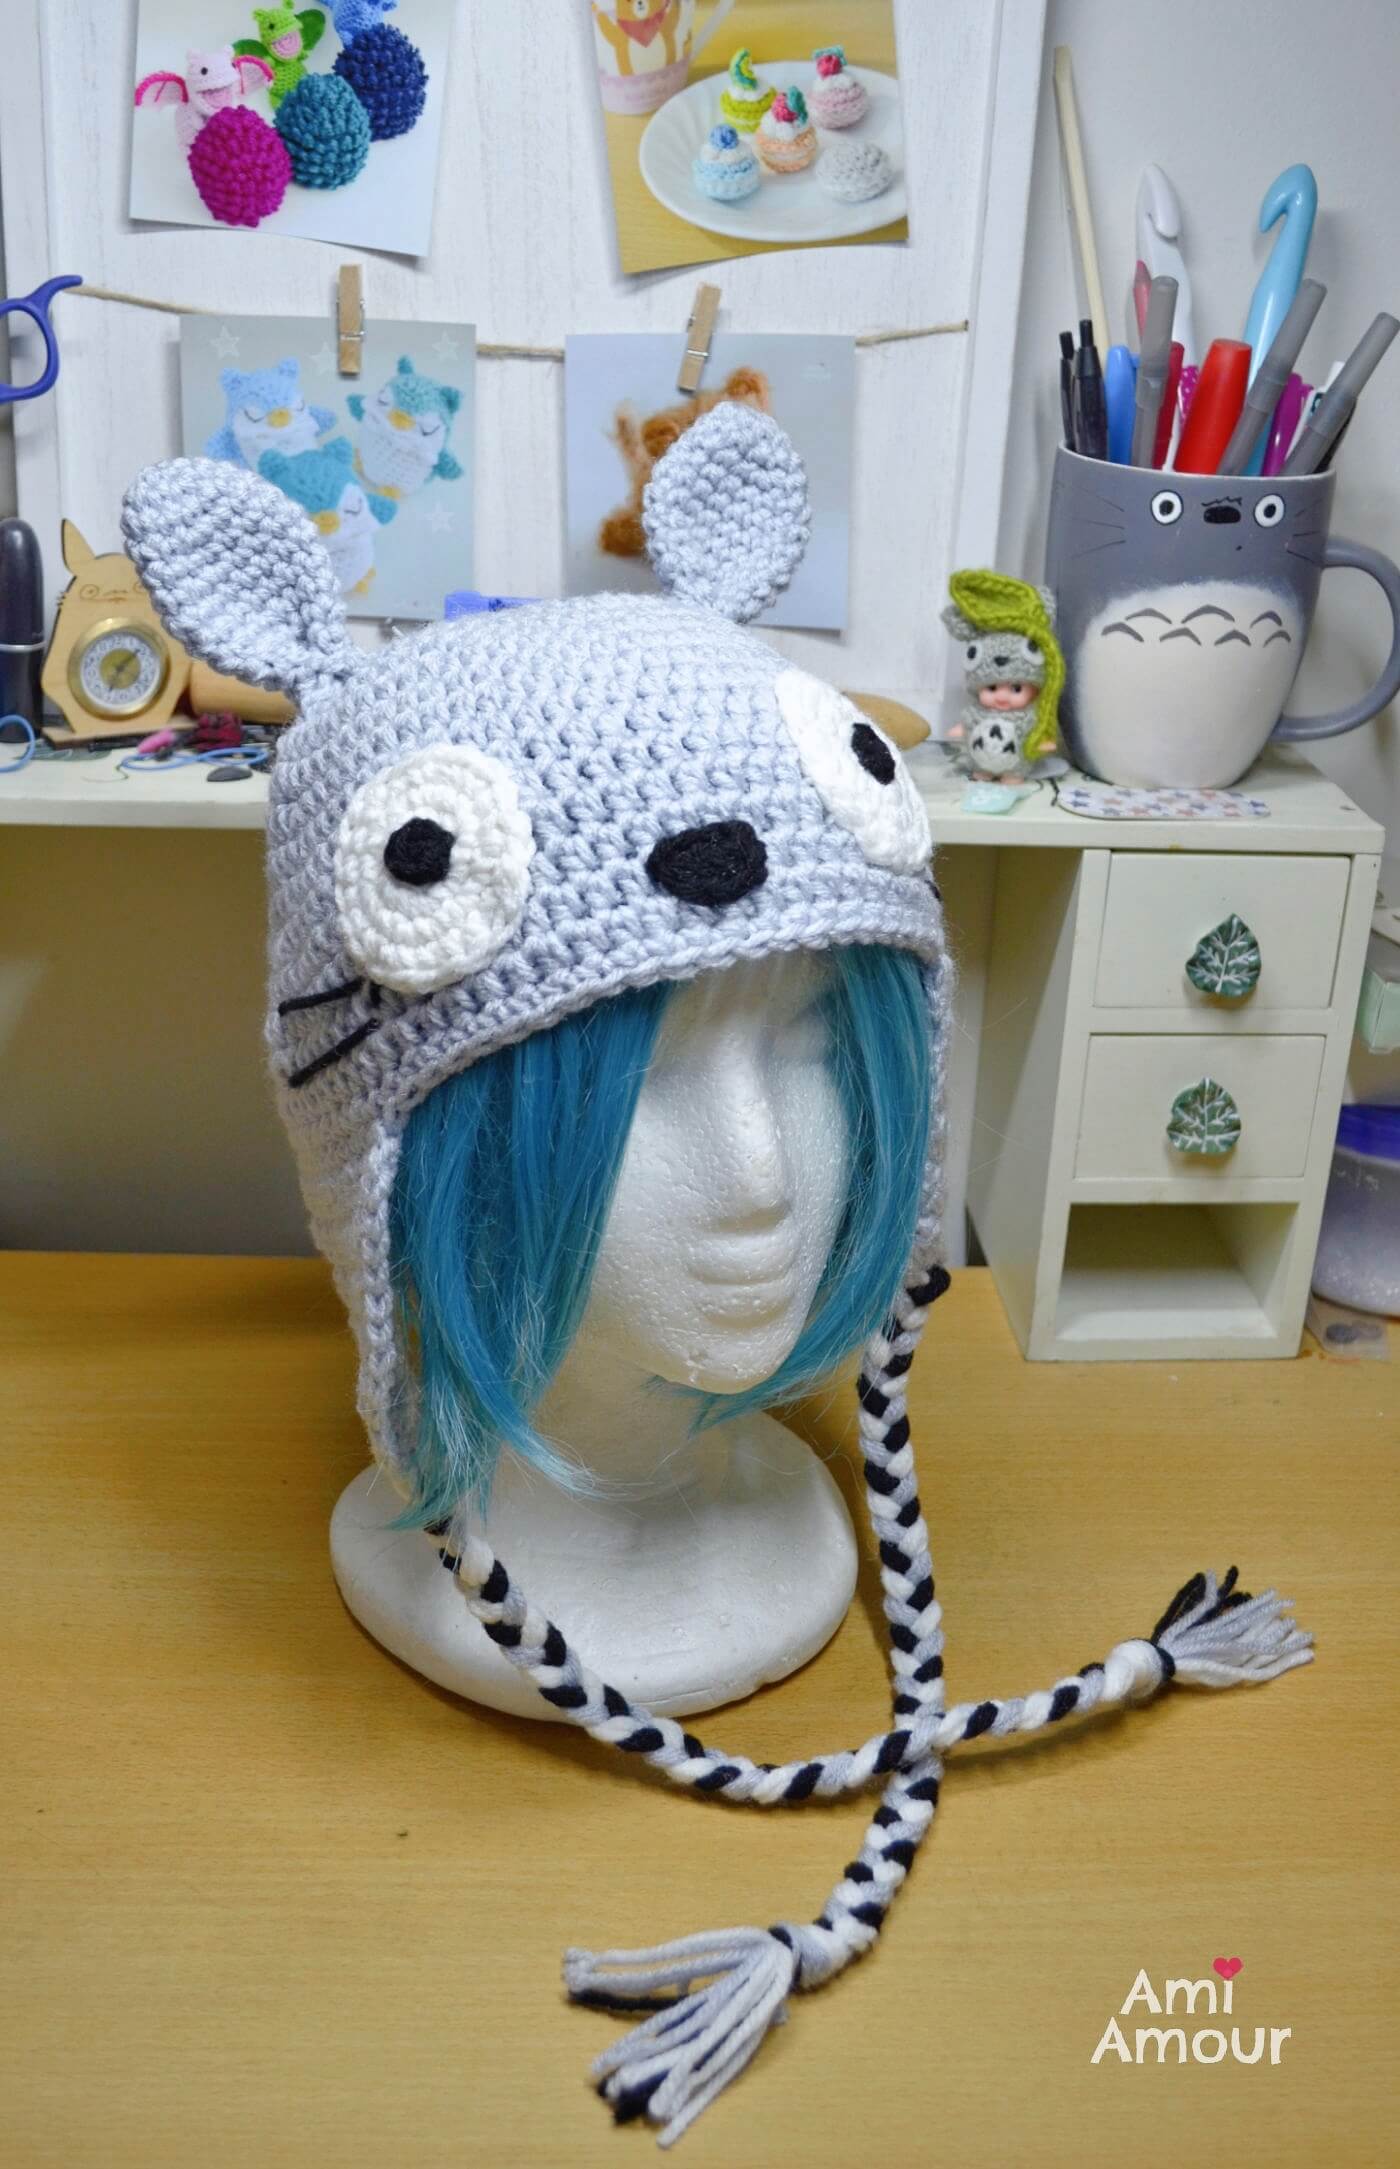
The hat is worked in the round with half double crochet stitches. The earflaps are worked in rows with single crochet.
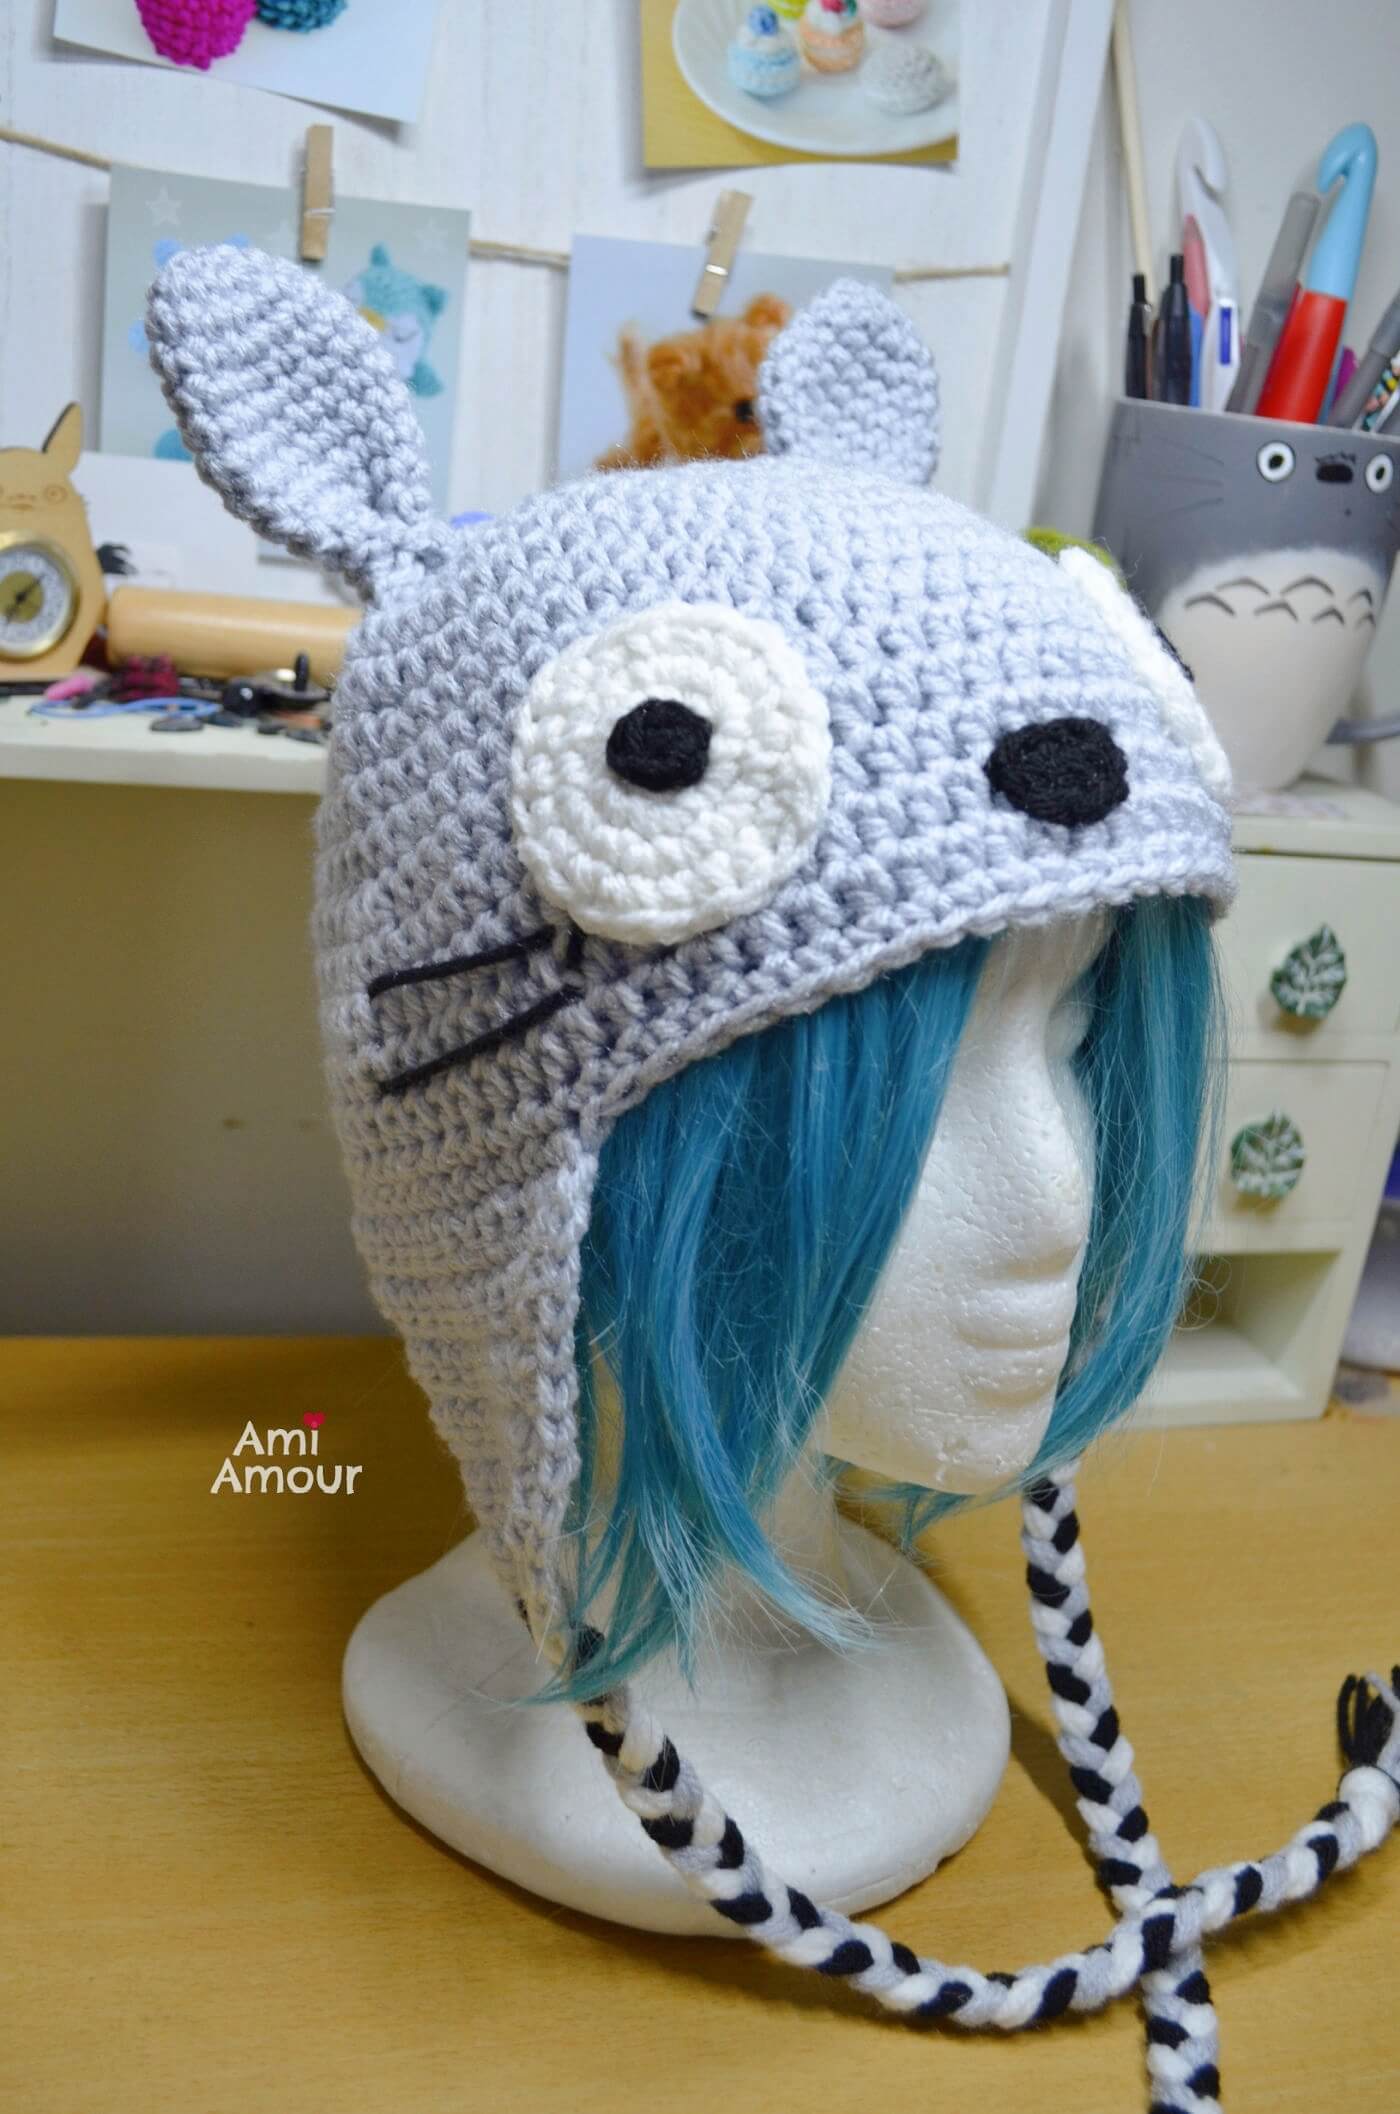
Its ears are able to stand up on its own.
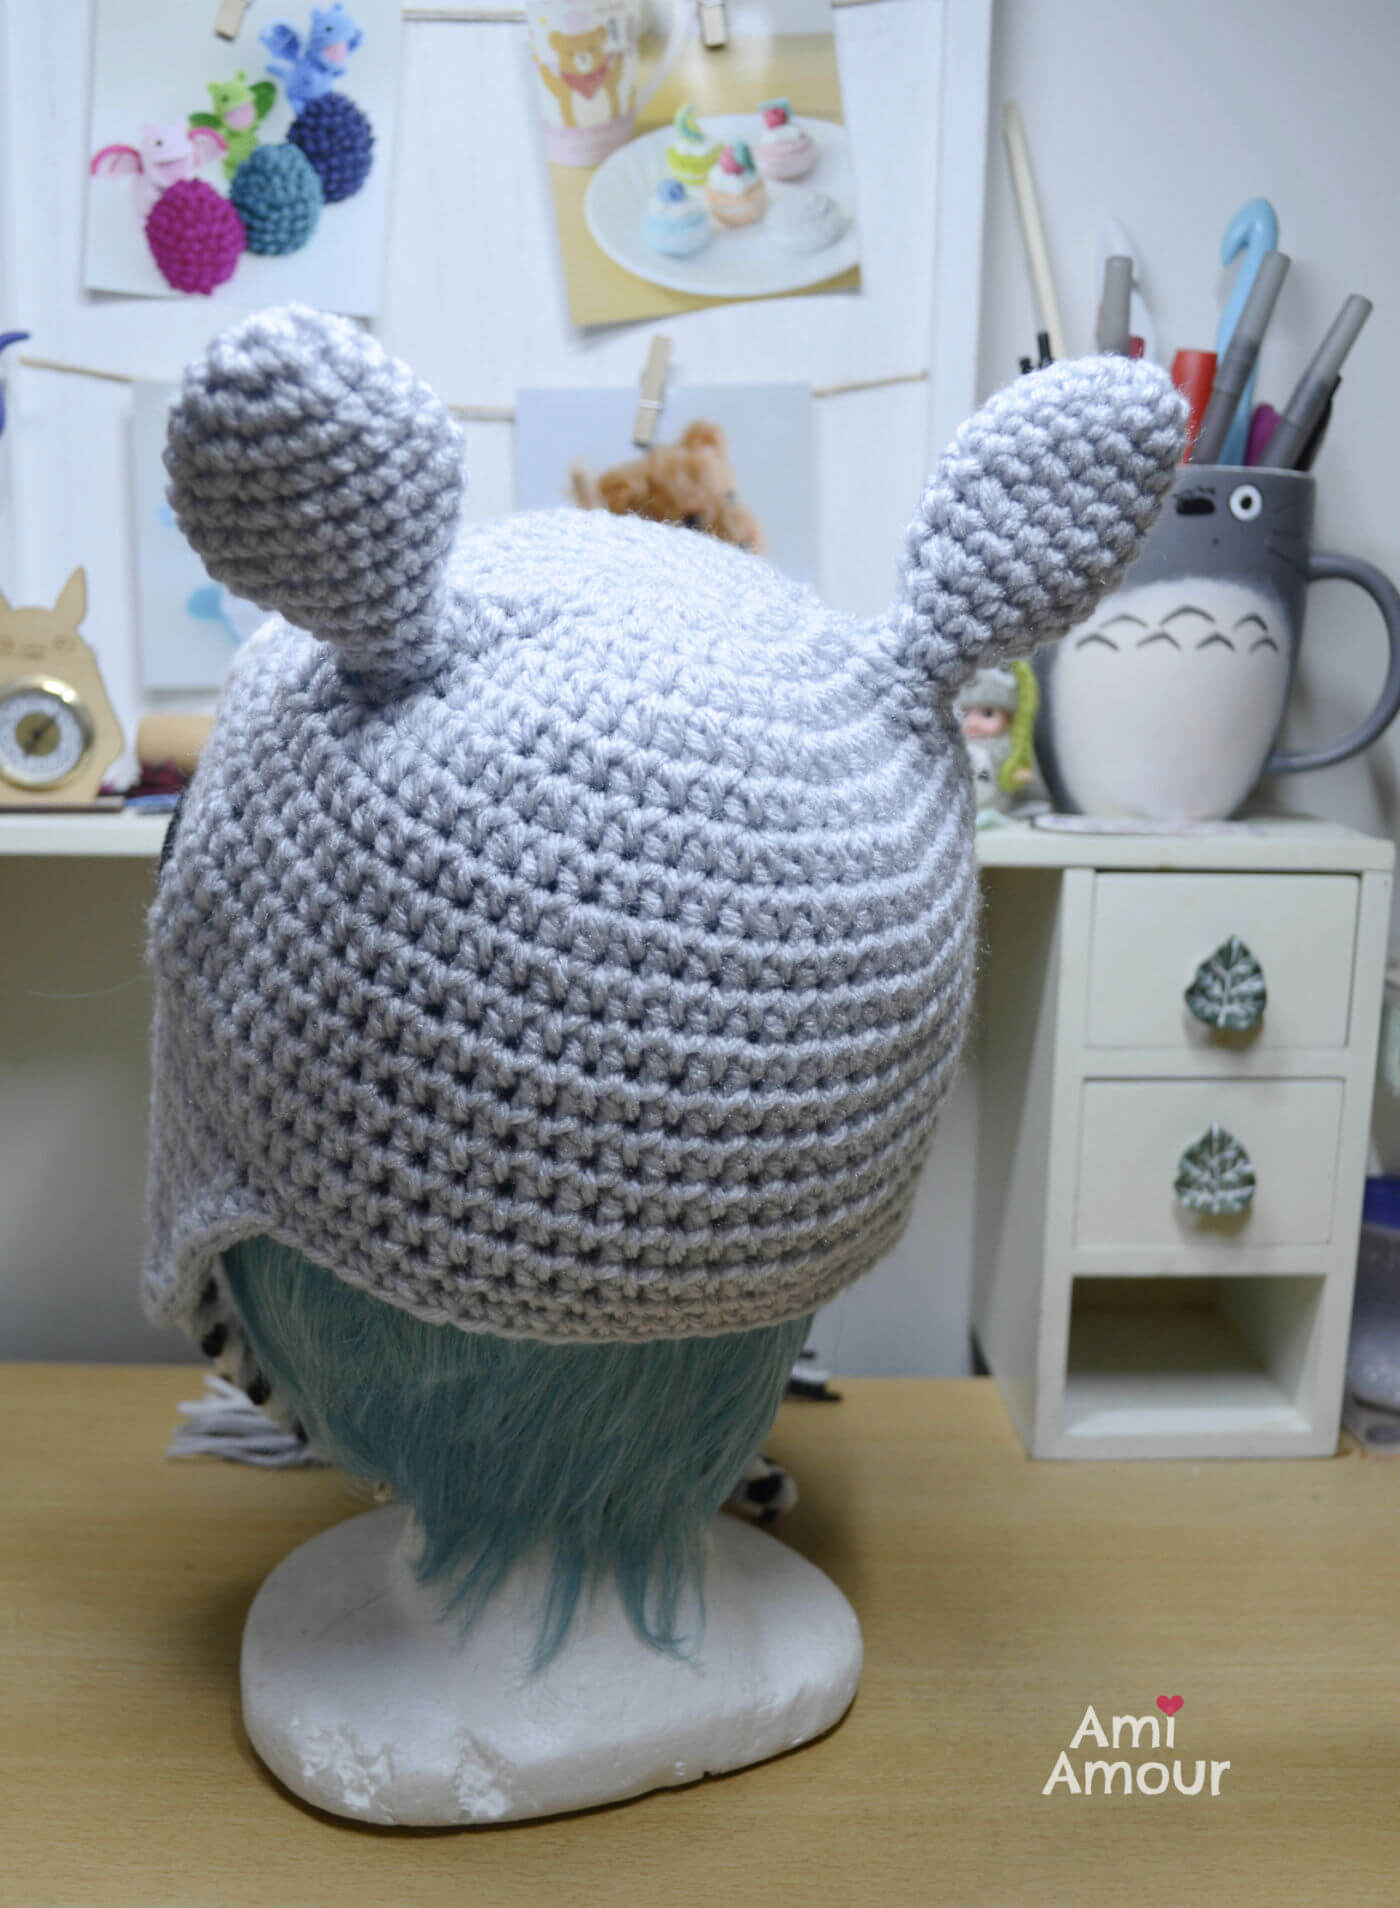
Waiting for the Catbus to arrive.
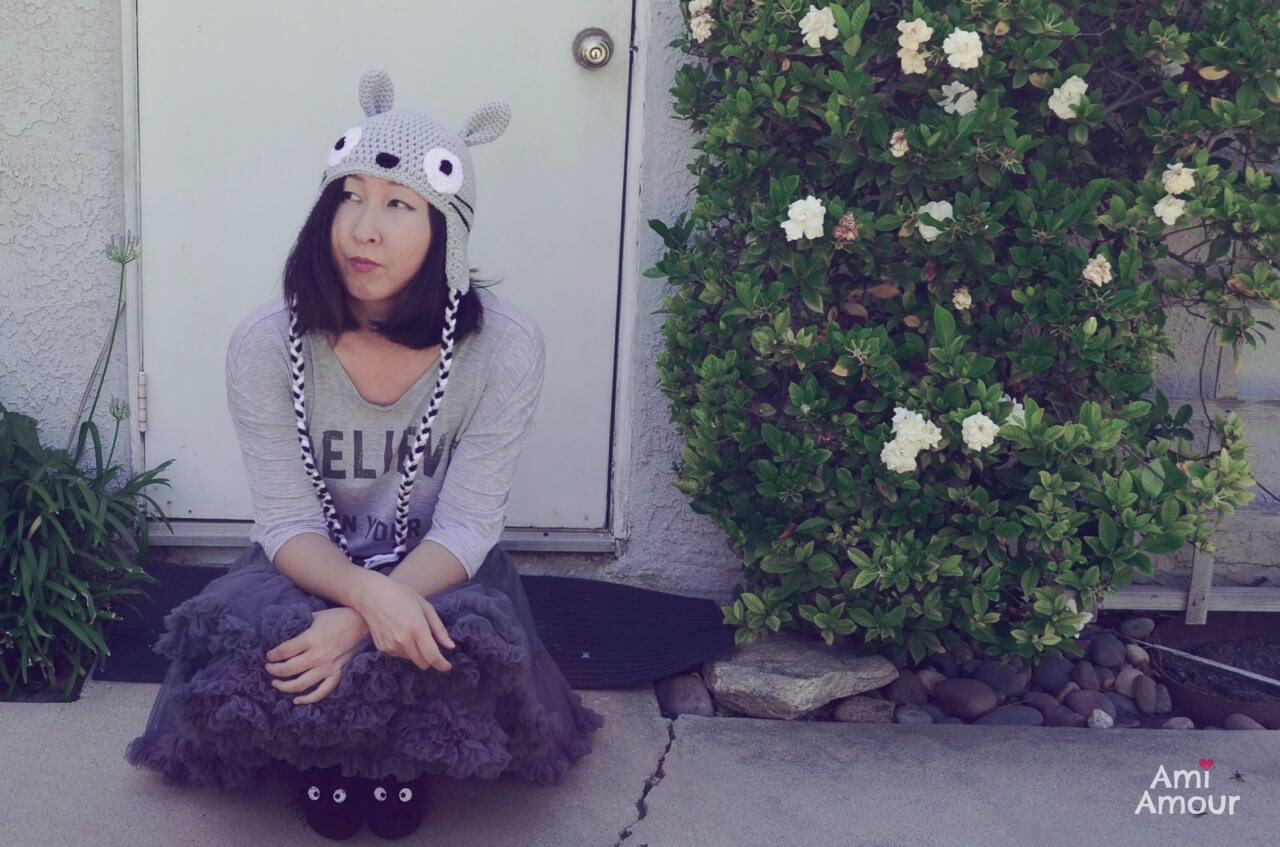
Also, did you notice the Soot Sprites peeping out? 😉 I made them using my Soot Sprite amigurumi pattern and just clipped them to the front of my shoes.
I’d love to see how your Totoro Hat project turns out. The free written pattern and video tutorial can be found below. Be sure to tag me with your project on Instagram @ami_amour.
Here are some of my other Studio Ghibli Crochet Patterns you may enjoy!
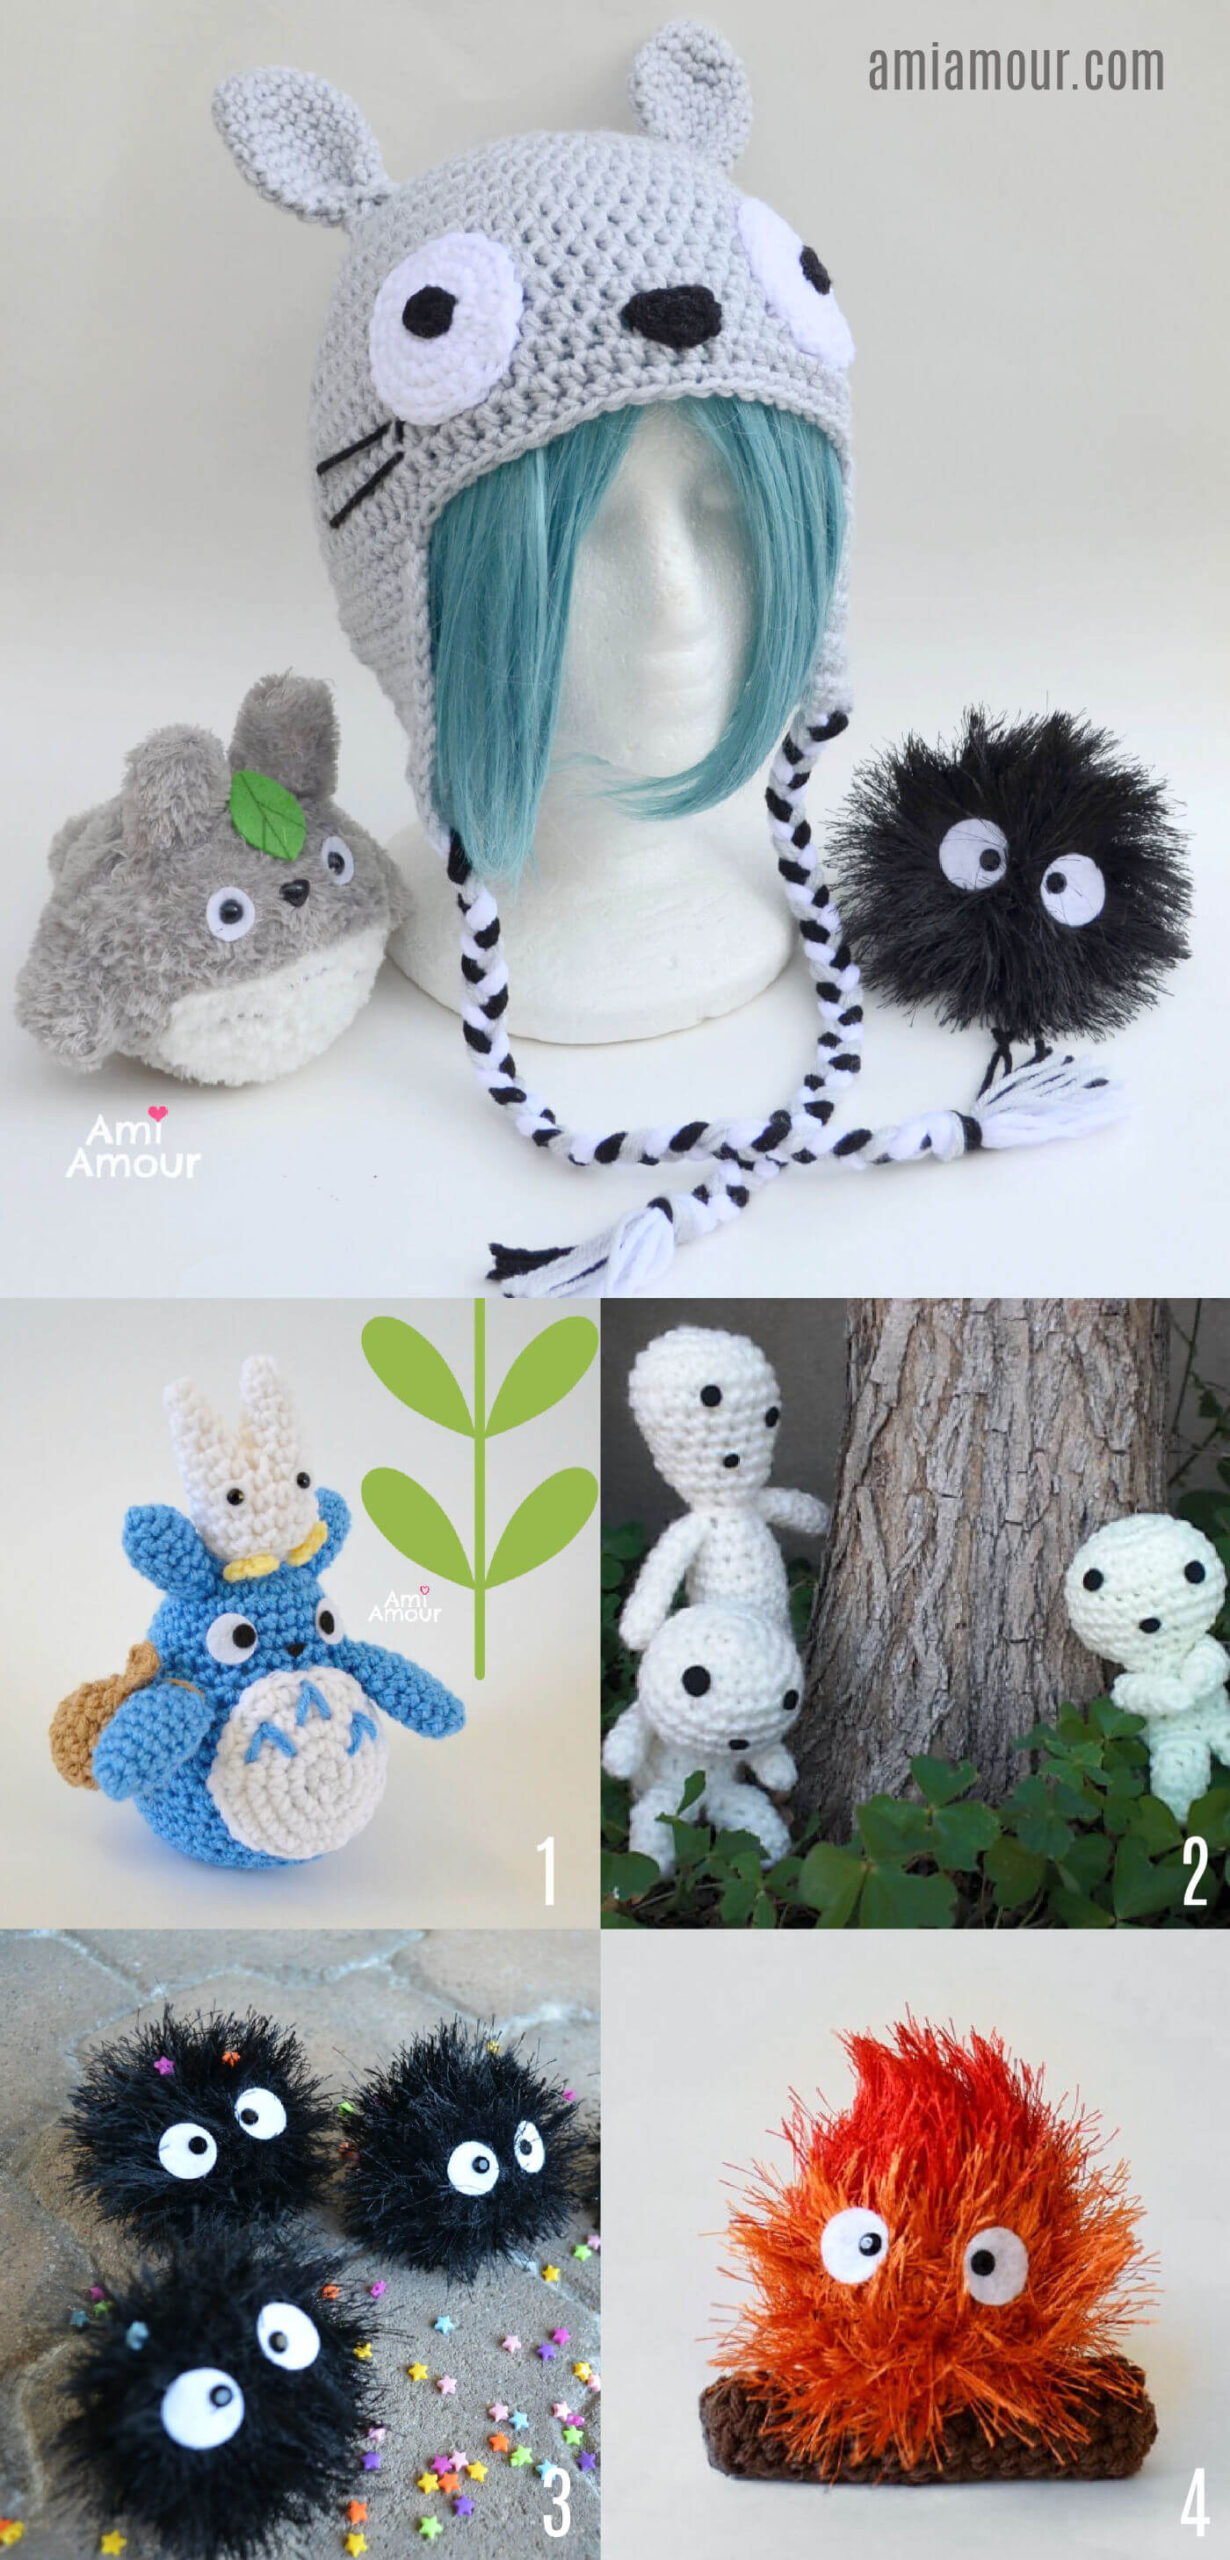
Studio Ghibli Crochet Patterns
1. Totoro Amigurumi Pattern
2. Soot Sprite Amigurumi Pattern
3. Calcifer Fire Amigurumi Pattern
4. Kodama Amigurumi Pattern
Don’t forget to subscribe to my newsletter do you don’t miss any of my patterns!
Totoro Hat Crochet Tutorial Video
Crochet along with me and see the hat in action!
Disclosure: This post contains affiliate links. This means I may receive a small commission if you decide to purchase anything by using one of these links.
LEVEL: Easy
CROCHET HOOK: 5.0mm size
YARN:
Red Heart Super Saver yarn (worsted weight, acrylic)
– 1 skein of Light Grey
– 1 skein of Black
– 1 skein of White
Note: you will need very small amounts of Black and White Yarn
NOTIONS:
– Yarn Needle
– Stitch Marker
– Scissors
ABBREVIATIONS: (American English crochet)
ch – chain
hdc – half double crochet
sc – single crochet
sc2tog – single crochet 2 stitches together (aka sc decrease)
st – stitch
Totoro Hat – Free Crochet Pattern
HAT BASE (for adult size)
With grey yarn
Round 1: 10 hdc into magic ring.
Round 2: 2 hdc in each st around – 20 hdc.
Round 3: [2 hdc in next st, hdc in next st] around – 30 hdc.
Round 4: [2 hdc in next st, hdc in next 2 st] around – 40 hdc.
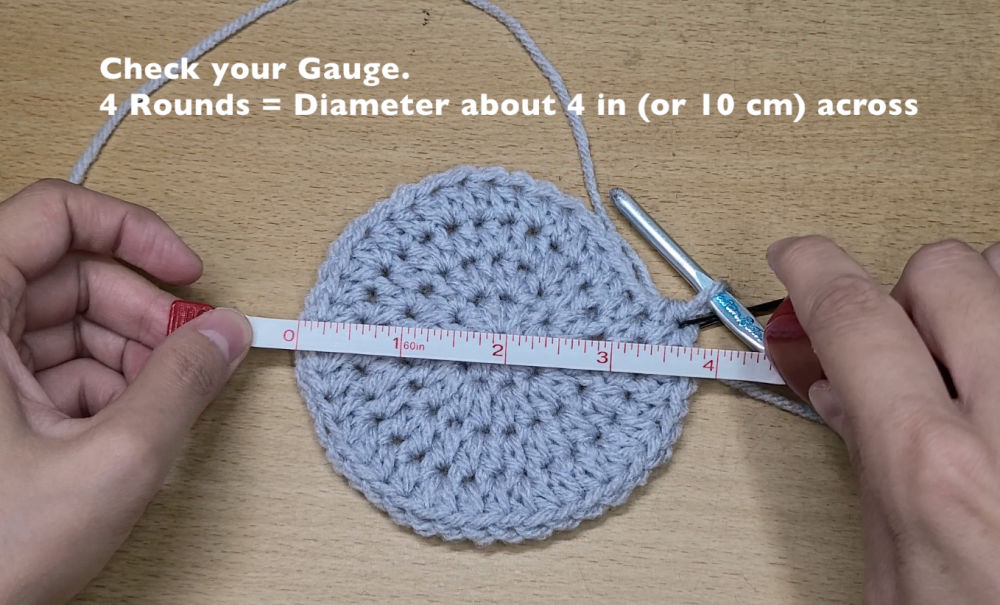
Stop to check your gauge. After 4 Rounds, it should be approximately 4in across the diameter (or 10cm across diameter). As long as you’re between 3.5in to 4in for the diameter, you’re on track to make an adult size hat.
Round 5: [2 hdc in next st, hdc in next 3 st] around – 50 hdc.
Round 6: Hdc in each st around – 50 hdc.
Round 7: [2 hdc in next st, hdc in next 4 st] around – 60 hdc.
Round 8: Hdc in each st around – 60 hdc.
Round 9: [2 hdc in next st, hdc in next 9 st] around – 66 hdc.
Round 10-11: Hdc in each st around – 66 hdc.
Round 12: [2 hdc in next 2 st, hdc in next 31 st] around – 70 hdc.
Round 13-16 – Hdc in each st around – 70 hdc.
Round 17: Sc in each st around – 70 sc.
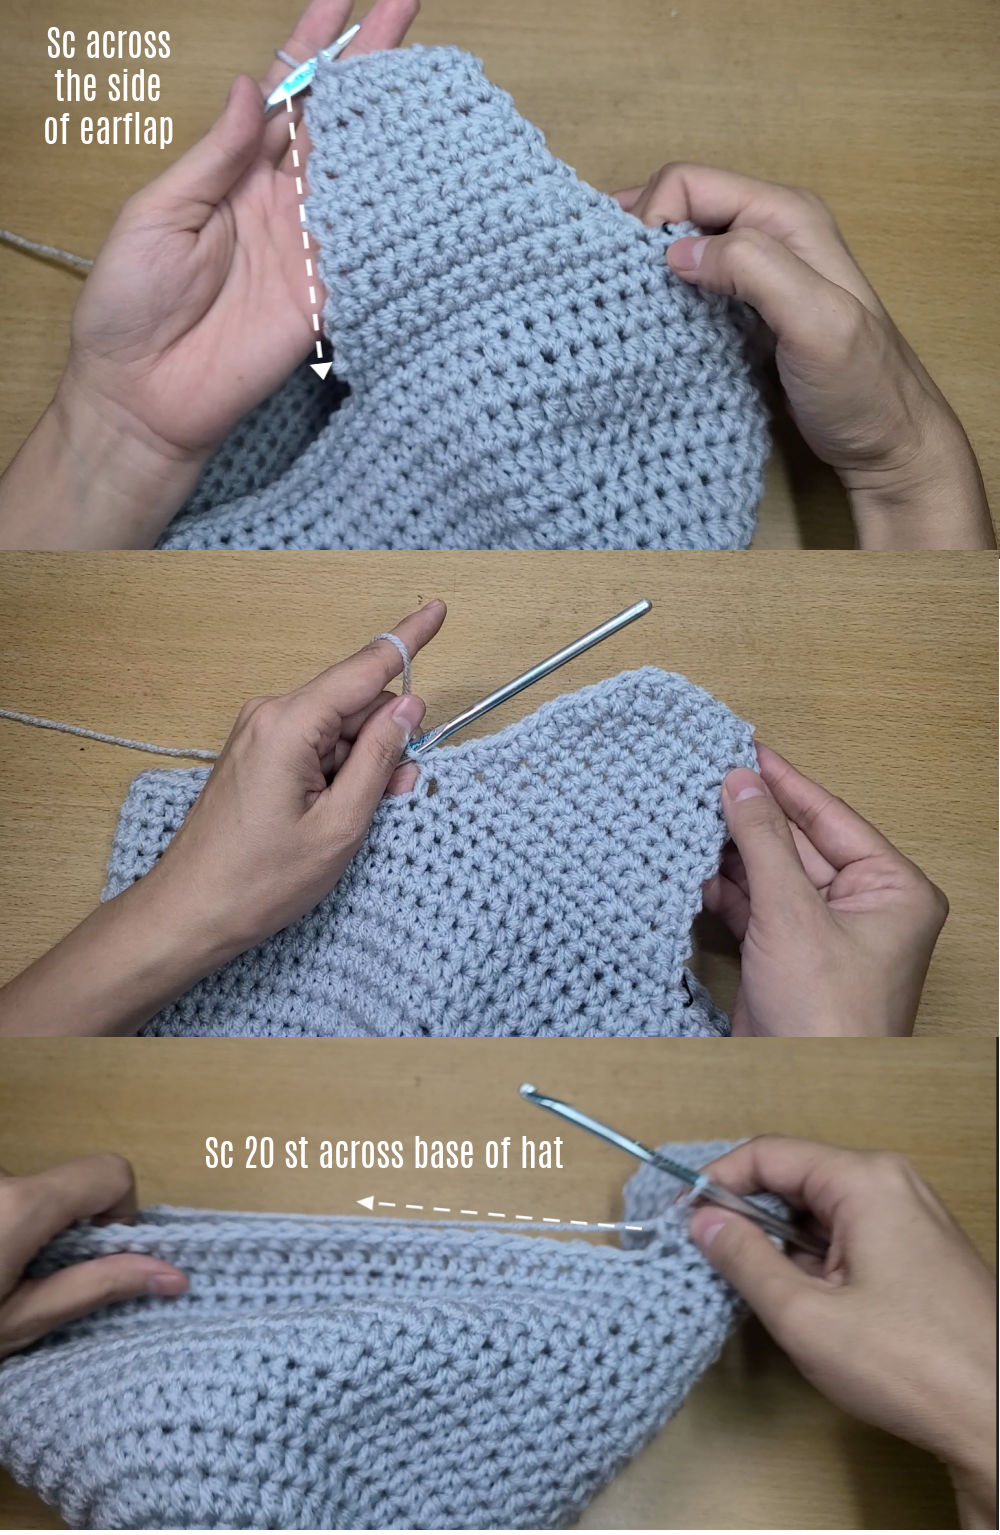
We will now work in rows for the earflap portion of the Hat. You can also follow along in this part of my video tutorial.
Row 18: Sc in next 14 st only.
Row 19: Ch 1, turn, sc in next 14 st – 14 sc.
Row 20: Ch 1, turn, sc2tog, sc in next 10 st, sc2tog – 12 sc.
Row 21: Ch 1, turn, sc in next 12 st – 12 sc.
Row 22: Ch 1, turn, sc2tog, sc in next 8 st, sc2tog – 10 sc.
Row 23-25: Ch 1, turn, sc in next 10 st – 10 sc.
Row 26: Ch 1, turn, sc2tog, sc in next 6 st, sc2tog – 8 sc.
Row 27-28: Ch 1, turn, sc in next 8 st – 8 sc.
Row 29: Ch 1, turn, sc2tog, sc in next 4 st, sc2tog – 6 sc.
Row 30: Ch 1, turn, sc2tog, sc in next 2 st, sc2tog – 4 sc.
Next, sc up the curve of the Earflap until you reach the main hat base area again. Then, sc across the hat base in next 20 st.
Repeat Row 18-30 again to create the 2nd Earflap. Next sc up the curve of the 2nd Earflap. Sl st to next st and fasten off, leaving a long tail.
EARS (make 2)
With gray yarn
Round 1: 6 sc into magic ring.
Round 2: 2 sc in each st around – 12 sc.
Round 3: Sc in each st around – 12 sc.
Round 4: [2 sc in next st, sc in next 5 st] around – 14 sc.
Round 5: Sc in each st around.
Round 6: [2 sc in next st, sc in next 6 st] around – 16 sc.
Round 7: Sc in each st around.
Round 8: [Sc2tog, sc in next 6 st] around – 14 sc.
Round 9: Sc in each st around.
Round 10: [Sc2tog, sc in next 5 st] around – 12 sc.
Round 11-12: Sc in each st around – 12 sc.
Fasten off, leaving a long tail.
EYES (make 2)
With white yarn
Round 1: 6 sc into magic ring.
Round 2: 2 sc in each st around – 12 sc.
Round 3: [2 sc in next st, sc in next st] around – 18 sc.
Rounnd 4: [2 sc in next st, sc in next 5 st] around – 21 sc.
Fasten off, leaving a long tail.
PUPILS (make 2)
With black yarn
Round 1: 4 sc into magic ring. Join to first st with sl st.
Fasten off, leaving a very long tail. (Note: you will want an extra long tail because later we will be using this tail end to embroider the Totoro whiskers for the hat)
NOSE
With black yarn
Ch 4, sc into 2nd ch from hook, 2 hdc in next st, sc in next st, sl st in same st to fasten off.
Fasten off, leaving a long tail.
TOTORO HAT ASSEMBLY
You can check out how I assemble my Totoro hat in my crochet video tutorial here.
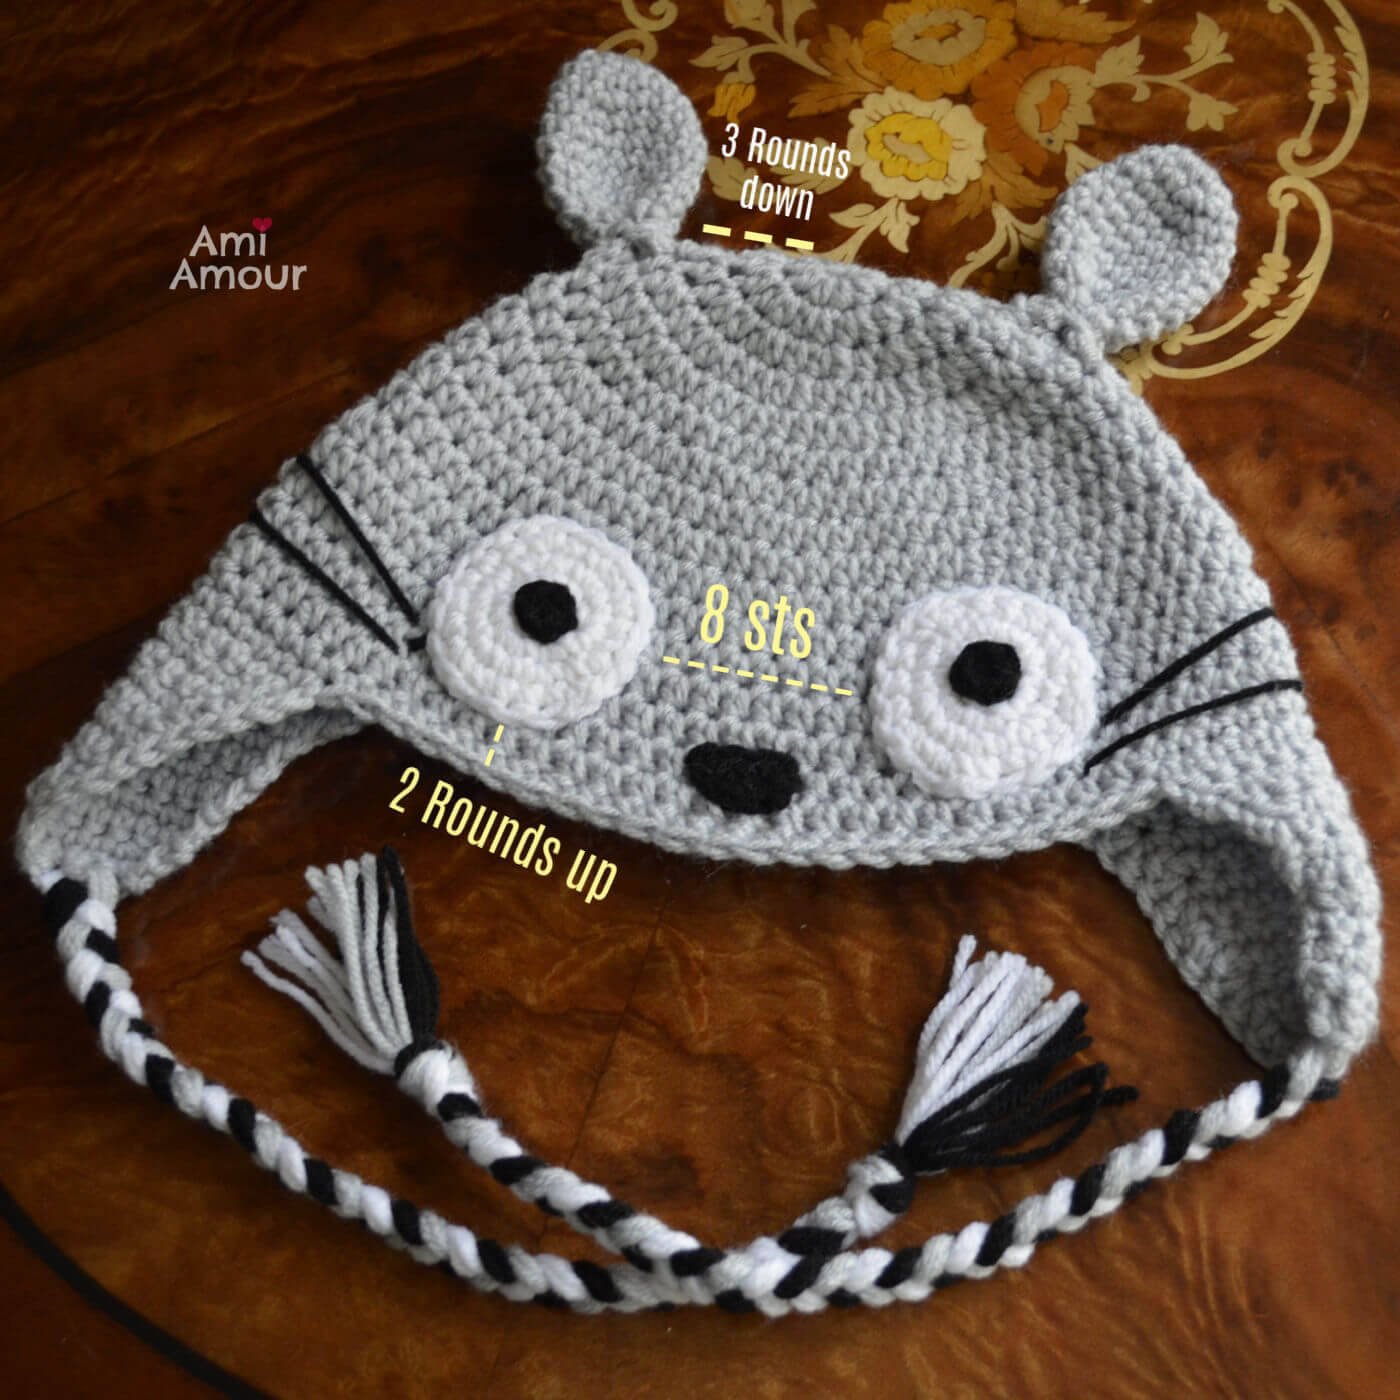
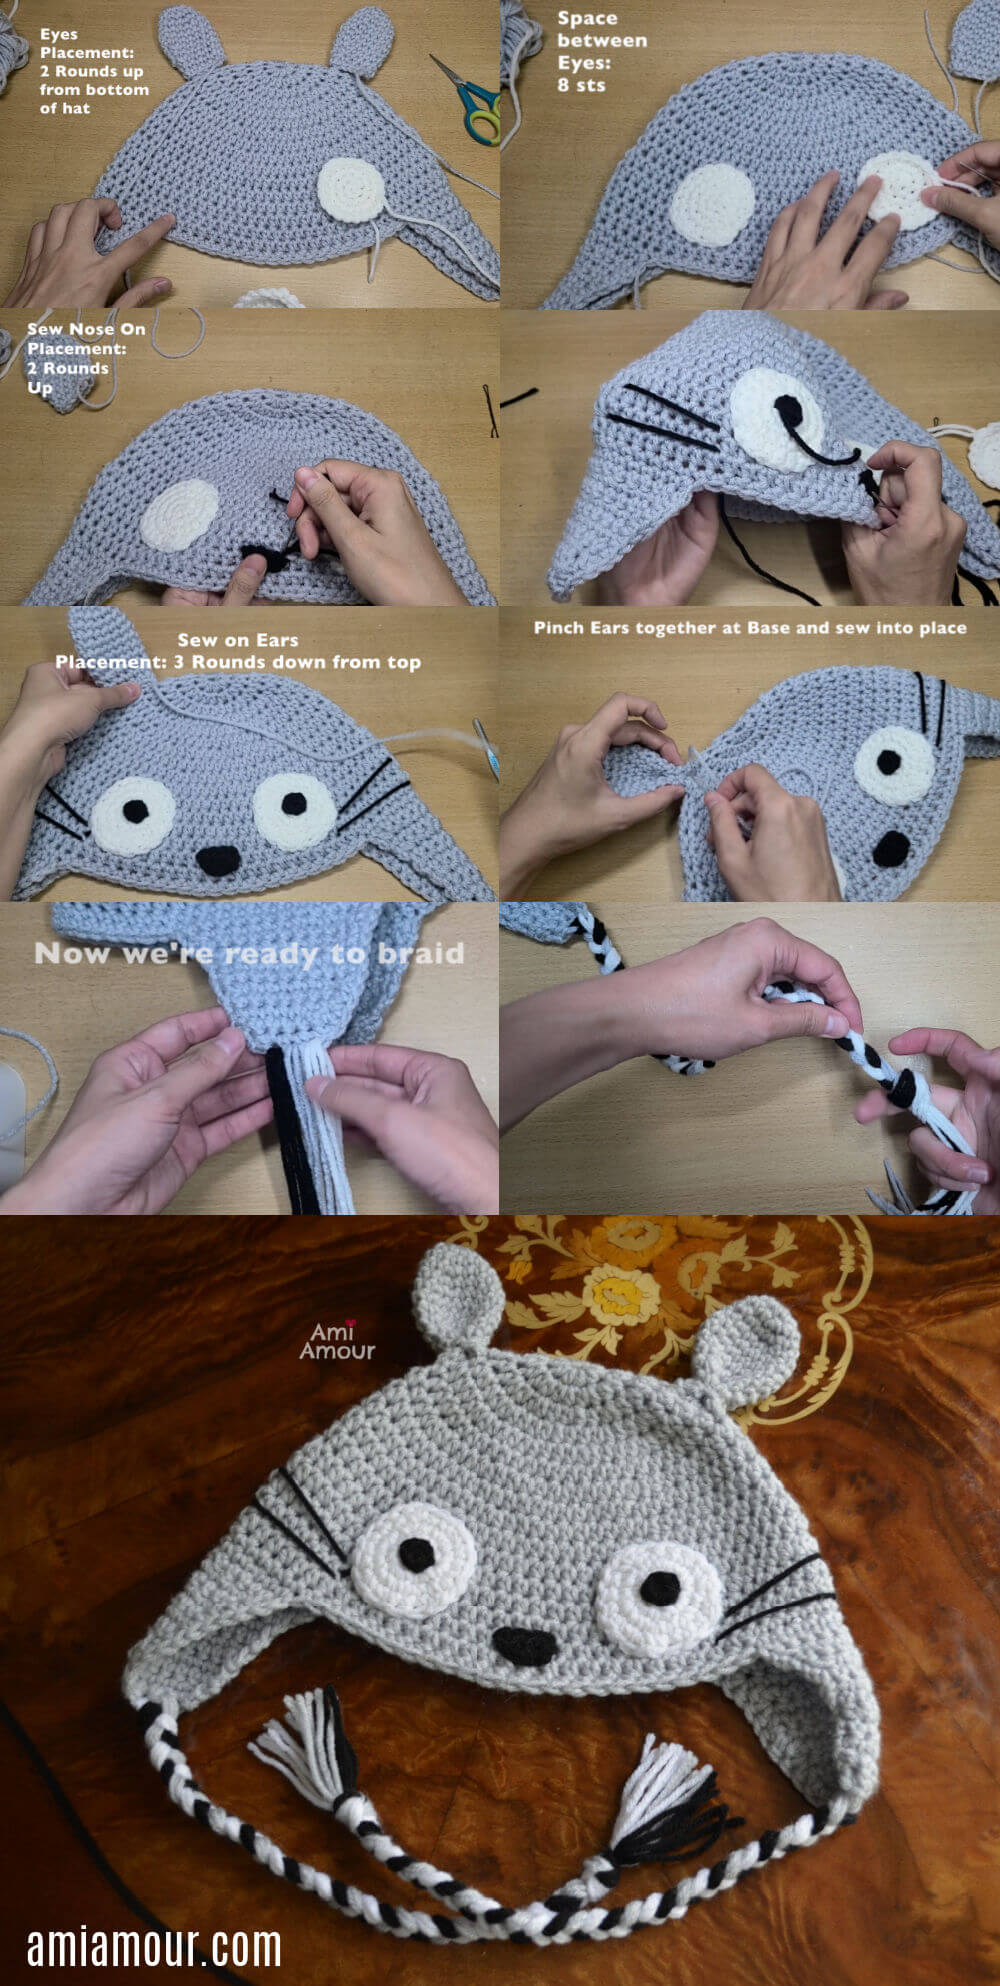
1. Sew Eyes onto the Hat. Placement should be 2 rounds above the bottom of the Hat. The eyes should be sewn and placed 8 sts apart from each other.
2. Sew the nose in middle space between the two eyes. Place 2 rows up from the bottom of the hat. The bottom of the nose is parallel to the bottom of the white eyes.
3. Sew the black pupils in the middle of the White Eyes. Embroider the whiskers on the right using the black yarn from the right pupil. Do the same for the whiskers on the left, using the yarn from the left pupil. Secure the black yarn by tying a knot to a stitch on the inside of the hat.
4. Placement of the Ears: Count 3 rounds down from the top of the hat. Sew parallel to the curve of the hat. Then, pinch the base of the ear and sew together. This will help the ear stand up.
5. Make sure you sew in and hide all the loose ends of the yarn.
6. For the braided cord portion. You will cut 50in long strands of yarn. Here is how many and what length you need in each color:
– 6 strands in the color Grey: each strand is 50in long (127 cm)
– 6 strands in the color Black: each strand is 50in long (127 cm)
– 6 strands in the color White: each strand is 50 in long (127 cm)
7. Go to the Earflap. Now in the center st of the last row on the Earflap, you will pull through 3 strands of grey yarn. Pull through until both ends are equal on both sides. To the left stitch of the earflap, you will pull through 3 strands of black yarn and pull through until they are both equal on both sides. To the right stitch of the earflap, you will pull through 3 strands of white yarn and pull through until both are equal on both sides. Now you are ready to braid. I like to do about 65 crossovers. When you are near the end of the strands, you will go ahead a tie a knot. Cut your ends to make even. Repeat on other 2nd Earflap.
8. You’ve finished your Totoro Hat! Make sure to tag me with your projects on Instagram @ami_amour, I’d love to see!
Crochet Totoro Hat Pattern
Materials
- Red Heart Super Saver Yarn Yarn (worsted weight, acrylic)
- 1 skein of Light Grey Yarn
- 1 skein of Black Yarn
- 1 skein of White Yarn
Tools
- Crochet Hook - 5.0mm size
- Yarn Needle
- Stitch Marker
- Scissors
Instructions
HAT BASE (adult size hat)
With grey yarn
Round 1: 10 hdc into magic ring.
Round 2: 2 hdc in each st around - 20 hdc.
Round 3: [2 hdc in next st, hdc in next st] around - 30 hdc.
Round 4: [2 hdc in next st, hdc in next 2 st] around - 40 hdc.
Stop to check your gauge. After 4 Rounds, it should be approximately 4in across the diameter (or 10cm across diameter). As long as you're between 3.5in to 4in for the diameter, you're on track to make an adult size hat.
Round 5: [2 hdc in next st, hdc in next 3 st] around - 50 hdc.
Round 6: Hdc in each st around - 50 hdc.
Round 7: [2 hdc in next st, hdc in next 4 st] around - 60 hdc.
Round 8: Hdc in each st around - 60 hdc.
Round 9: [2 hdc in next st, hdc in next 9 st] around - 66 hdc.
Round 10-11: Hdc in each st around - 66 hdc.
Round 12: [2 hdc in next 2 st, hdc in next 31 st] around - 70 hdc.
Round 13-16: Hdc in each st around - 70 hdc.
Round 17: Sc in each st around - 70 sc.
We will now work in rows for the earflap portion of the Hat. You can also follow in this part of my video tutorial on my YouTube Channel.
Row 18: Sc in next 14 st only.
Row 19: Ch 1, turn sc in next 14 st - 14 sc.
Row 20: Ch 1, turn, sc2tog, sc in next 10 st, sc2tog - 12 sc.
Row 21: Ch 1, turn, sc in next 12 st - 12 sc.
Row 22: Ch 1, turn, sc2tog, sc in next 8 st, sc2tog - 10 sc.
Row 23-25: Ch 1, turn, sc in next 10 st - 10 sc.
Row 26: Ch 1, turn, sc2tog, sc in next 6 st, sc2tog - 8 sc.
Row 27-28: Ch 1, turn, sc in next 8 st - 8 sc.
Row 29: Ch 1, turn, sc2tog, sc in next 4 st, sc2tog - 6 sc.
Row 30: Ch 1, turn, sc2tog, sc in next 2 st, sc2tog - 4 sc.
Next, sc up the curve of the Earflap until you reach the main hat base area again. Then, sc across the hat base in the next 20 st.
Repeat Row 18-30 again to create the 2nd Earflap. Next sc up the curve of the 2nd Earflap. Sl st to next st and fasten off, leaving a long tail.
EARS (make 2)
With grey yarn
Round 1: 6 sc into magic ring.
Round 2: 2 sc in each st around - 12 sc.
Round 3: Sc in each st around - 12 sc.
Round 4: [2 sc in next st, sc in next 5 st[ around - 14 sc.
Round 5: Sc in each st around.
Round 6: [2 sc in next st, sc in next 6 st] around - 16 sc.
Round 7: Sc in each st around.
Round 8: [Sc2tog, sc in next 6 st] around - 14 sc.
Round 9: Sc in each st around.
Round 10: [Sc2tog, sc in next 5 st] around - 12 sc.
Round 11-12: Sc in each st around - 12 sc.
Fasten off, leaving along tail.
EYES (make 2)
With white yarn
Round 1: 6 sc into magic ring.
Round 2: 2 sc in each st around - 12 sc.
Round 3: [2 sc in next st, sc in next st] around - 18 sc.
Round 4: [2 sc in next st, sc in next 5 st] around - 21 sc.
Fasten off, leaving a long tail.
PUPILS (make 2)
WIth black yarn
Round 1: 4 sc into magic ring. Join to first st with sl st.
Fasten off, leaving a very long tail. (Note: you will want an extra long tail because later we will be using this tail end to embroider the Totoro whiskers for the hat.)
NOSE
With black yarn, ch 4, sc into 2nd ch from hook, 2 hdc in next st, sc in next st, sl st in same st to fasten off, leaving a long tail.
TOTORO HAT ASSEMBLY:
1. Sew Eyes onto the Hat. Placement should be 2 rounds above the bottom of the Hat. The eyes should be sewn and placed 8 sts apart from each other.
2. Sew the nose in the middle space between the two eyes. Place 2 rows up from the bottom of the hat. The bottom of the nose is parallel to the bottom of the white eyes.
3. Sew the black pupils in the middle of the White Eyes. Embroider the whiskers on the right using the black yarn from the right pupil. Do the same for the whiskers on the left, using the yarn from the left pupil. Secure the black yarn by trying a knot to a stitch on the inside of the hat.
4. Placement of the Ears: Count 3 rounds down from the top of the Hat. Sew parallel to the curve of the Hat. Then, pinch the base of the Ear and sew together. This will help the Ears stand up.
5. Make sure to sew and hide all ends.
6. For the braided cord portion, you will cut long strands of yarn all measuring about 50in long. Here is how many you will need in each color.
- 6 strands in the color Grey: each strand is 50in long (127 cm)
- 6 strands in the color Black: each strand is 50 in long (127 cm)
- 6 strands in the color White: each strand is 50 in long (127 cm)
7. Go to the Earflap. Now in the center st of the last row on the Earflap, you will pull through 3 strands of grey yarn. Pull through until both ends are equal on both sides. To the left stitch of the earflap, you will pull through 3 strands of black yarn and pull through until they are both equal on both sides. To the right stitch of the earflap, you will pull through 3 strands of white yarn and pull through until both are equal on both sides. Now you are ready to braid. I like to do about 65 crossovers. When you are near the end of the strands, you will go ahead and tie a knot to finish off the braid. Cut your ends to make even. Repeat on the 2nd Earflap.
8. You've finished your Crochet Totoro Hat! Make sure you tag me with your projects on Instagram @ami_amour. I'd love to see!


2 Comments
LisSandra
February 17, 2024 at 1:17 pmI just wanted to let you know there is a typo in the printable version in round 12. It should be 2 hdc in next 2 st, hdc in next 31 st] but the printable version says hdc in next 3 st.
The website version has it correct though! That’s as far as I’ve gotten though. Thanks for the pattern!
Ami Amour
February 17, 2024 at 1:32 pmThanks for catching that. I’ve corrected it now!