
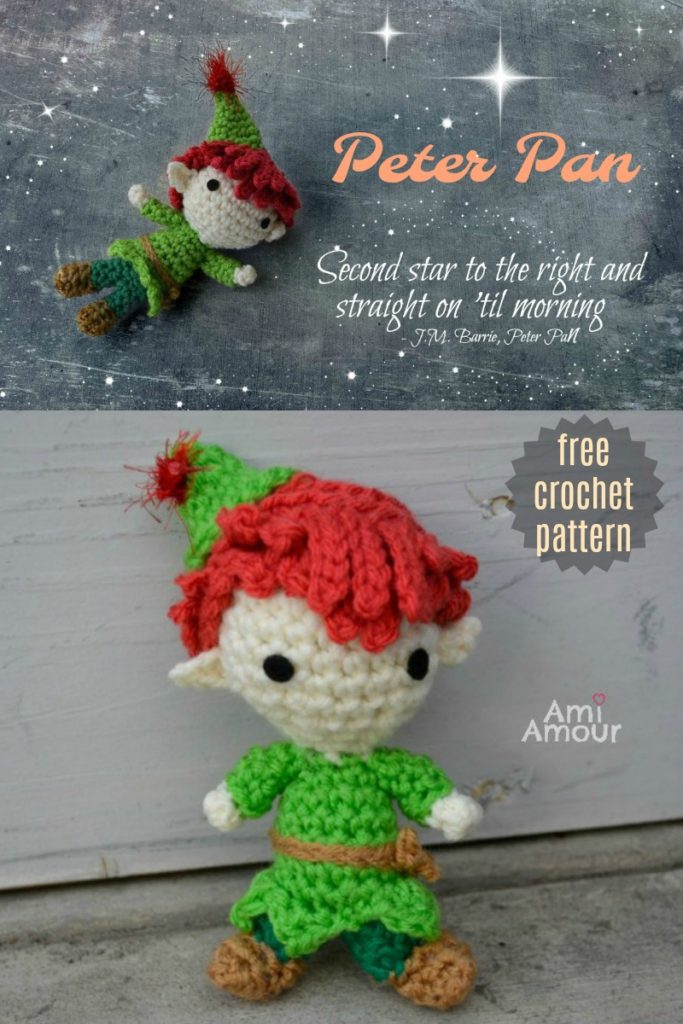
Hey guys, thought I’d start off with the year with my latest free amigurumi crochet pattern, the one and only Peter Pan! It’s only fitting as we grow a year older to turn to the fantasy of Peter Pan, the evergreen boy, the Boy Who Never Grew Up.
One of the best and memorable lines to ever begin a book is in J.M. Barrie’s book Peter and Wendy: “All children, except one, grow up.”

And I must confess, as an amigurumi maker and someone who still loves dolls and plushes, I feel a kinship to Peter Pan, as in many ways I never grew up also. But I think it’s a good thing. Years may come and go but well, a love of something, wonder, curiosity and imagination always keeps the heart young!
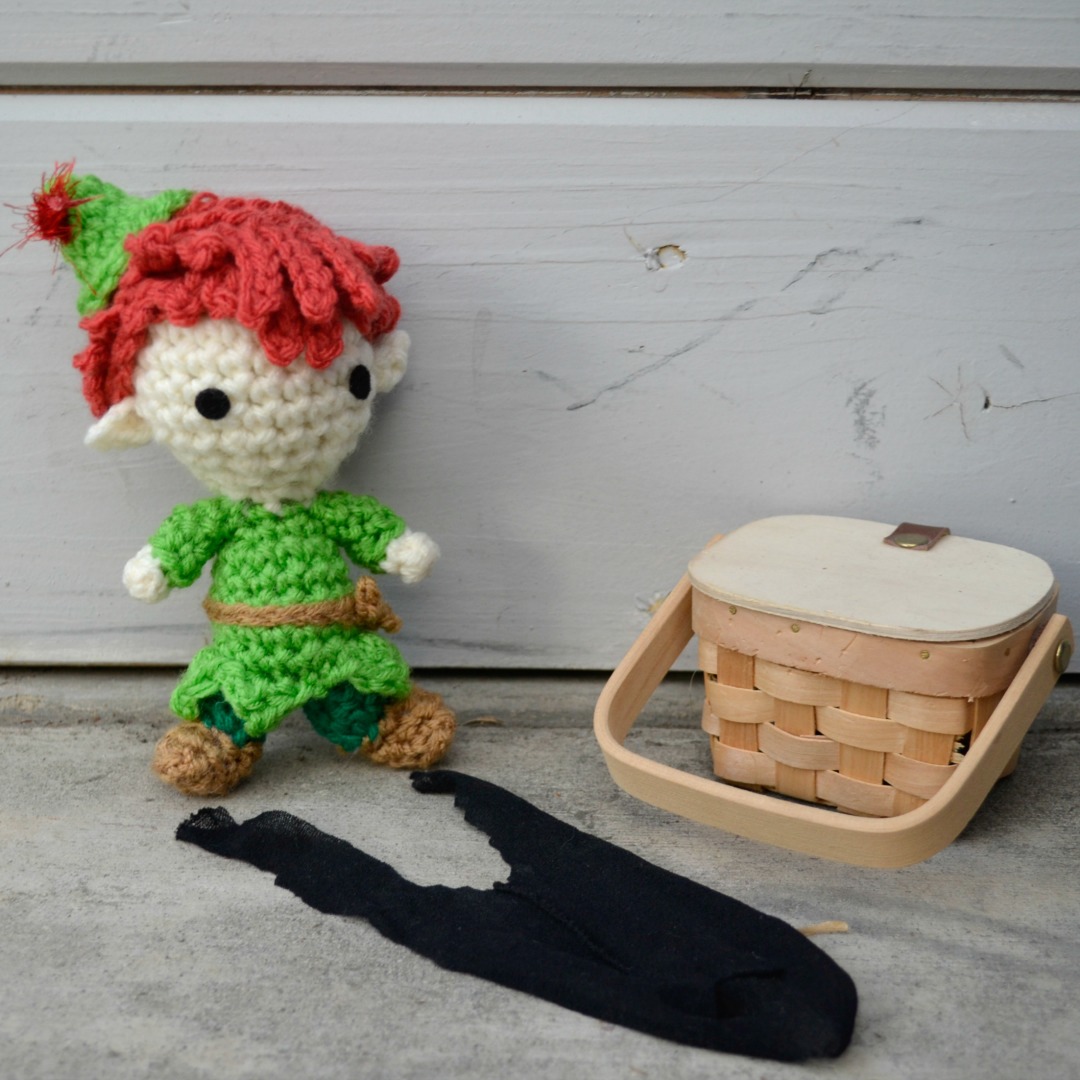
So I hope you guys will enjoy this Peter Pan amigurumi. I tried to capture the whimsy of this fairy boy. This Peter Pan crochet pattern design details include a jaunty cap that lies atop his head, leaf details for his clothing, fairy ears, and a mop of ginger hair.
He’s fun and fast to crochet and you’ll be sure to have an adventurous time in Neverland!
One of my favorite scenes from the book is when he tries to get his shadow to stick back onto him.
So sprinkle on some fairy dust, second star to the right and straight on ’til Morning, let’s fly off to Neverland! I hope to share a lot more patterns this year, so be sure to subscribe, so you don’t miss them!
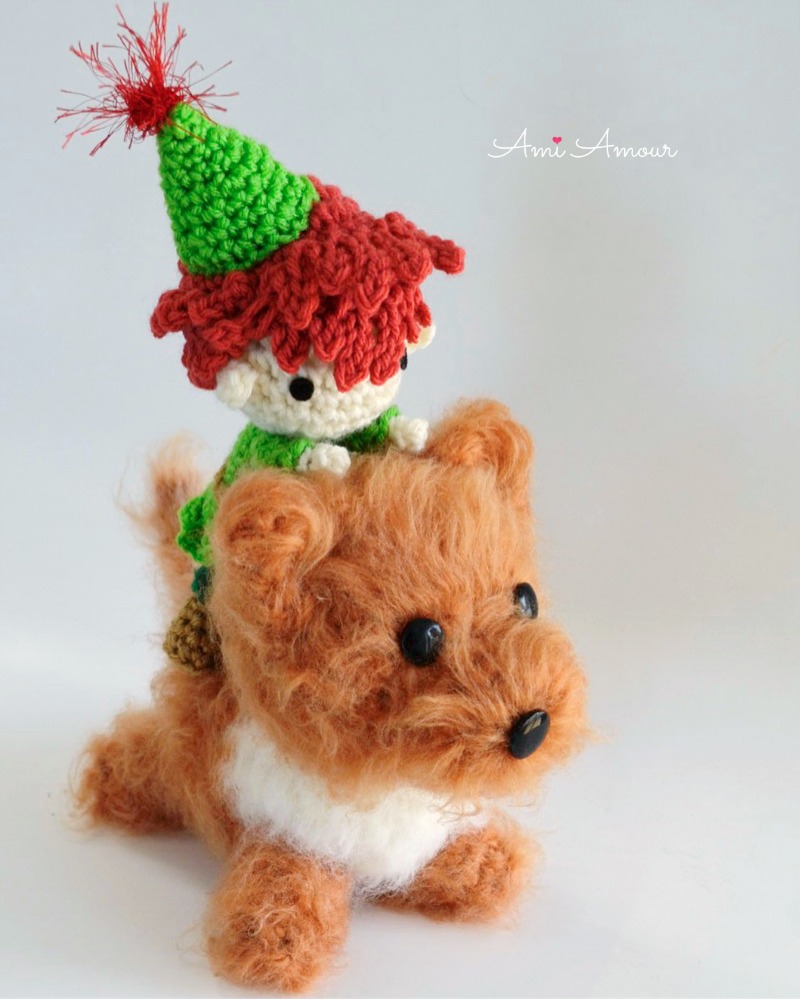
If you enjoy this pattern, you may also like my Brushed Dog Amigurumi Pattern and Tutorial. The dog goes really well with my Peter Pan amigurumi. You can also check out all my other Free Crochet Patterns.
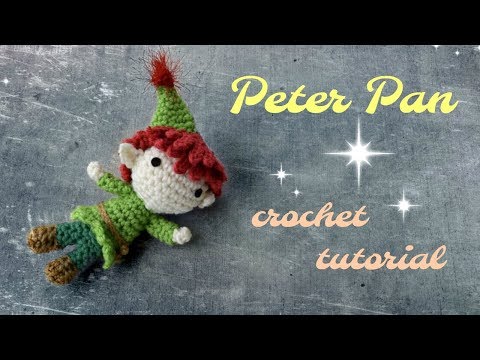
I’ve also created a Peter Pan amigurumi video tutorial so you see Peter Pan in action and crochet along with me from beginning to end if you want. It’s also useful to visually see some of slightly more complicated parts of the pattern, such as the hair.
Peter Pan Crochet Tutorial Video
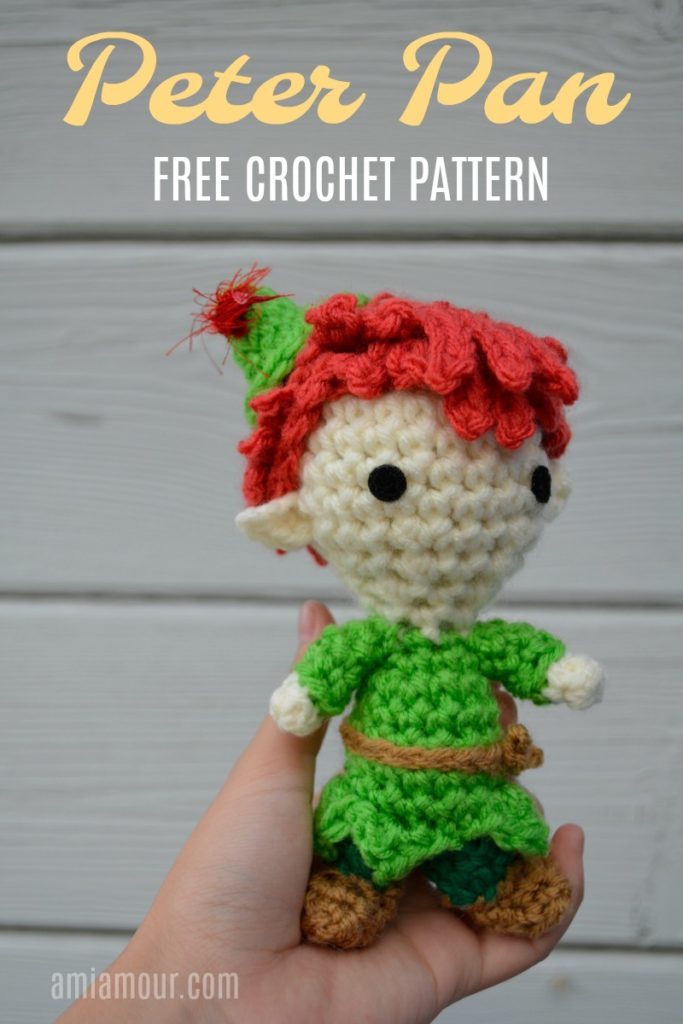
Peter Pan Amigurumi Crochet Pattern
SIZE: Approximately 7in/18cm tall
HOOK SIZE: 5.0mm
YARN:
Red Heart Super Saver
– Spring Green
– Aran
– Flamingo
– Warm Brown
– Paddy Green
Lionbrand Fun Fur – red
NOTIONS:
Poly-fil Stuffing
Black Felt (for eyes)
Yarn Needle
Stitch Marker
Fabri-tac Glue
Scissors
HEAD AND BODY
Round 1: With aran yarn, 6 sc into magic ring.
Round 2: 2 sc in each st around – 12 sc.
Round 3: [2 sc in next st, sc in next st] around – 18 sc.
Round 4: [2 sc in next st, sc in next 2 st] around – 24 sc.
Round 5-8: Sc in each st around.
Round 9: [Sc2tog, sc in next 2 st] around – 18 sc.
Round 10: [Sc2tog, sc in next st] around – 12 sc.
Round 11: [Sc2tog, sc in next st] around – 8 sc.
Round 12: With light green yarn, sc in each st around – 8 sc.
Round 13: [2 sc in next st, sc in next st] around – 12 sc.
Round 14: Sc in each st around.
Round 15: [2 sc in next st, sc in next 3 st] around – 15 sc.
Round 16: Sc in each st around.
Round 17: [2 sc in next st, sc in next 4 st] around – 18 sc.
Round 18: Sc in each st around.
Round 19: In Back Loop only, sc in each st around.
Round 20: [Sc2tog, sc in next st] around – 12 sc.
Round 21: Sc2tog around – 6 sc.
Fasten off, leaving a long tail. Stuff and sew closed
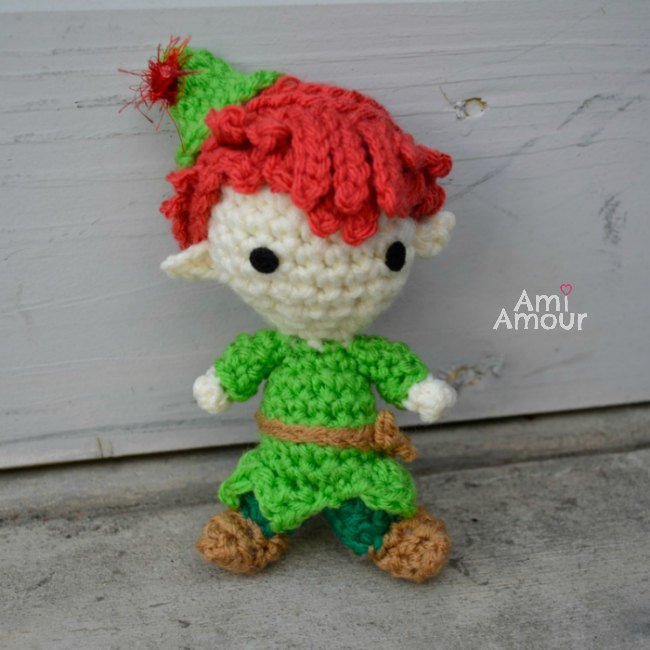
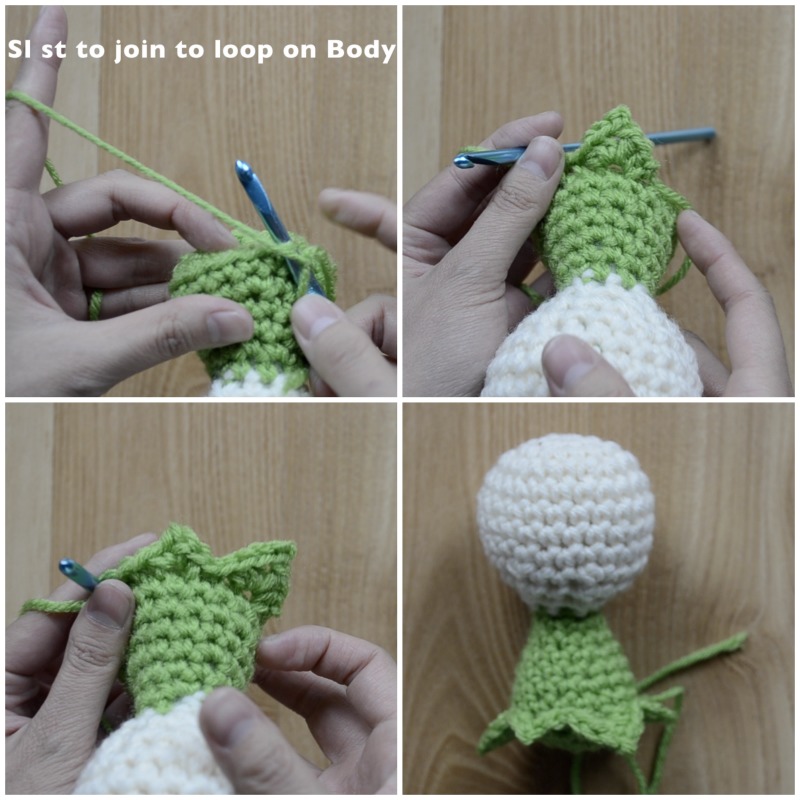
LEAF CLOTHING
With light green yarn, sl st into the bottom ridge (Front loop of Round 19 on Body) to join back onto Body.
You can also follow along in this video tutorial for the leaves.
Round 1: ([2 hdc in next st, ch 2, sl st into first ch, 2 hdc in same st, sl st in next 2 st], [sc in next st, ch 2, sl st in first ch, sc in same st, sl st in next 2 st]) repeat around.
Note: You should have 6 leaves in total, alternating between a bigger leaf and a smaller leaf.
Fasten off, leaving a tail. Hide all ends.
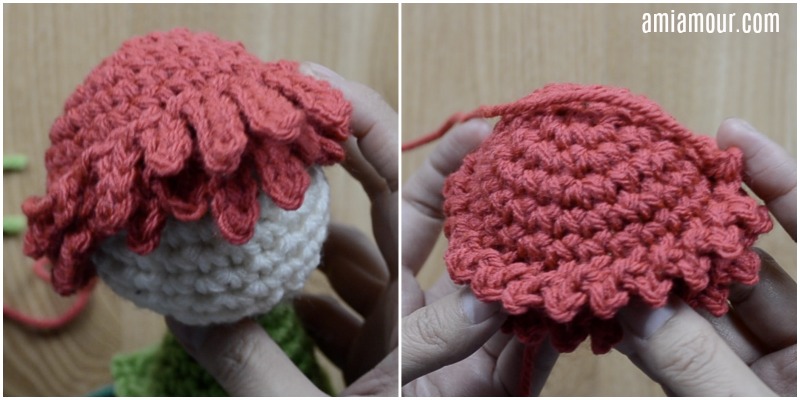
HAIR
You can also follow along in this video tutorial for the hair.
Round 1: With light red yarn, 6 sc into magic ring.
Round 2: 2 sc in each st around – 12 sc.
Round 3: [2 sc in next st, sc in next st] around – 18 sc.
Round 4: [2 sc in next st, sc in next 2 st] around – 24 sc.
Round 5-6: Sc in each st around.
Round 7-8: In Back Loop only, sc in each st around.
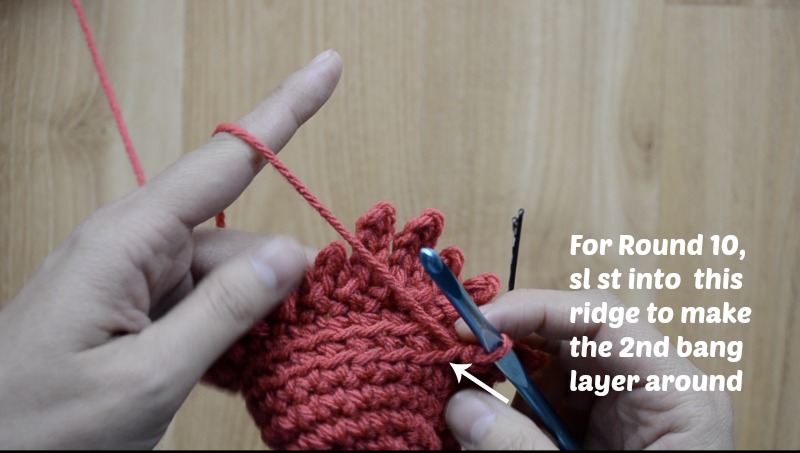
Round 9: Sl st in next st, [ch 3, sl st back in 2 ch, sl st in next st] 2 times, [ch 5, sl st back in 4 ch, sl st in next st] 2 times, [ch 3, sl st in next 2 ch, sl st in next st] 17 times.
Round 10: Sl st in next st, ch 1, sl st into 2nd ridge up on hair, (ch 4, sl st in next 3 ch, sl st in next st] 2 times, [ch 6, sl st in next 5 st, sl st in next st] 3 times, [ch 4, sl st in next 3 ch, sl st in next st] 2 times, [ch 2, sl st in next ch, sl st in next st] around.
CAP
With green yarn
Round 1: 4 sc in magic ring.
Round 2: Sc in each st around.
Round 3: [2 sc in next st, sc in next st] around – 6 sc.
Round 4: [2 sc in next st, sc in next 2 st] around – 8 sc.
Round 5: [2 sc in next st, sc in next 3 st] around – 10 sc.
Round 6: [2 sc in next st, sc in next 4 st] around – 12 sc.
Round 7: Sc in each st around.
Round 8: [2 sc in next st, sc in next 3 st] around – 15 sc.
Fasten off, leaving a long tail.
FEATHER
With red fun fur yarn (or you can just also just use acrylic worsted weight yarn),
Ch 2, 6 sc into 2nd ch from hook
Fasten off, leaving a long tail.
Note: If you prefer not to use fun fur, you can also just use regular red worsted weight acrylic yarn.
For this, you can instead do Ch 4, sc in 2nd ch from hook, 2 hdc in next ch, sl st in last ch. Fasten off, leaving a long tail.
ARM
With light green yarn
Round 1: 6 sc in magic ring. Sl st to join to first sc.
Round 2: In back loop only, sc in each st around.
Round 3-4: Sc in each st around.
Round 5: [Sc2tog, sc in next st] around – 4 sc.
Fasten off, leaving a long tail.
HAND
With aran yarn
Round 1: 4 sc into magic ring. Sl st to join to first sc.
Round 2: Sc in each st around.
Fasten off, leaving a long tail.
EAR
With aran yarn
Ch 4, sl st in previous ch, sc in next ch, hdc in next ch, ch 2, sl st in same last ch.
Fasten off, leaving a long tail.
PANTS
With dark green yarn
Round 1: 6 sc into magic ring. Sl st to join to first sc.
Round 2: In backloop only, sc in each st around.
Round 3-4: Sc in each st around.
You have just created Part A. Fasten off. Repeat Rounds 1-4 once more to create Part B, but do not fasten off. Attach together with 2 sc across. You should now have 8 sc around. [Note: See video tutorial if needed for joining the pants.]
Round 5: [2 sc in next st, sc in next st] around. Sl st to join to first st. – 12 st.
Fasten off, leaving a long tail.
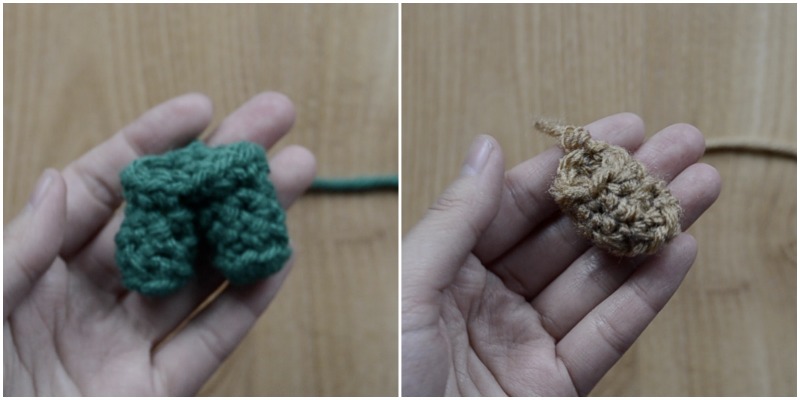
SHOE (make 2)
With brown yarn
Round 1: Ch 5, sc in next 4 ch, turn to other side of ch, and sc in next 4 ch – 8 sc.
Round 2: In Back Loop only, sc around.
Round 3: Sc2tog, sc in next 6 st – 7 sc.
Round 4: Sc2tog, sc in next 5 st – 6 sc.
Fasten off, leaving a long tail.
BELT
With brown yarn, Ch 24, and fasten off, leaving a long tail.
ASSEMBLY
1. Sew Hair onto Head.
2. Stuff pants and sew onto bottom of Body.
3. Stuff boots and sew onto bottom of Pants.
4. Sew on Arms to Body.
5. Sew on Hands to Arms.
6. Cut 2 small circles from black felt for the eyes. Glue on with Fabri-tac.
7. Sew on Ears.
8. Sew on Belt. The ends should cross over in an X at the side.
9. Sew on Cap to Head.
10. Sew on Feather to Cap.
11. Hide and cut all ends.
12. Sprinkle with Fairy Dust and fly off to Neverland with Peter Pan.
I’d love to see how your Peter Pan amigurumi project turns out so be sure to tag me on Instagram or Facebook!
Or PIN this for Later!
6 Comments
Deborah Follett
November 25, 2019 at 12:24 pmWould you be open to allowing the finished product to be sold if you are given design credit? I really love doing literary themed amigurumi toys and wanted to sell them with a used copy of the story book to promote reading and imagination…
Ami Amour
November 26, 2019 at 11:50 pmHI Deborah, that is such an awesome idea! And I love that you’re promoting reading and imagination (you can never have enough of either!) You’re free to do as you wish with all of the finished objects you make. Best wishes to you!
crochetay
August 3, 2021 at 8:45 pmI really love all of your dolls, they are so cute! I have been wanting to start a blog like this. any tips?
Ami Amour
August 23, 2021 at 5:25 pmThank you! I use a self-hosted wordpress for my blog! Siteground is a good one to use for wordpress hosting. You do have to pay each month for the hosting, but once they set it up for you, it’s pretty easy to write and manage content on! You would need to purchase a domain name too.
tailor
August 5, 2021 at 1:03 amI really love your stuff. you are really creative, and, all your projects seem to come out perfect! How long have yo been crocheting for? I have only been doing it since last June.
Ami Amour
August 23, 2021 at 5:15 pmThank you! Glad you’ve picked up crochet! I’ve been doing it for a while. More than 12 years now I think!