
Spooky Season is upon us! What better way to kick off the festivities but with a fun crochet Jack Skellington project from Nightmare Before Christmas.
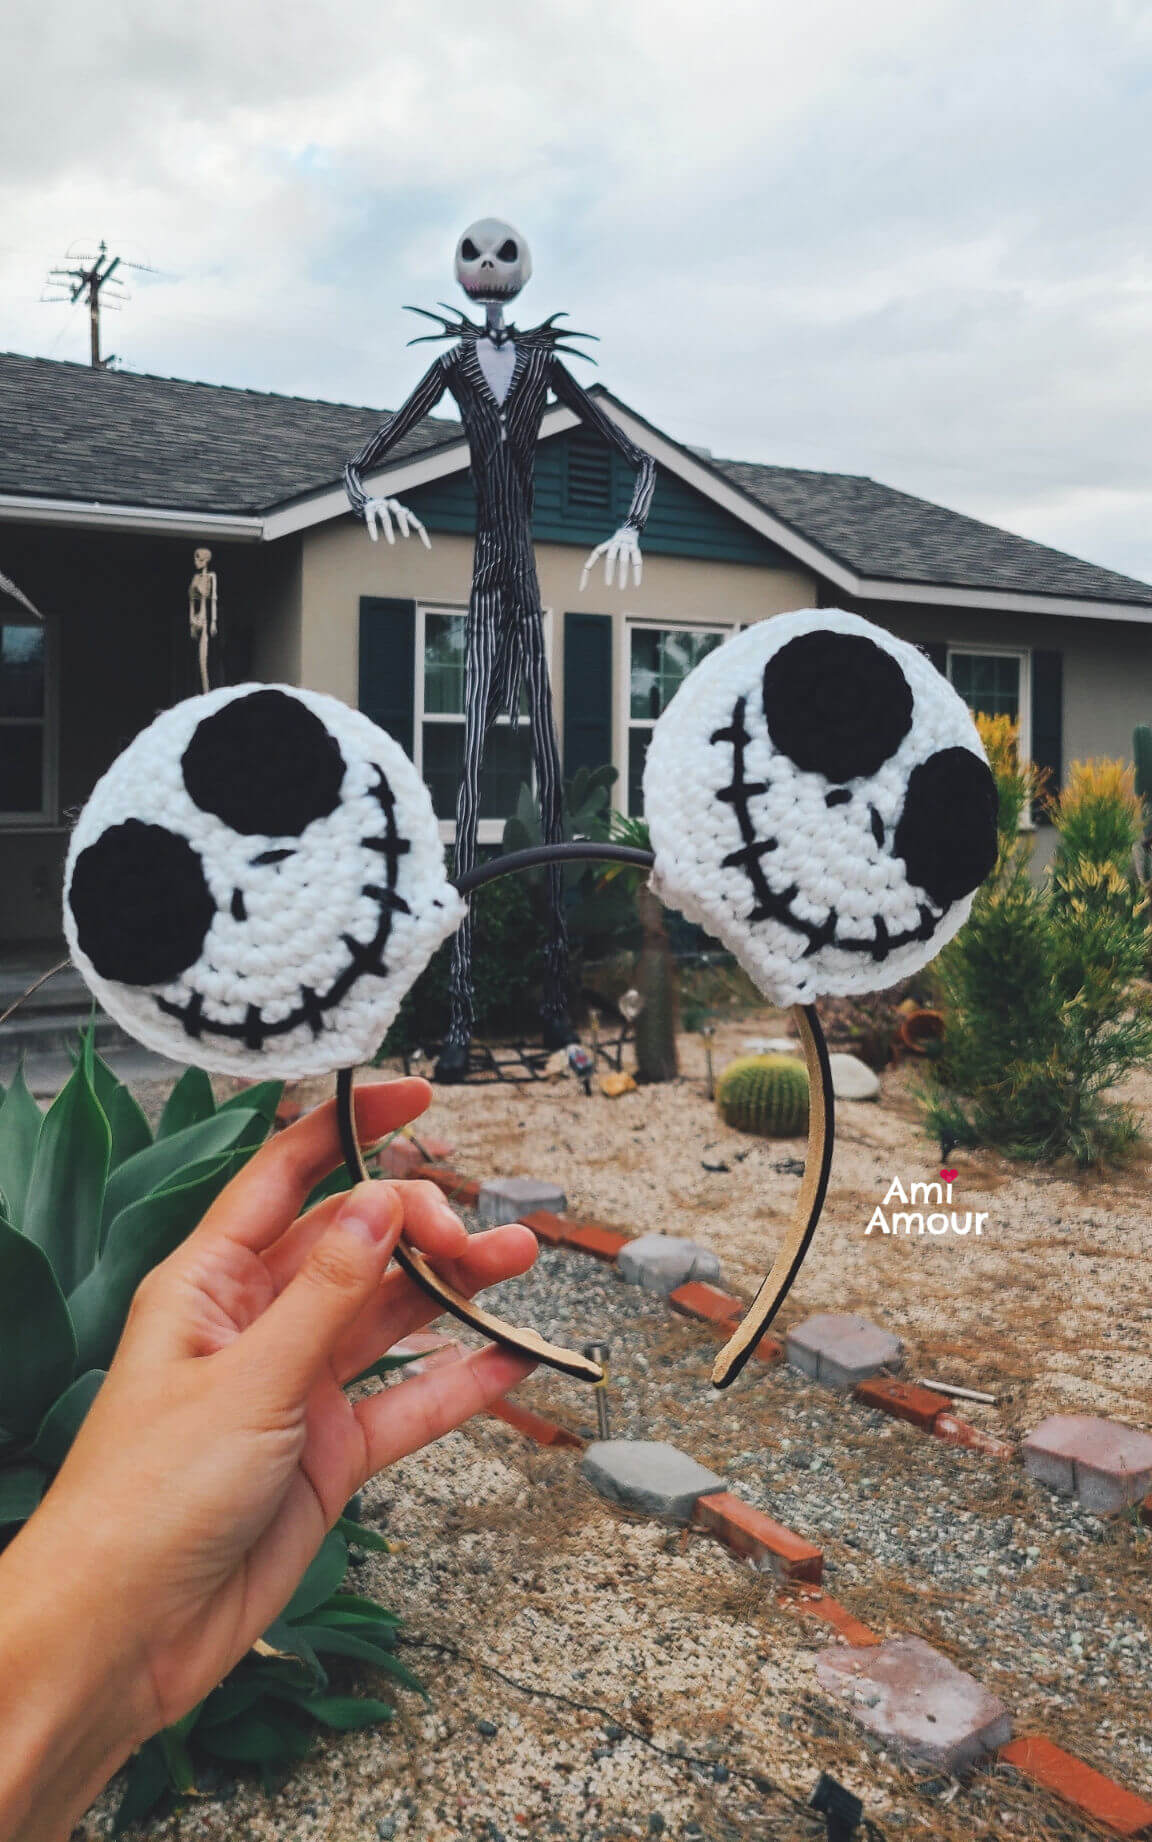
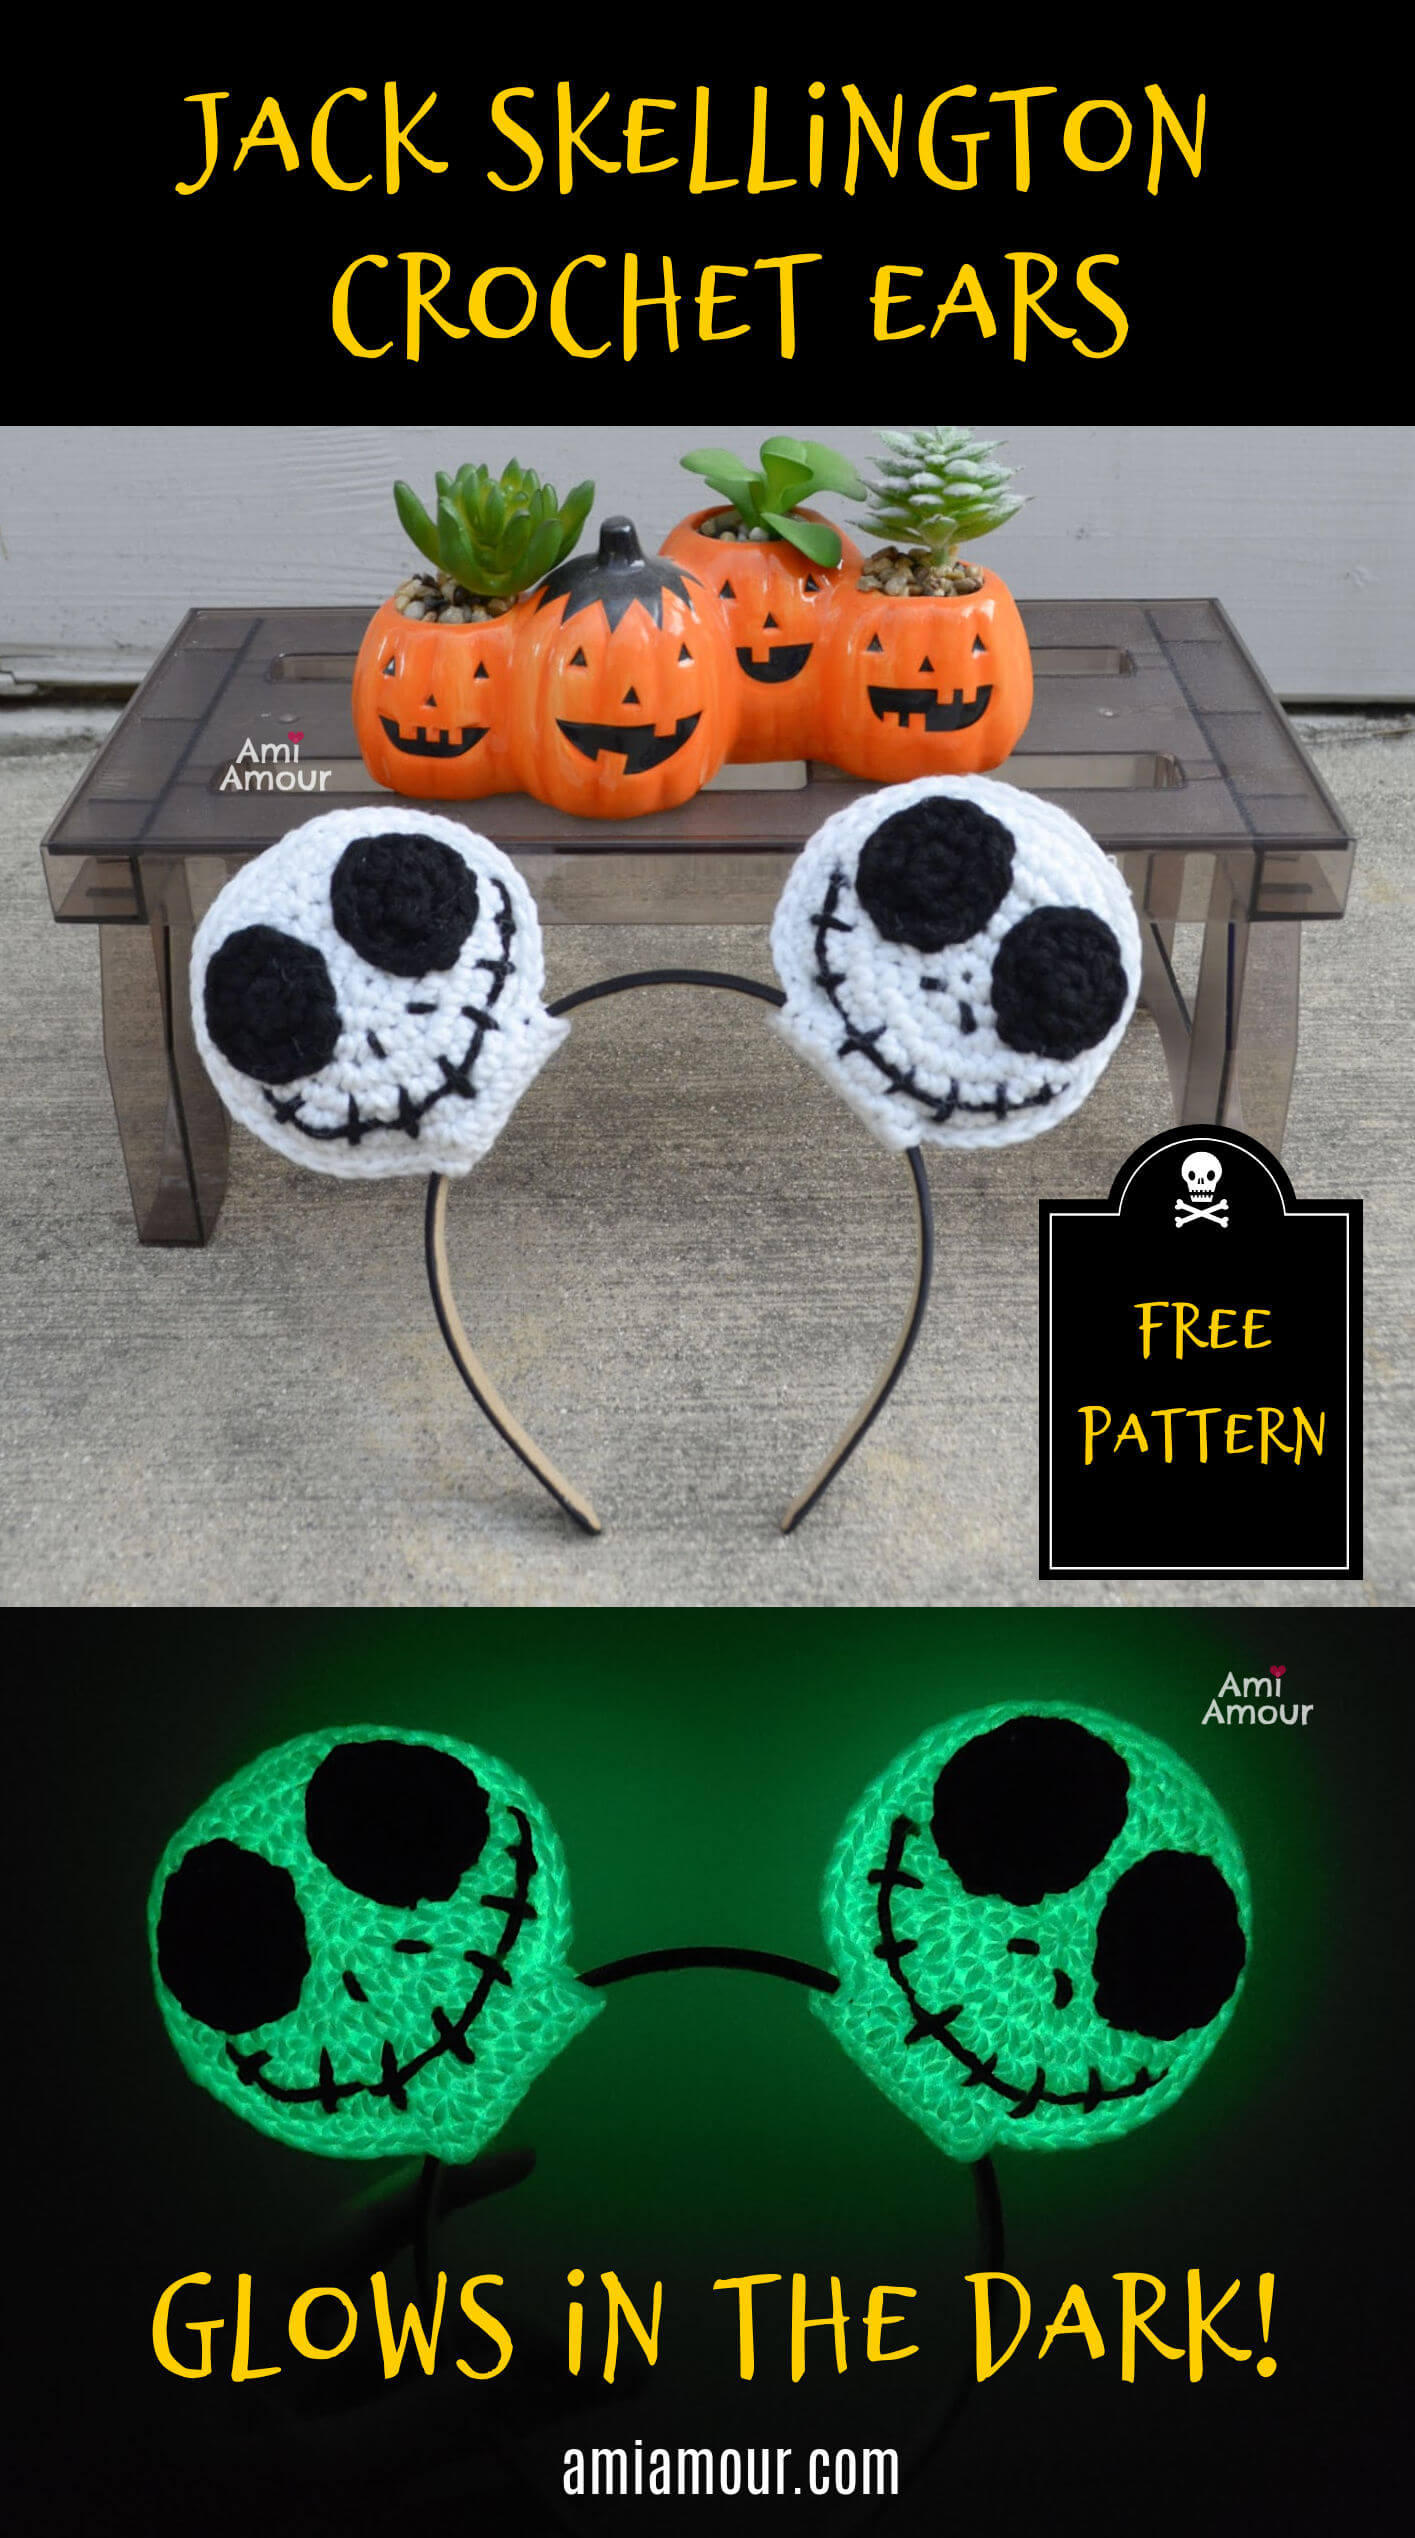
I’ve turned his skull into Crochet Ears (like those Disney Ears) to wear for the fall holiday and I’m releasing this Jack Skellington as a free crochet pattern so that everyone, too, can wear skulls on top of their head!
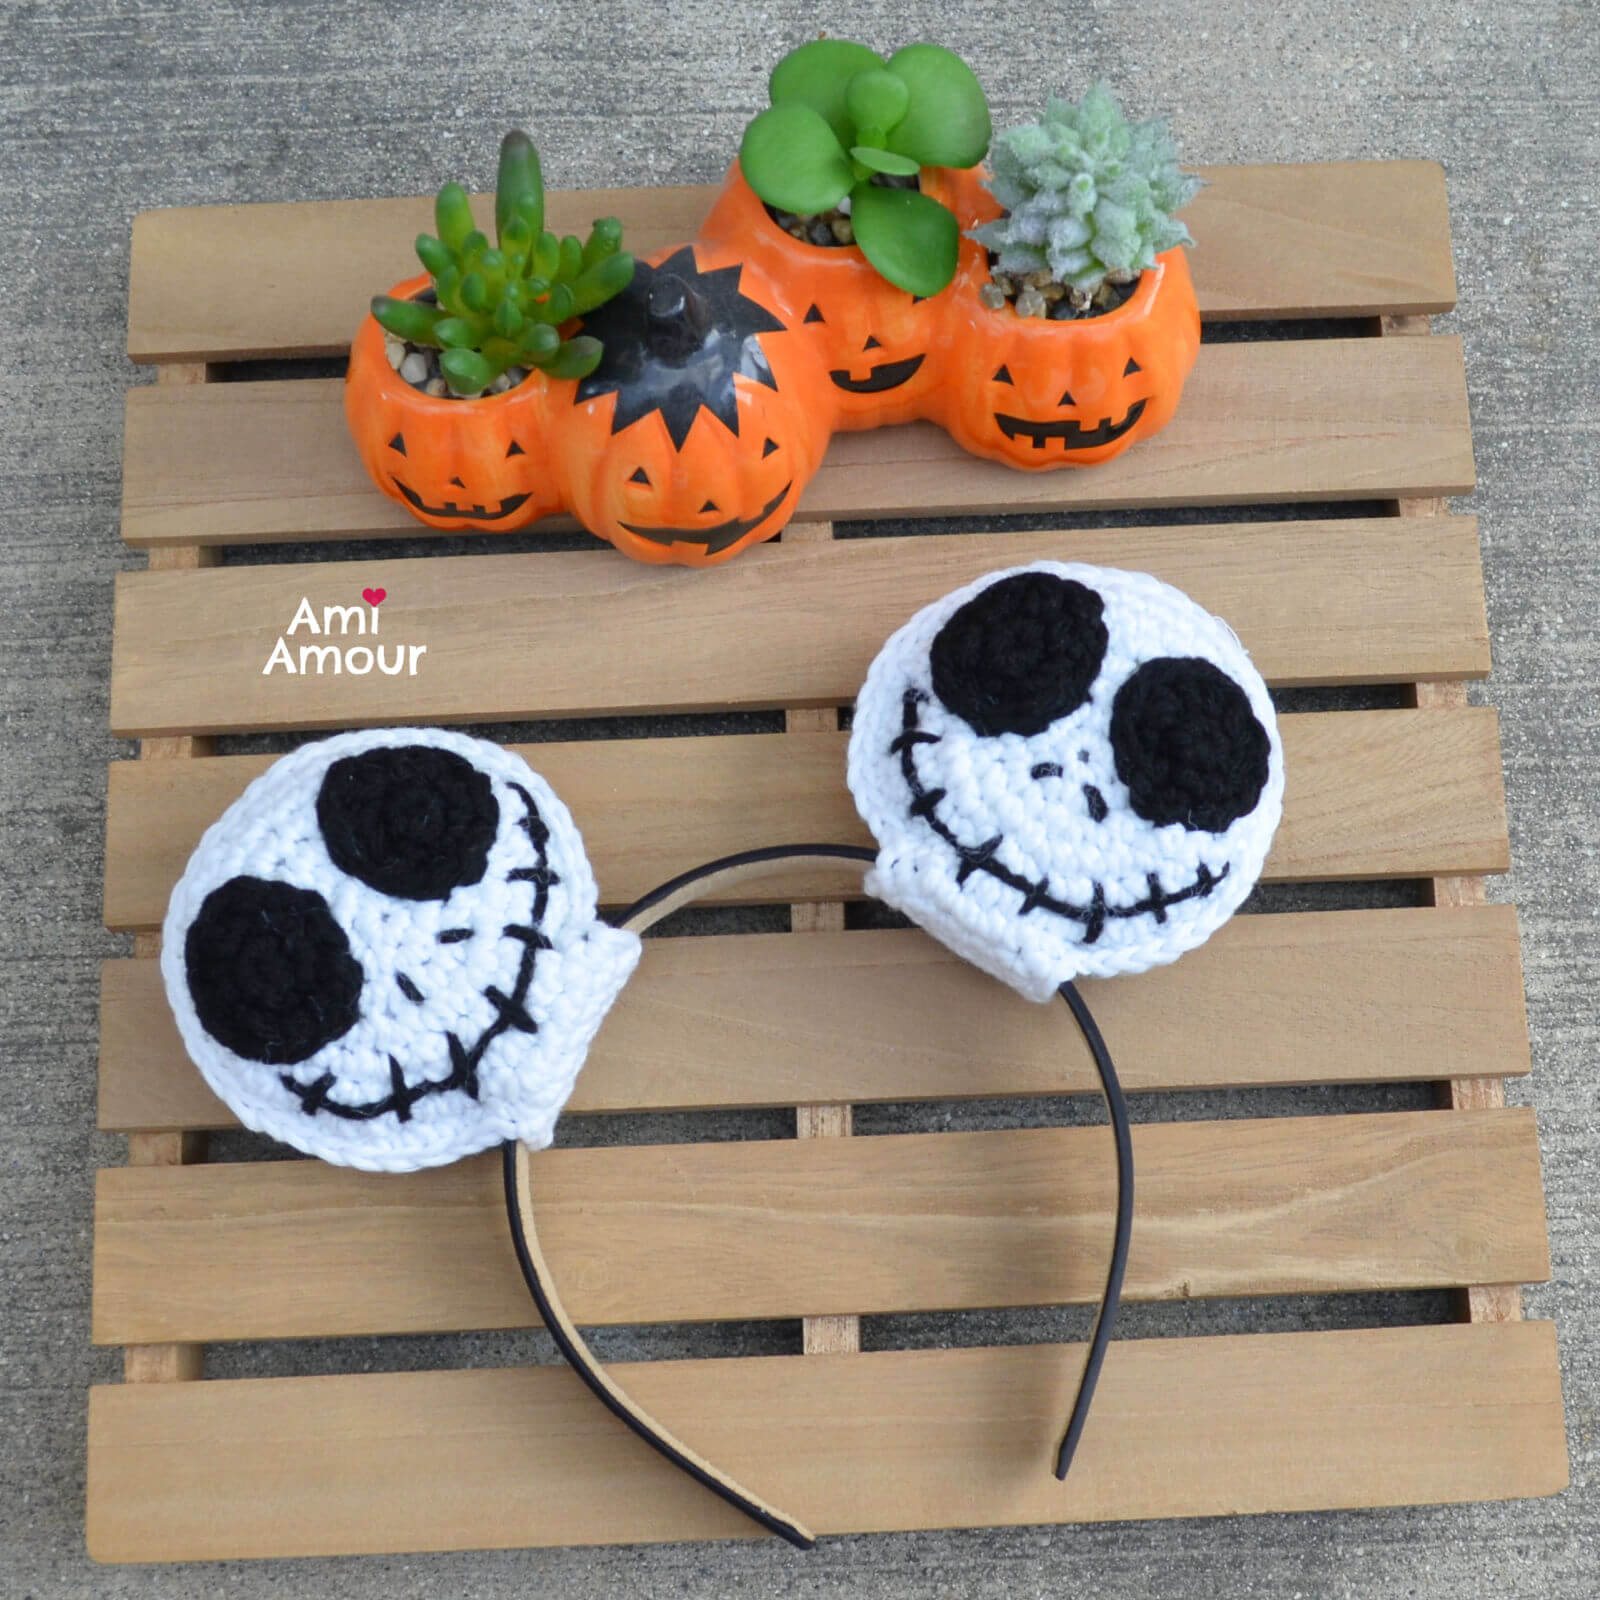
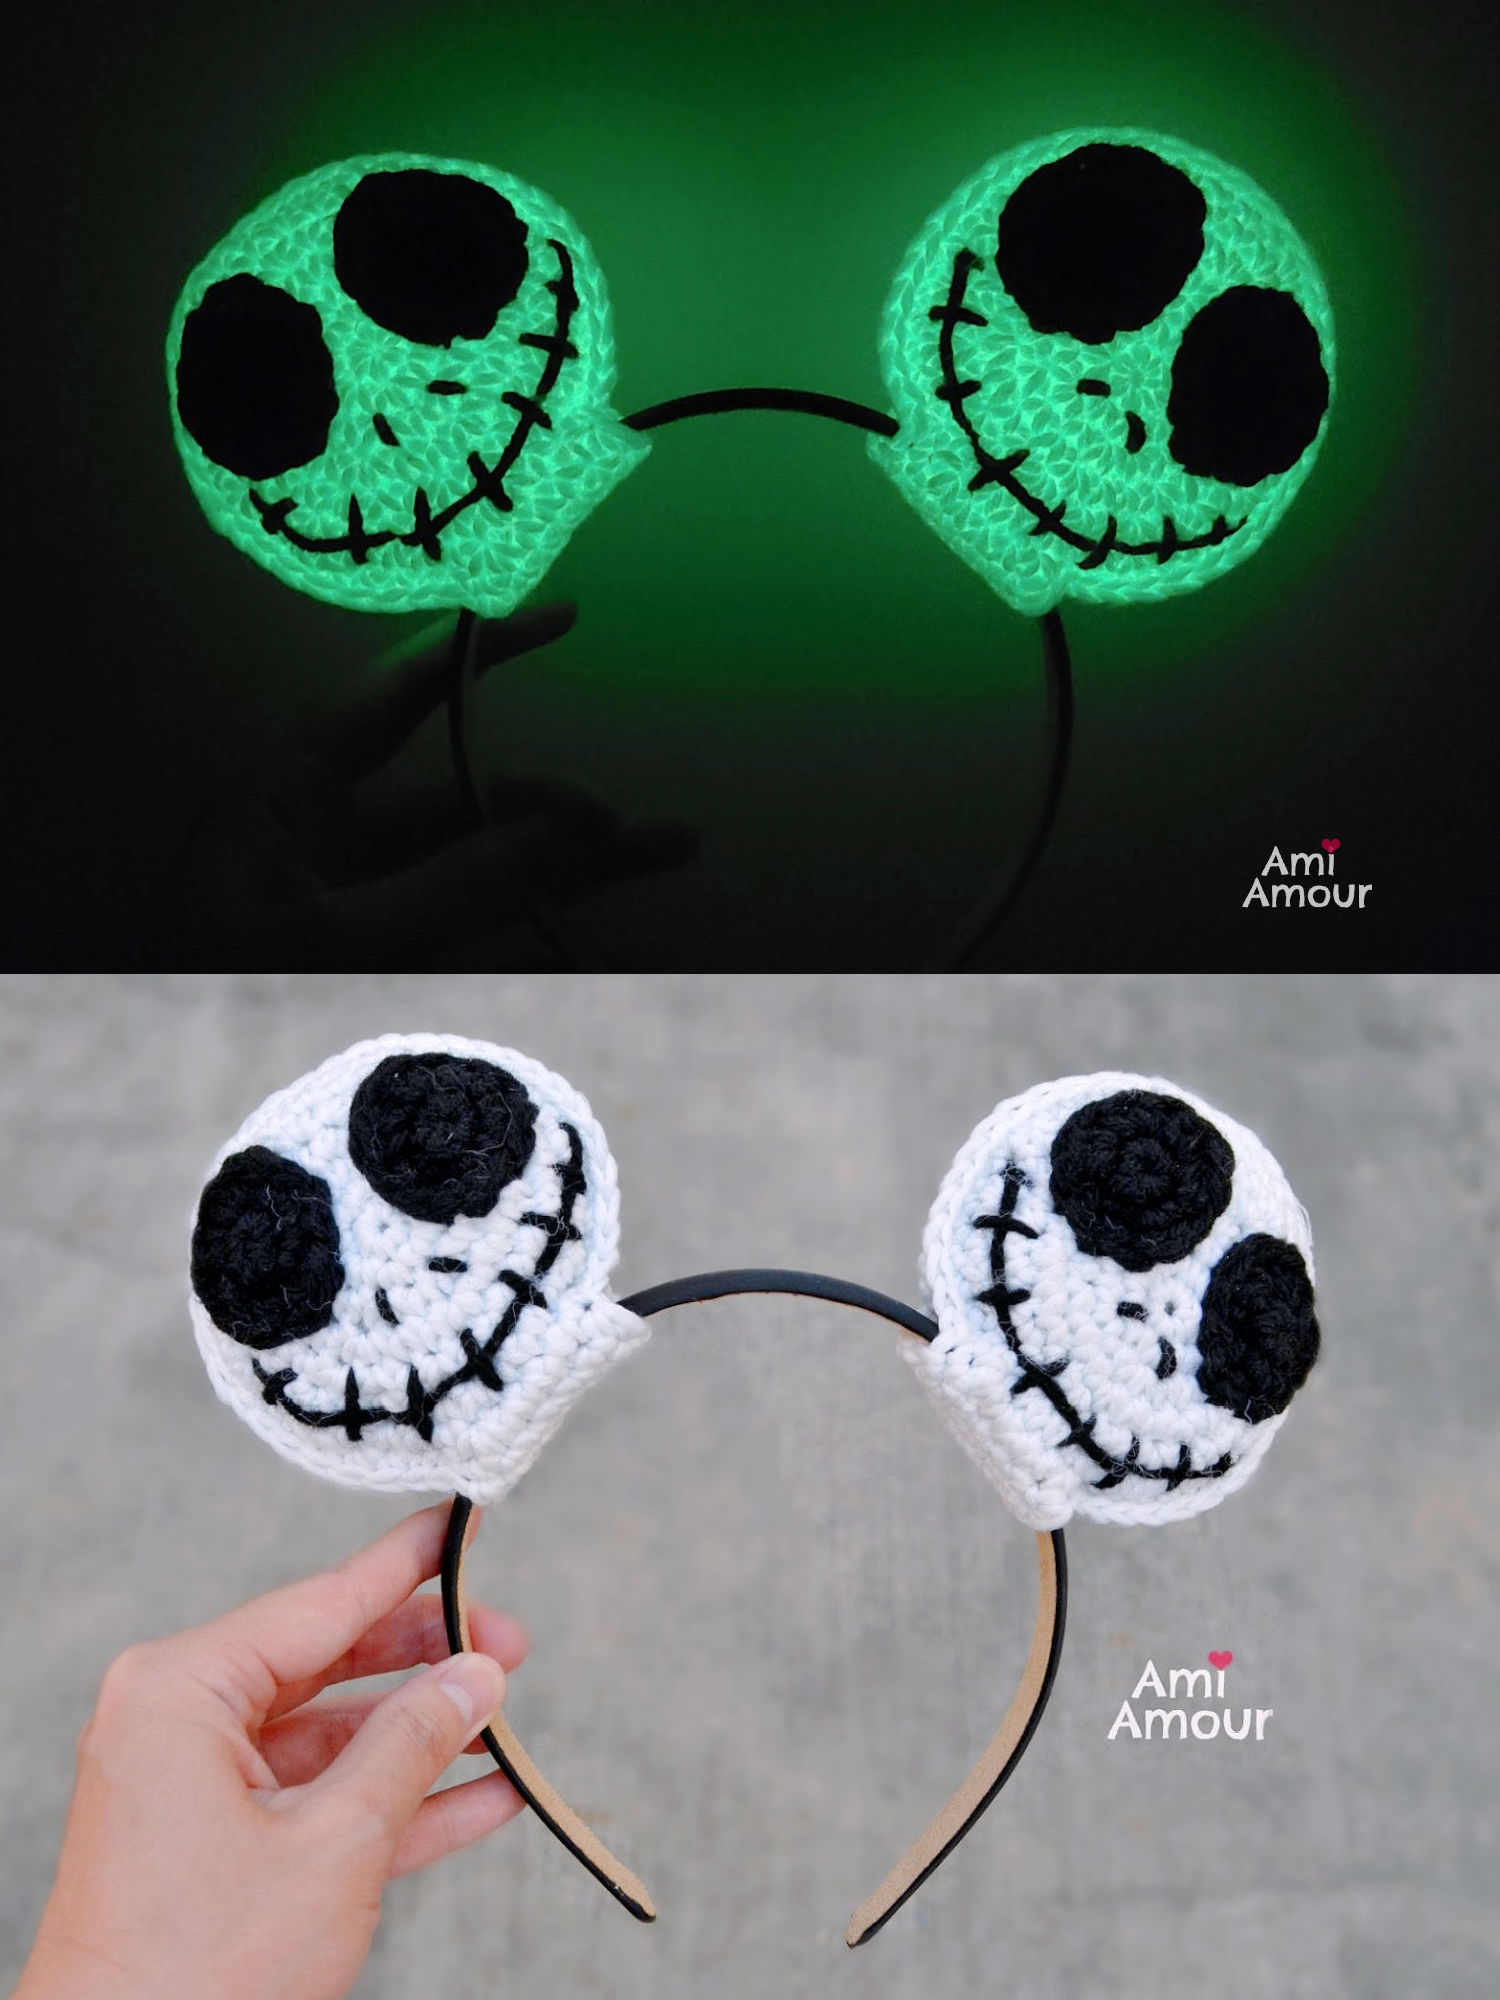
A cool feature of this project is that I’ve used glow in the dark yarn so that the crochet Jack Skellington skulls can eerily glow at night giving everyone a spooky delight. Ooooooooo!
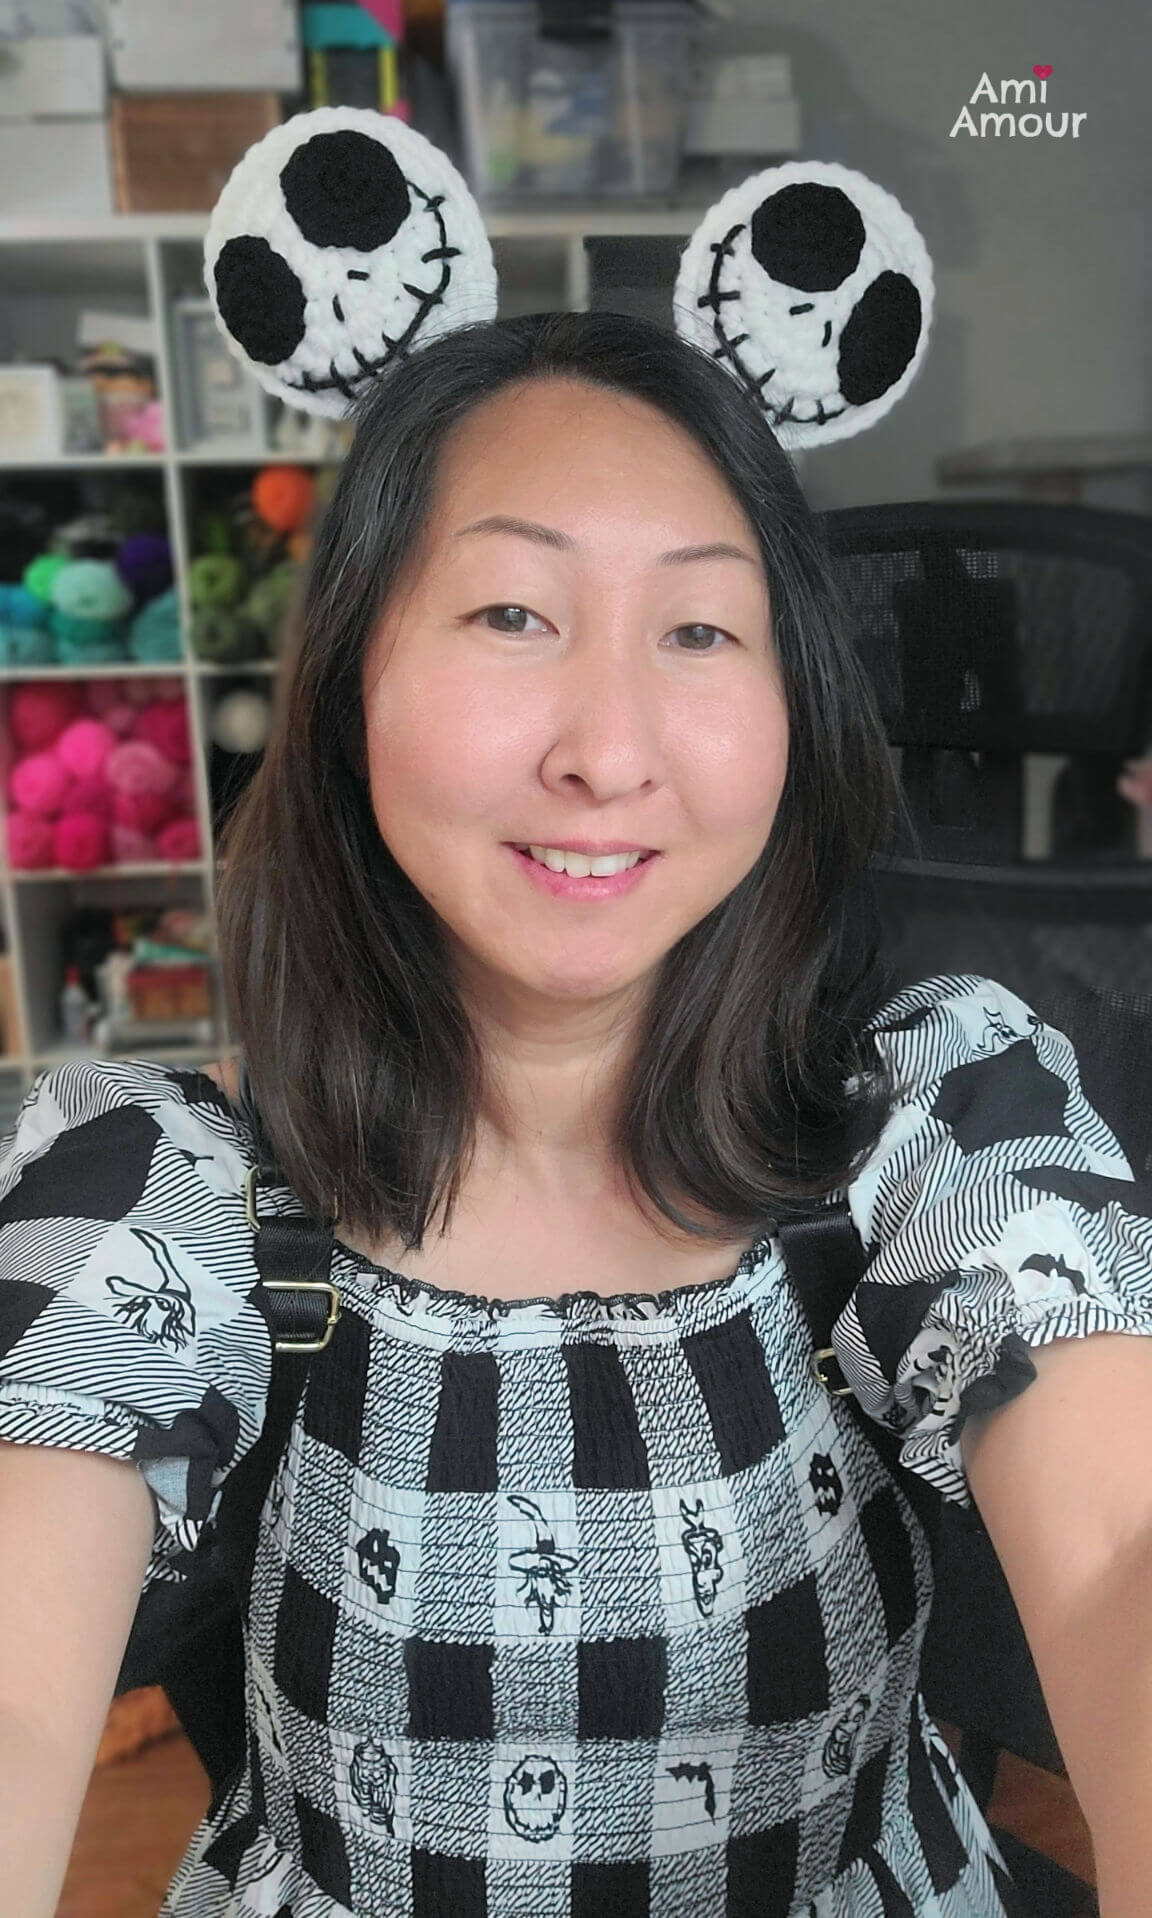
I came up with this crochet Jack Skellington pattern because I went to Disneyland recently for their Halloween season. And of course, part of the magic in going to Disneyland is dressing up for the festivities.
Well, I had the perfect Nightmare before Christmas Dress and I thought it’d be very fun to have matching crochet ears to go along with the dress. They were the cutest pair together!
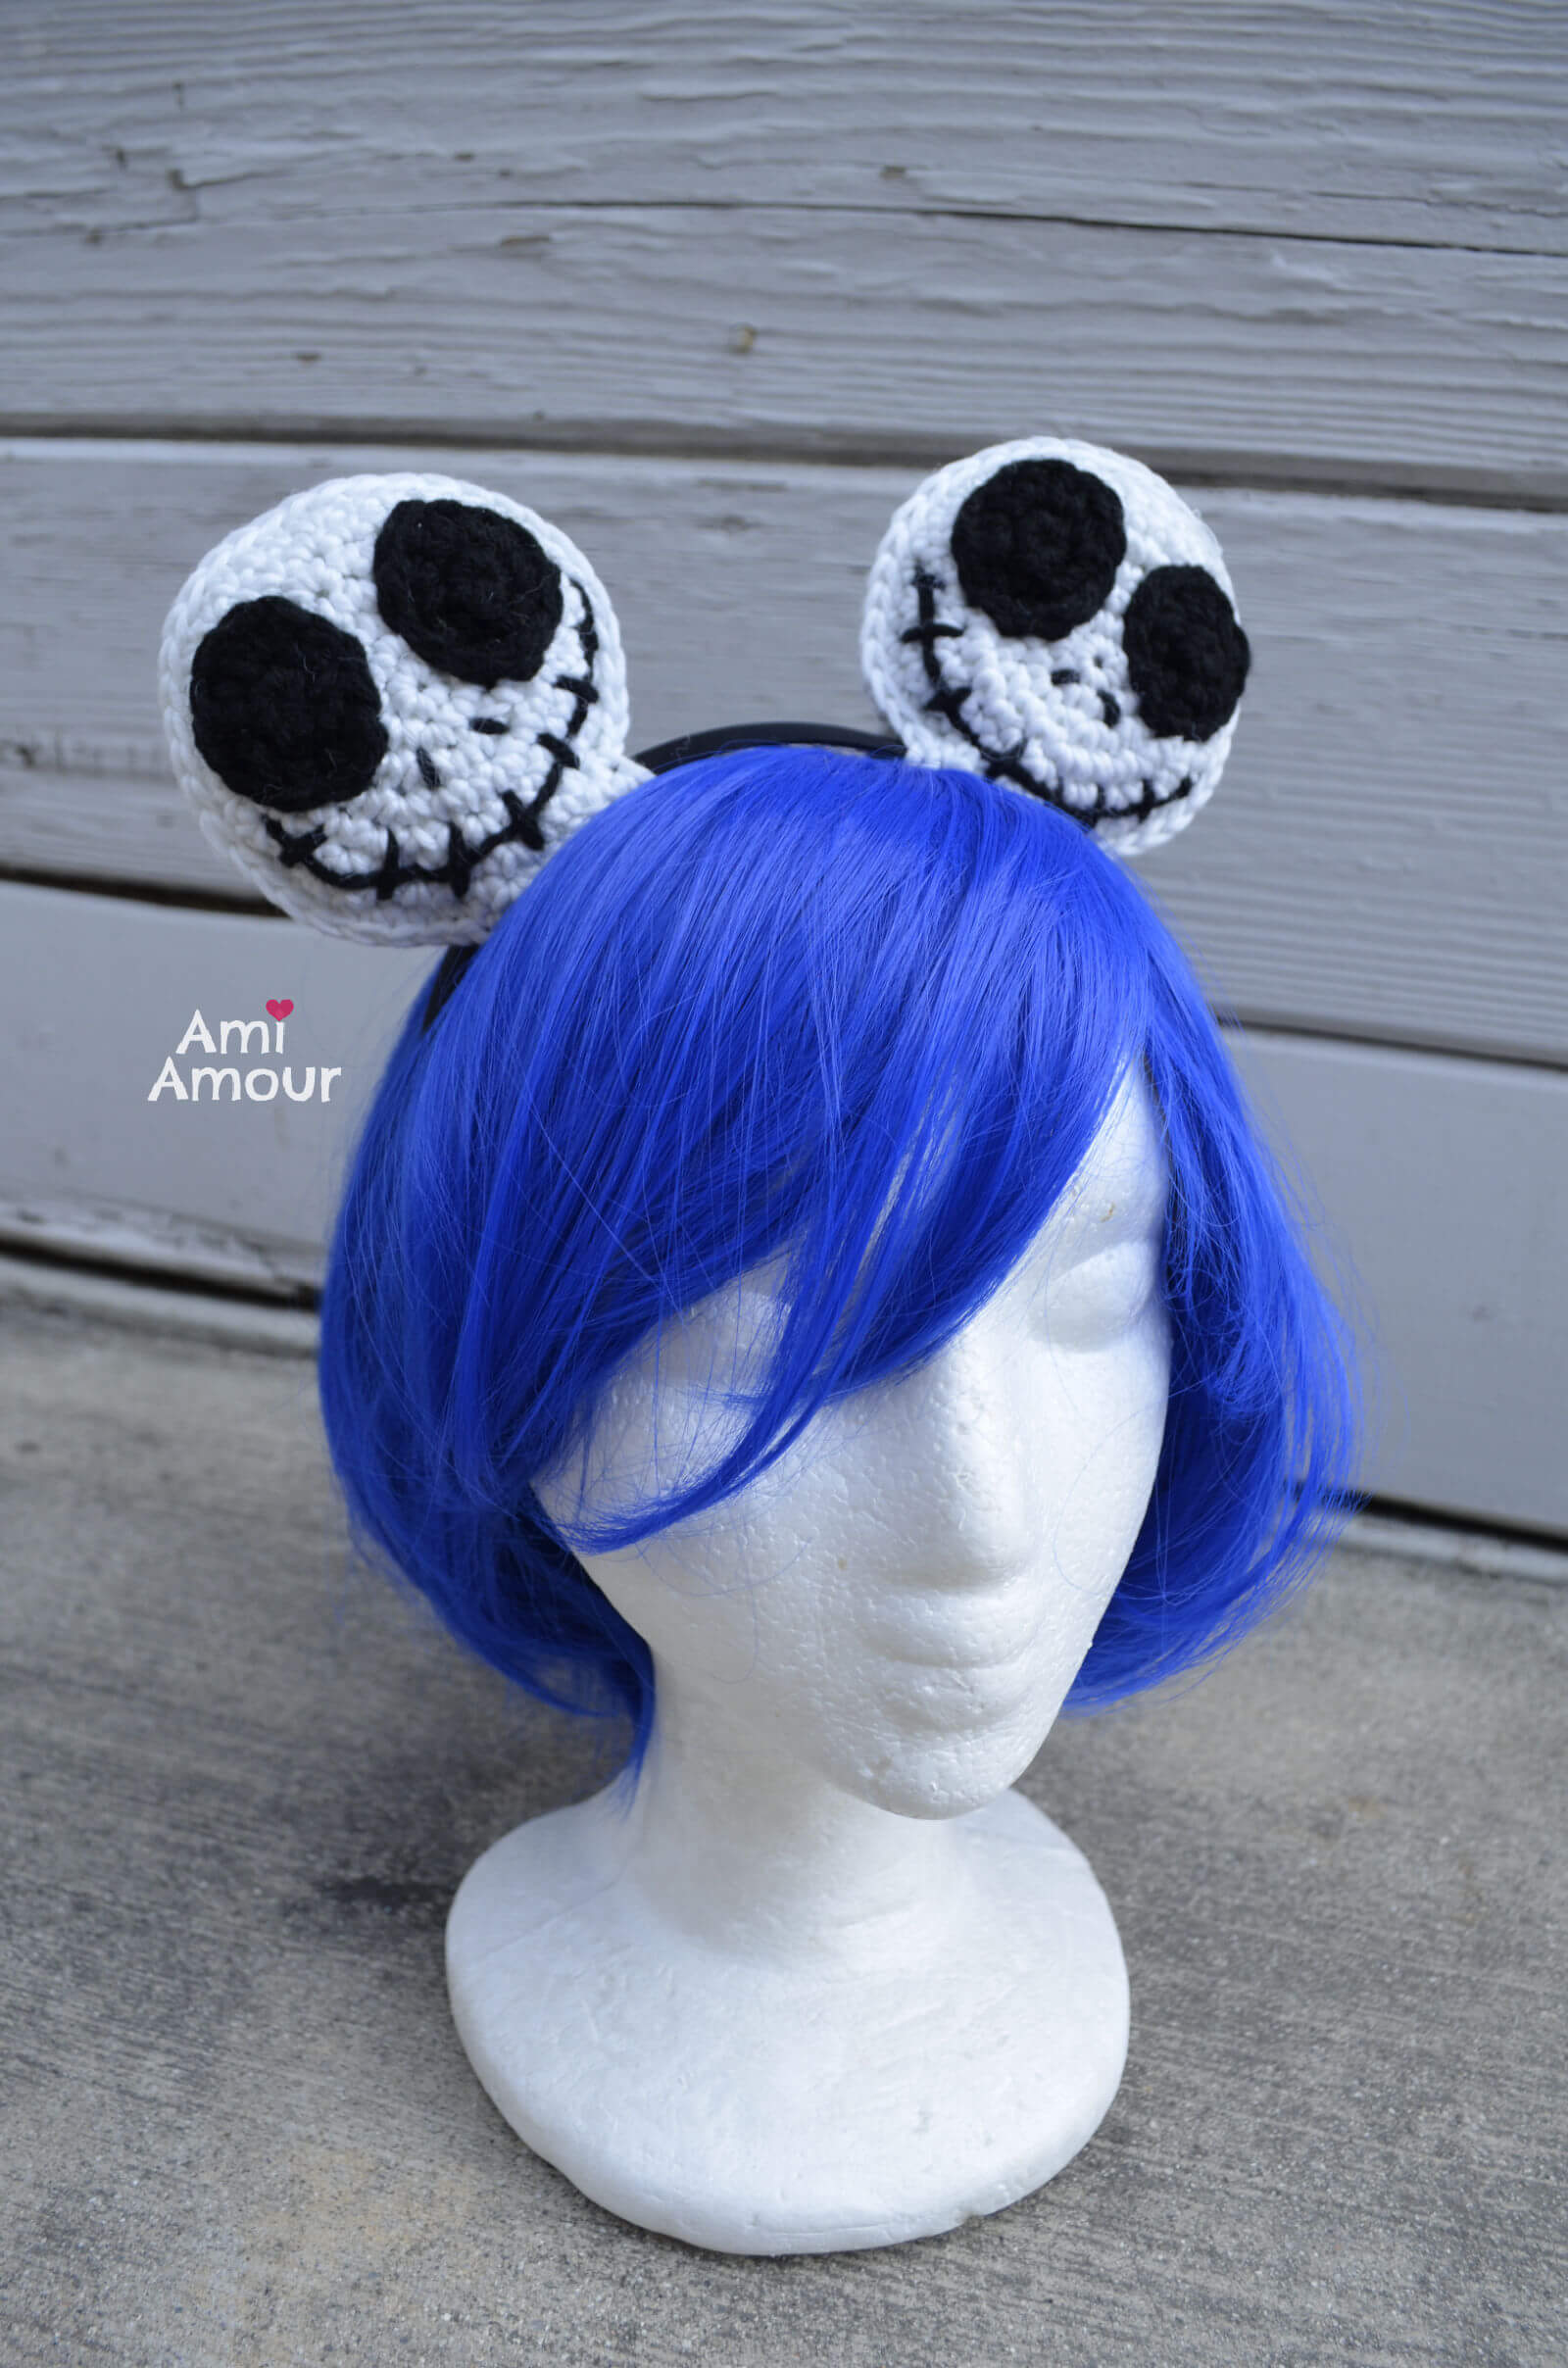
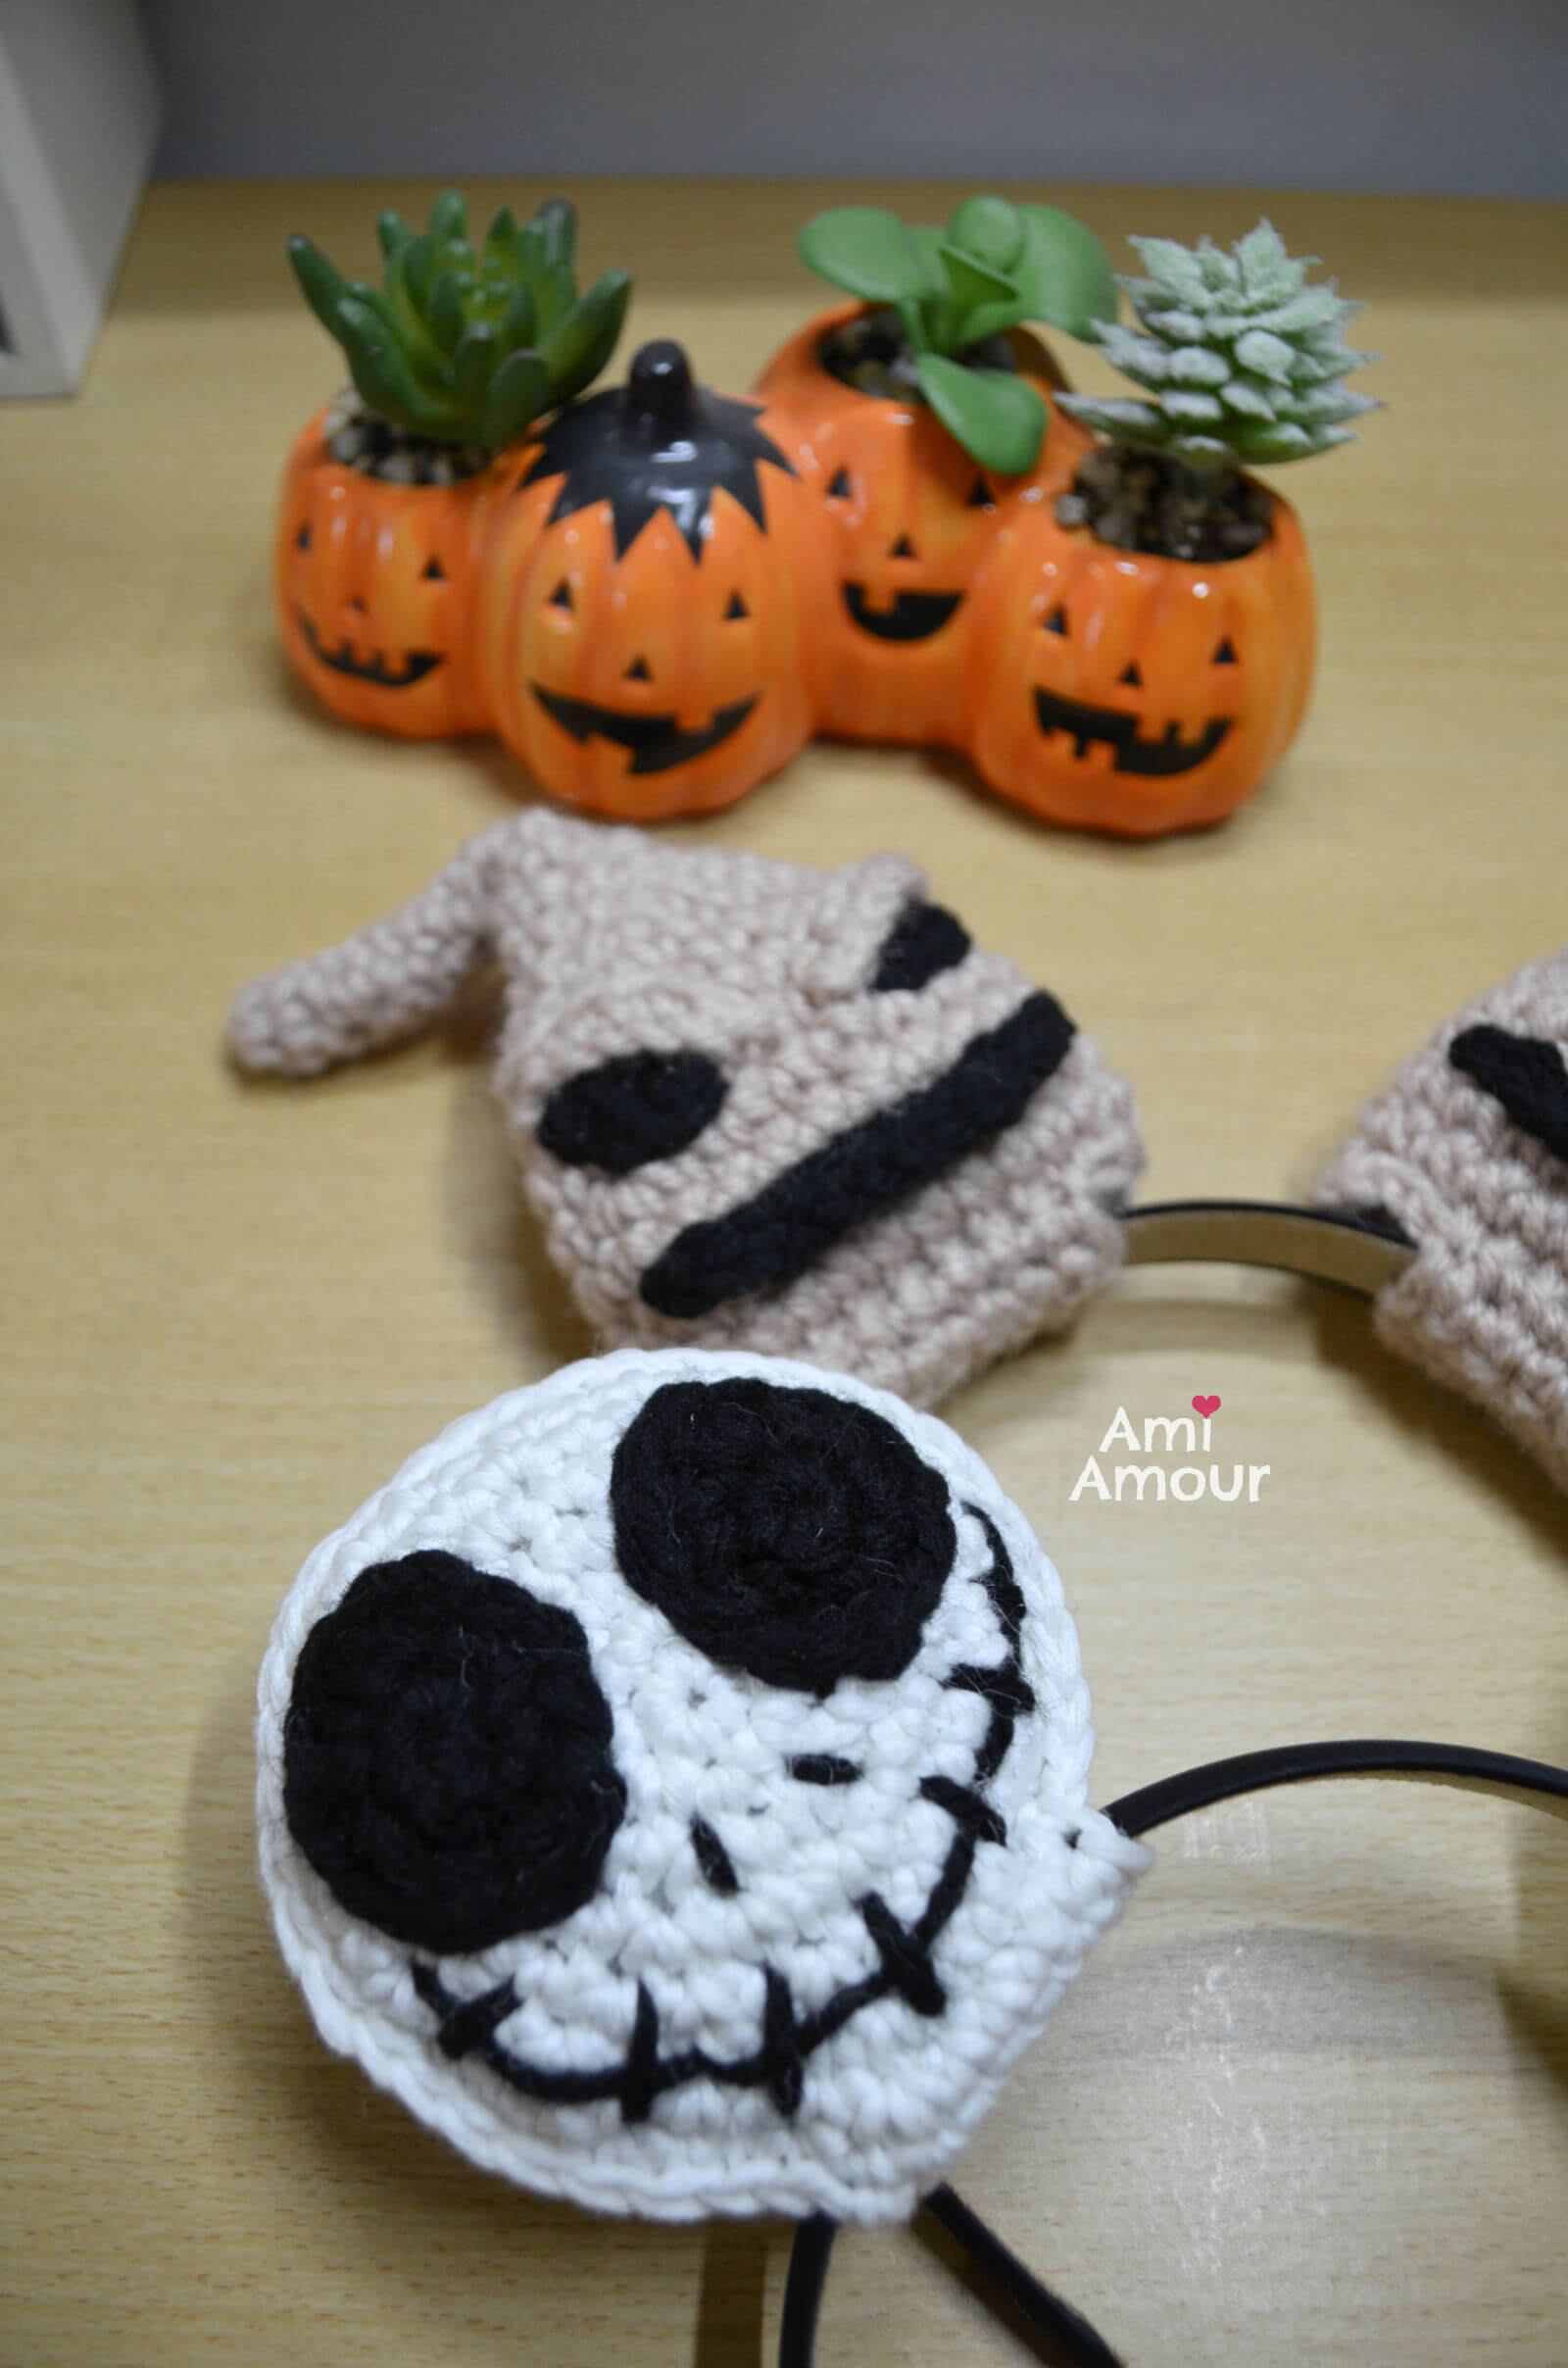
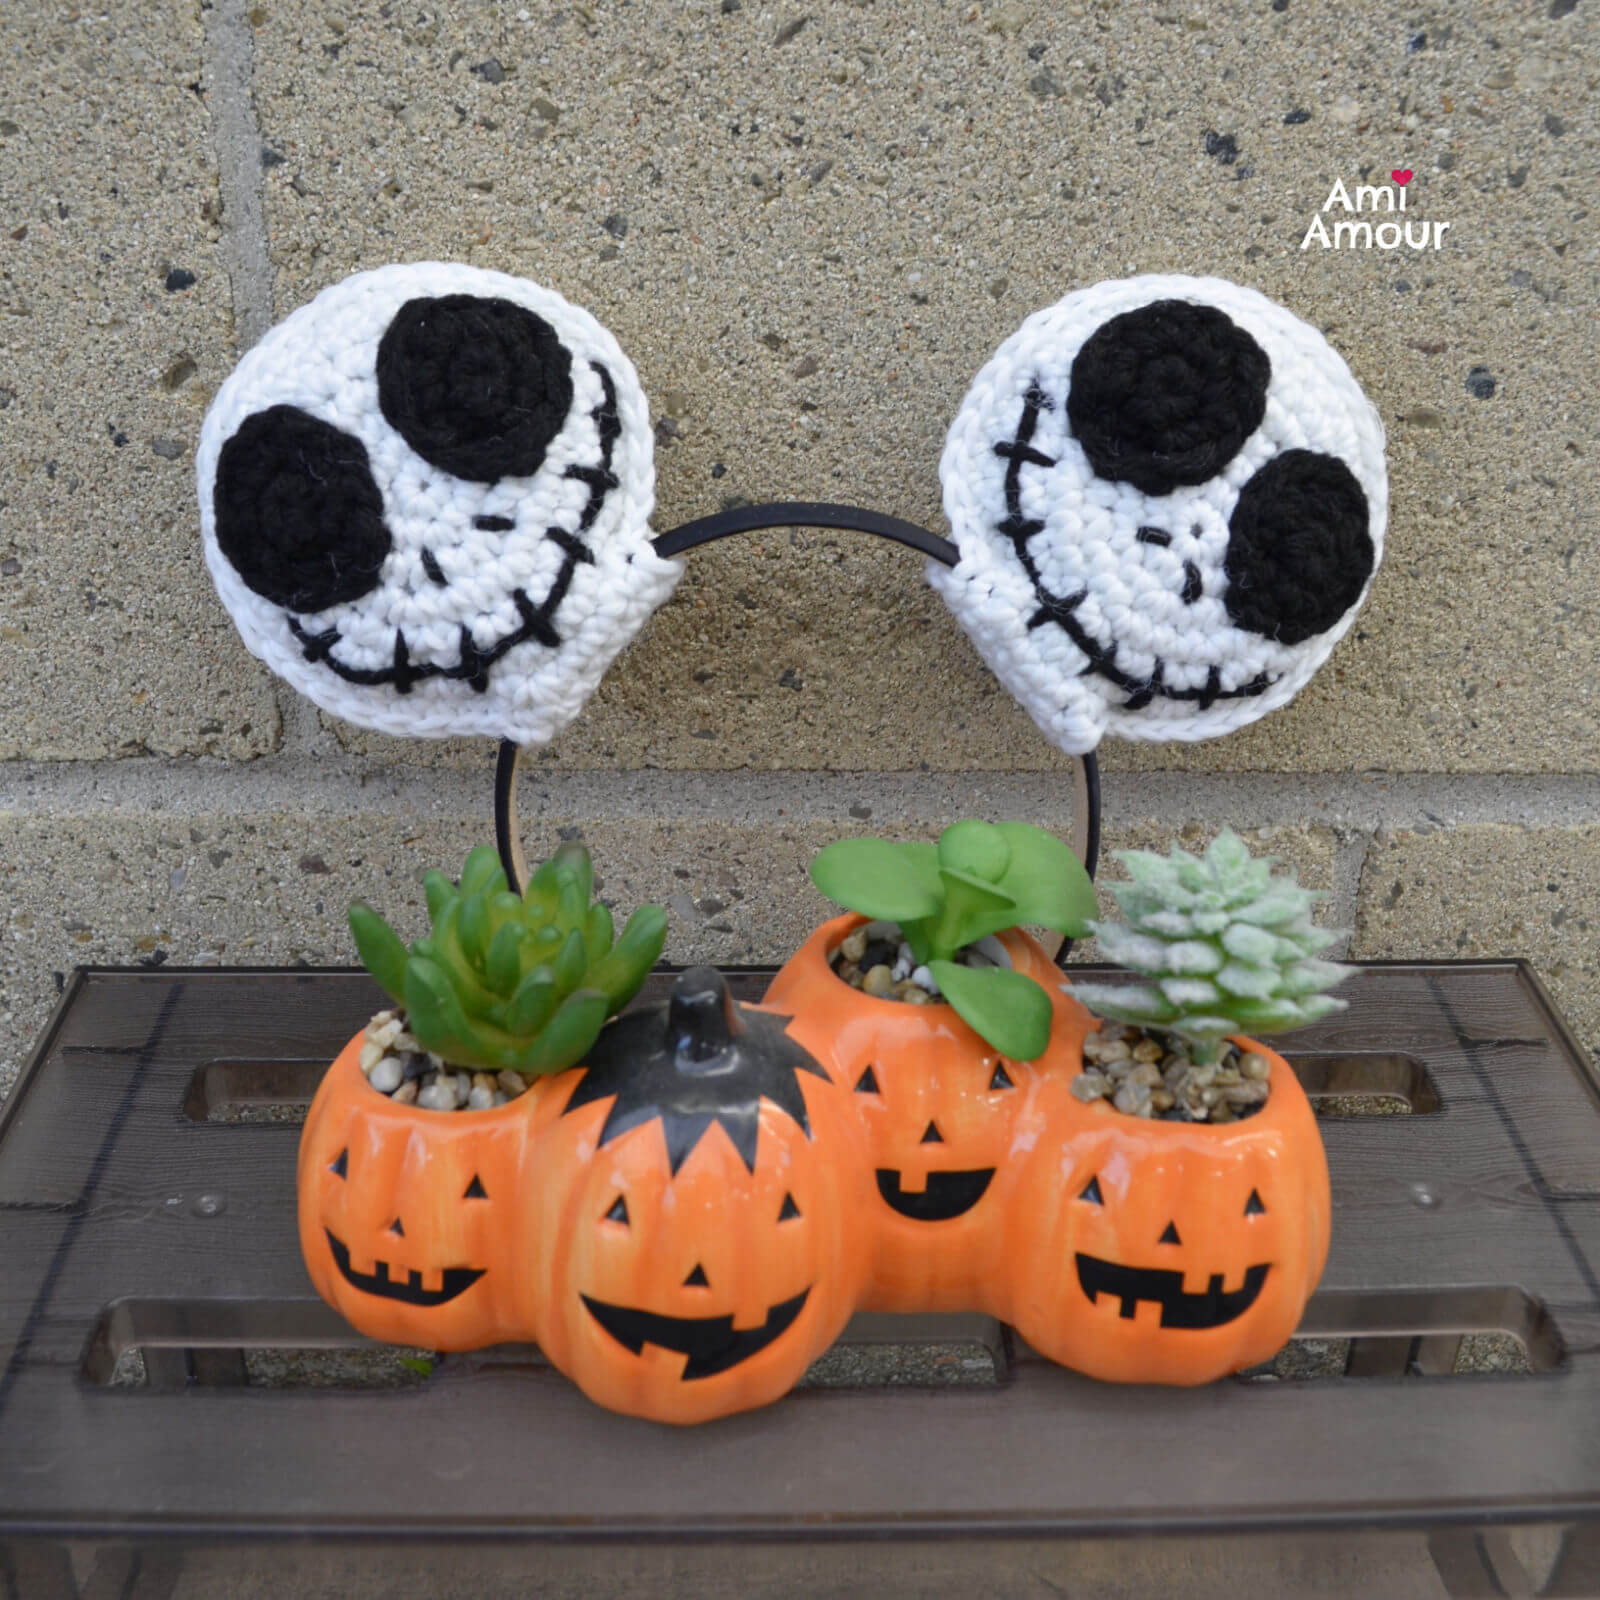
Here’s a close-up with the crochet Jack Skellington Ears!
I adored the Dia De Los Muertos decoration at Disneyland too. Jack fits right in!
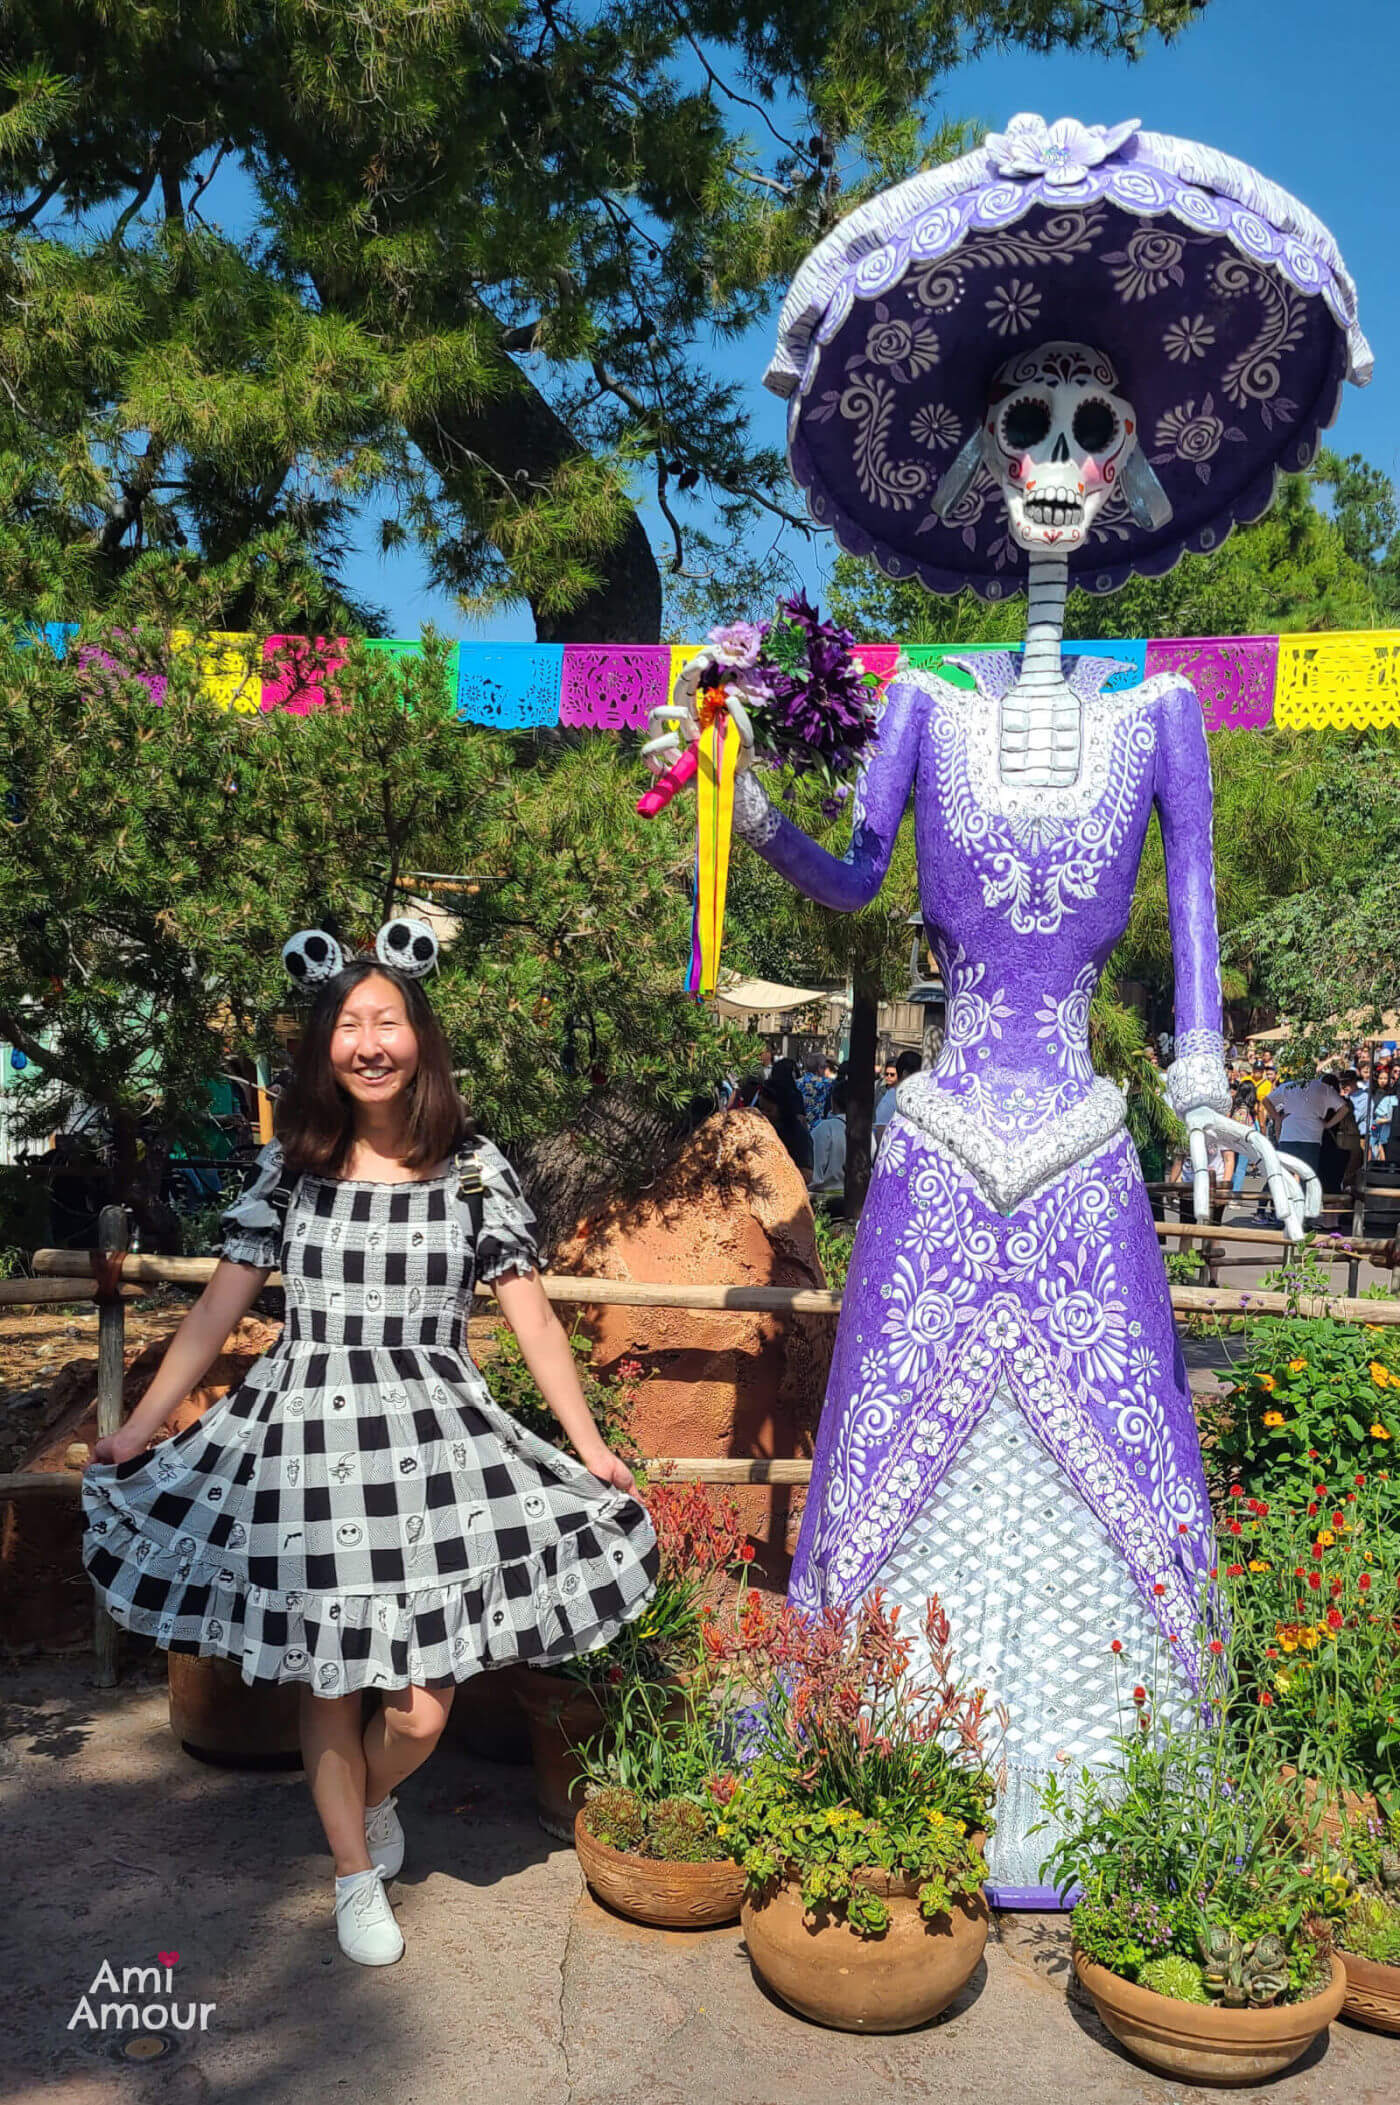
And of course, we can’t forget to take a photo with Jack as well (and with cute Zero too!)

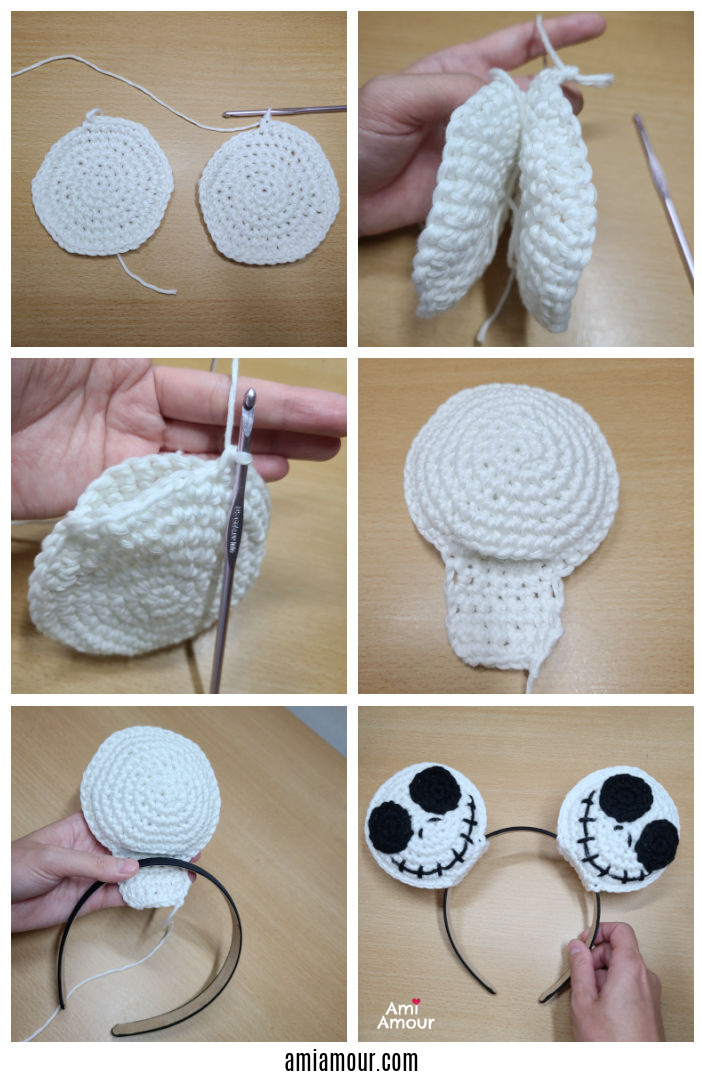
So the technique how I crocheted the Jack Skellington Ears is really similar to the technique used in my 2D to 3D Star Amigurumi pattern. It can work as an applique as well, but basically I crochet 2 circles and then join them together with single crochet border. However, I leave a gap open at the bottom of the skull. Next, I crochet some rows which I can use to wrap around the headband to sew the skull into place on the backside.
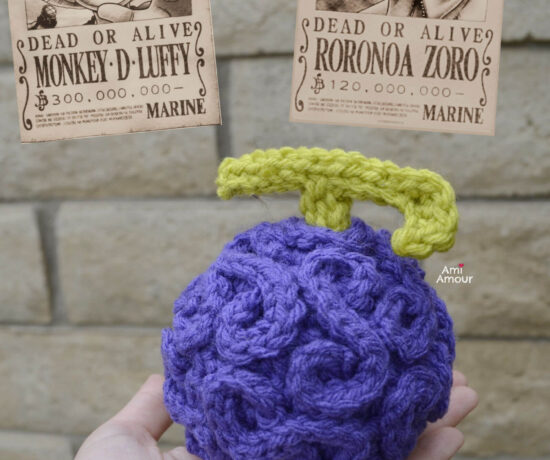
The nice thing about the Jack Ears is that they are easily detachable from the headband. They just slide on and off. Which means the ears can be interchangeable since you can pull them on or off the headband as you please. You can mix and match! (Hopefully eventually as I come out with more designs :D) In fact, I had also crocheted another set of ears for Oogie Boogie.
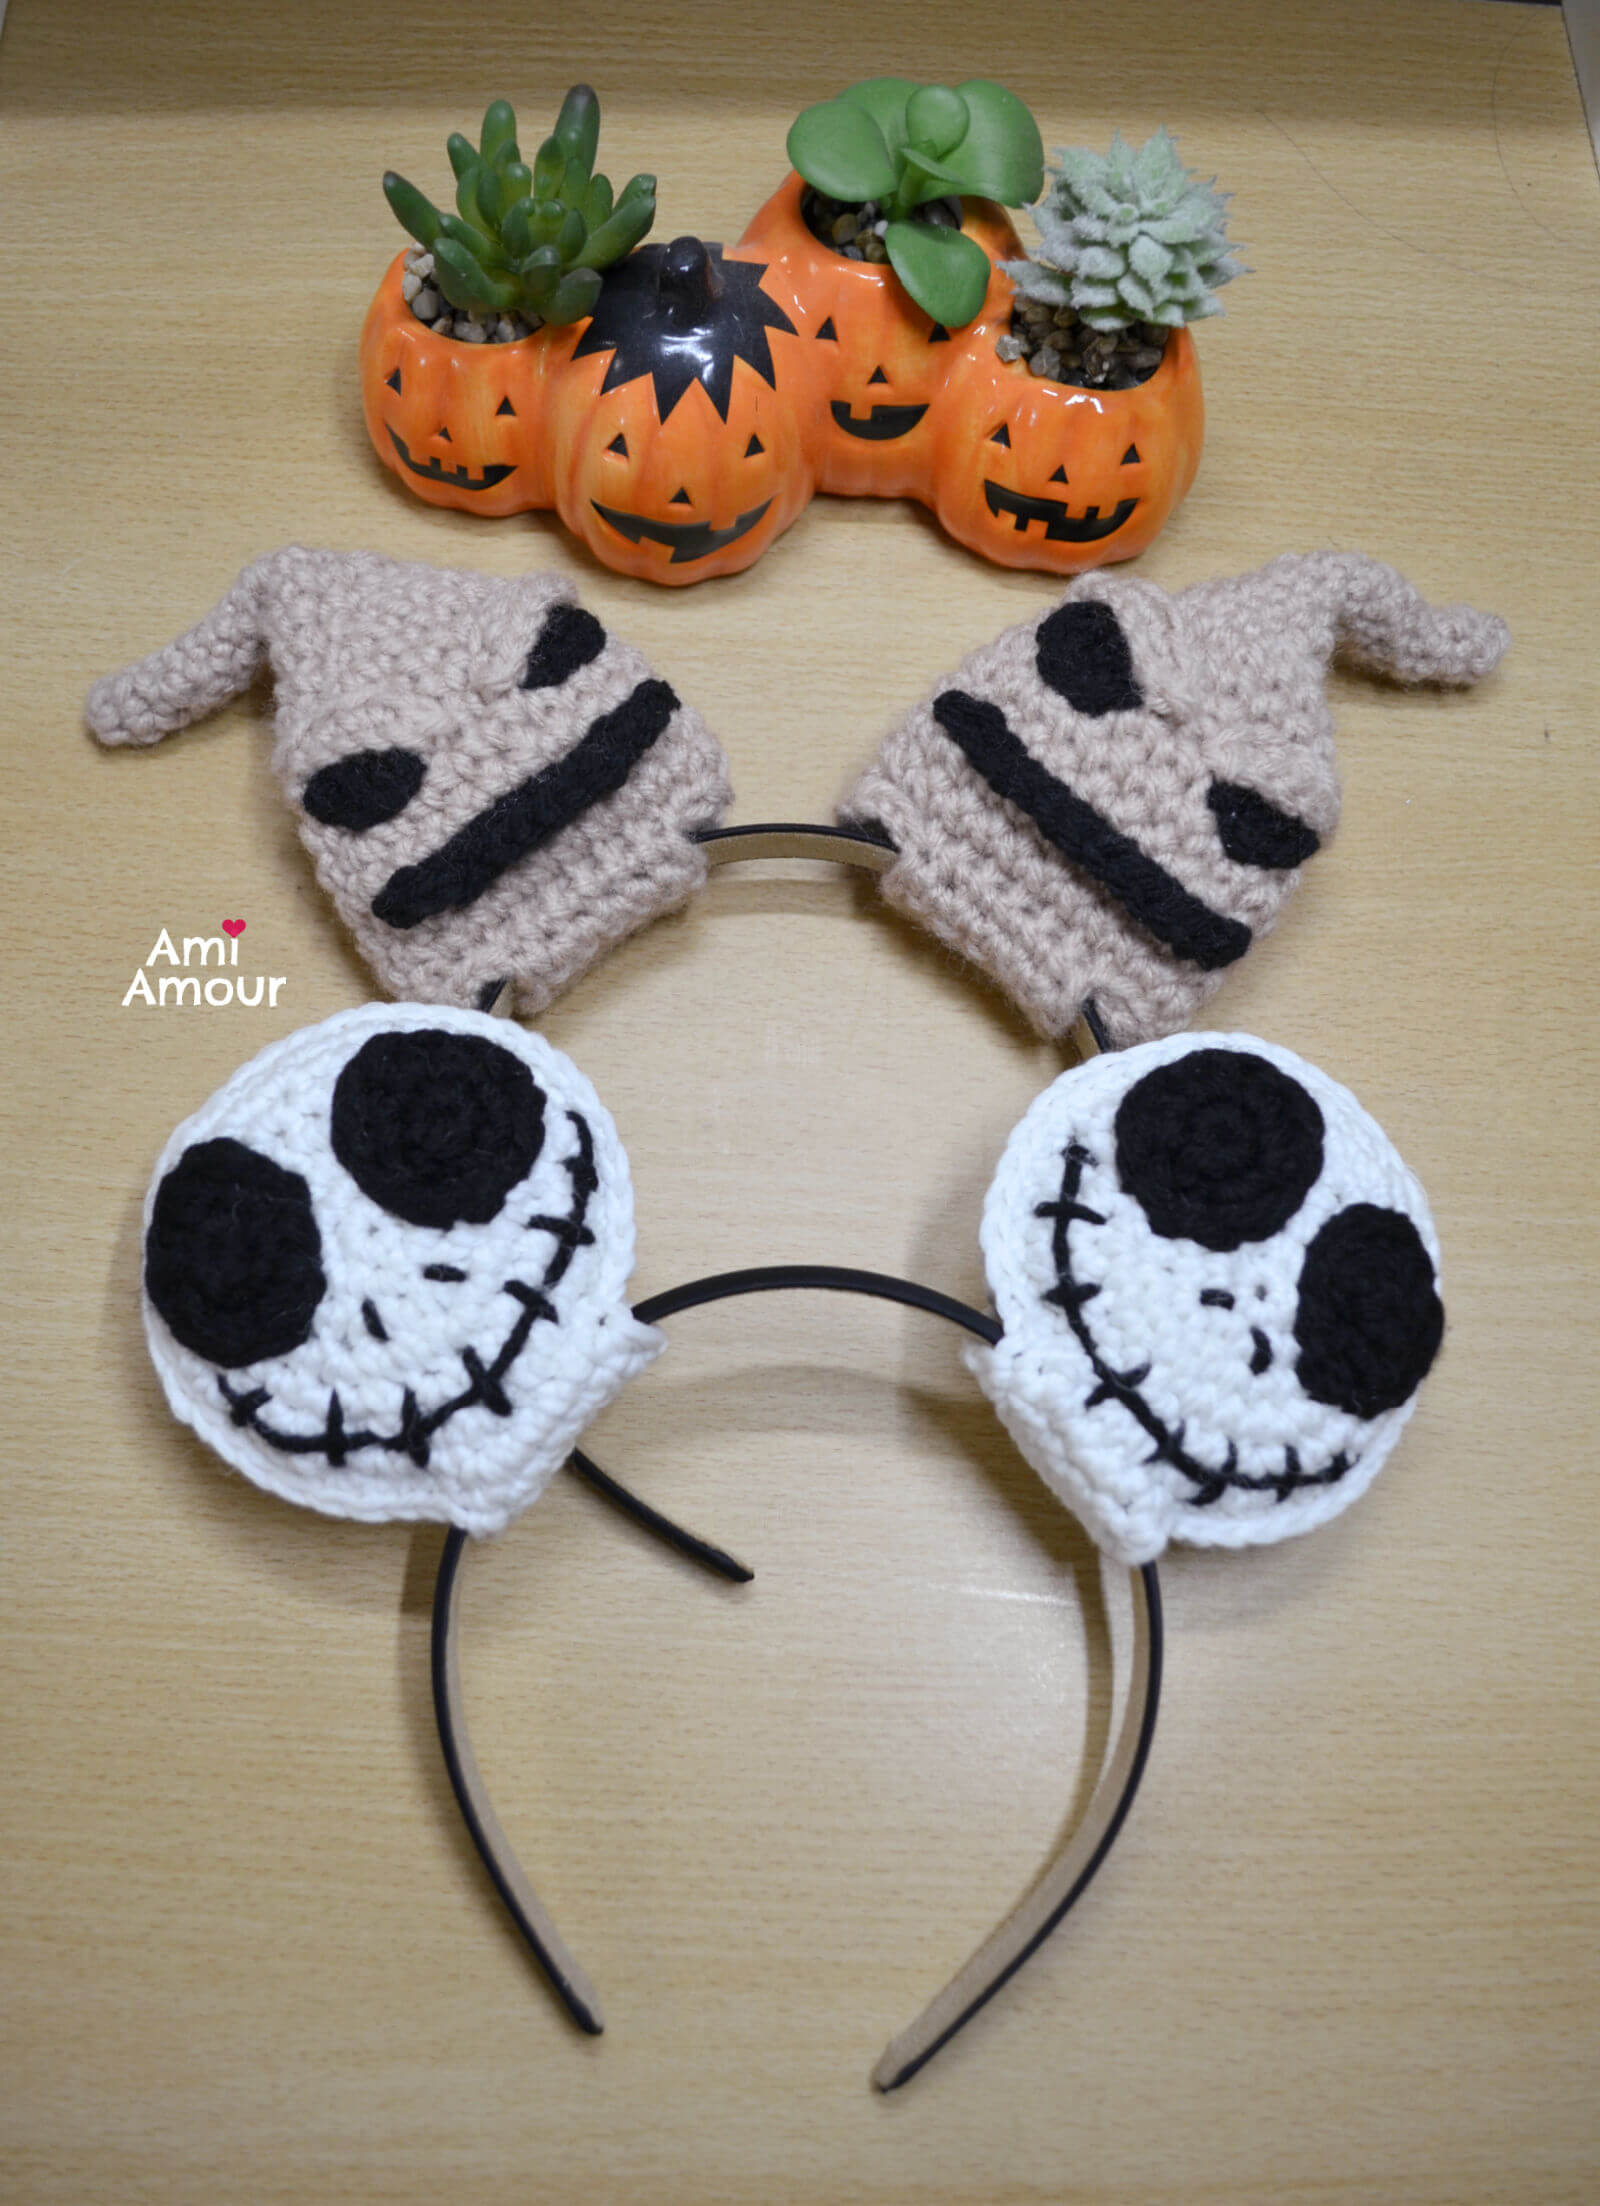
So you can take the ears off and reuse the headband again, or even have one ear as Jack and one ear as Oogie Boogie. If you’re interested in the pattern for Oogie Boogie, let me know. If there’s enough interest, I may write it up one day!
UPDATE: I wrote up the pattern for crochet Oogie Boogie now! Thanks to all those who expressed interest in him. Hope you guys enjoy!
All in all, this is a super quick project to make for Halloween in which you can wear as a fun accessory during parties, trick or treating, or going to Disneyland. Feel free to use the pattern as a head accessory, an applique, or a garland for some great Halloween decor. The skull can even be used like a little pouch to hold candy, and it would make a nice Halloween treat or gift favor!
I would love to see all your ideas in action! So don’t forget to tag me with me your projects on Instagram @ami_amour.
The free written pattern and video tutorial can be found below. Happy Crocheting!
Jack Skellington Ears Crochet Tutorial Video
See the ears glow in action and crochet along with me!

*Disclosure: This post contains affiliate links. This means I may receive a small commission if you decide to purchase anything by clicking on one of these links.
Jack Skellington Ears Crochet Pattern – Nightmare Before Christmas
LEVEL: Easy
CROCHET HOOK: 4.00mm crochet hook
YARN:
Glow in the Dark Yarn (this is the brand I used)
Red Heart Worsted Weight, Acrylic Yarn:
Black (very small amount needed)
HEADBAND: You will need a 2cm (or 3/4 in) headband to insert the crochet ears into.
NOTIONS:
Polyfil Stuffing
Yarn Needle
Stitch Marker
Scissors
Optional: UV Flashlight
This is great to have when you’re going out at night and there’s no light source around. You can use it quickly charge your Glow in the Dark project and have it eerily glowing again in a jiffy!
Jack Skellington Skull
With glow in the dark yarn
Round 1: 6 sc into magic ring
Round 2: 2 sc in each st around – 12 sc.
Round 3: [2 sc in next st, sc in next st] around – 18 sc.
Round 4: [2 sc in next st, sc in next 2 st] around – 24 sc.
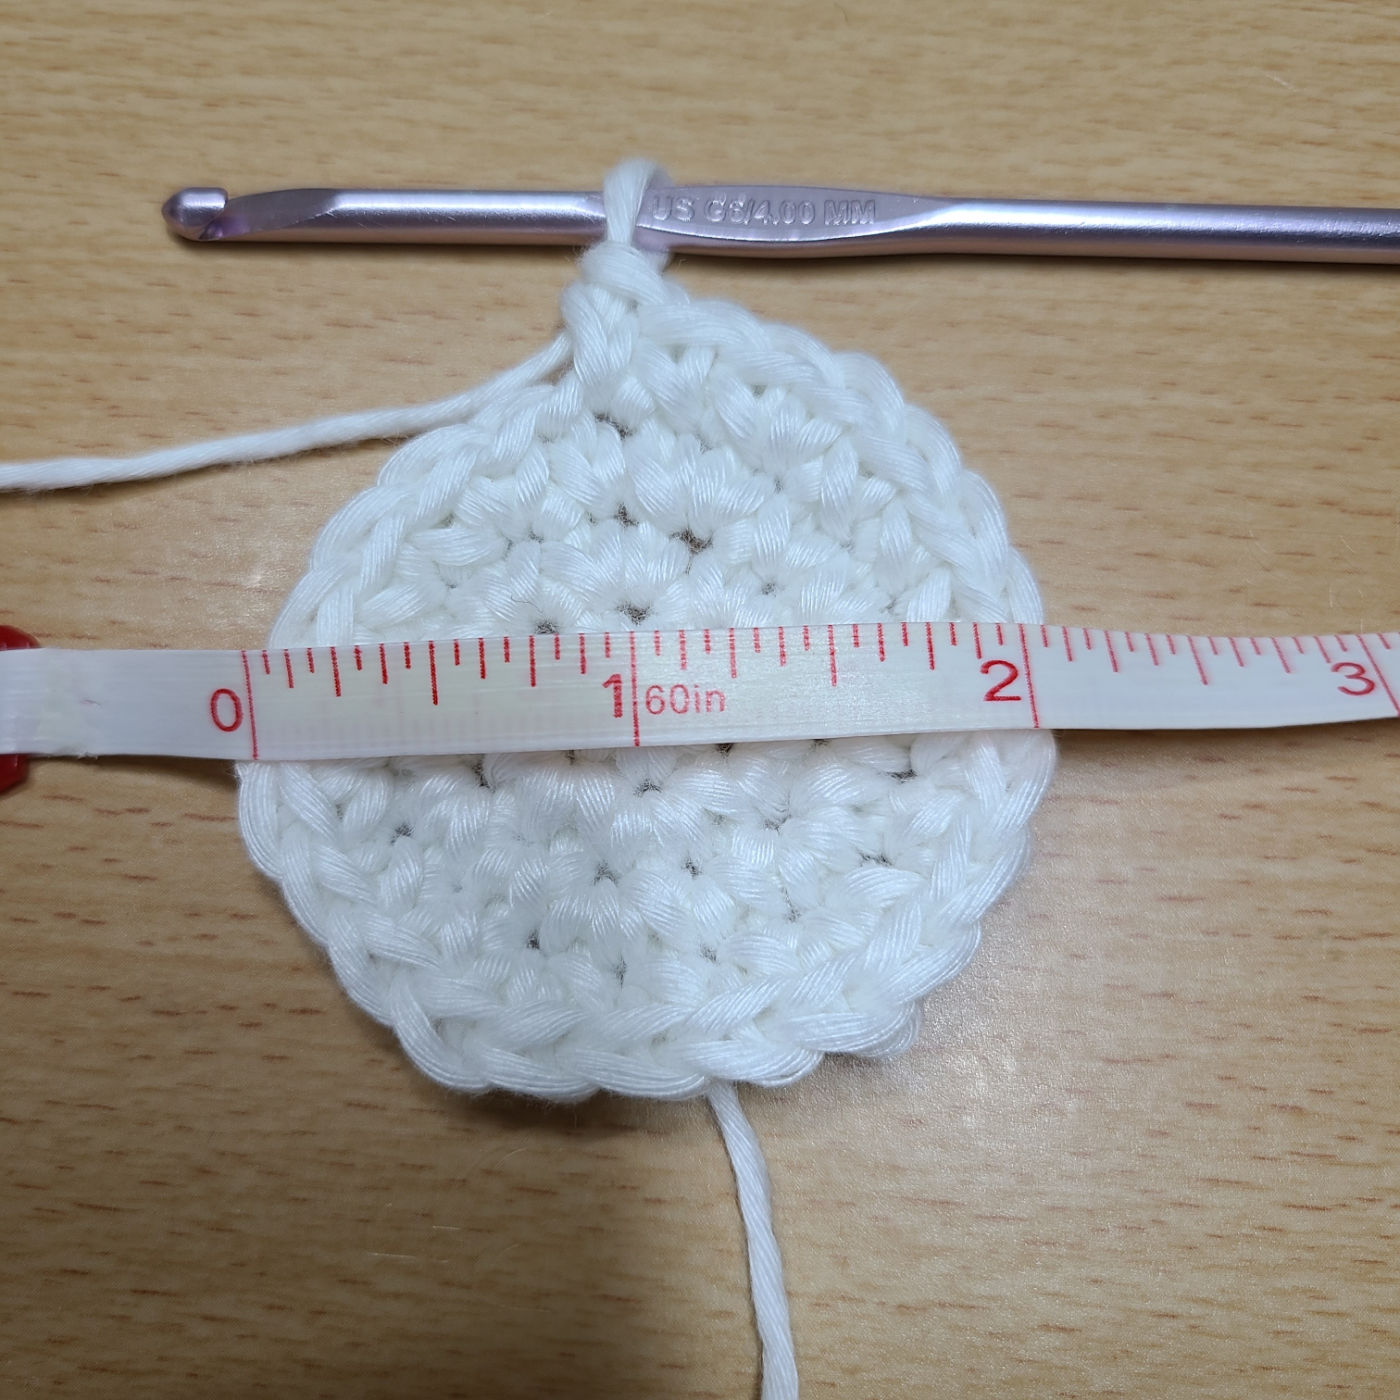
If you want to check your gauge, after 4 Rounds you should be at about 2in (5cm) wide in diameter. It doesn’t have to be exact and it’s ok if you’re off. If it’s bigger, than that means you’ll just get a bigger size skull than mine, or if it’s smaller, than you’ll get a smaller size skull.
Round 5: [2 sc in next st, sc in next 3 st] around – 30 sc.
Round 6: [2 sc in next st, sc in next 4 st] around – 36 sc.
Round 7: [2 sc in next st, sc in next 5 st] around – 42 sc.
Fasten off, cut a short tail.
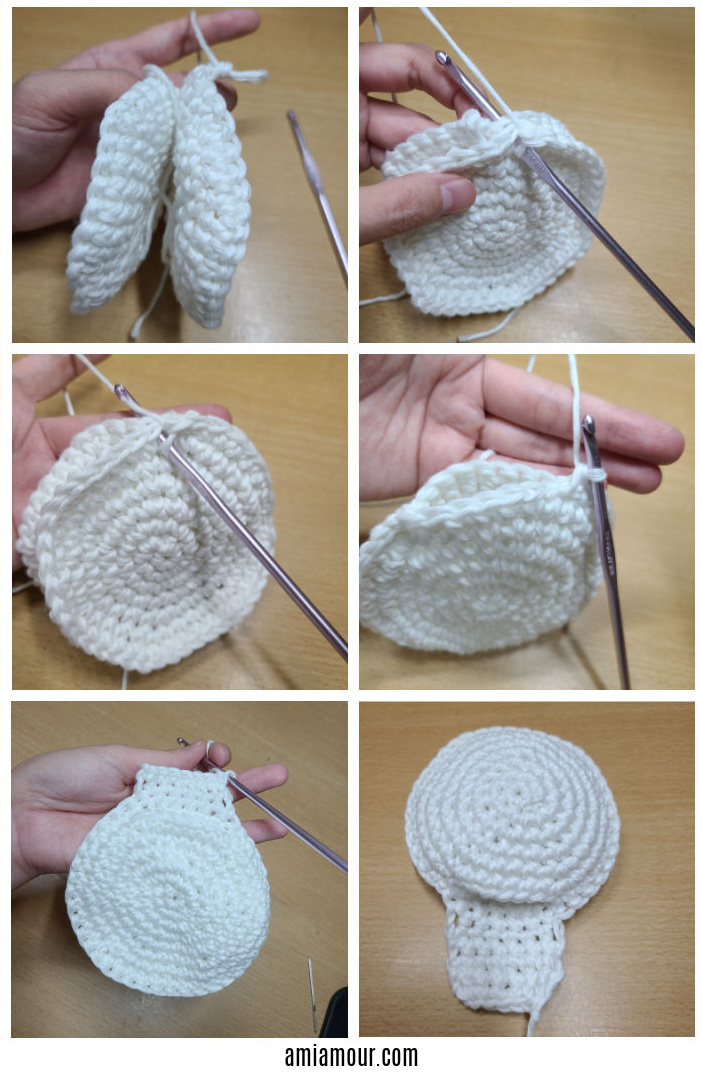
Repeat Rounds 1 to 7 to create a 2nd part, but do not fasten off. Place the circles back to back. For Round 8 we will now join the 2 circles together.
Round 8: Join with sc through both layers of the circle for 35 st only. You will have 7 sts left, which leaves a hole/opening in the circle. [See photos below or this part of the video tutorial]
We will now work in rows on the front circle part only (we are no longer going through both layers).
Row 9: Sc in next 7 st only.
Row 10-14: Ch 1, turn, sc in next 7 st only – 7 st.
Fasten off, leaving a super long tail.
SKULL EAR ASSEMBLY
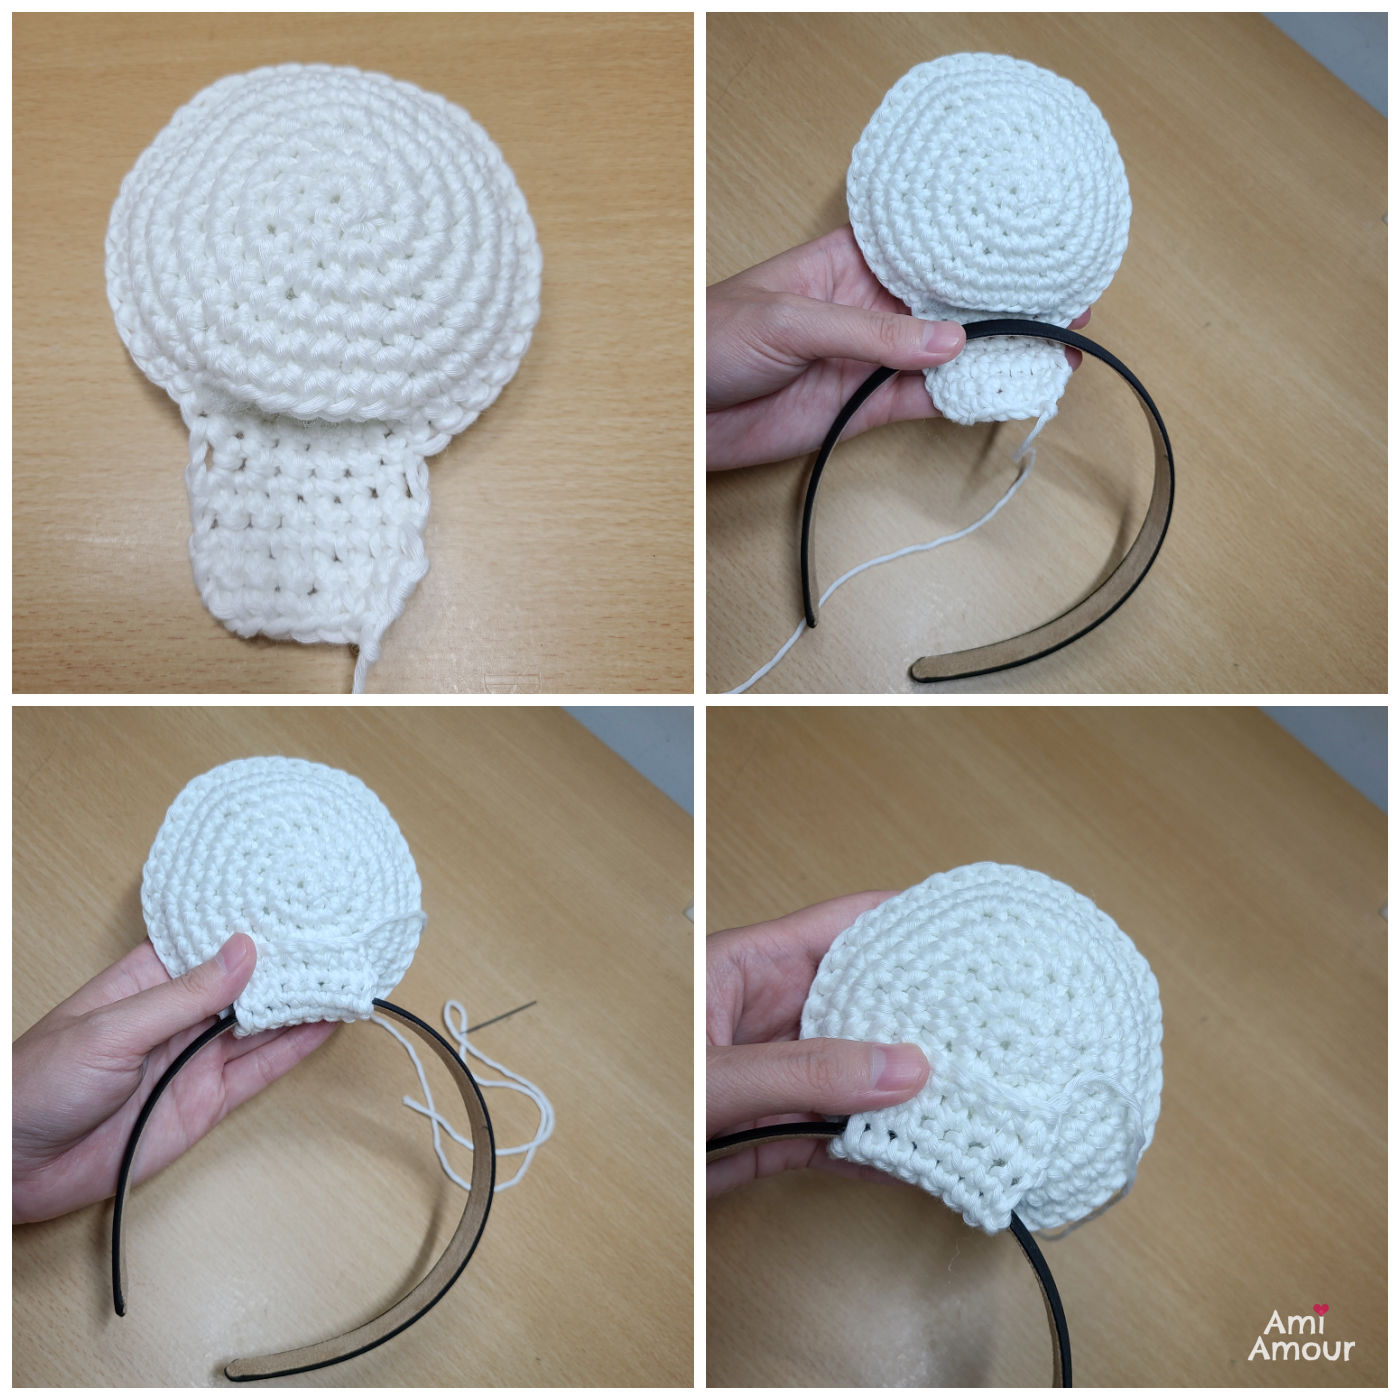
1. Go ahead and stuff the circle portion with polyfil.
2. Place the Jack Skull underneath the headband. Wrap the row section over the headband to place on top of the circle again.
3. Make sure to wrap tight. I like to make the row match up to about underneath the first round of the ear.
4. Sew into place. You can watch the tutorial here to see how I like to sew it.
SKULL EYES (make 2)
With black worsted weight yarn
Round 1: 6 sc into magic ring.
Round 2: 2 sc in next 3 st, 2 hdc in next 3 st – 12 st.
Round 3: Sc in next 3 st only.
Fasten off, leaving a long tail.
SKULL FACE ASSEMBLY
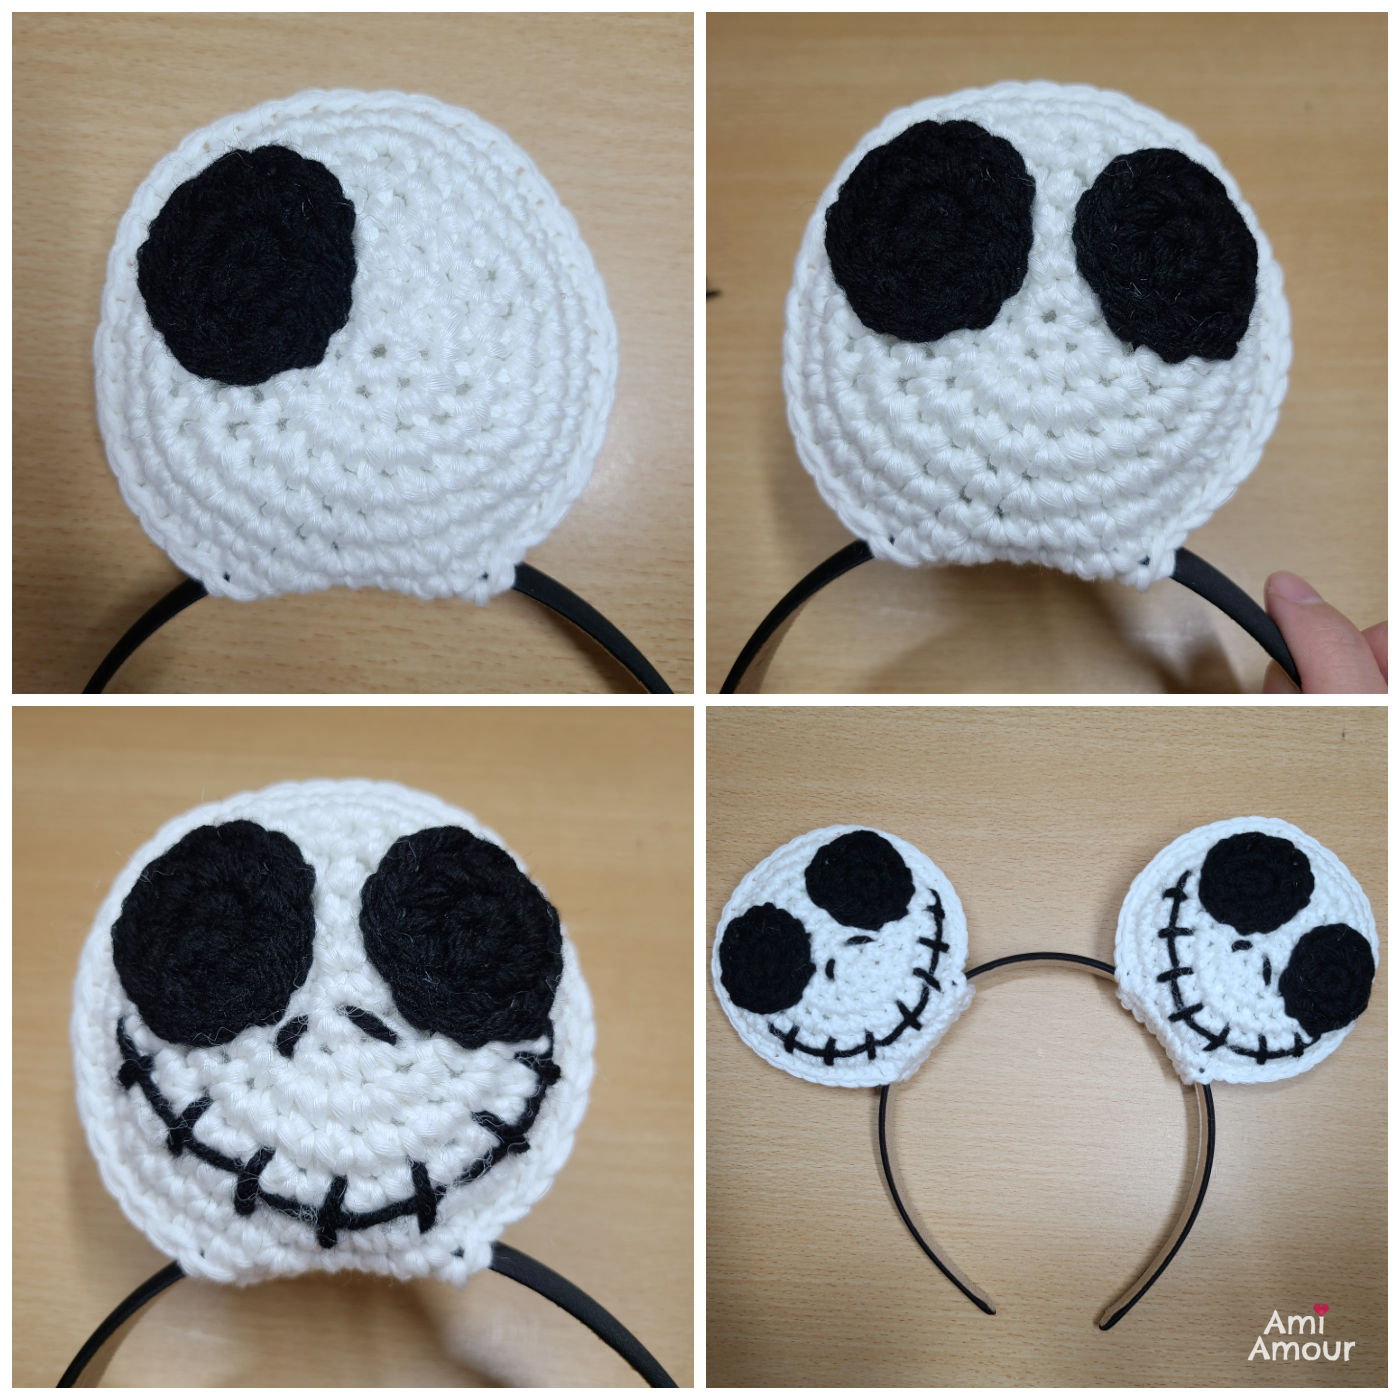
1. Sew the Eyes onto the Face.
2. With black worsted weight acrylic yarn, embroider the mouth onto the face.
3. Embroider the nose onto the face.
4. Repeat the entire pattern one more time to create the 2nd Ear.
5. Place both onto the Headband and you have your completed crochet Jack Skellington Ears.
6. Charge up your Jack Skellington Ears with light, sunlight, or this portable UV Flashlight (great to use at night when no lightsource is around) and watch it glow!
7. Go out and enjoy the festivities and make sure you tag me with your projects at Instagram @ami_amour.
8. Don’t forget to also make the Oogie Boogie Ears too!

Jack Skellington Ears - Crochet Pattern
These Jack Skellington Crochet Ears are the perfect accessory for the spooky holiday! Best of all, they even glow in the dark!
Materials
Yarn
- Glow in the Dark Yarn
- Red Heart Super Saver (Worsted weight, acrylic yarn): Color Black
Other Materials
- 2cm wide Headband
- Polyester Fiberfill
Tools
- 4.0mm crochet hook
- Yarn Needle
- Stitch Marker
- Scissors
Instructions
Jack Skellington Skull
With glow in the dark yarn
Round 1: 6 sc into magic ring.
Round 2: 2 sc in each st around - 12 sc.
Round 3: [2 sc in next st, sc in next st] around - 18 sc.
Round 4: [2 sc in next st, sc in next st] around - 24 sc.
Round 5: [2 sc in next st, sc in next 3 st] around - 30 sc.
Round 6: [2 sc in next st, sc in next 3 st] around - 36 sc.
Round 7: [2 sc in next st, sc in next 4 st] around - 42 sc.
Fasten off and cut a short tail for the first circle.
Repeat Round 1 to 7 to create a 2nd part, but DO NOT fasten off for the 2nd Circle. Place the circles back to back. For Round 8 we will now join the 2 circles together with sc.
Round 8: Join with sc through both layers of the circle for 35 st only. You will have 7 st left, which leaves a hole/opening in the circle. [See photos below or this part of the video tutorial here]
We will now work in rows on the front circle part only (we are no longer going through both layers).
Row 9: Sc in next 7 st only.
Row 10-14: Ch 1, turn, sc in next 7 st only - 7 st.
Fasten off, leaving a super long tail.
SKULL EAR ASSEMBLY
1. Go ahead and stuff the circle portion with polyfil.
2. Place the Jack Skull underneath the headband. Wrap the row section over the headband to place on top of the circle again.
3. Make sure to wrap tight. I like to make the row match up to about underneath the first round of the ear.
4. Sew into place. You can watch the tutorial here to see how I like to sew it.
SKULL EYES (make 2)
With worsted weight, acrylic yarn in the color Black
Round 1: 6 sc into magic ring.
Round 2: 2 sc in next 3 st, 2 hdc in next 3 st - 12 st.
Round 3: Sc in next 3 st only.
Fasten off, leaving a long tail.
SKULL FACE ASSEMBLY
1. Sew the Eyes onto the Face.
2. With black worsted weight acrylic yarn, embroider the mouth onto the face.
3. Embroider the nose onto the face.
4. Repeat the entire pattern one more time to create the 2nd Ear.
5. Place both onto the headband and you have your completed crochet Jack Skellingon Ears.
6. Charge up your Jack Skellington Skulls with light, sunlight, or a portable UV Flashlight and watch it glow!
7. Go out and enjoy the festivities and make sure you tag me with your projects on Instagram @ami_amour. I'd love to see!
8. Don't forget to make the Oogie Boogie Ears too!
5 Comments
Leah Crane
October 19, 2023 at 3:46 amLove it! Thank you!! Did you write up a pattern for Oogie Boogie because I’m obsessing over it now…lol Yes, we do need Oogie too 😉
Ami Amour
September 14, 2024 at 9:28 amHi, yes I’ve written up the pattern for Oogie Boogie Ears now. Thanks so much for expressing your interest!
Caitlin Thomas
November 25, 2023 at 6:02 amI’d love the OOGIE BOOGIE Ears too!
Reyley
August 29, 2024 at 3:27 pmHi can I get the oogie boogie pattern please
Liz Ashley
September 1, 2024 at 6:08 amI would love the ooogie boogie pattern!