
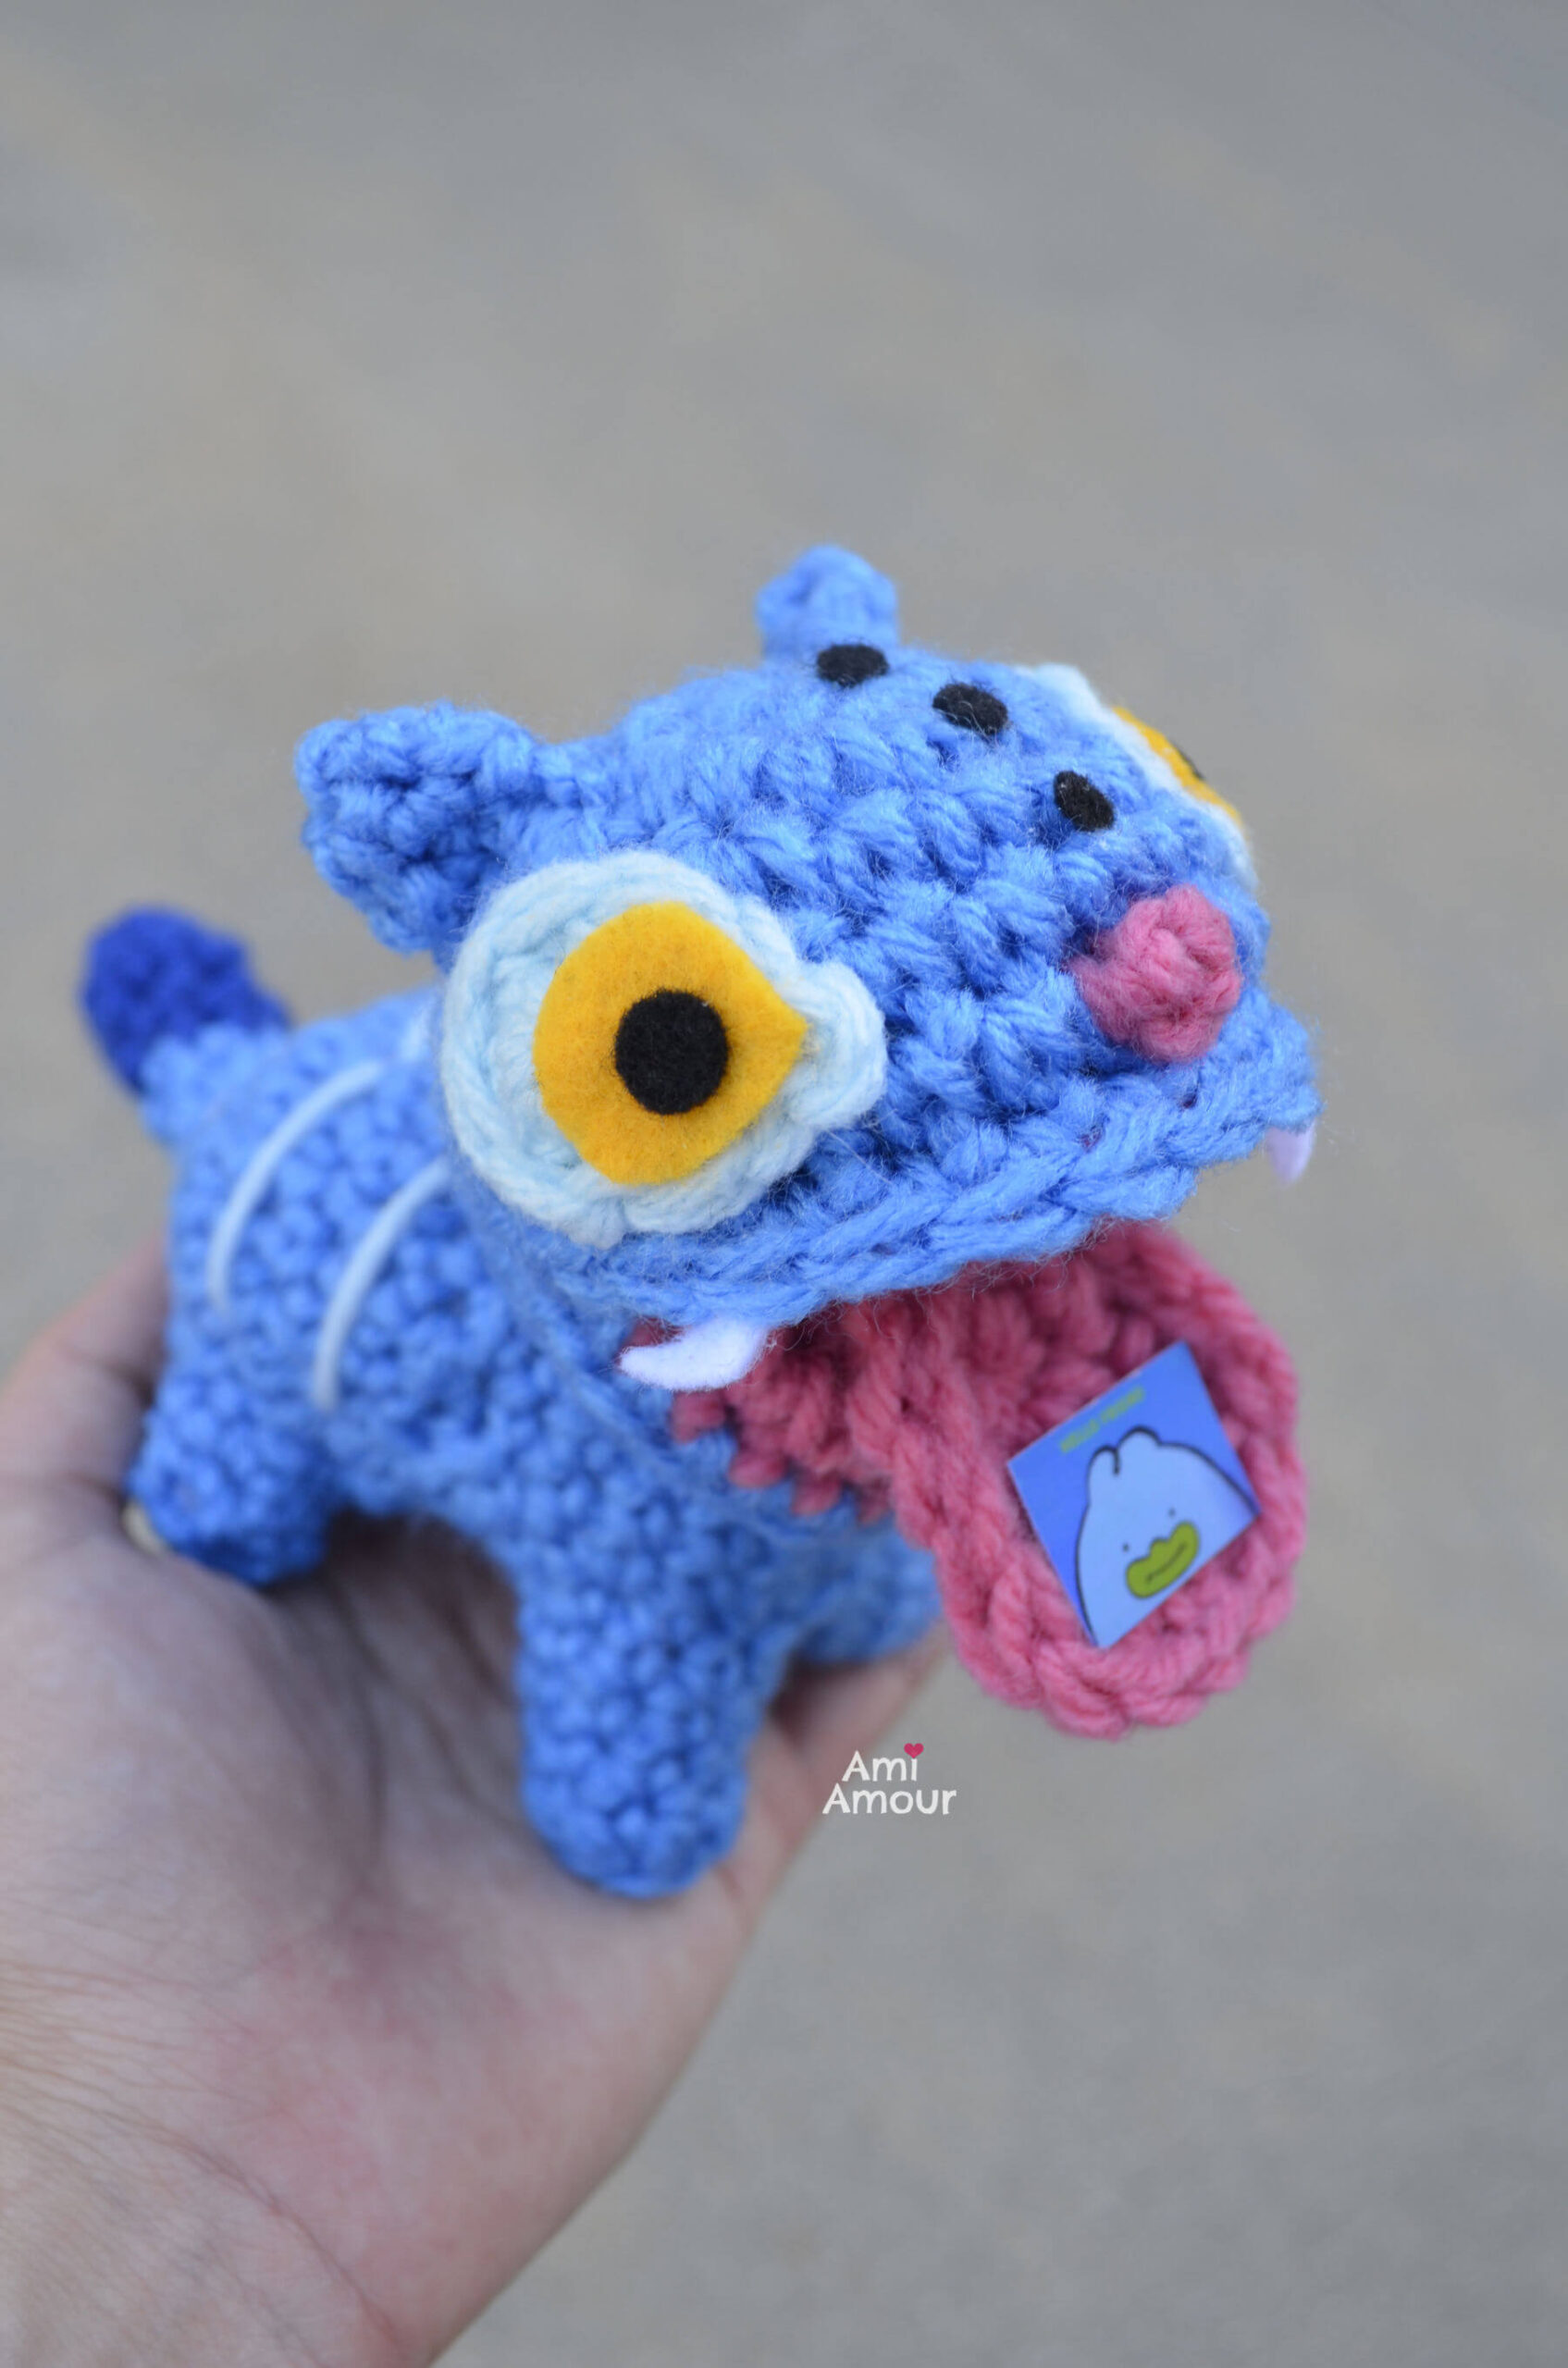
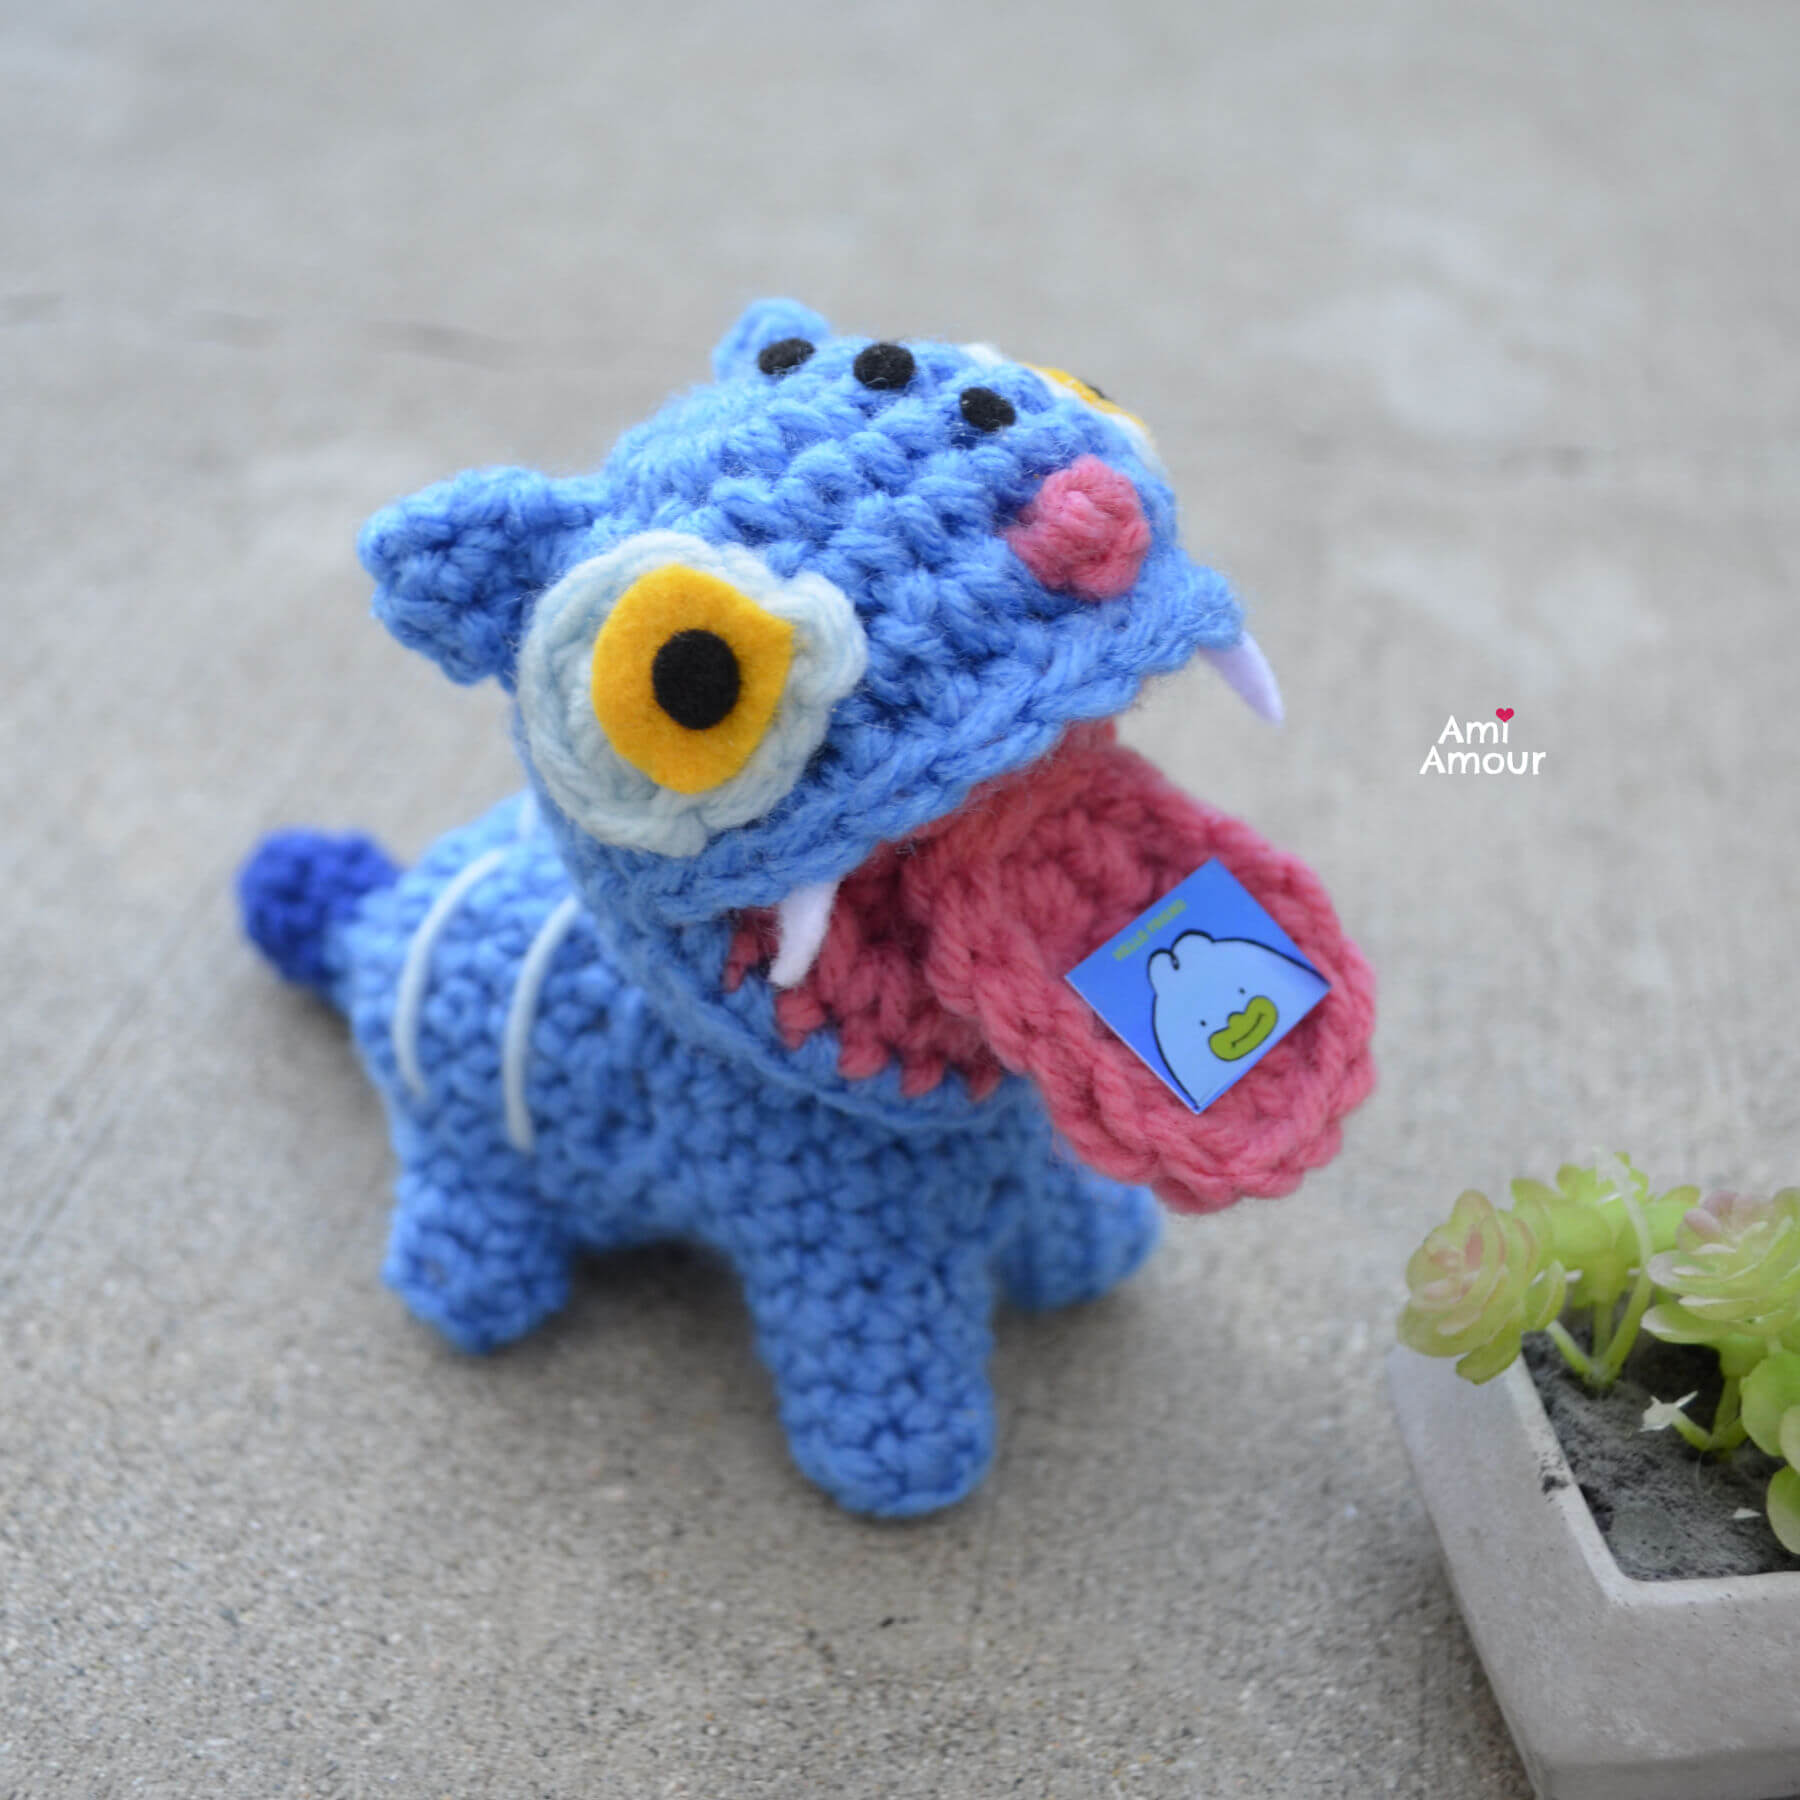
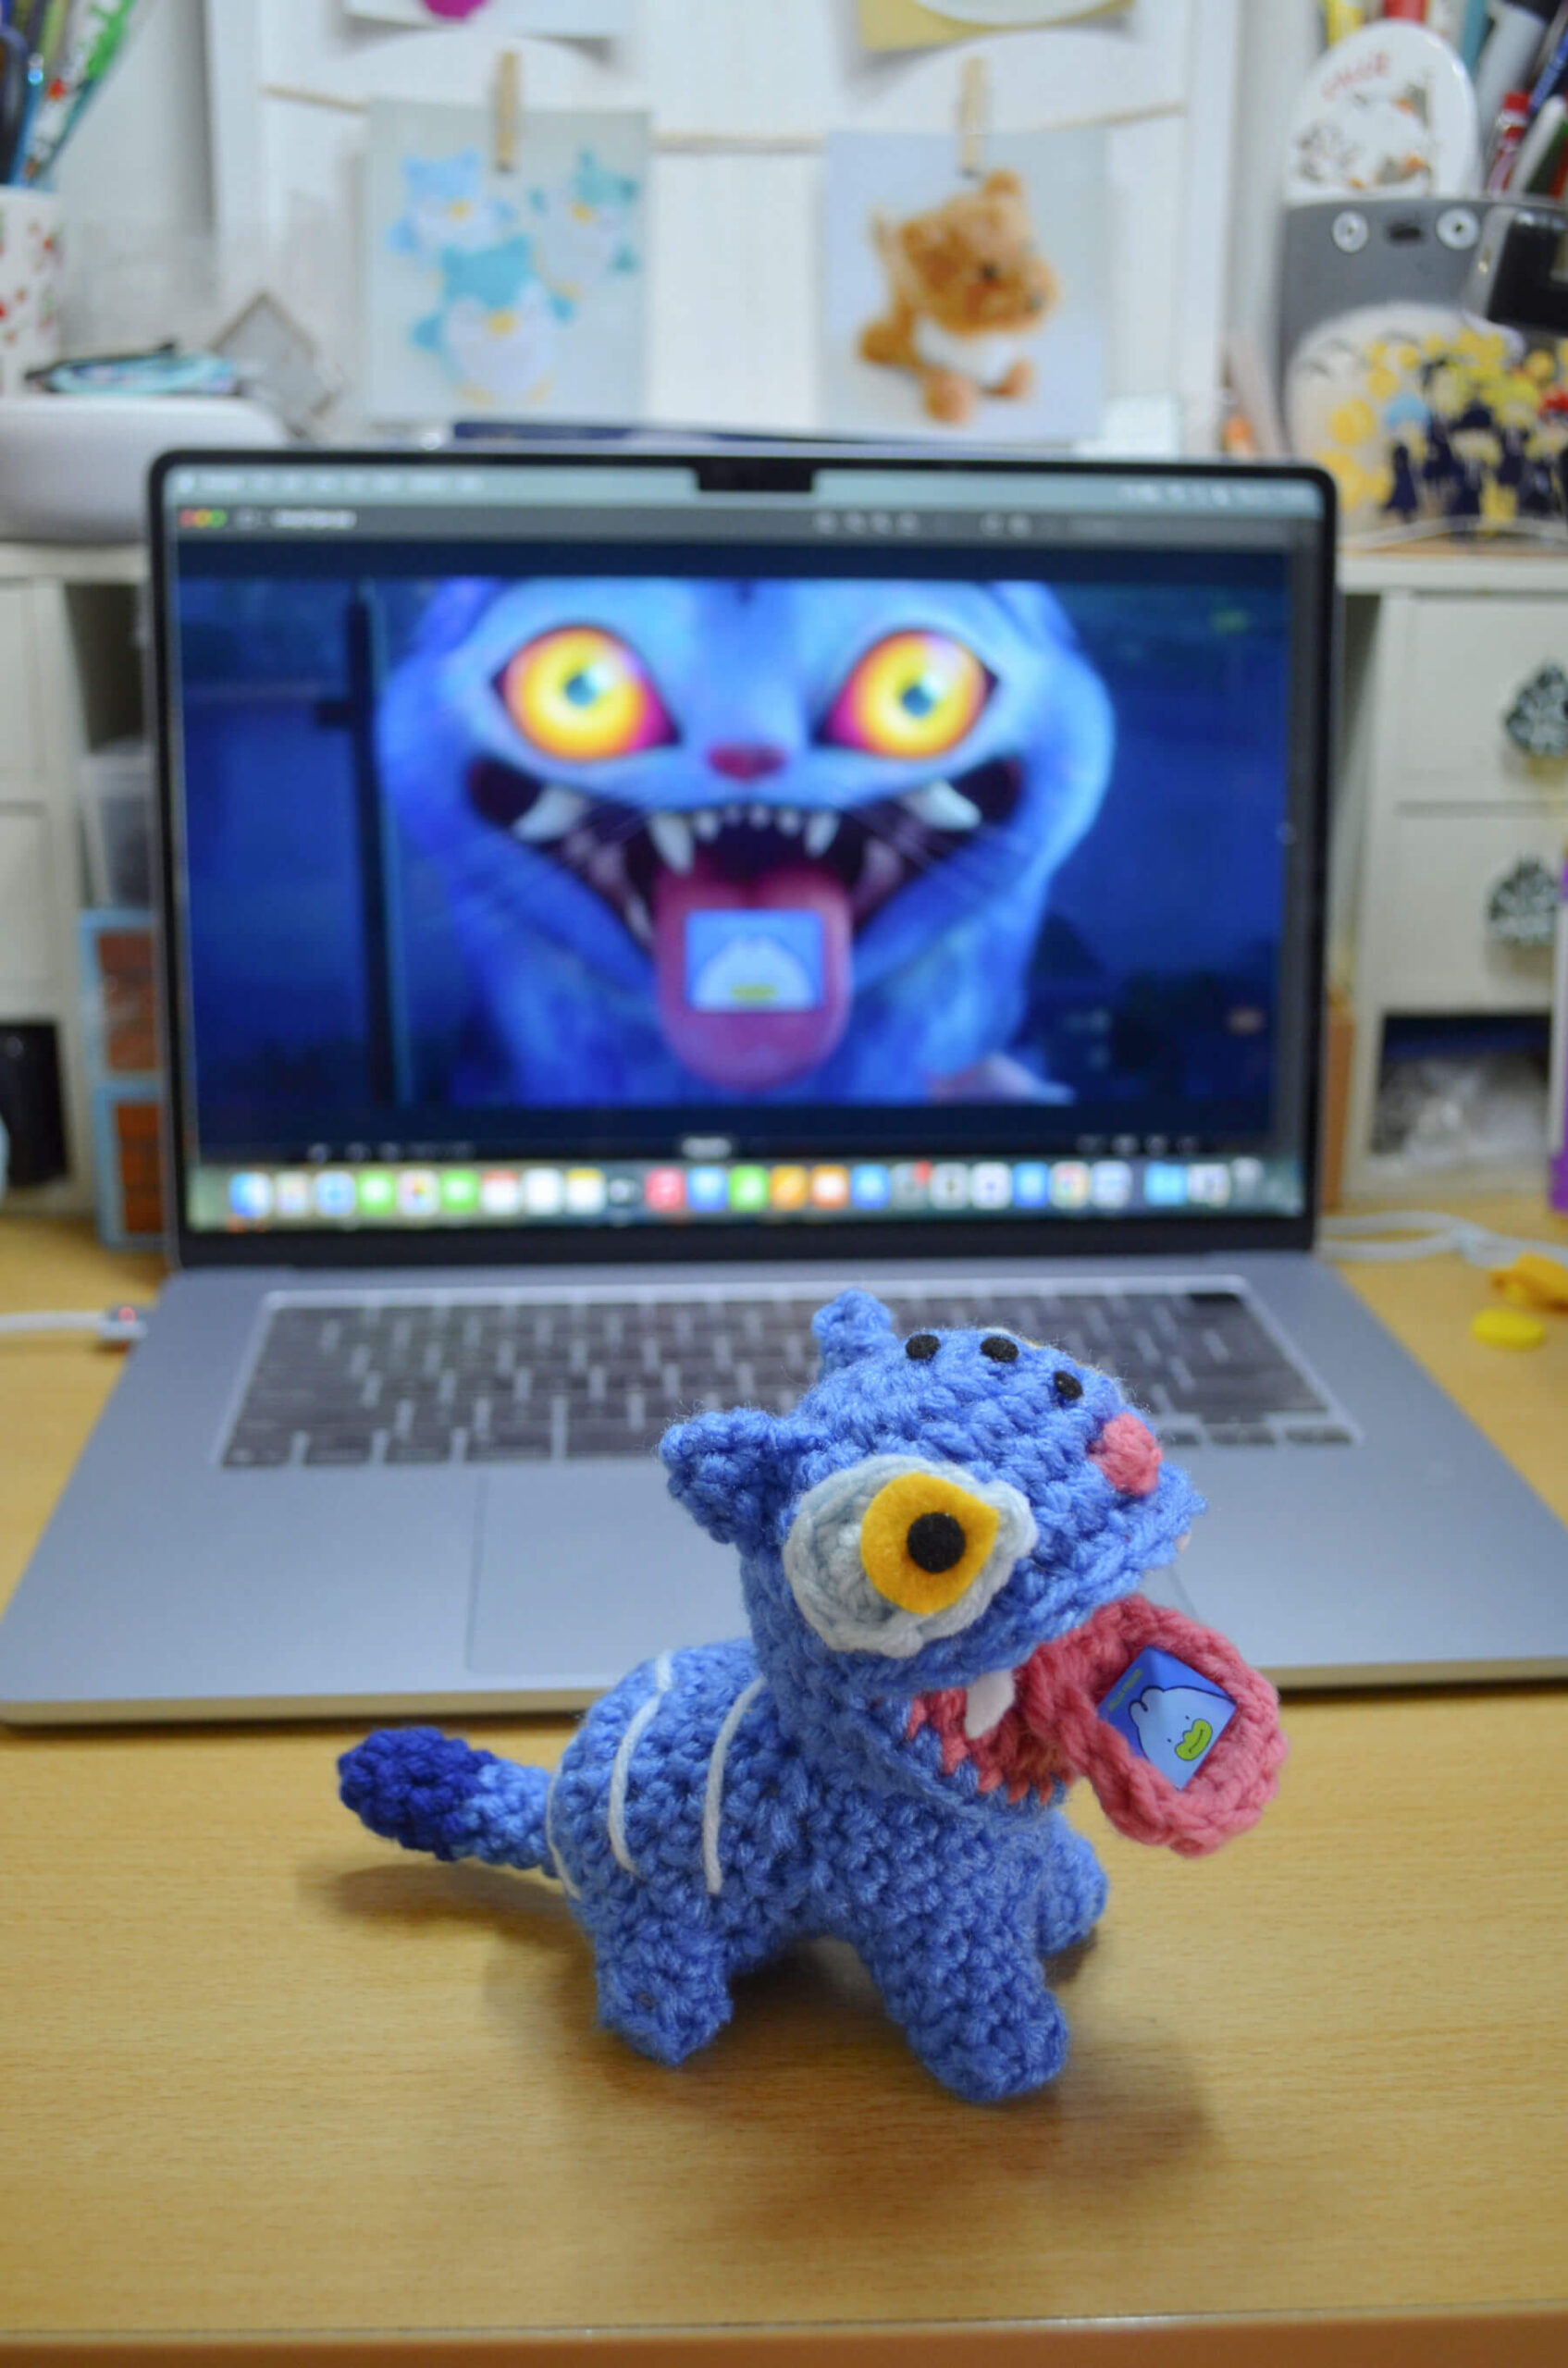
Hey guys, I’m continuing on with my Open Mouth Amigurumi series, but this is a character from the viral sensation K-Pop Demon Hunters, an animated movie from Netflix. Introducing crochet Derpy Tiger in a fun and free crochet pattern!
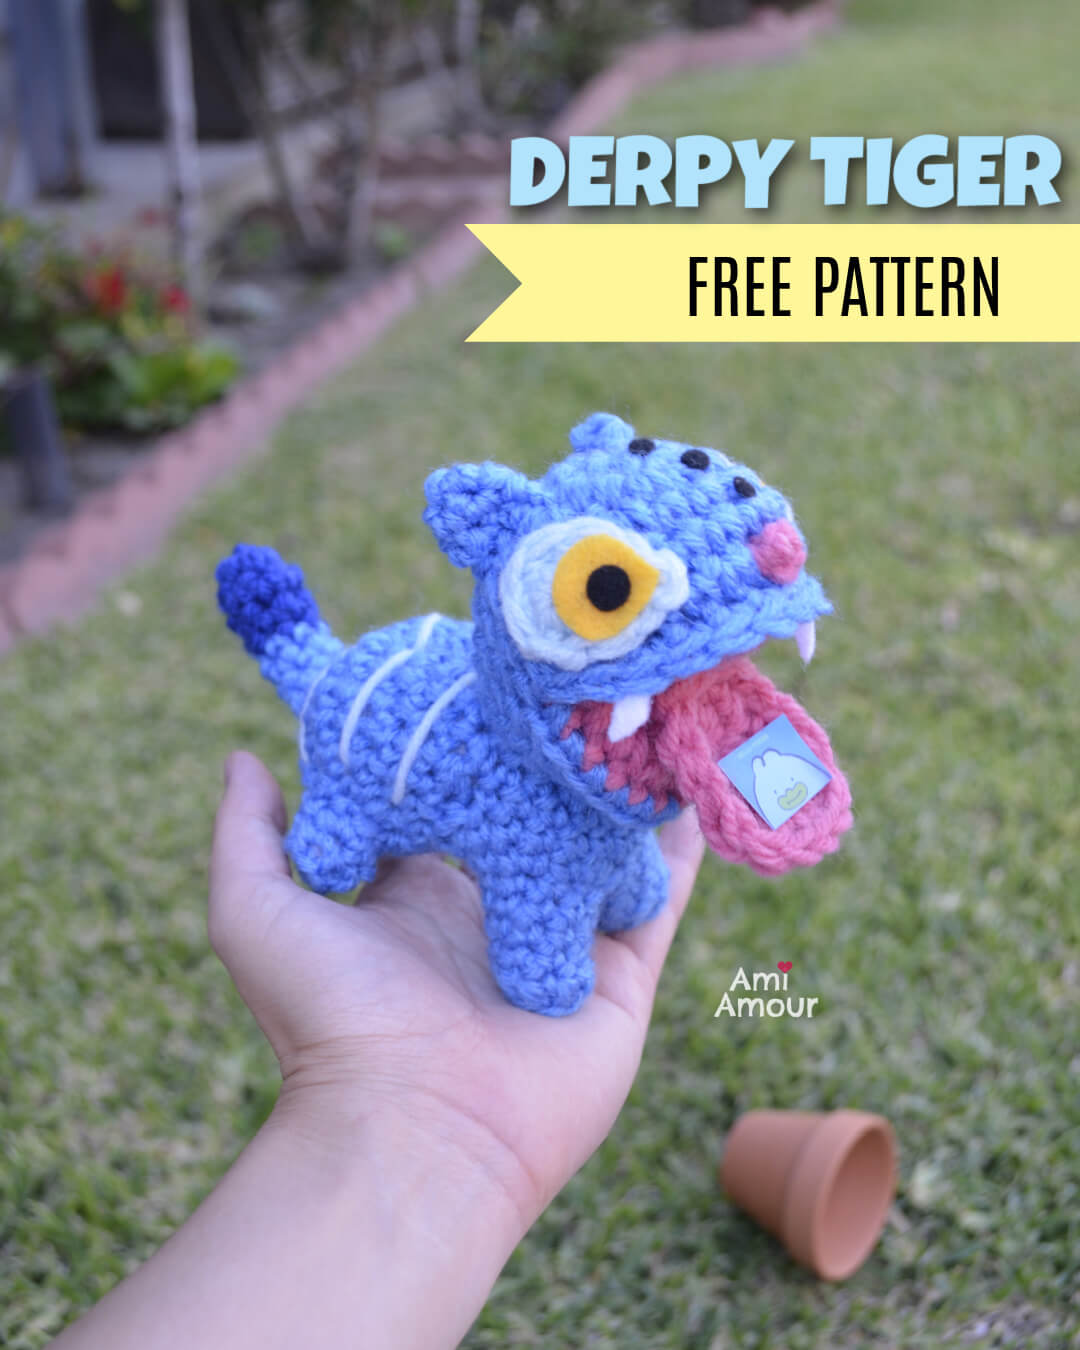

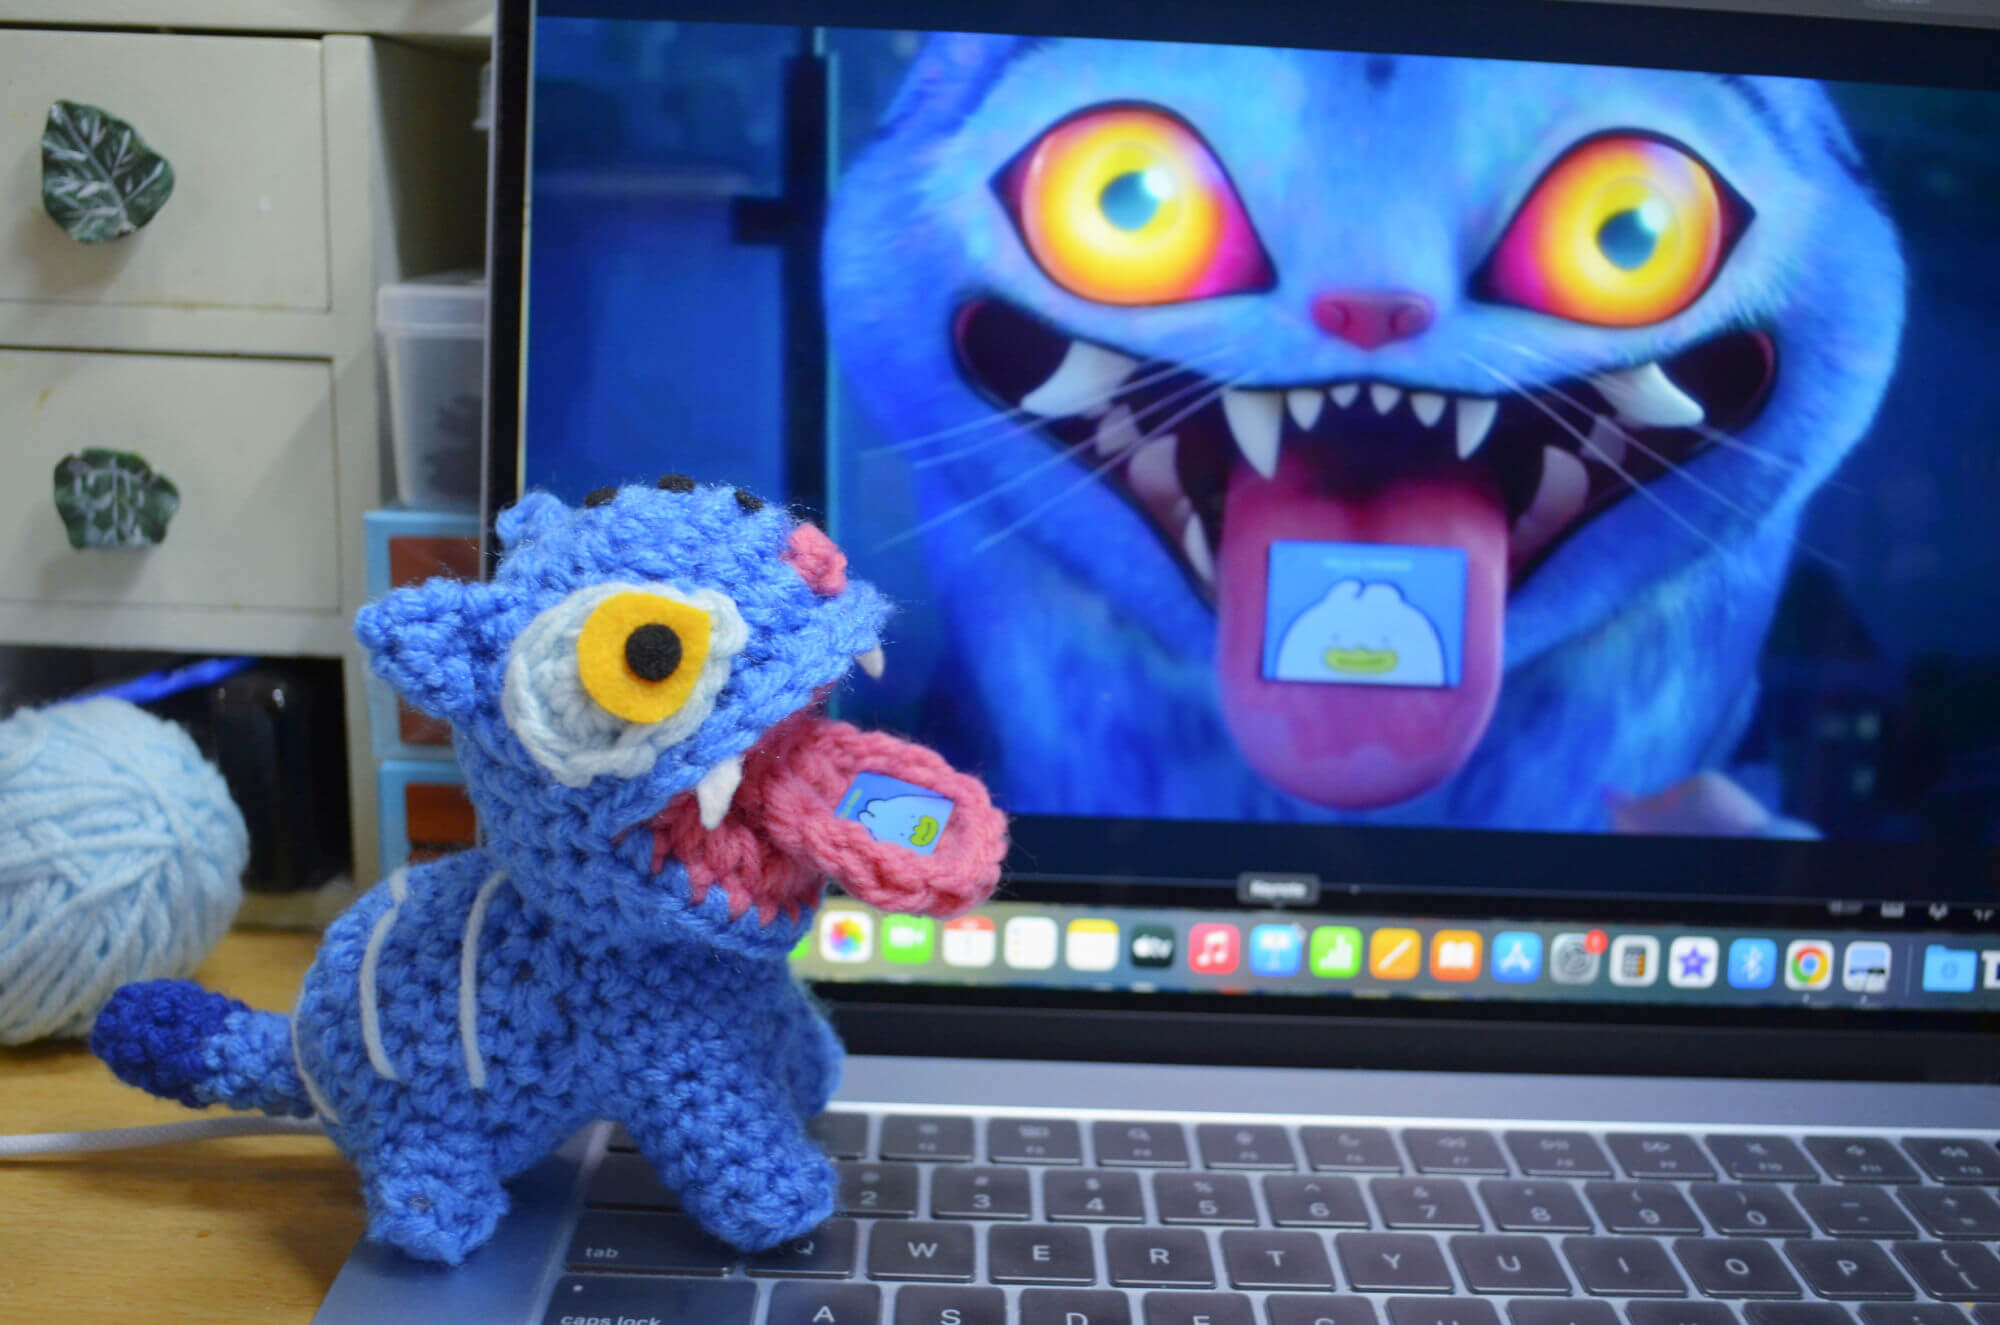
When I first saw Derpy Tiger on screen, and in the moment he rolls out his tongue and reveals a note to act as a special messenger between two of the characters in KPop Demon Hunters, I knew I would have to make an amigurumi version of the Derpy Tiger.
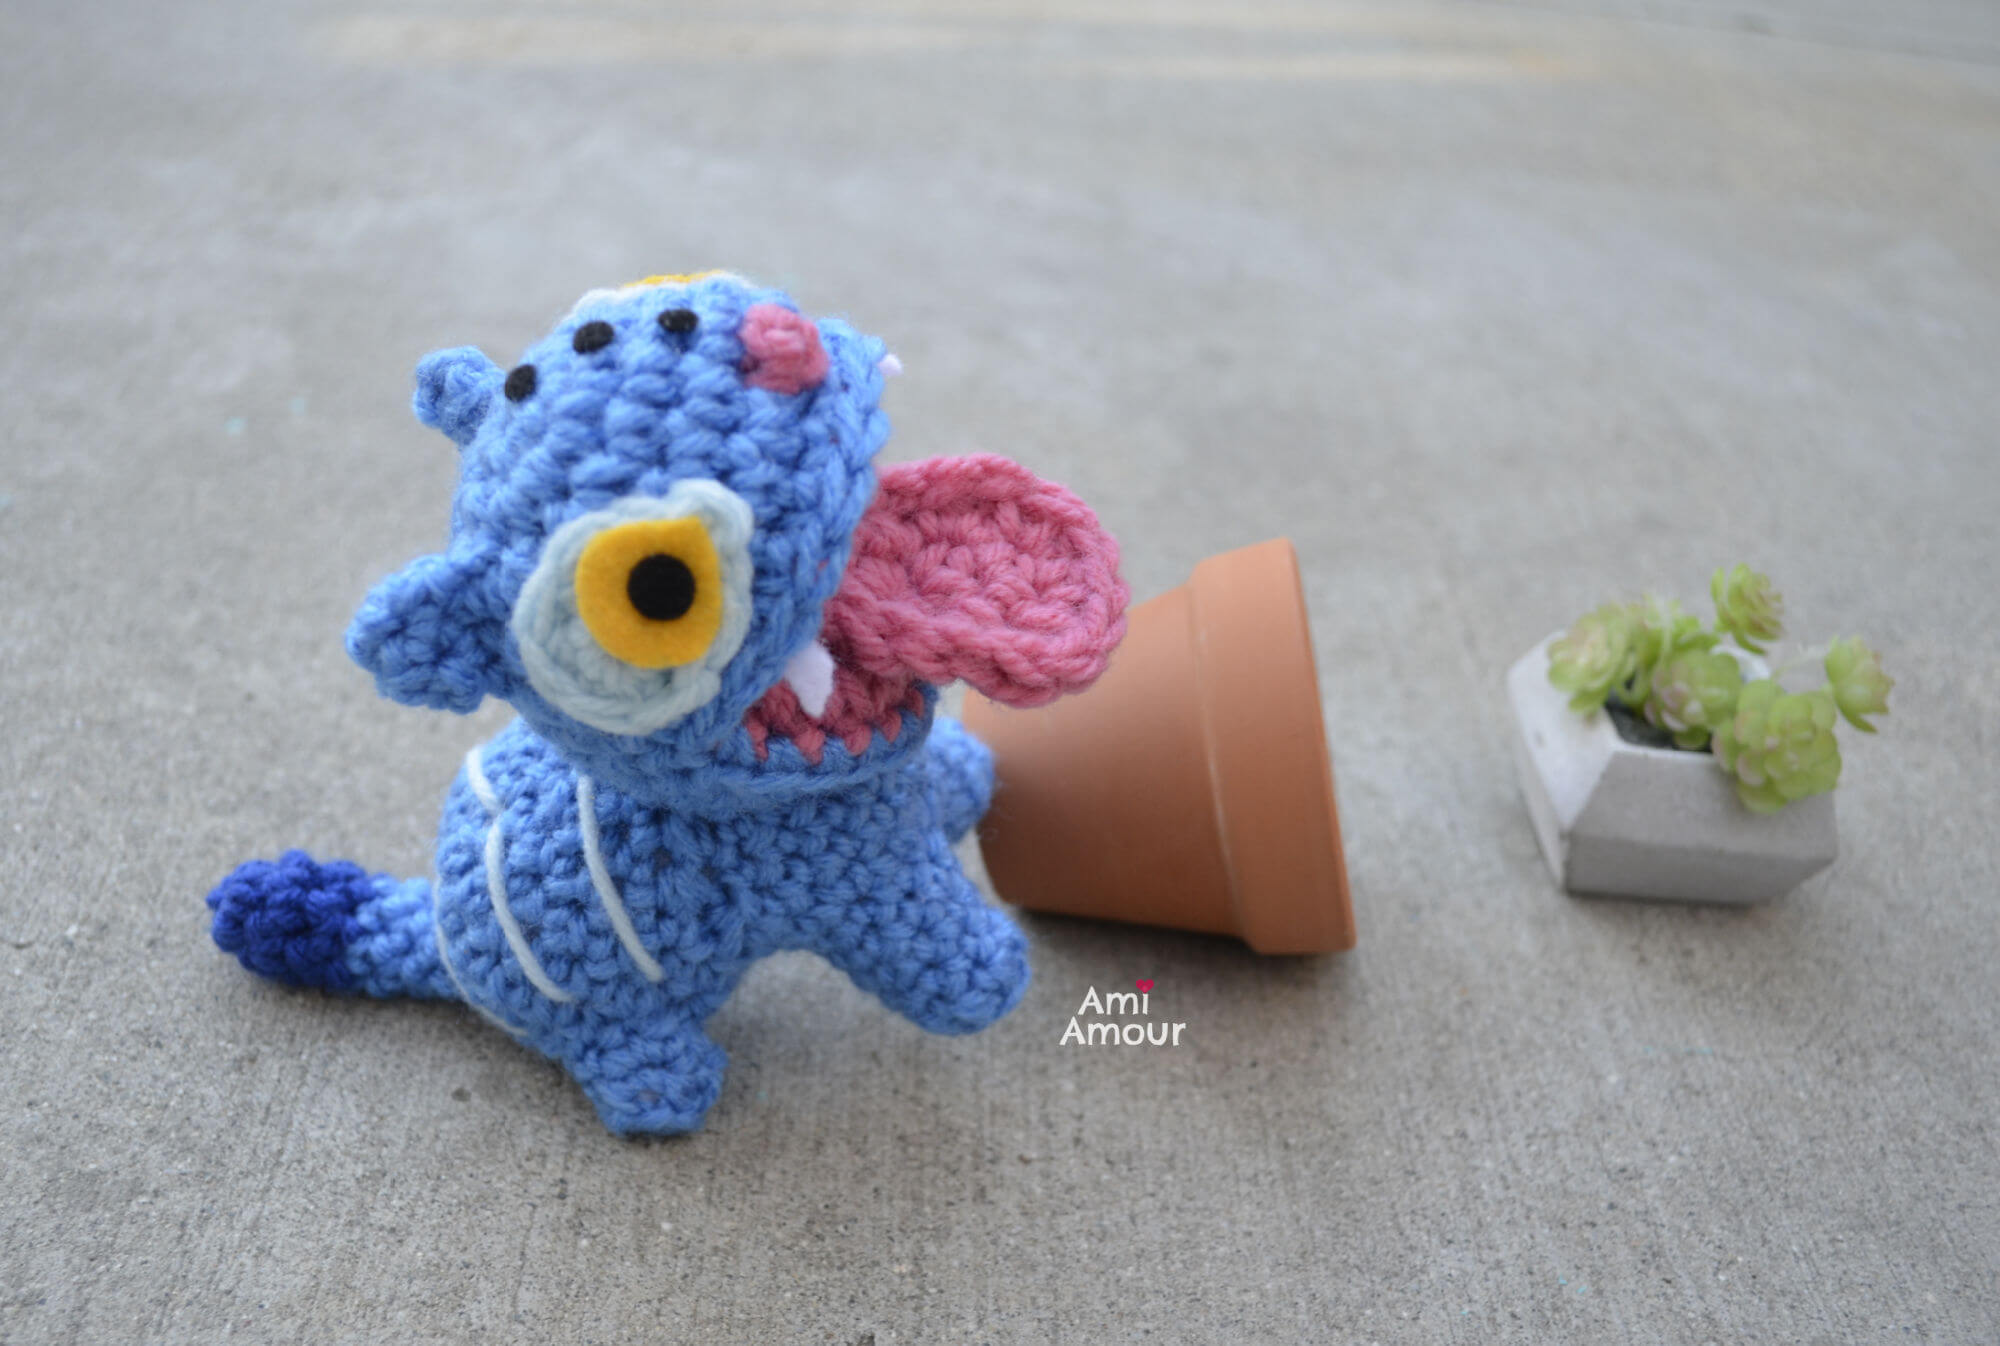
He seems to have similar characteristics of a cat. It’s quite funny though because cats usually like to tip over stuff, but this derpy tiger has the opposite tendency. When things get knocked over (like a flower pot), he can’t help but try to make it upright and get it fixed right away. We love an OCD King!
No matter how many times this special messenger’s notes gets rejected, he comes back unfailing with even more notes.
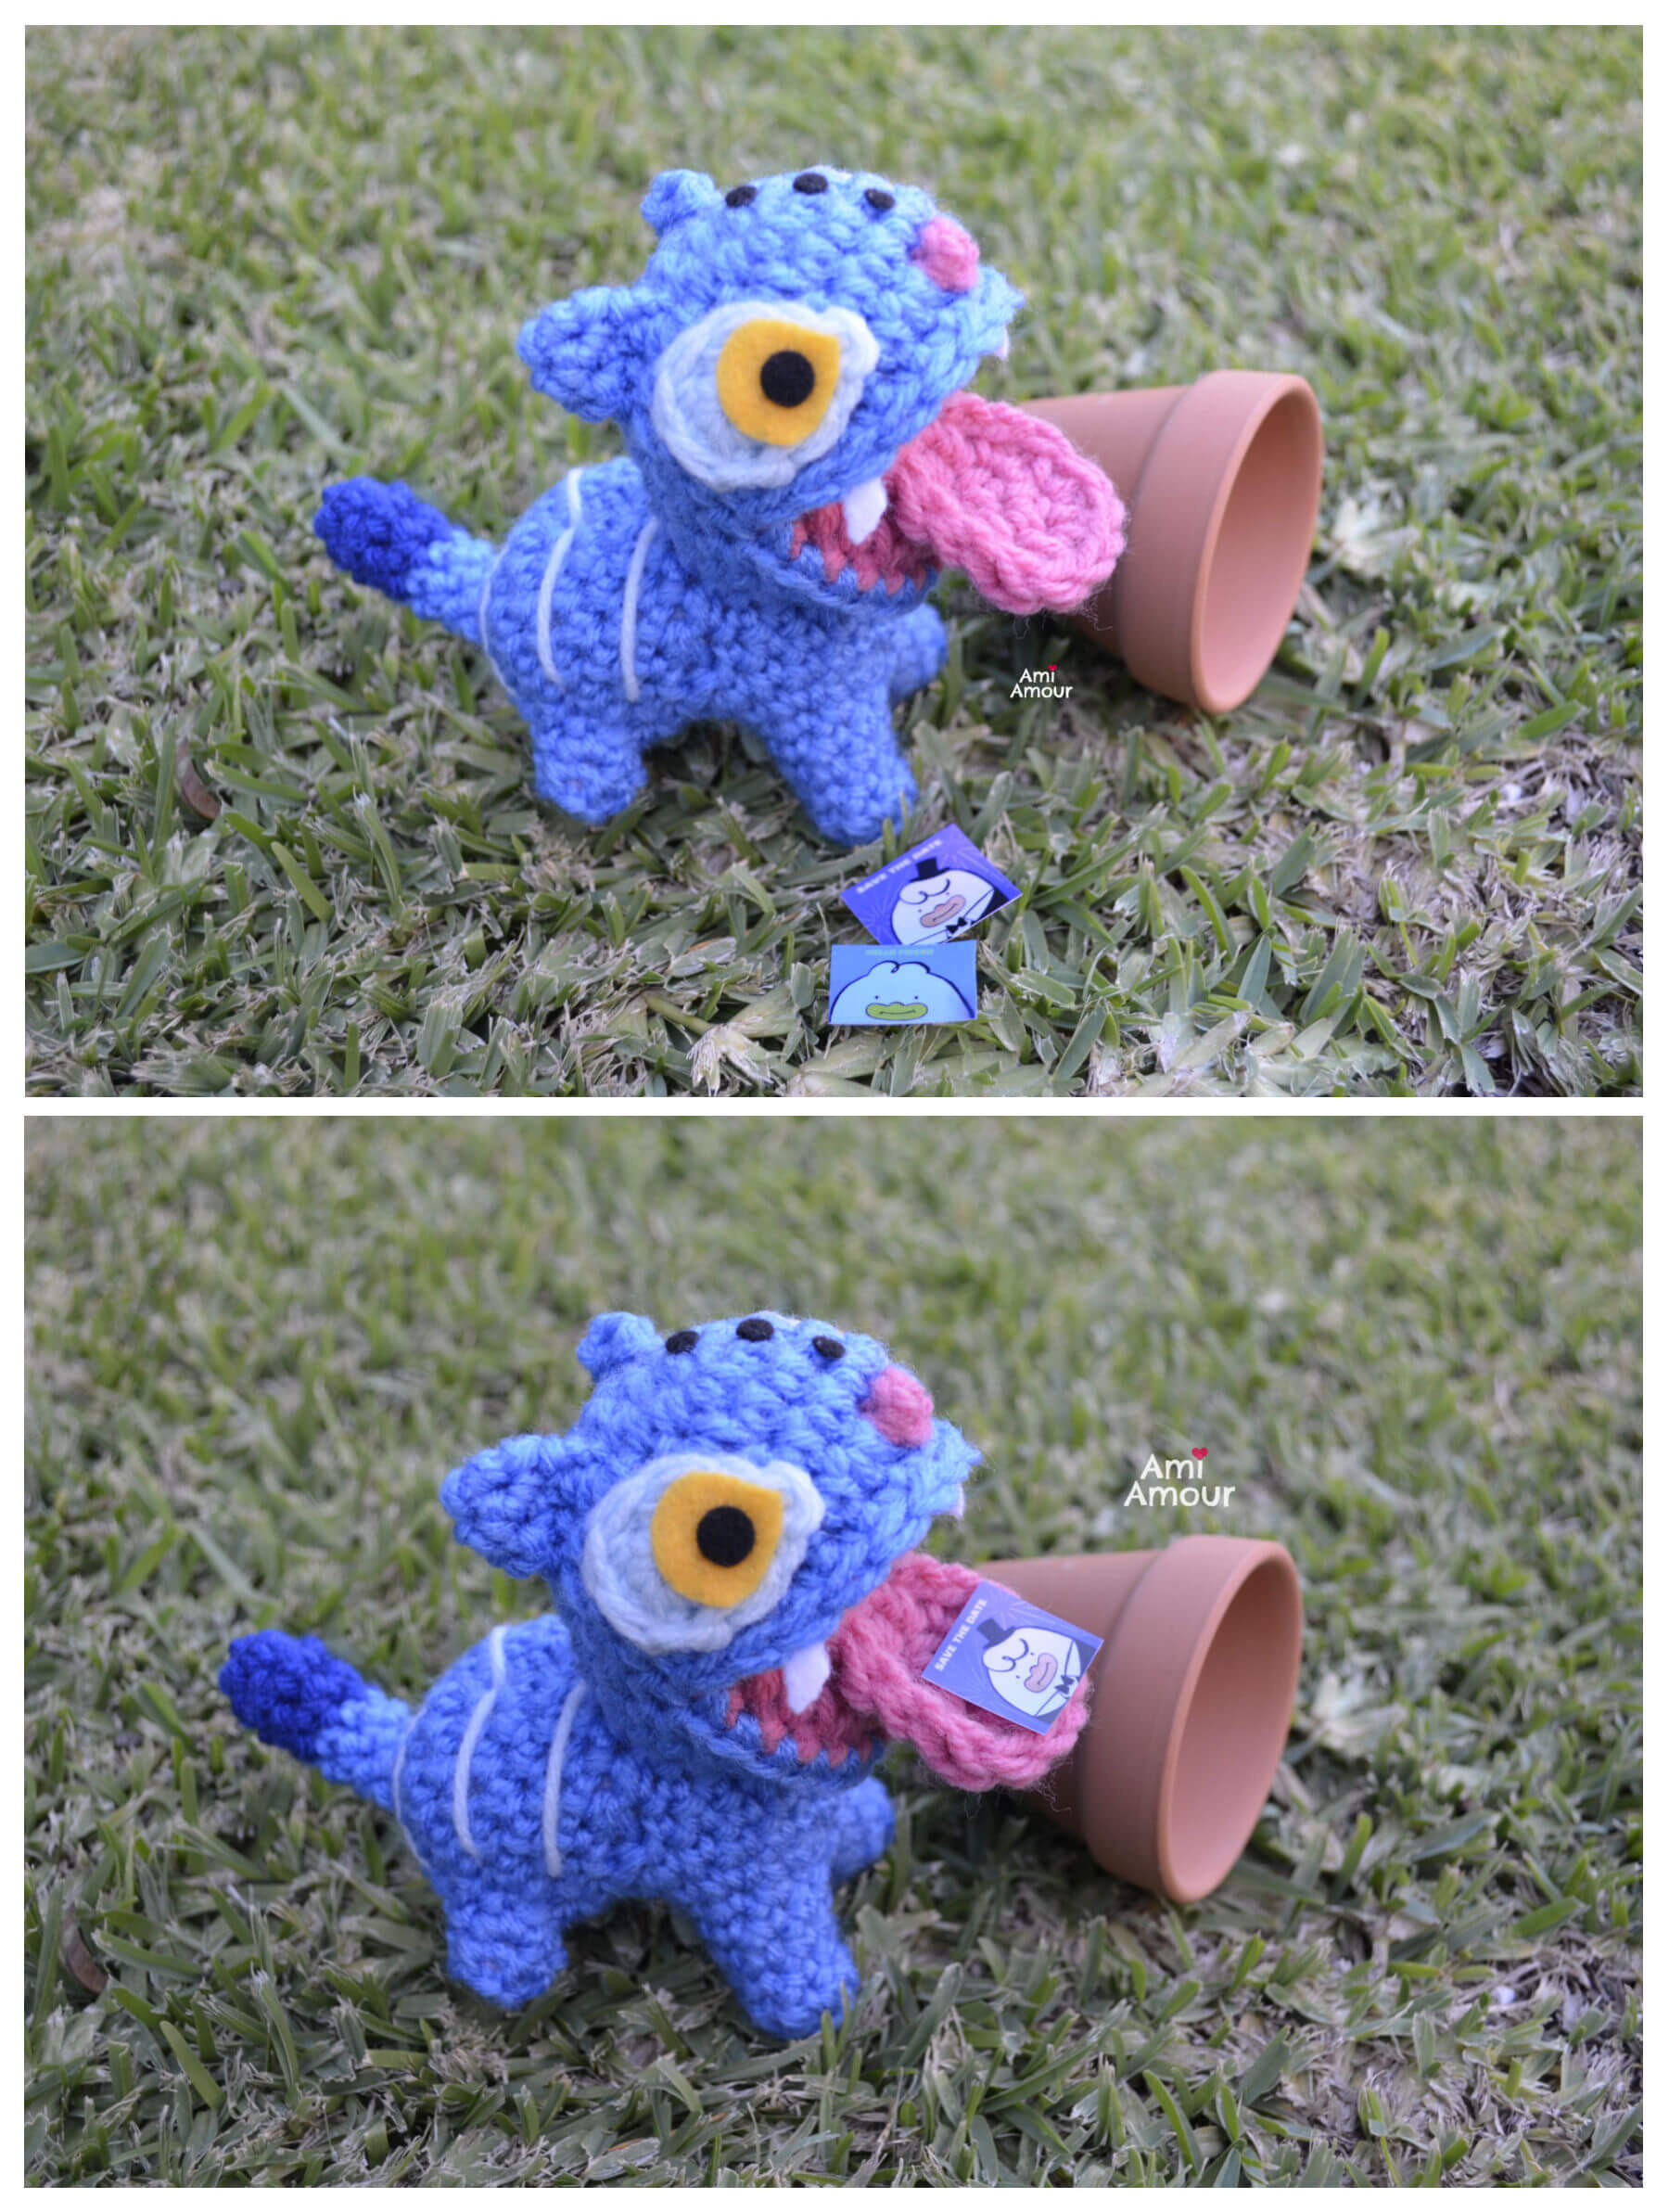
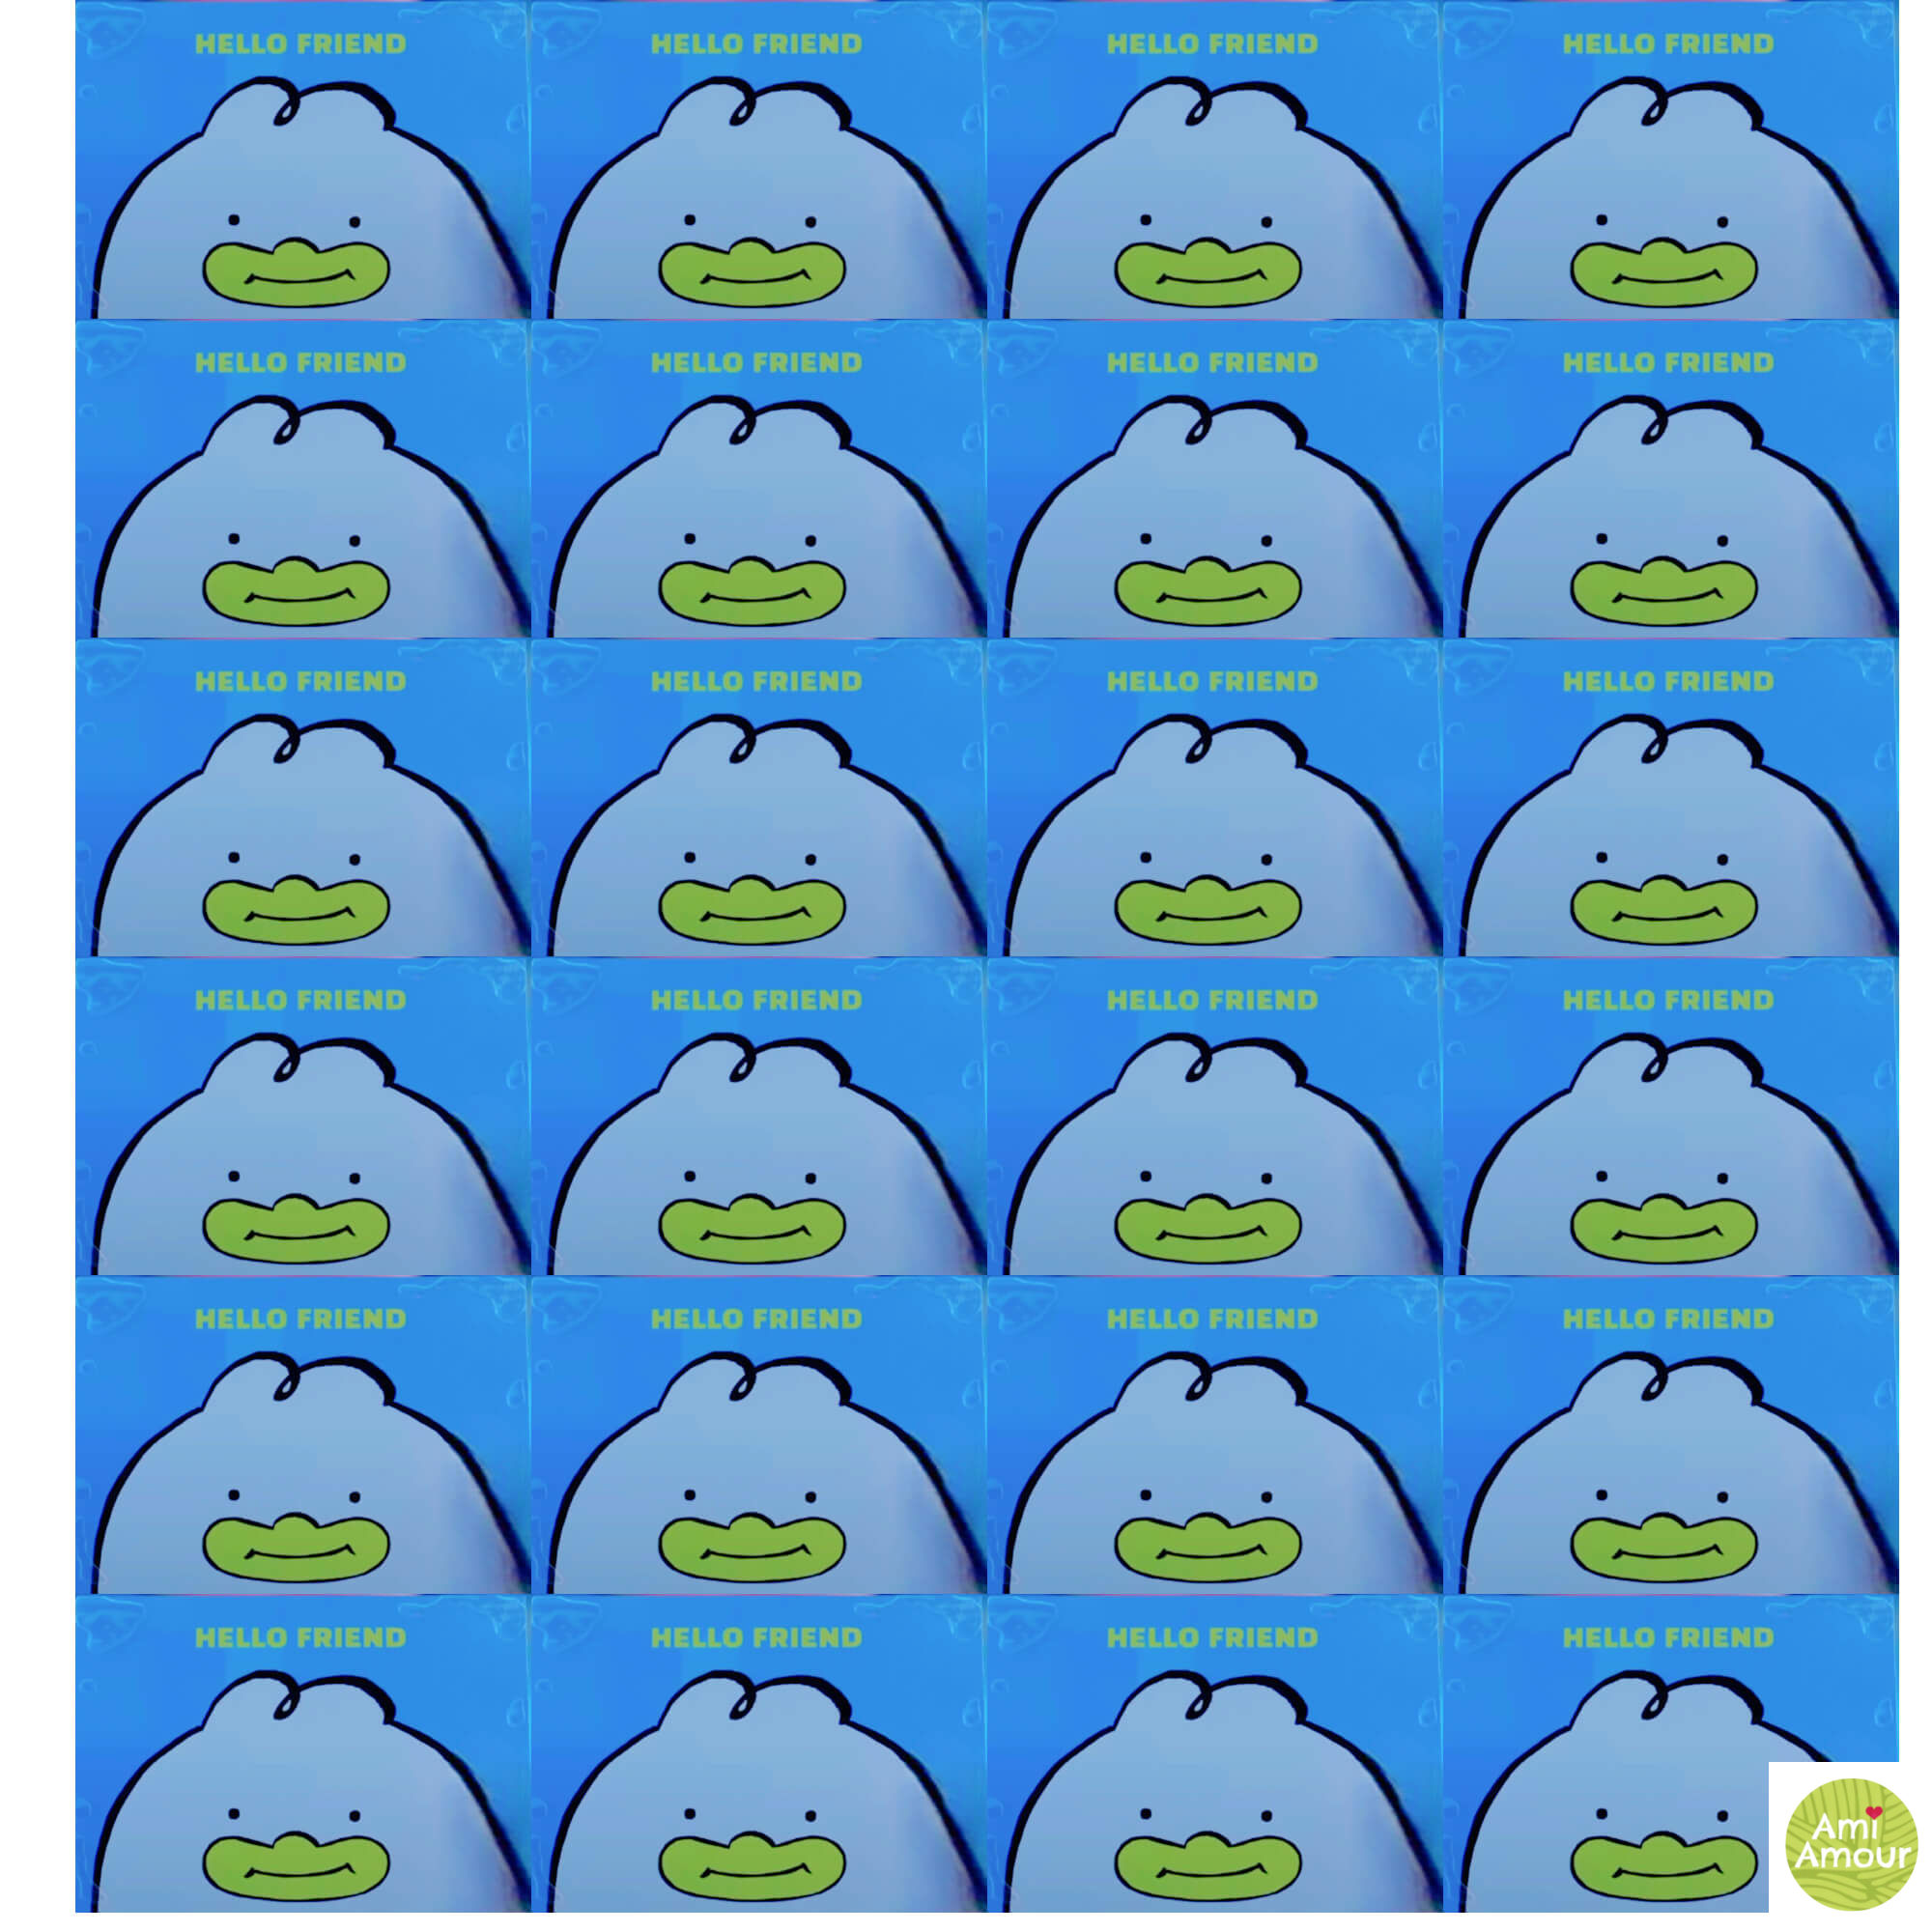
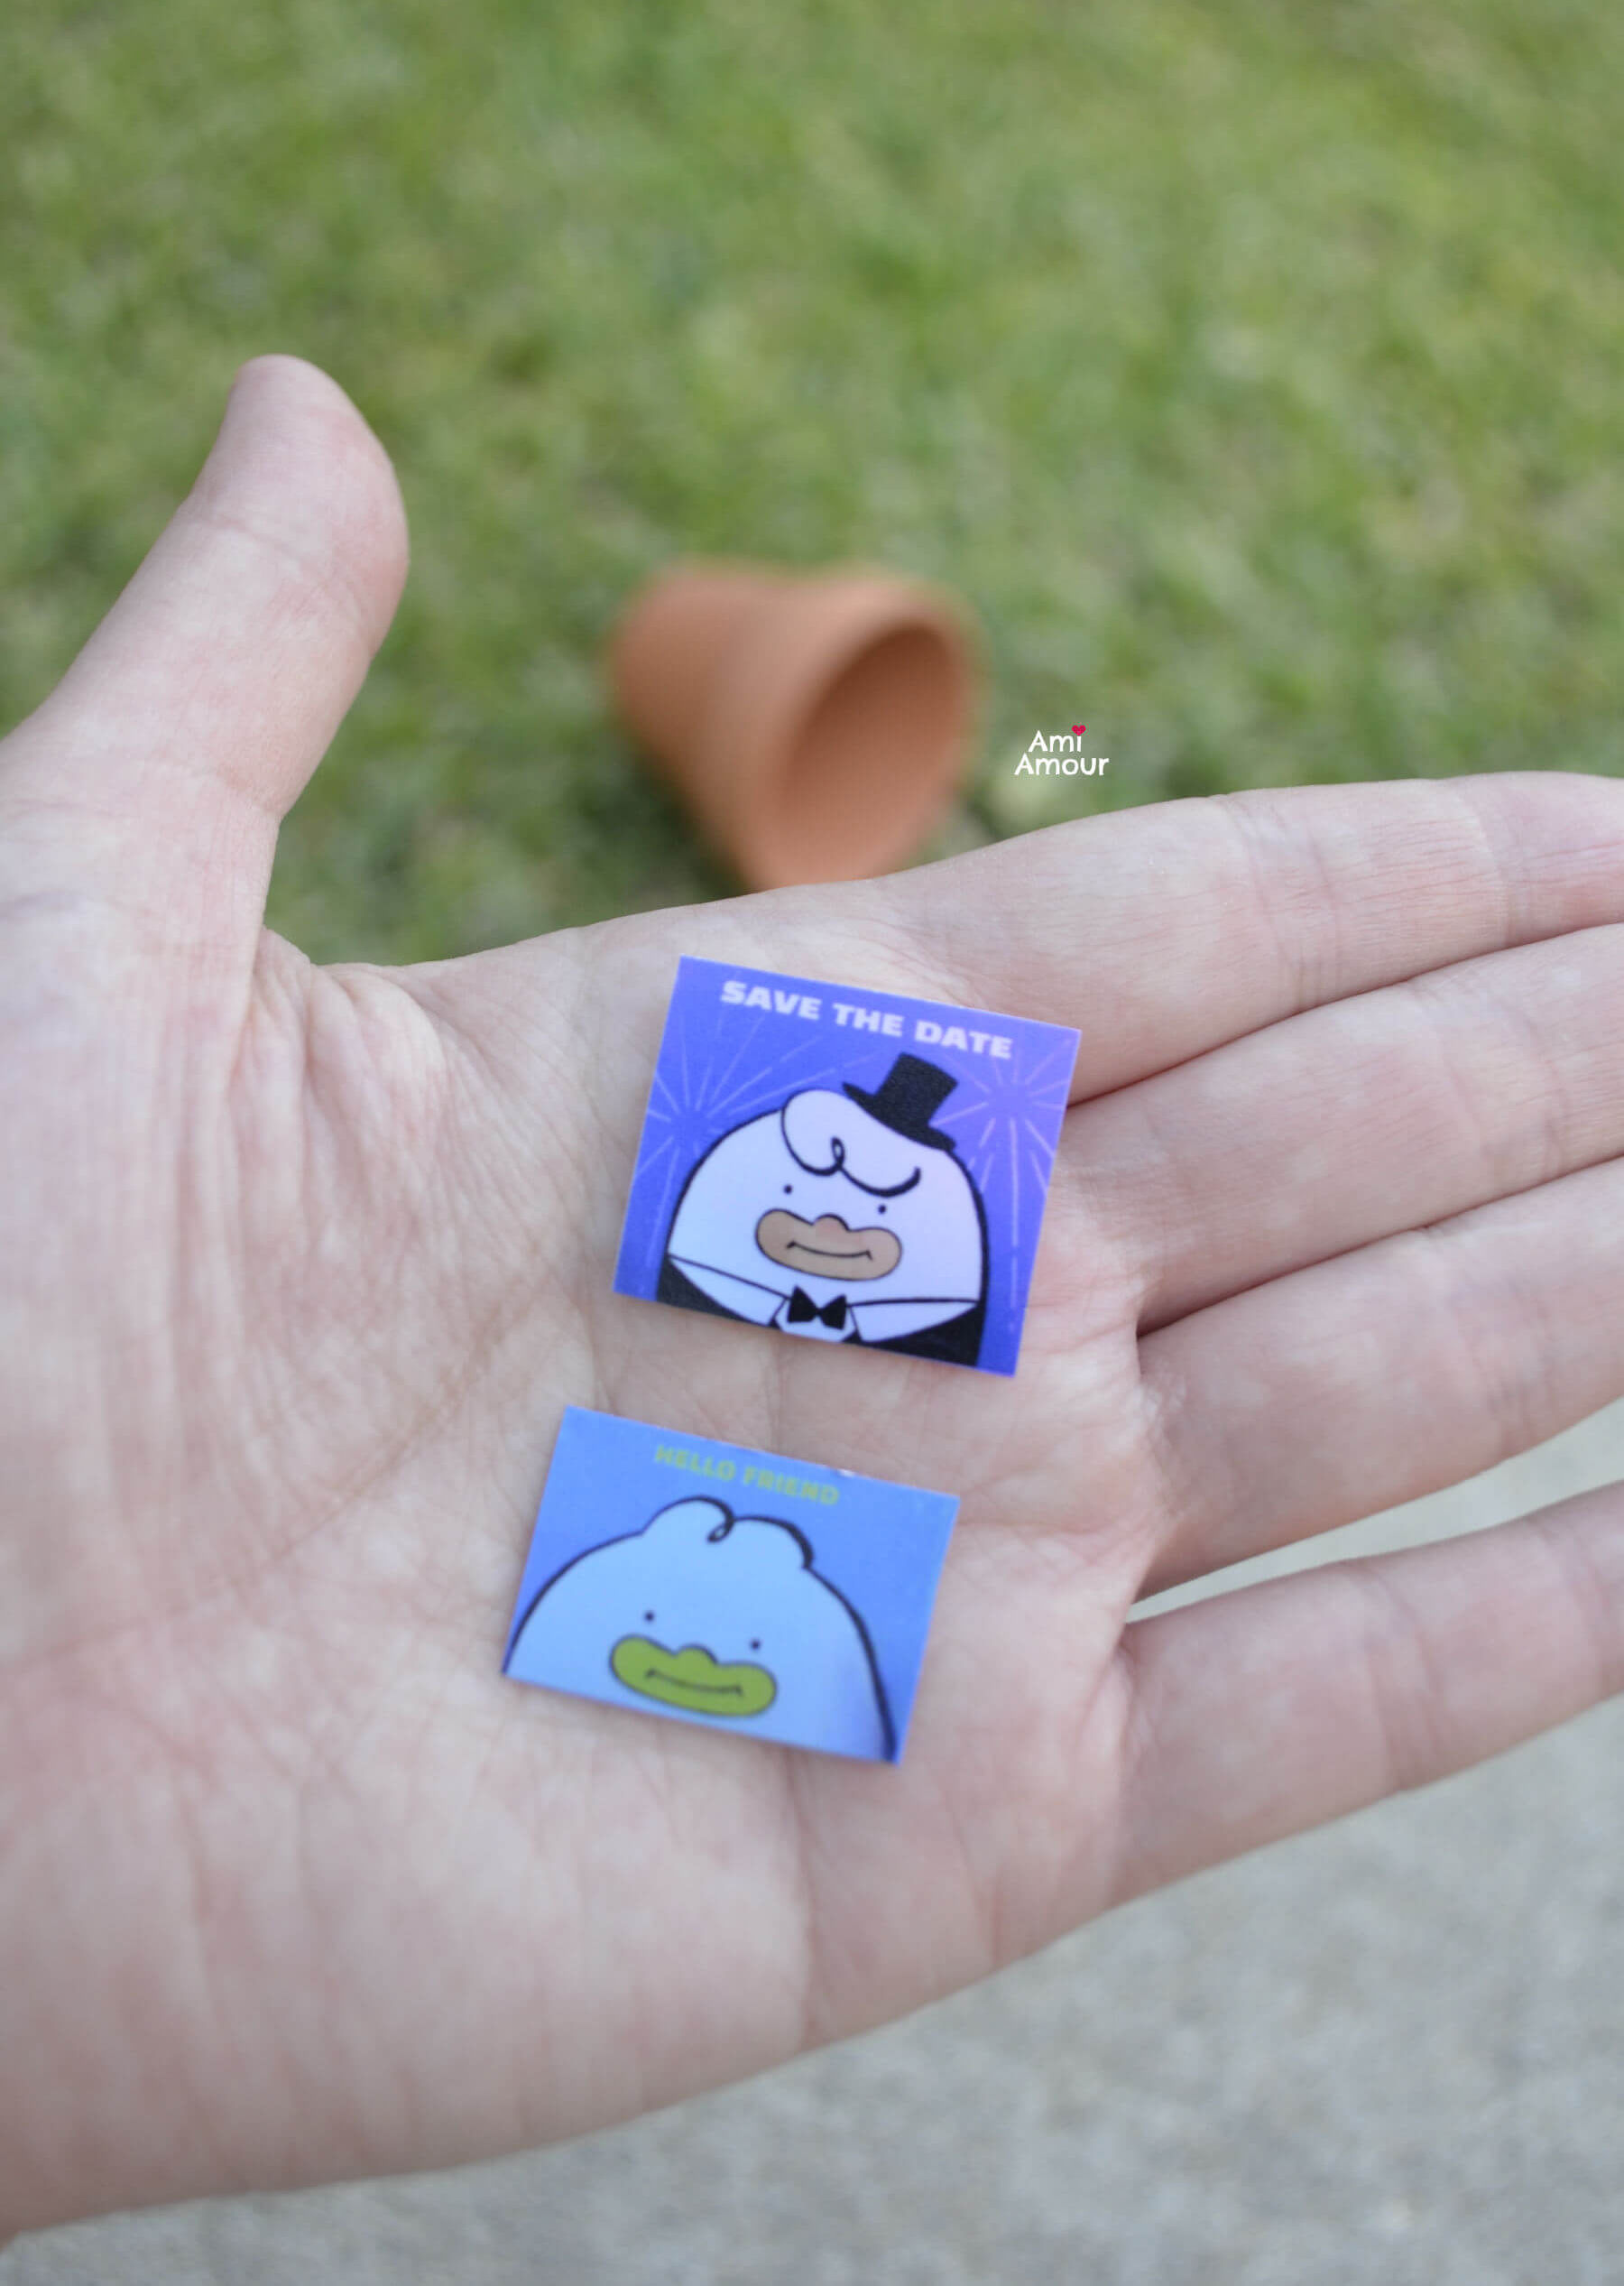
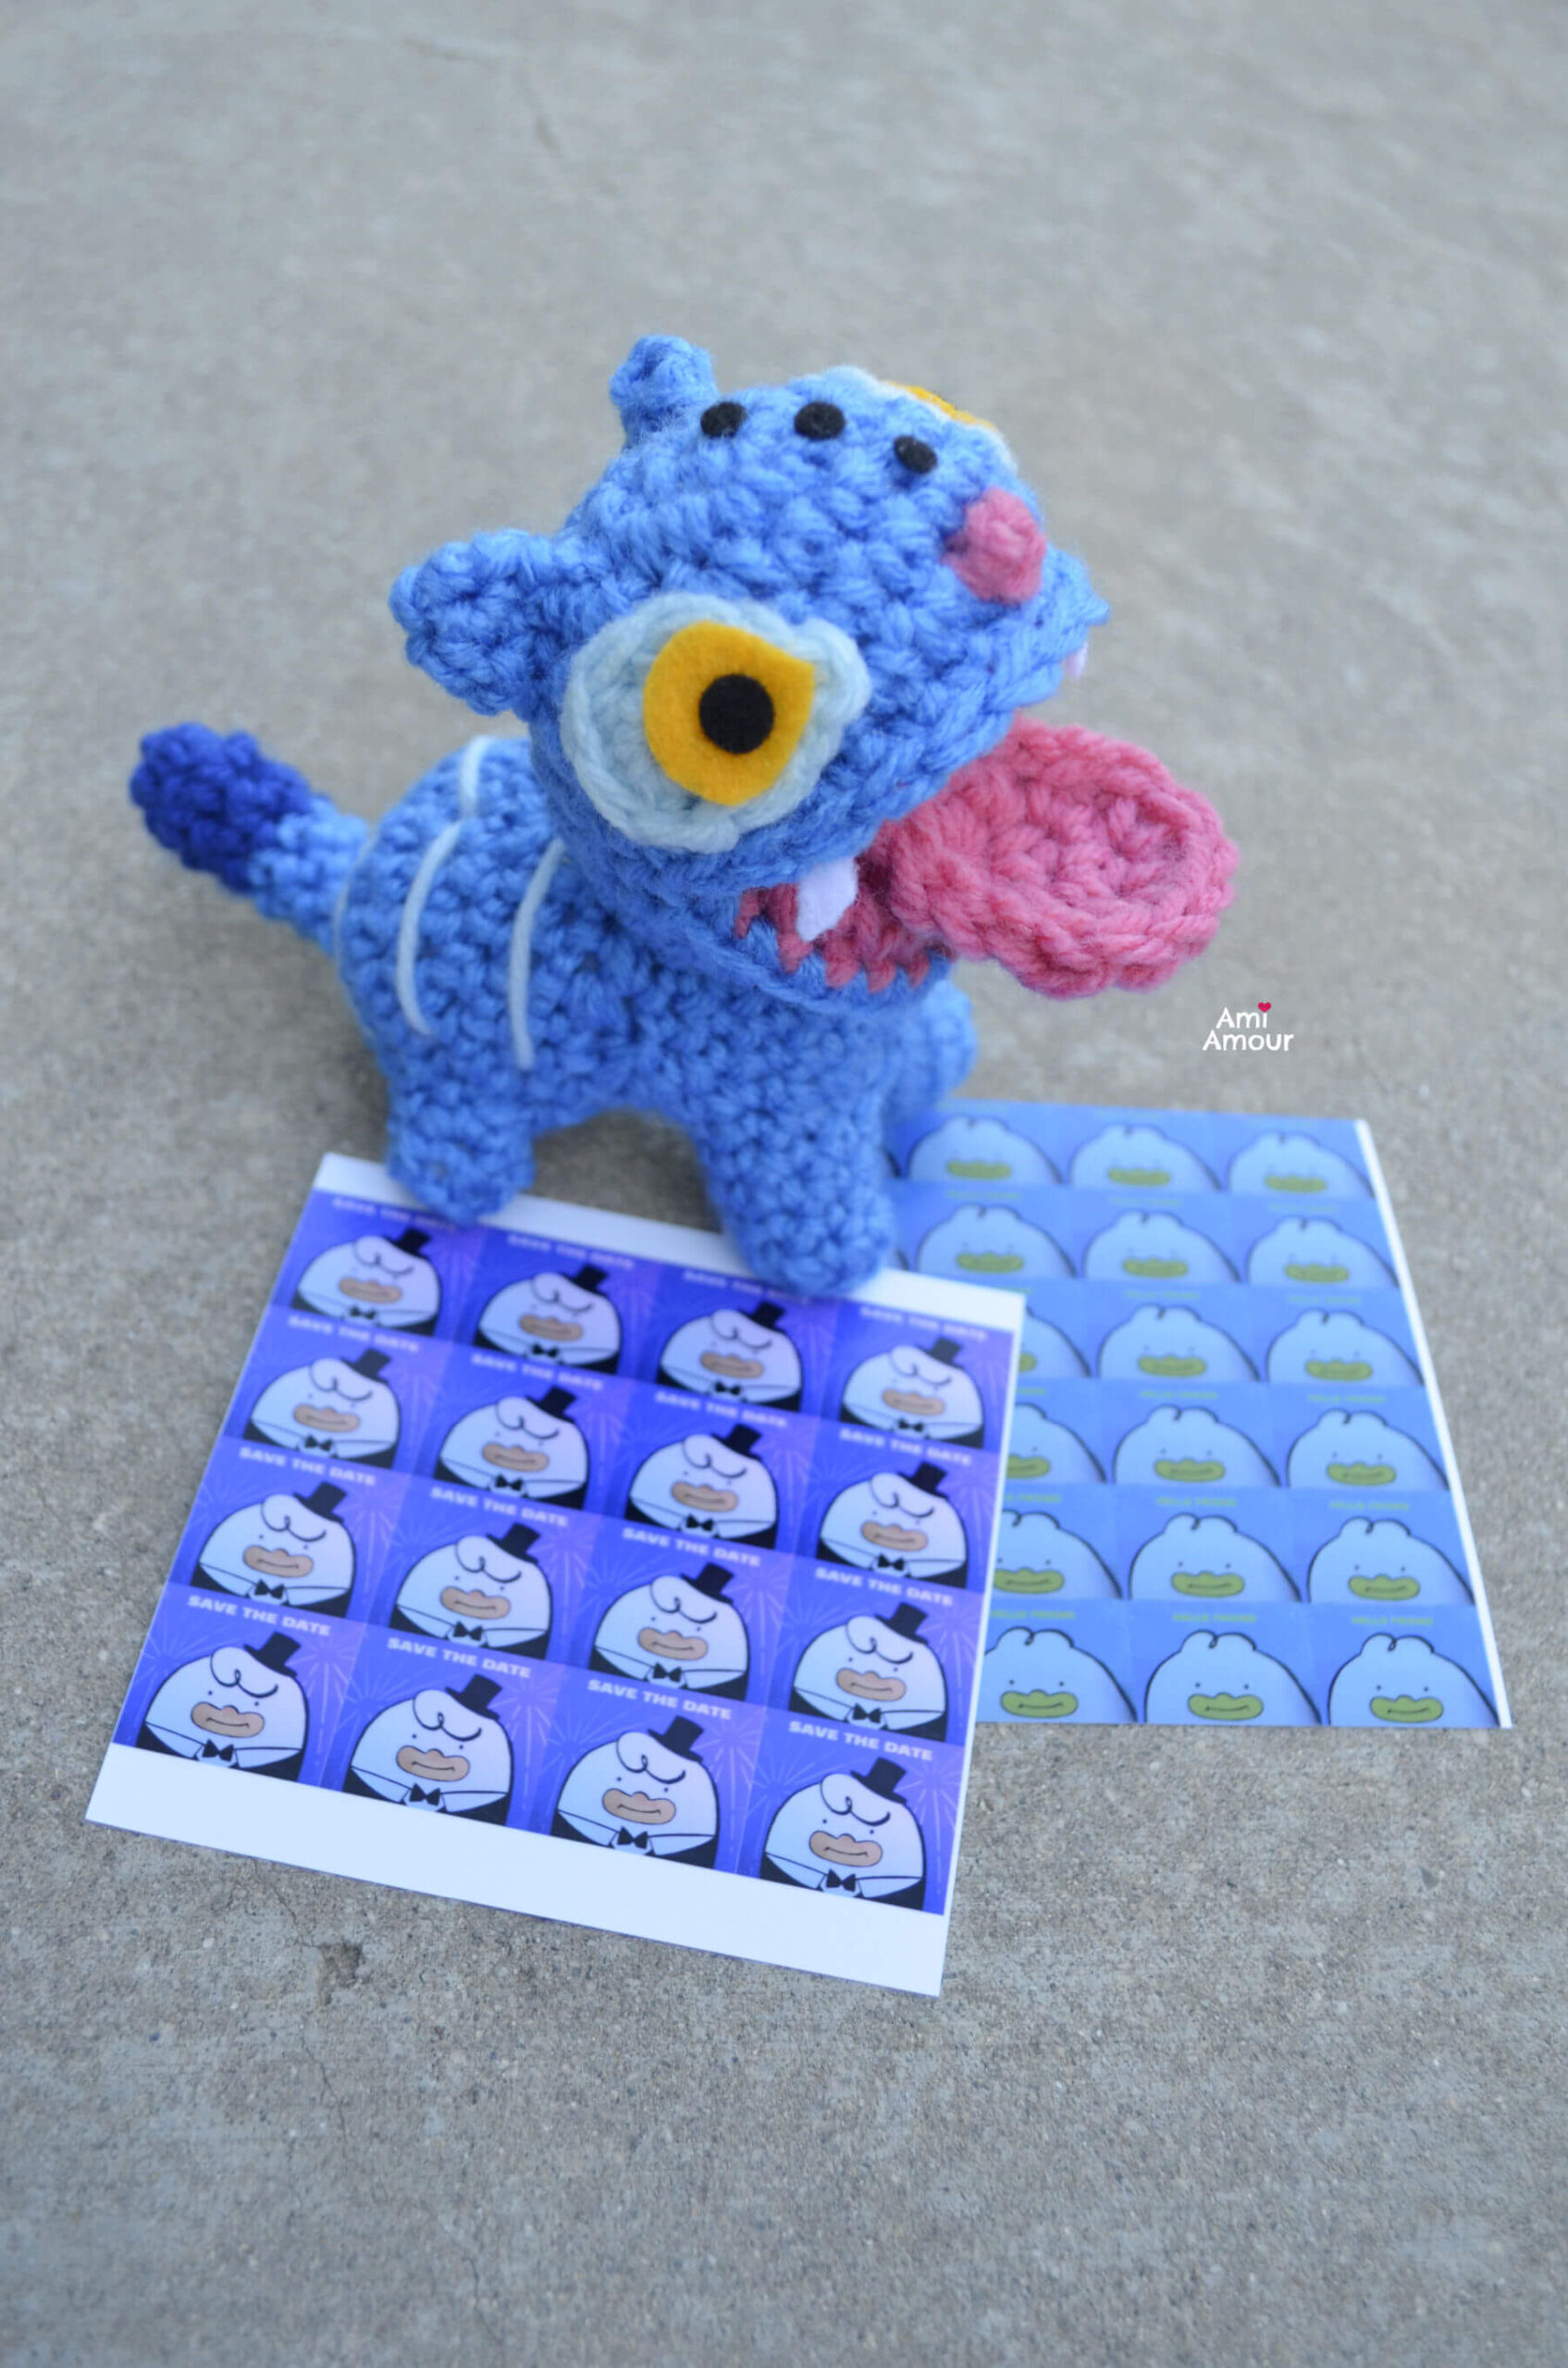
He has several notes he carries through the movie. To create it, I just printed smaller versions of it on a 4in by 4in photo. Here’s the graphic I created below.
The Derpy Tiger free crochet pattern and video tutorial is below, but if you’d like a convenient ad-free PDF version which includes ALL my other Open Mouth Amigurumi patterns, you can purchase it here.
It will also include the graphics of the two different note cards of “Hello Friend” and “Save the Date.” Thanks for the support and it helps me continue to keep coming out with awesome patterns for you all!

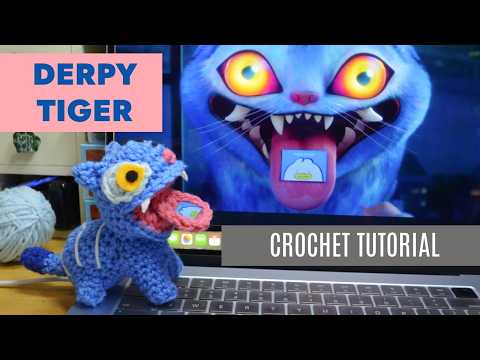
Derpy Tiger – Video Crochet Tutorial
See the Derpy Tiger in action and crochet along with me!
Disclosure: This post contains affiliate links. This means I may receive a small commission if you decide to purchase anything by using one of these links.
Derpy Tiger Amigurumi – Free Crochet Pattern
LEVEL: Intermediate
CROCHET HOOK:
5.0mm size
YARN:
Red Heart Super Saver Yarn
(worsted weight, acrylic yarn)
– Light Periwinkle
– Light Blue
– Royal
– Pretty ‘n Pink
NOTIONS:
Yarn Needle
Scissors
Stitch Marker
Felt (in small amount of gold, black) for the eyes and face
Fabri-tac Glue
Polyfill Stuffing
ABBREVIATIONS (American English crochet)
ch – chain
dc – double crochet
hdc – half double crochet
sc – single crochet
sl st – slip stitch
sc2tog – single crochet 2 together (sc dec)
st – stitch
APPROXIMATE SIZE:
4.5 inches tall and 4 inches long
HEAD
Please follow and complete the pattern for the OPEN MOUTH AMIGURUMI BASE first and then come back to finish the rest of the body.
Note: You will make the Head in a blue color.
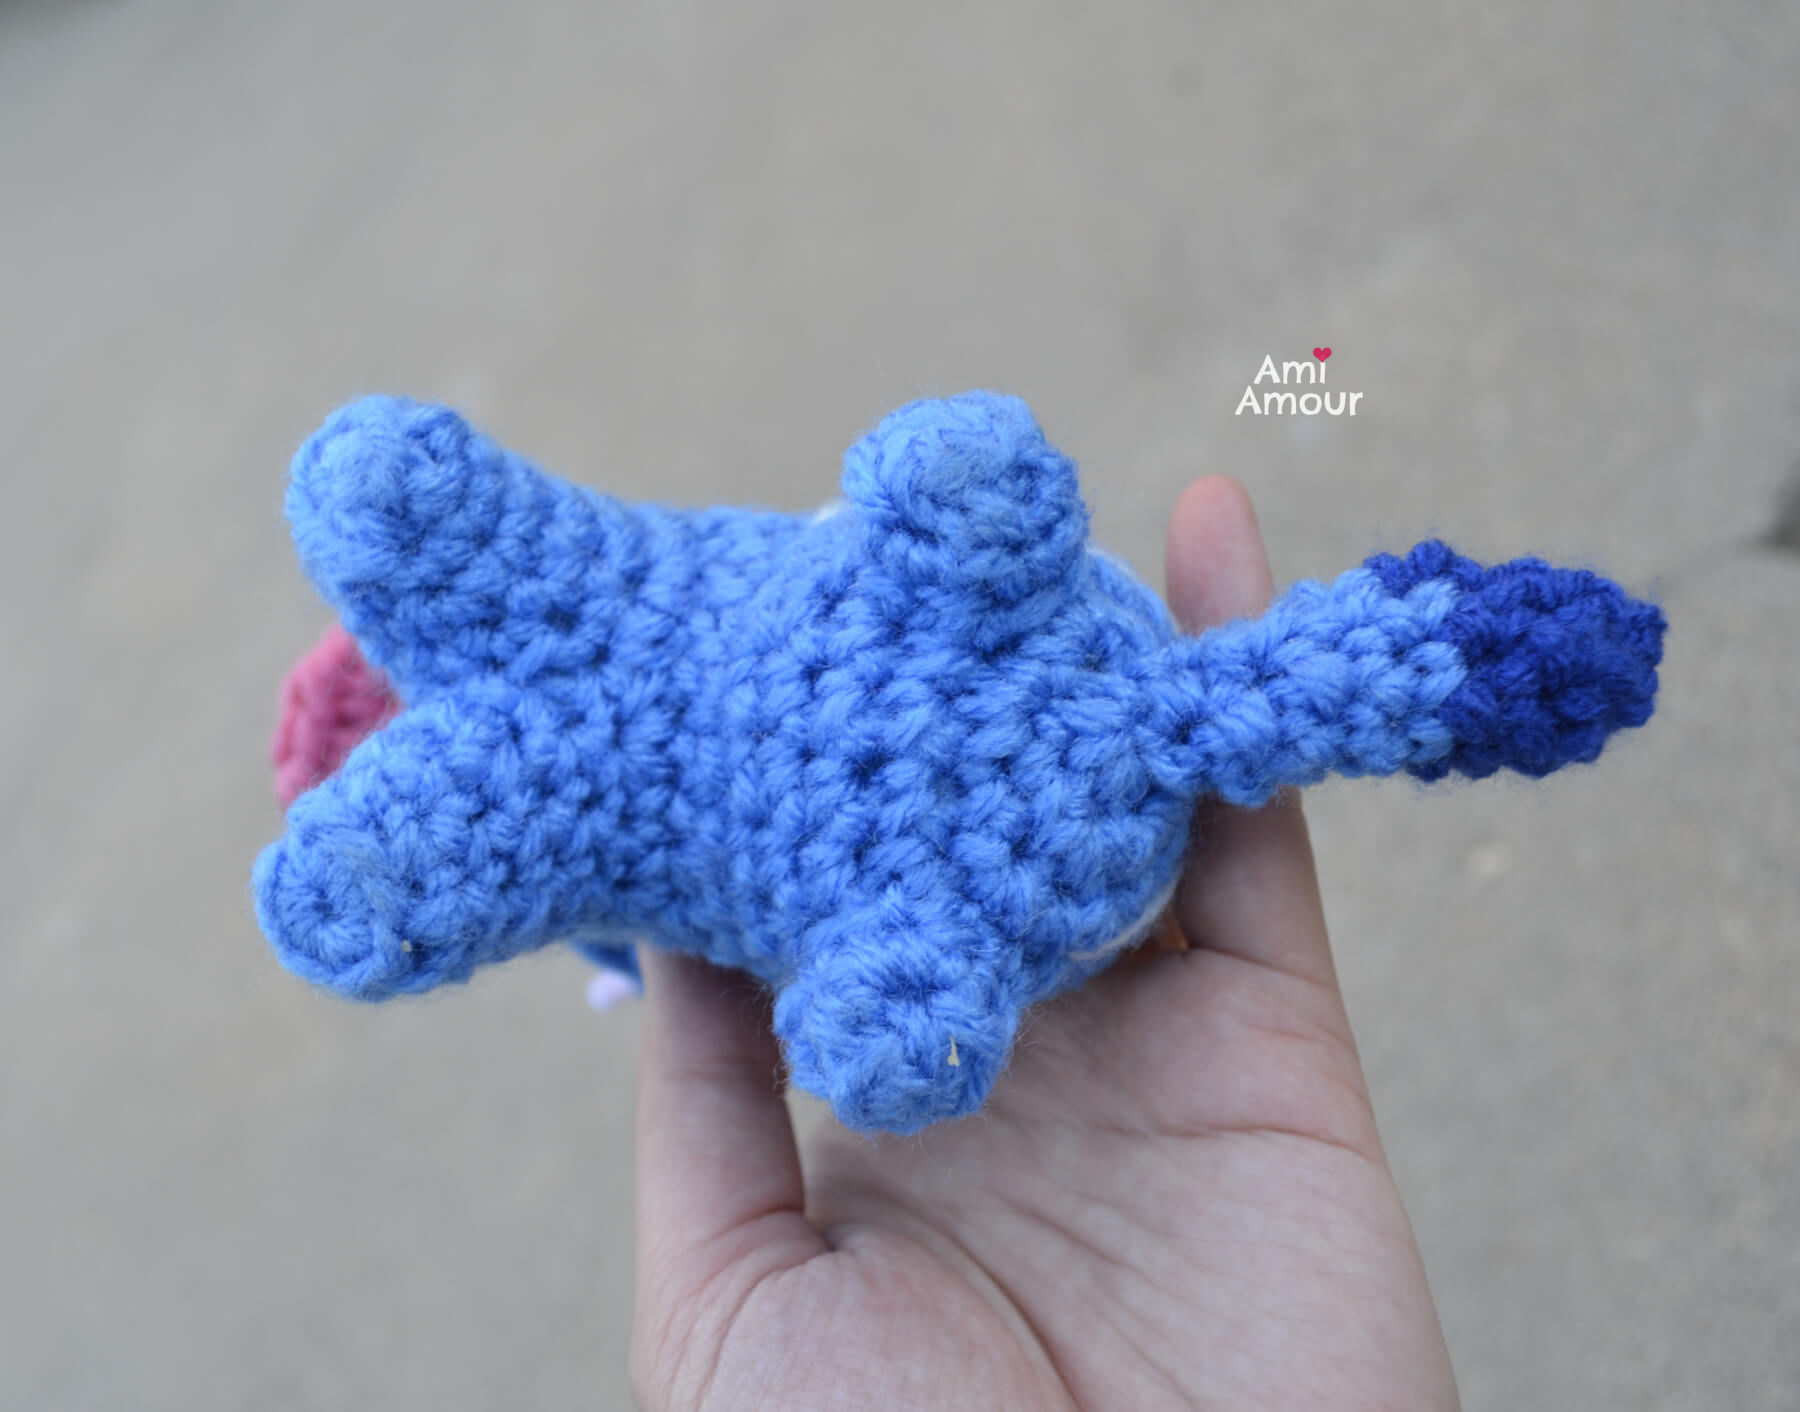
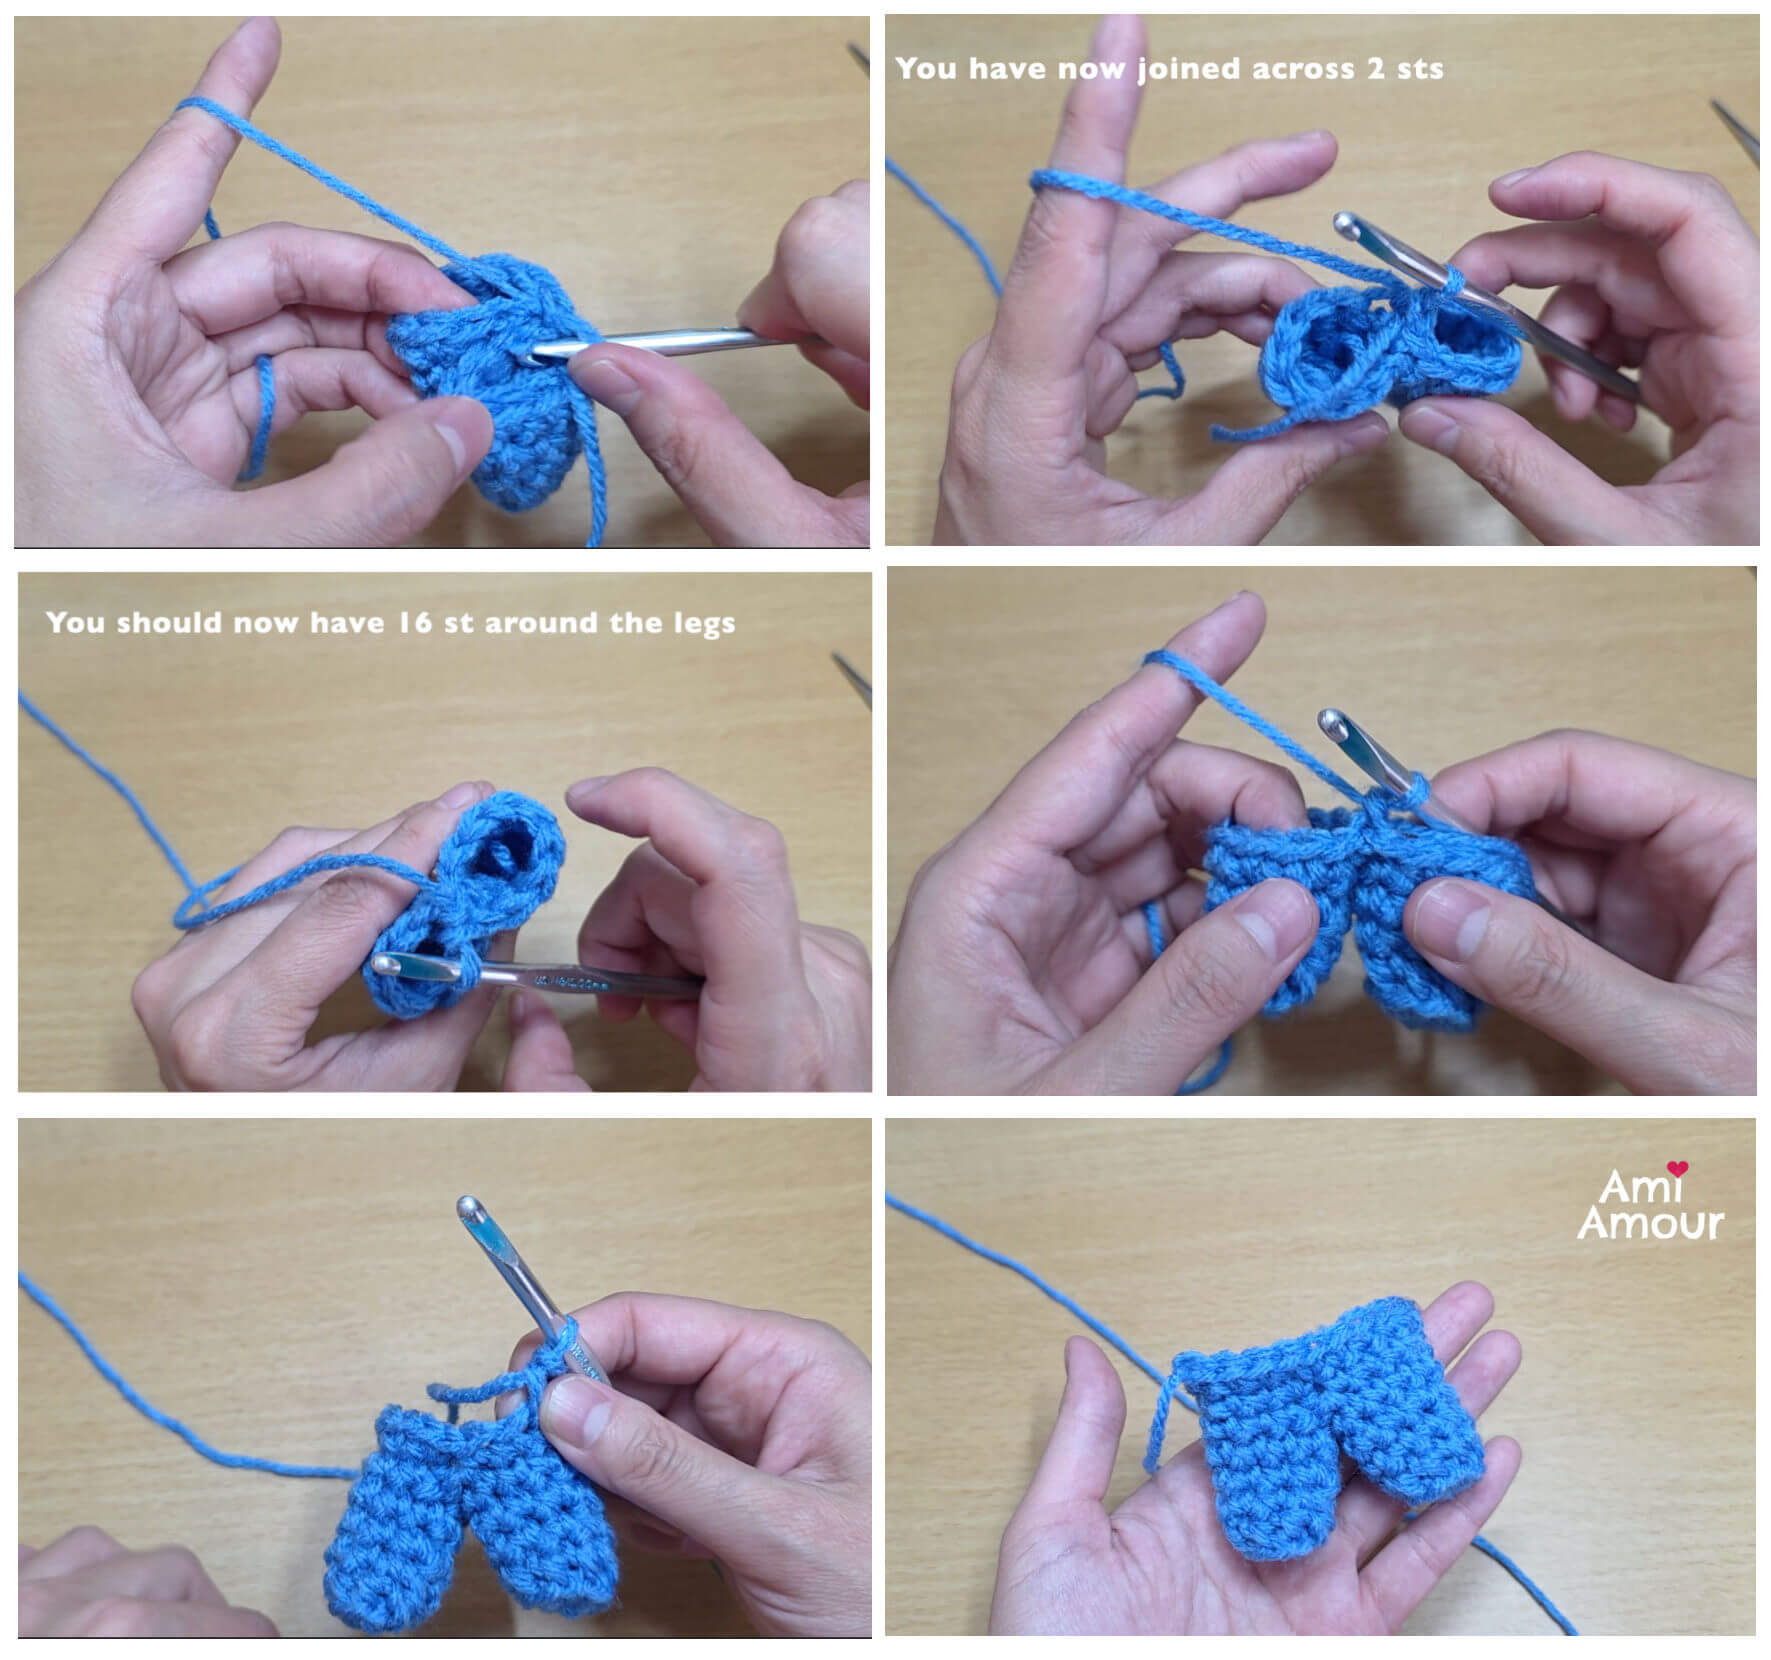
FRONT LEG PAIR
With blue yarn
Round 1: 8 sc into magic ring – 8 sc.
Round 2: (In Back Loop only) Sc in each st around – 8 sc.
Round 3: (Through both loops again) Sc in each st around – 8 sc.
Round 4: [2 sc in next st, sc in next 3 st] around – 10 sc.
Round 5: Sc in each st around – 10 sc.
Fasten off. You have just created FRONT LEG A.
Repeat Rounds 1-5 once more to create FRONT LEG B.
Do not fasten off! Join FRONT LEG A and FRONT LEG B together across 2 sts using sc. See video tutorial here.
You should now have 16 sc around the entire front leg pair.
Round 6: Sc in each st around – 16 sc.
Round 7: [2 sc in next st, sc in next 3 st] around – 20 sc.
Sc in next 5 st only, fasten off.
BODY [Make sure you’ve created Front Leg Pair first.]
With blue yarn
Round 1: 6 sc into magic ring – 6 sc.
Round 2: Sc in each st around – 12 sc.
Round 3: [2 sc in next st, sc in next st] around – 18 sc.
Round 4: [2 sc in next st, sc in next 8 st] around – 20 sc.
Round 5-7: Sc in each st around – 20 sc.
Do not fasten off!
Attach BODY to FRONT LEG PAIR by joining across 8 st with sc. It is the same method as joining the front legs together. Place the parts side by side and hook into stitch of front leg pair and follow through into the stitch of the Body.
See video tutorial here.
After joining the 2 parts together, there should now be 24 sts around the BODY and the FRONT LEG PAIR, not counting the joined stitches. You will continue to work in the round of the BODY and FRONT LEG PAIR.
Round 8: Sc in each st around – 24 sc.
Round 9: [Sc2tog, sc in next 2 st] around – 18 sc.
Round 10: [Sc2tog, sc in next st] around – 12 sc.
Fasten off, leaving a long tail.
Stuff the Body.

EAR (make 2)
With blue yarn
Round 1: 4 sc into magic ring – 4 sc.
Round 2: [2 sc in next st, sc in next st] around – 6 sc.
Round 3: Sc in each st around – 6 sc.
Fasten off, leaving a long tail.
HIND LEG (make 2)
With blue yarn
Round 1: 6 sc into magic ring – 6 sc.
Round 2: (In Back Loop only) Sc in each st around – 6 sc.
Round 3: [2 sc in next st, sc in next 2 st] around – 8 sc.
Fasten off, leaving a long tail.
EYE PATCH (make 2)
With light blue yarn
Round 1: 6 sc into magic ring – 6 sc.
Round 2: Sc in next st, (hdc, ch 2, sl st into previous ch, dc) in next st, sc in next 4 st.
Sl st to join to first st.
Fasten off, leaving a long tail.
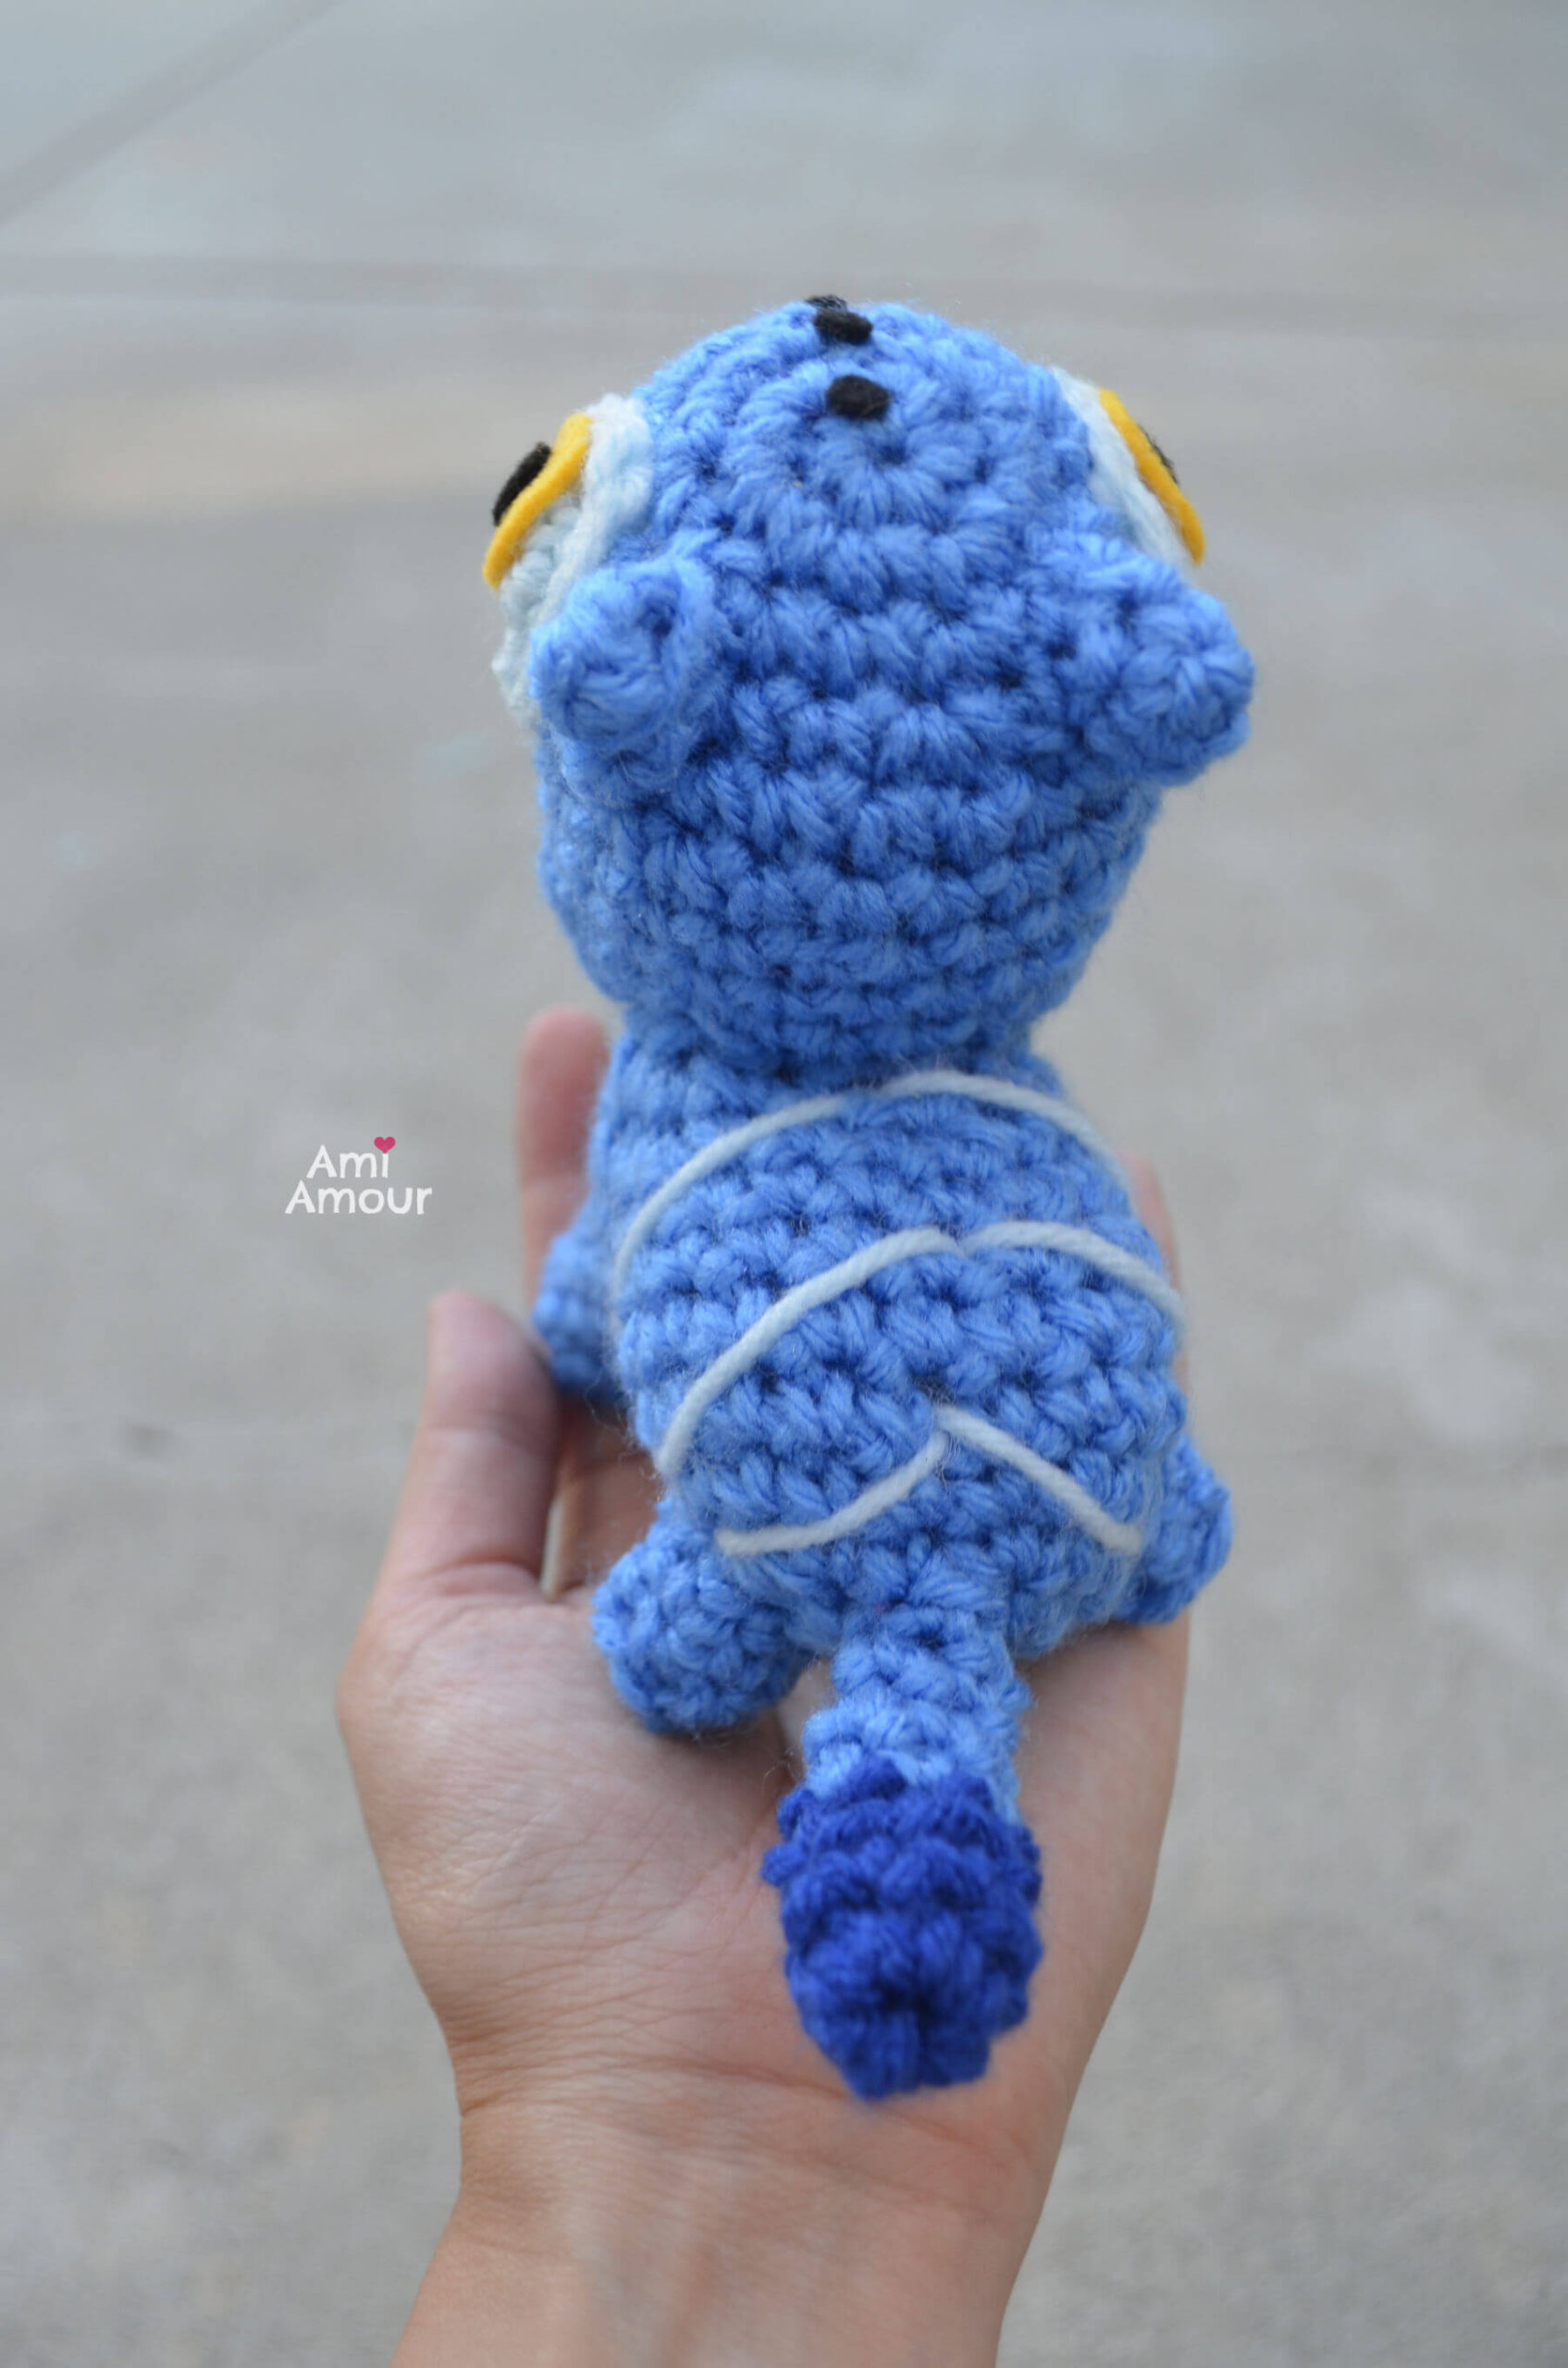
TAIL
Round 1: With dark blue yarn, 6 sc into magic ring – 6 sc.
Round 2-3: Sc in each st around – 6 sc.
Round 4-5: With blue yarn, sc in each st around – 6 sc.
Round 6: Sc2tog, sc in next 4 st – 5 sc.
Round 7: Sc in each st around – 5 sc.
TONGUE
With pink yarn
Round 1: 6 sc into magic ring.
Round 2: Sc in next st, 2 hdc in next 2 st, sc in next 3 st – 8 st
Round 3: Sc in next st, 2 hdc in next 2 st, sl st in next 5 st – 10 st
Round 4: Sc in next st, 2 hdc in next 3 st, sl st in next 3 st
Fasten off, leaving a long tail.
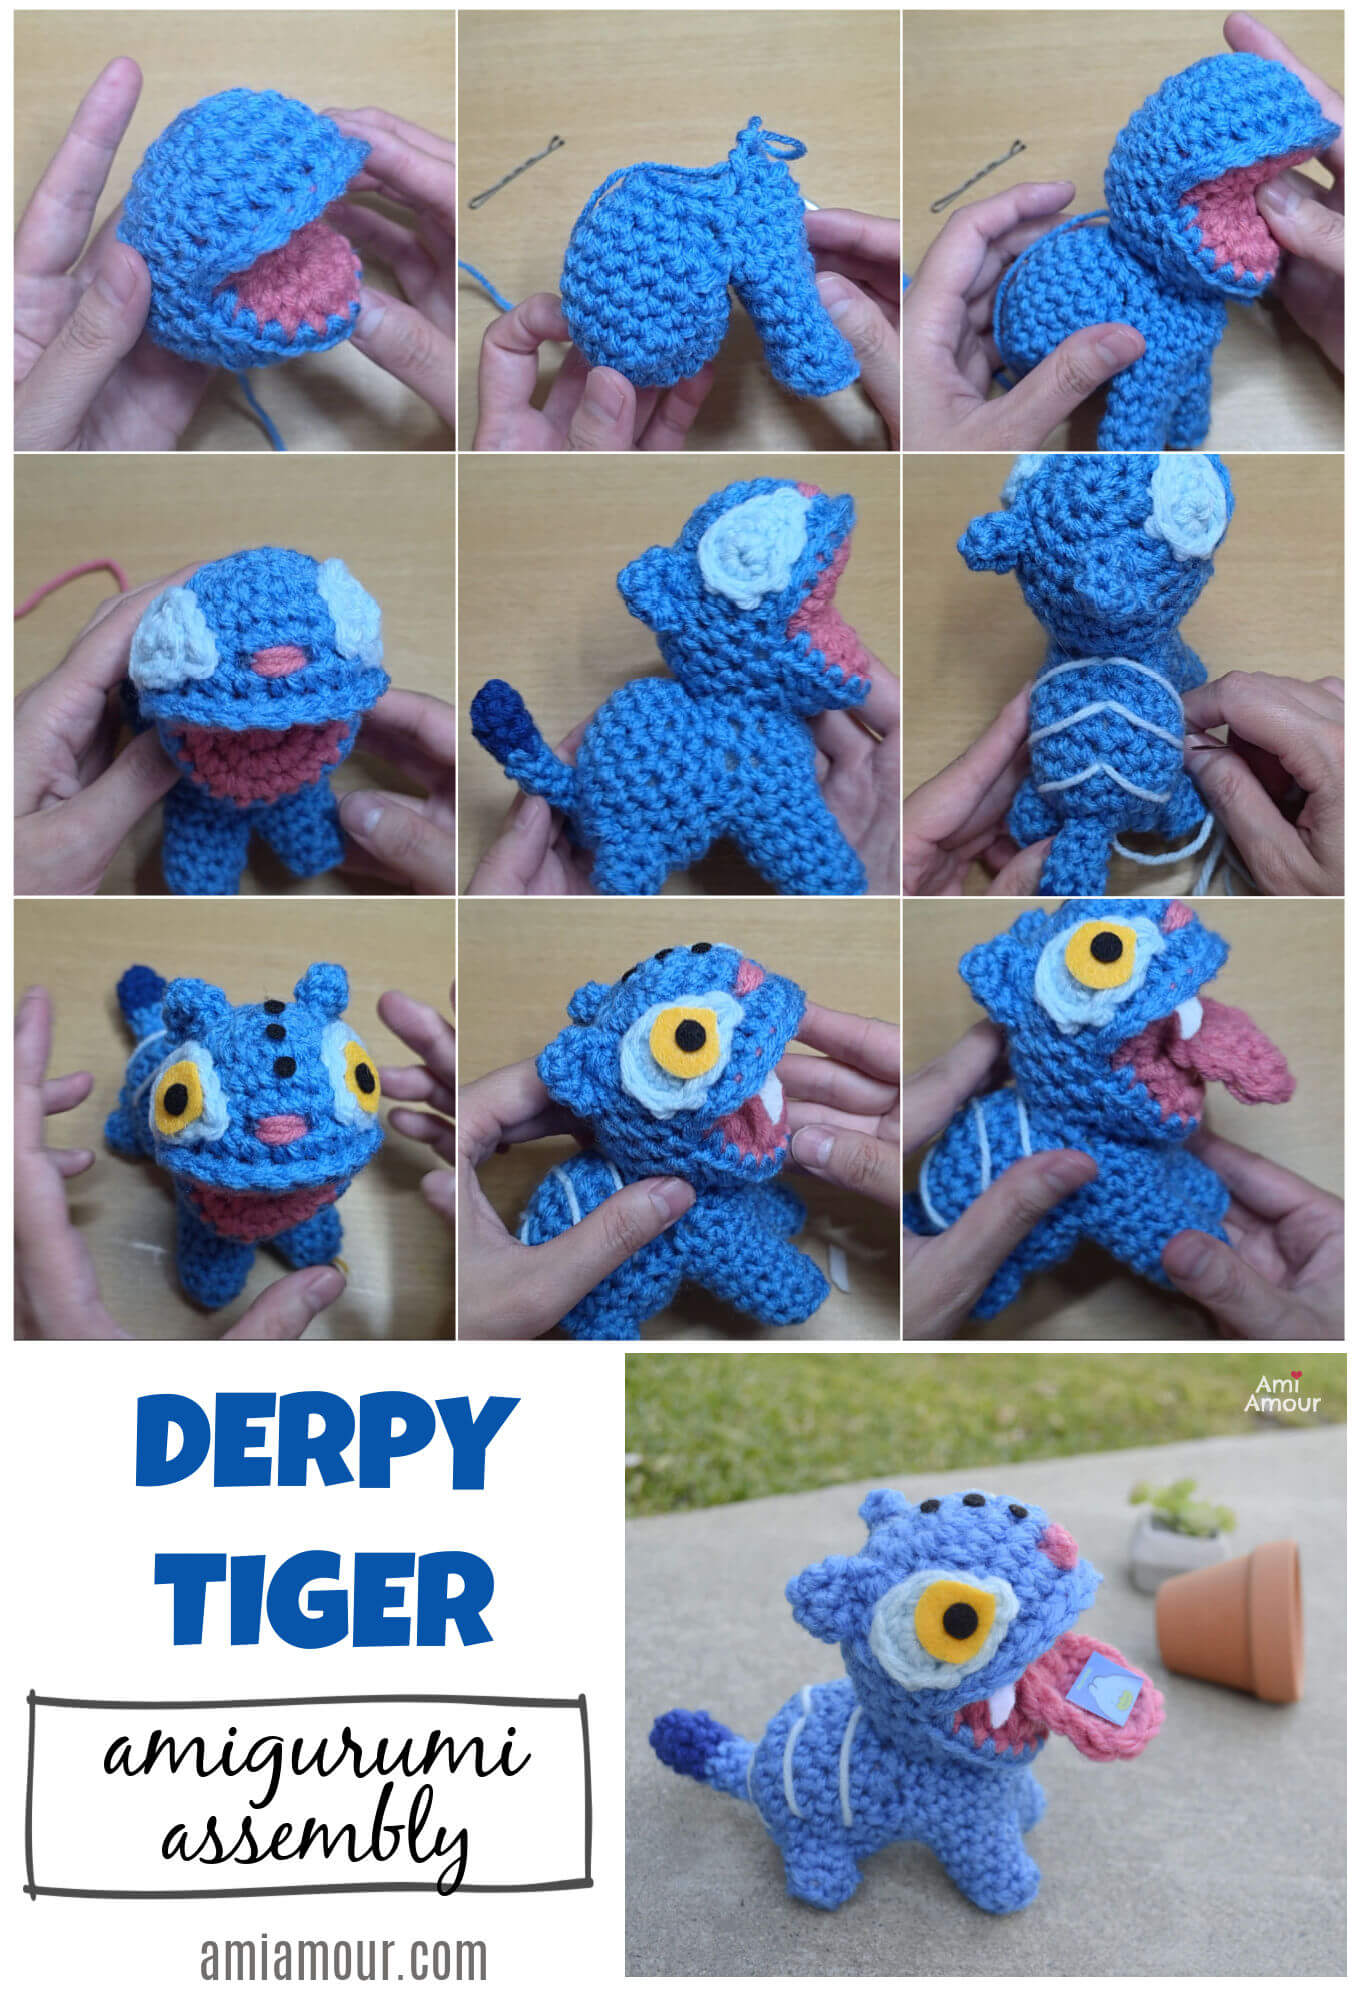
AMIGURUMI ASSEMBLY
See video tutorial here.
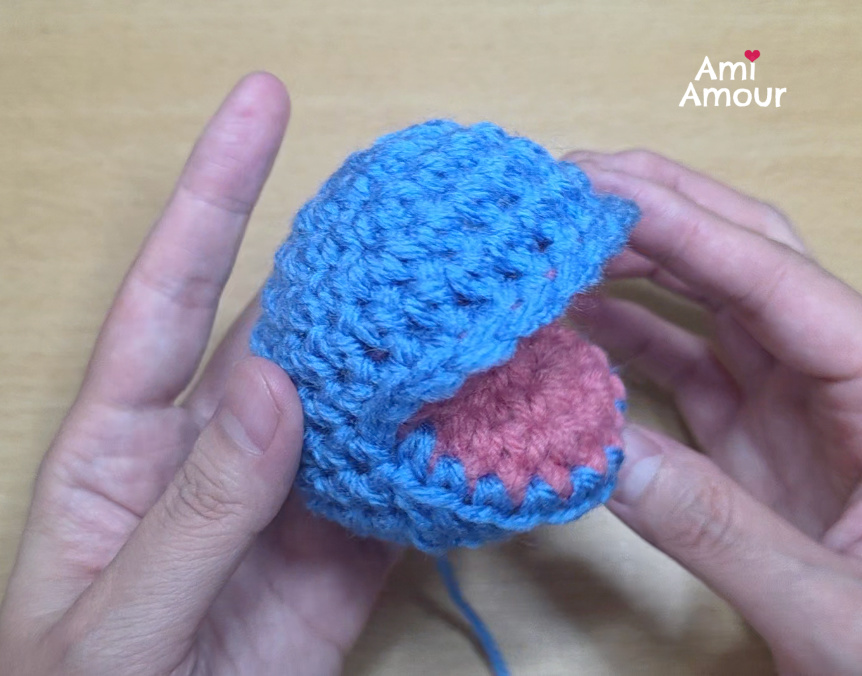
1. Sew Head to Body.
2. Sew Eyepatch to Head.
3. With pink yarn, embroider nose on Head. (Or if you prefer, you can also crochet the part with ch 2, sl st into first ch, fasten off and leave a long tail. And then sew onto head).
4. Sew on Ears.
5. Sew on Hindlegs to back of body.
6. Sew on Tail.
7. Embroider the stripes on the back of the body.
8. With gold felt, cut a tear shape for the eyes.
9. With black felt, cut 2 circles for the pupils.
10. With black felt, cut 3 small circles for the face.
11. With Fabri-tac, glue on felt parts to face, the eyes, the pupils, and the face markings.
12. With white felt, cut 2 fangs and glue on fangs to top of mouth with Fabri-tac glue. (Other options: If you would like to crochet and use white yarn instead, you can also do ch 2, sc into first ch and fasten off, leaving a long tail. Make 2 for fangs and sew onto mouth.)
13. Sew on Tongue.
14. (Optional) Print out the notes from the graphic to use as a prop for the tongue. Print out on 4in by 4in photo. (I just had mine printed at Walmart Photos) Cut and place into tongue. If you would like it to stay in place, you can glue the note to the tongue.
15. You’ve finished your Derpy Tiger! Make sure you tag me with your projects on @ami_amour on Instagram. I’d love to see!

No Comments