
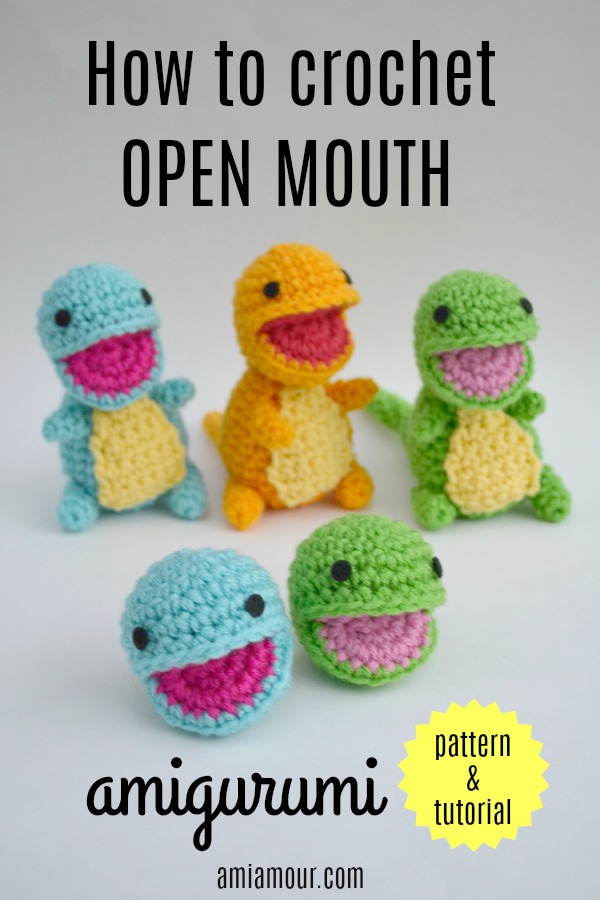
I’m excited to share with you guys how to crochet an Open Mouth Amigurumi!
If you’ve been following me for some time, you may have seen me use this technique on some of my amigurumi designs and crochet patterns.
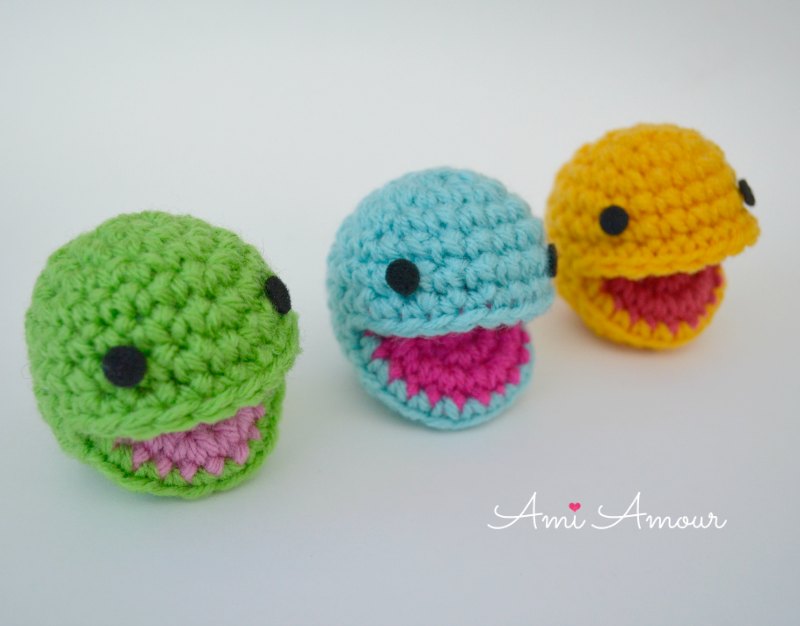
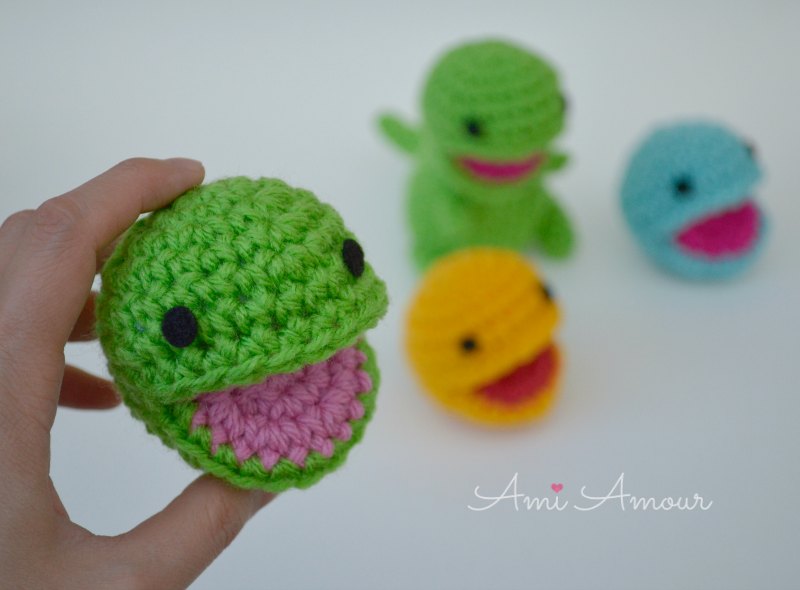
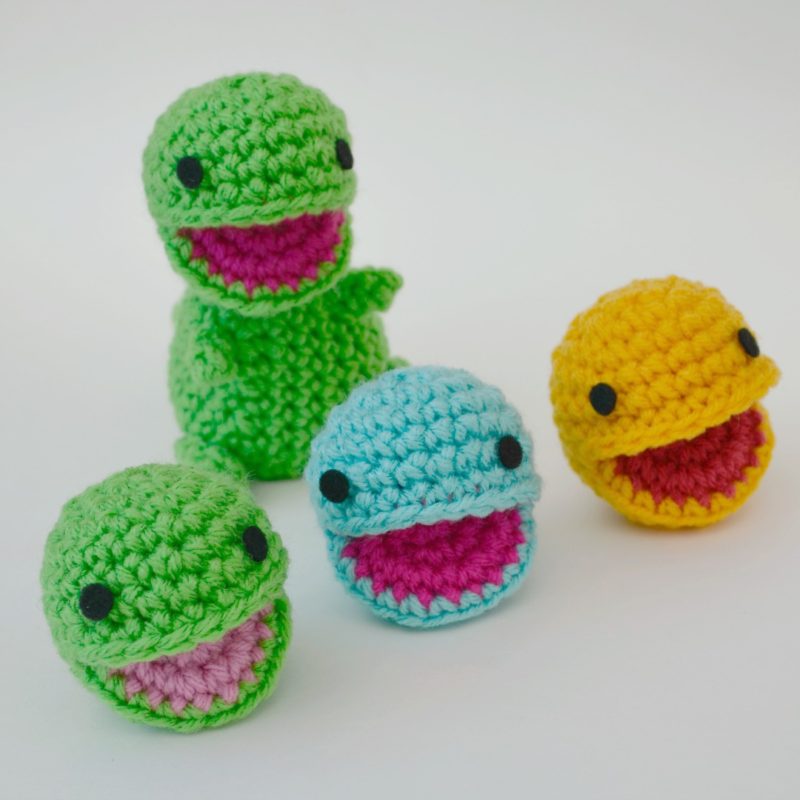
I love how it makes the amigurumi look so happy with a big fat smile on its face.

On the flip side, you can also make it look more menacing and like it’s going to eat you by adding teeth as well!
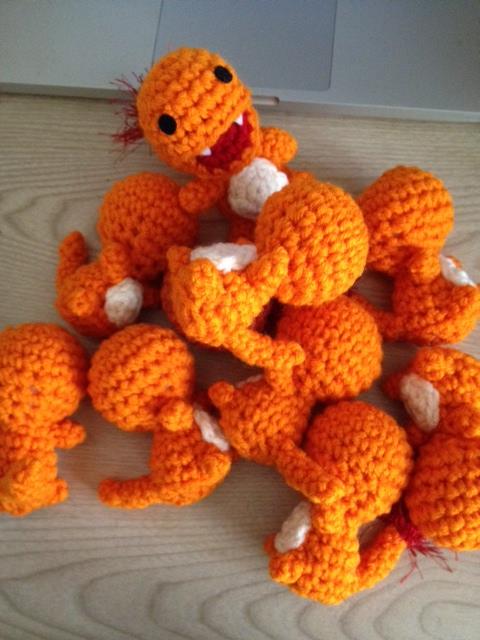
Ok, well, maybe he doesn’t look so menacing and still looks pretty cute, but it’s all about how you make the face!
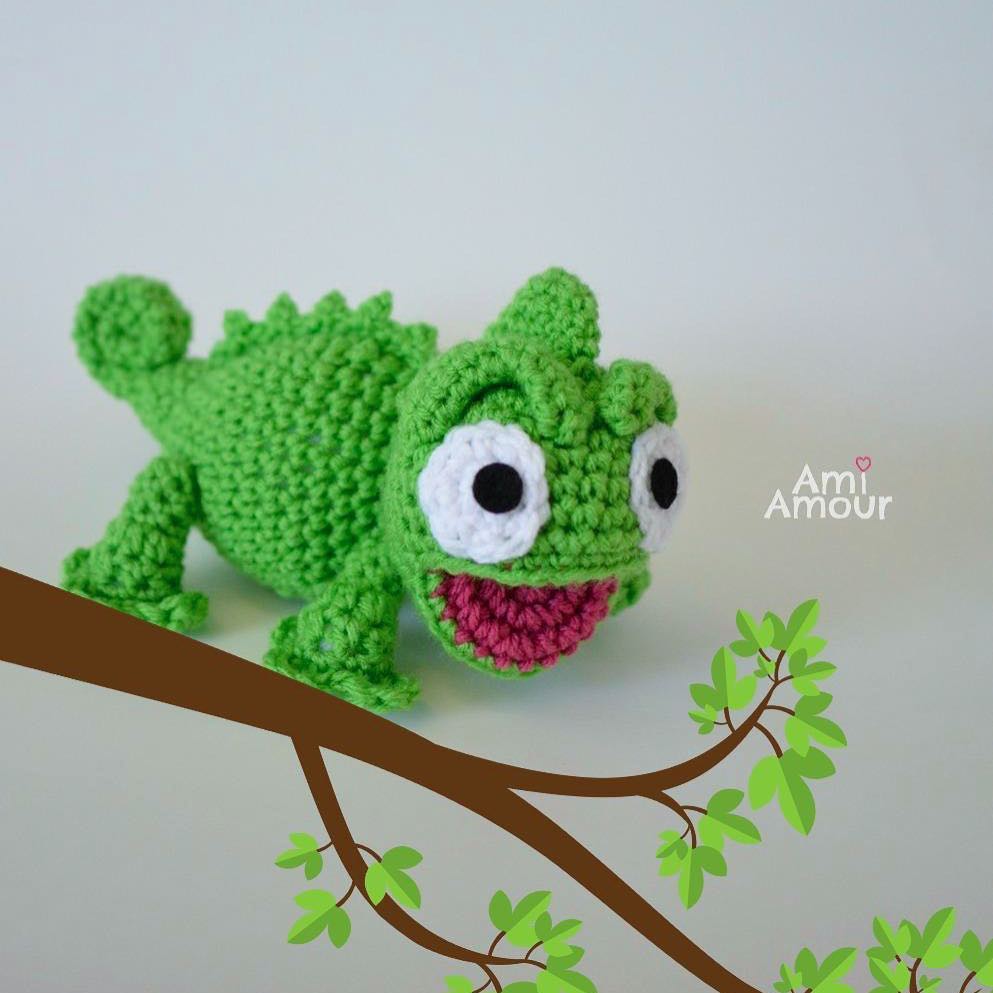
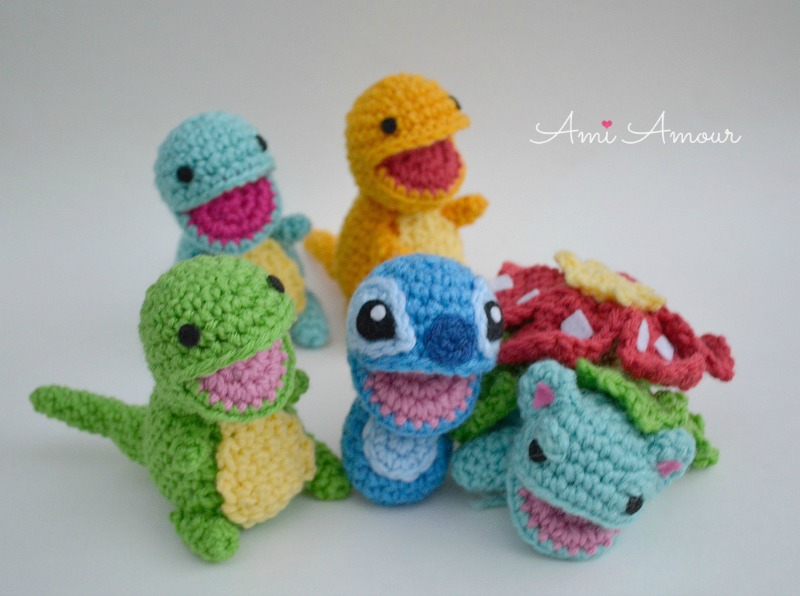
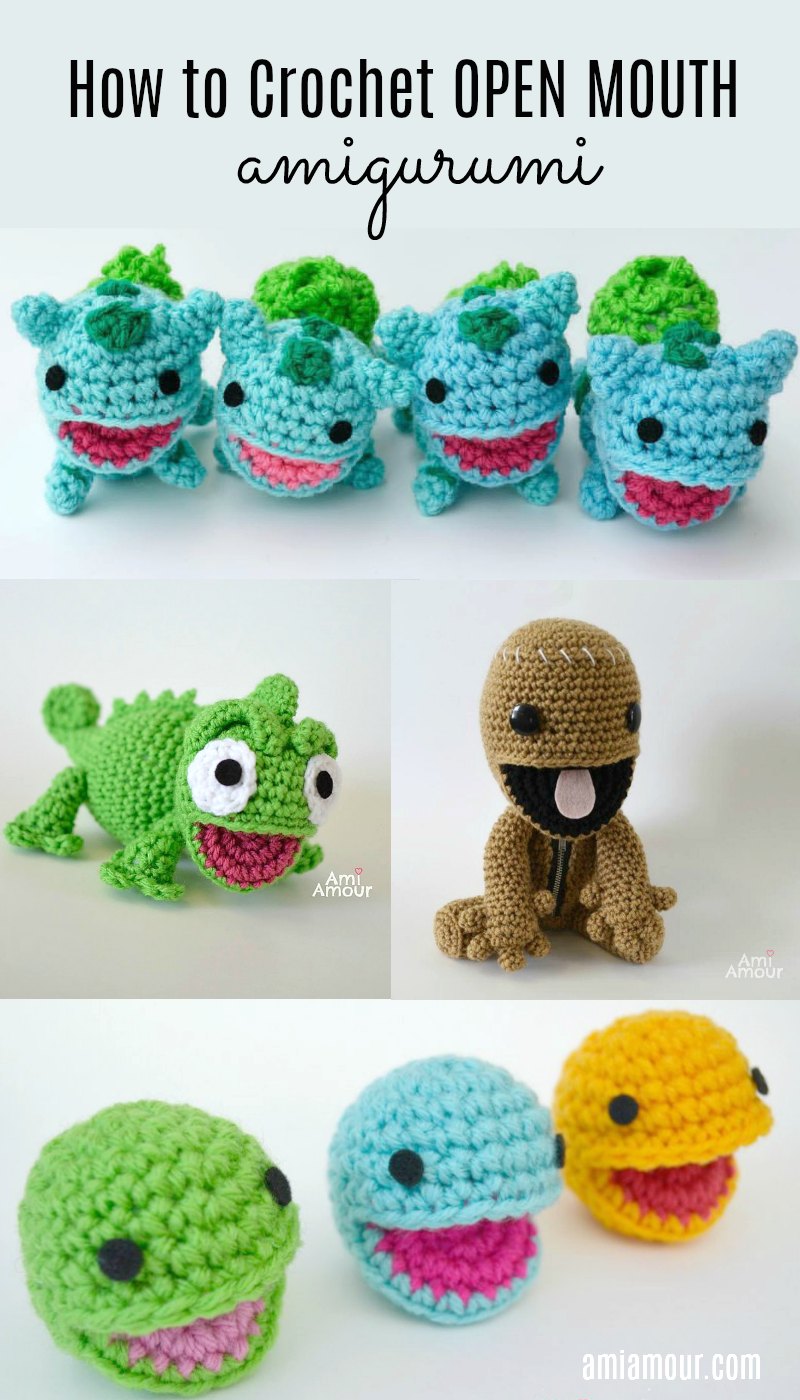
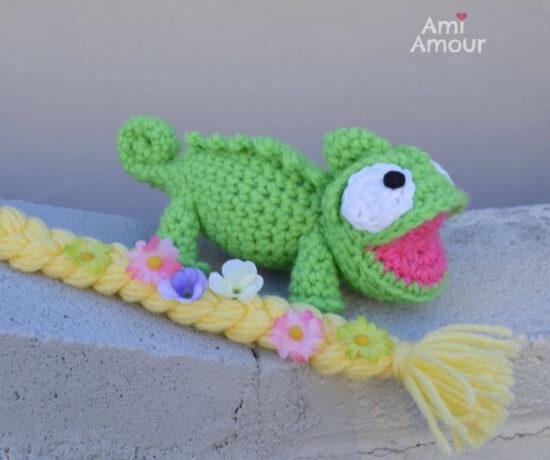
Here are some other amigurumis I’ve utilized the technique on, such as this charming Chameleon
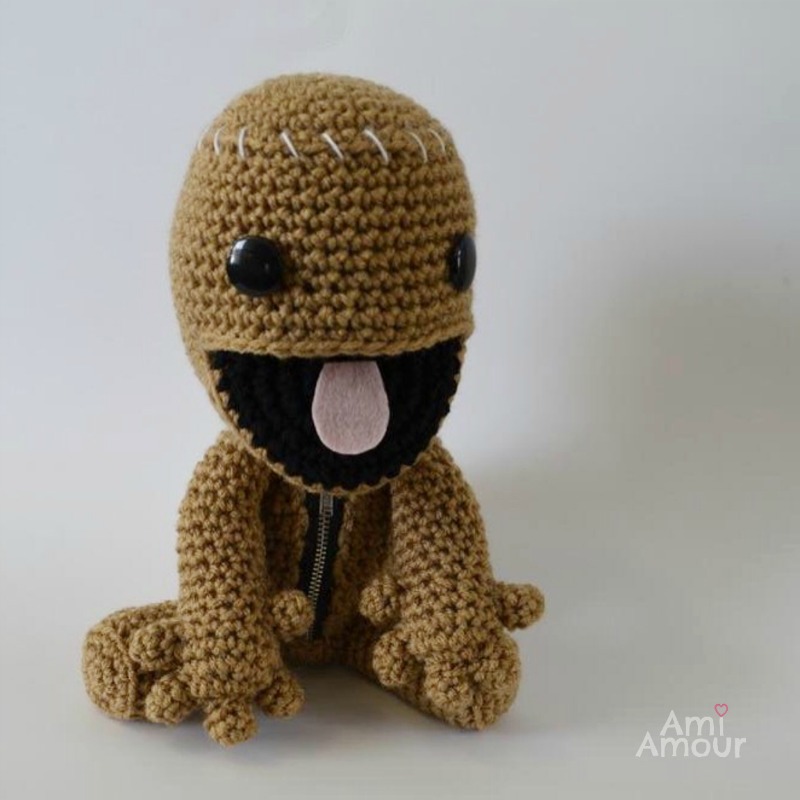
This very happy Sackboy
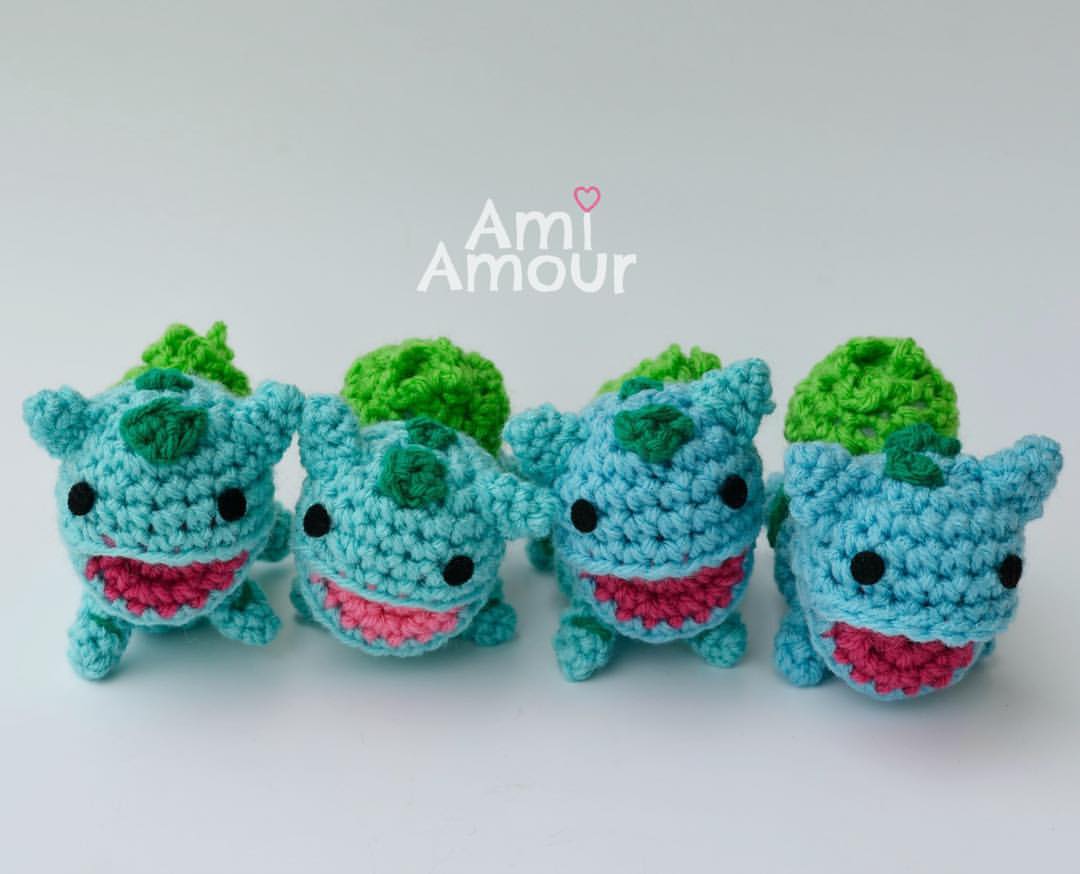
And all these cute lil Bulbasaurs
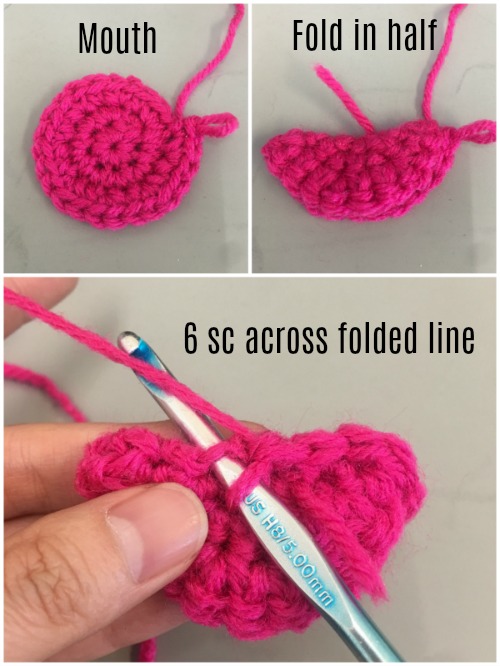
The basic premise of the Open Mouth Amigurumi is you first create a small circle for the mouth.
Fold it in half and single crochet across the straight line.
This creates the top portion and bottom portion of the mouth. Once you make the head, you can attach the mouth with the top portion first, and then later the bottom portion.
It sounds complicated in writing, but honestly once you follow my pattern and tutorial below, you’ll be able to easily make these Open Mouth Amigurumis in no time at all.
I can’t wait for you guys to add this wonderful technique to your ami-making skills and repertoire. I’m also very curious what kind of projects you guys might end up creating using this pattern base and would definitely love to see! Be sure to tag me on my Instagram or Facebook.
Here’s a list of my patterns that use this Head Base Pattern.
OPEN MOUTH AMIGURUMI SERIES
1. Dinosaur Amigurumi Pattern
3. Dragon Egg Amigurumi Pattern (this is a companion pattern to the Dragon)
4. Lilo and Stitch Amigurumi Pattern
5. Crochet Chameleon – Pascal Amigurumi Pattern
6. Calvin and Hobbes Crochet Pattern (This pattern includes a larger size pattern for the Open Mouth Head Base.)
7. Derpy Tiger Crochet Pattern – Kpop Demon Hunters
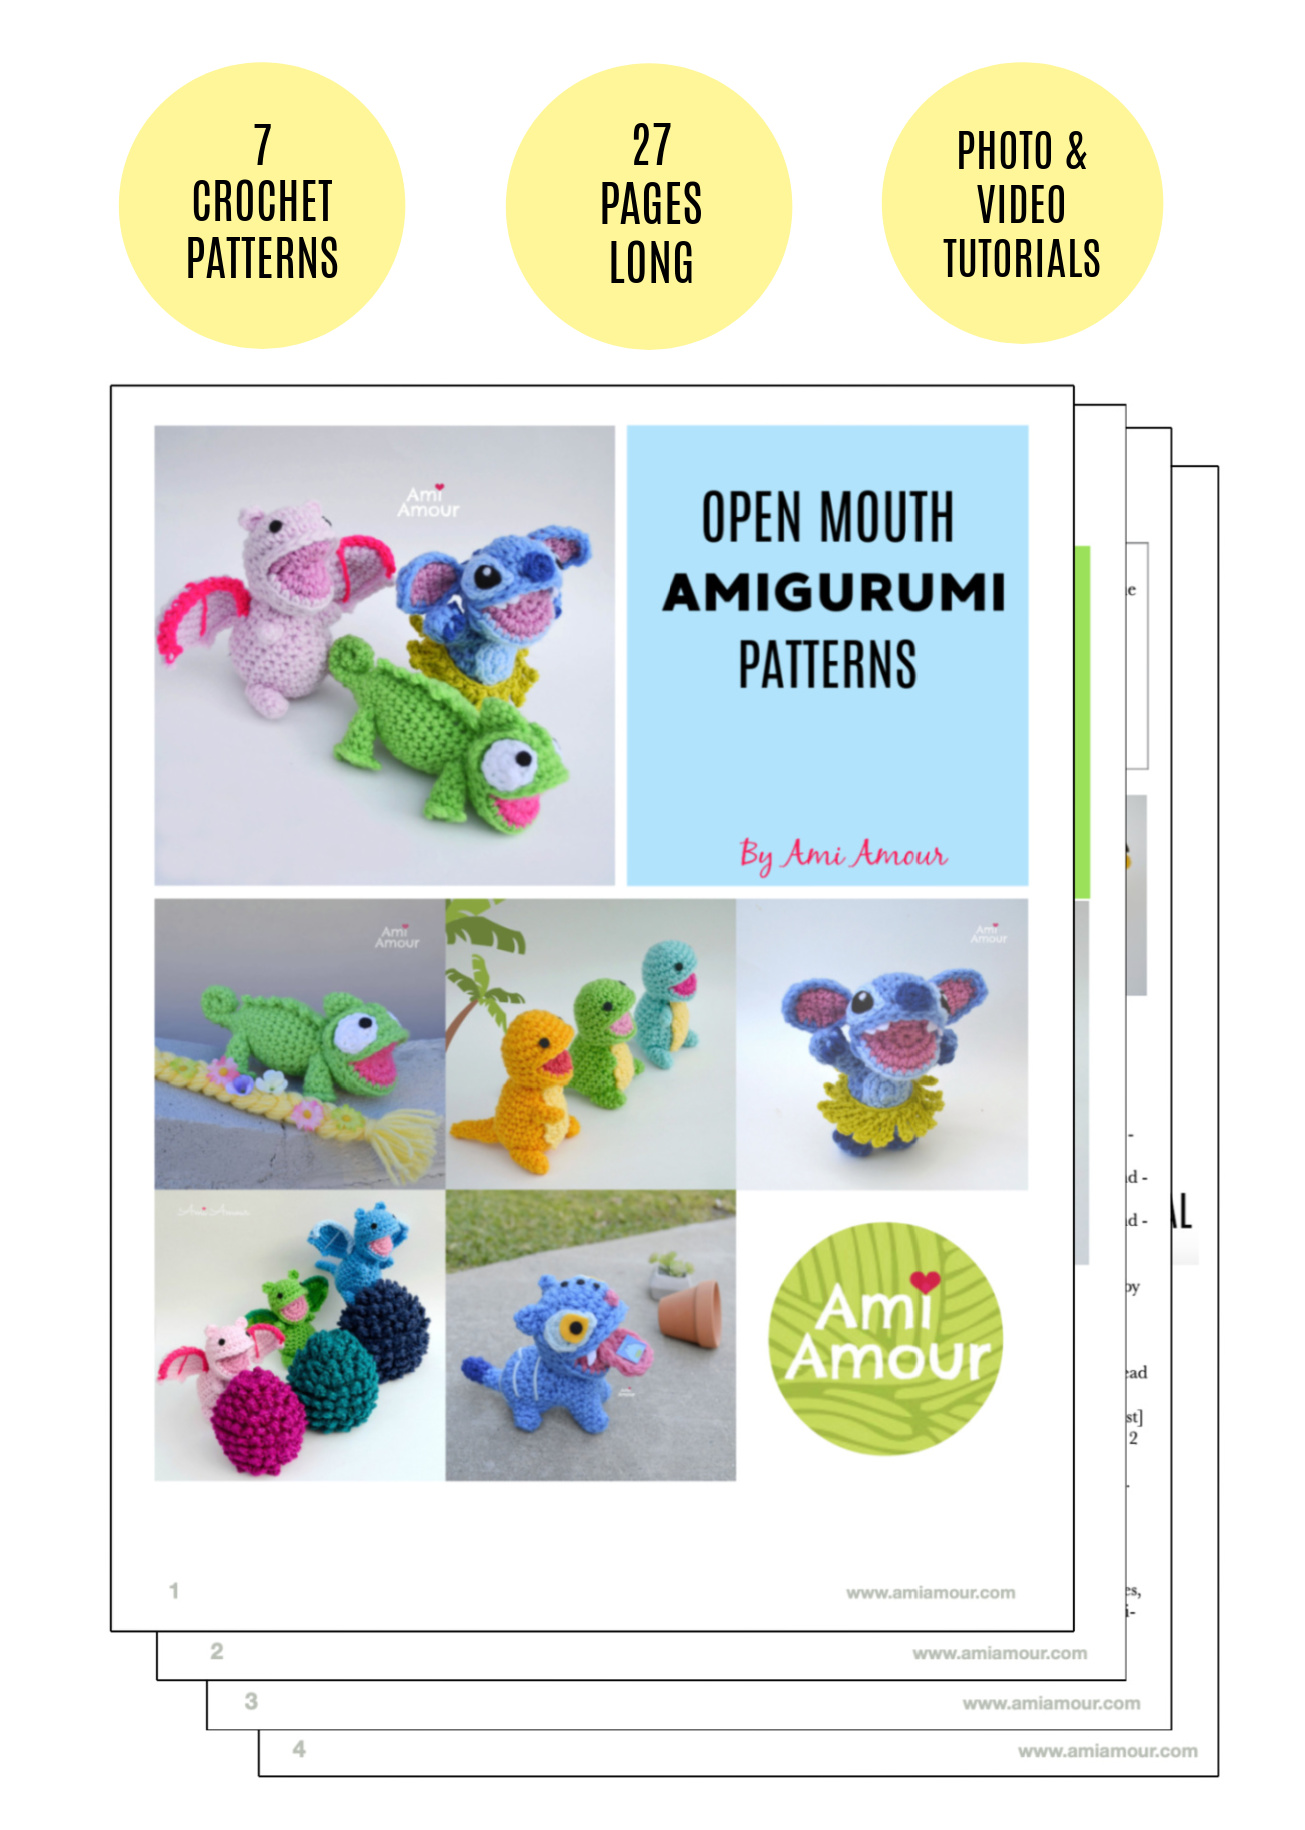
These patterns are all free on my blog, but I’ve also collected the patterns into an Open Mouth Amigurumi Patterns PDF E-book. So if you prefer an ad-free version that’s beautifully formatted, you can purchase the Pattern Set here in my Etsy shop.
It’s 27 pages long and has all the photos, photo tutorials, and links to video tutorials you’ll ever need all handy in one place. It’s a culmination of all my years spent designing and working with Open Mouth so I hope you will like and enjoy. Thank you for supporting my patterns. It means the world to me!
I’ll be coming out with more new patterns in the near future which will use this very Open Mouth Amigurumi Base Pattern to create more cute crochet creatures, so be sure to subscribe to my blog to get all my pattern updates!
If you like this pattern, here are some of my other FREE PATTERNS you may enjoy!
OPEN MOUTH AMIGURUMI VIDEO TUTORIAL
See the Open Mouth Amigurumi in action and crochet along with me!

Disclosure: This post contains affiliate links. This means I may receive a small commission if you decide to purchase anything by clicking on one of these links. Thanks for your support!
OPEN MOUTH AMIGURUMI BASE PATTERN
LEVEL: Easy Intermediate
CROCHET HOOK: 5.0mm hook
YARN:
Red Heart Super Saver (worsted weight, acrylic yarn)
– Spring Green
– Shocking Pink
NOTIONS:
– Polyester Fiberfill
– Yarn Needle
– Stitch Marker
– Scissors
– Black Felt (for eyes)
– Fabri-tac Glue
ABBREVIATIONS: (In American English crochet)
sc – single crochet
sc2tog – single crochet 2 together (sc dec)
st – stitch
APPROXIMATE SIZE: 3in/8cm tall by 3in/8cm wide
MOUTH
With pink yarn (or whatever color you’d like for the mouth)
Round 1: 8 sc into magic ring.
Round 2: 2 sc in each st around – 16 sc.
Round 3: [2 sc in next st, sc in next st] around – 24 sc.
Do not fasten off. Fold Mouth in half. Sew the straight line of the fold closed by using sc – 6 sc across. Fasten off. See photos below.
HEAD
With green yarn (or whatever color you want for the head)
Round 1: 6 sc into magic ring.
Round 2: 2 sc in each st around – 12 sc.
Round 3: [2 sc in next st, sc in next st] around – 18 sc.
Round 4: [2 sc in next st, sc in next 5 st] around – 21 sc.
Round 5: [2 sc in next st, sc in next 6 st] around – 24 sc.
Round 6: Sc in each st around – 24 sc.
Round 7: Attach mouth (top portion) to head by sc in next 12 st (sc stitches through both head and mouth parts), sc in next 12 st on head – 24 sc. [See Photo Tutorial below or Video Tutorial]
Round 8: Attach mouth (bottom portion) to head by sc in next 12 st, sc in next 12 st on head – 24 sc.
Round 9: (In back loop) [Sc2tog, sc in next 2 st] 3 times, (now through both loops) [Sc2tog, sc in next 2 st] 3 times – 18 sc.
Round 10: [Sc2tog, sc in next st] around – 12 sc.
Round 11: Sc2tog around – 6 sc.
Fasten off, leaving a long tail.
Stuff and sew closed. Be sure to take a look at my video tutorial for stuffing tips and tricks so that your head retains it’s nice open mouth shape. For eyes, cut out two small black circles and glue on with Fabri-tac.

If you would like Bodies to go along with your Head, please check out the rest of my Open Mouth Amigurumi Series.
Open Mouth Amigurumi Series
1. Baby Dinosaur Amigurumi Pattern
2. Dragon Amigurumi Pattern
16 Comments
Mary
May 9, 2019 at 3:22 pmThey are so cute, I’ll have to make some for my grandchildren. You are so very talented, thank you so much for sharing your patterns.
Ami Amour
May 16, 2019 at 10:28 pmThank you for your awesome words, Mary! Yes, the open mouth is so fun for the grandchildren to play with!
Wasanti
May 19, 2019 at 7:59 pmI soooo love this! Thank you for sharing ?
Ami Amour
May 30, 2019 at 12:44 amThank you and I hope you have fun with it!
Di
October 11, 2019 at 11:33 pmThank you! So very adorable xxxx
Ami Amour
October 14, 2019 at 5:50 pmYour welcome! Happy crocheting!
Rumiko Sode
January 20, 2020 at 3:45 pmI just made the mouth~head. I must say this is magic, how you create the head around the open mouth! I hope I’ll make a decent dino so I can post it on your FB page. 😀
Ami Amour
January 20, 2020 at 4:32 pmWow that was fast work, Rumiko! You were definitely on it hehehe. I’m sure your dino will be fantastic and I can’t wait to see it!
Laurie
February 17, 2020 at 7:56 pmThank you for sharing your cute patterns and your special technique! I’m sorry to be dense, but I can’t figure out how to sew on the mouth. Are you holding the pink mouth against the back (wrong) side of your work, or are you flipping the head over and crocheting back in the “wrong” direction from the normal direction? I’ve tried 3 times and I can’t seem to figure it out. I even slowed down your video to half speed but I couldn’t see how you were doing this. If you have a few minutes could you (or someone else) try to fix my brain so I can do this right? Thanks! 🙂
Ami Amour
February 23, 2020 at 9:33 pmHi Laurie, sorry I didn’t see your comment until now! So whatever work is facing outward to be seen by the eye as the outside of the doll, should be showing on the “right” side of the work. Also I always go in one direction. Once I attach the mouth to the head part, I continue to sc around the back of the head until I come around back to the mouth, then I attach the mouth again, and then continue my way with sc around the head again. Hope that helps!
Cindy
May 27, 2020 at 2:56 pmThis is a lovely tip! Thank you so much! I can’t wait to try it out on my next project :)!!!!
Ami Amour
June 16, 2020 at 10:38 amIt’s a fun trick to learn to add to your amigurumi making! Happy Crocheting!
Lily Rakyta
April 17, 2021 at 5:08 pmI don’t really understand the part with the head. From the part when you attach the mouth, and all the way to the end. Do you think you could explain it more for me?
Ami Amour
April 17, 2021 at 5:55 pmHi Lily, in this blog post above, there is a video tutorial to help you guide through making the head as well, so I would just follow along with the video. You can also find the video on my YouTube channel as well. Hope that can help!
Cass
May 28, 2022 at 8:30 pmHi! I love your pattern and glad you posted a YouTube video for the head… reading it is confusing lol
I wanted to add teeth, and I’m curious if you have a suggestion for making those? I want able to find a link anywhere in the patterns.
Thank you! 💜
Ami Amour
May 28, 2022 at 9:02 pmYou can either cut a small triangle from white felt and glue on with Fabri-tac glue. Or if you want to crochet a small tooth, you can also try doing Ch 2, sl st into first ch, and fasten off with a long tail and that should give you a small triangle that looks like a fang. Hope that helps!