
Ohana means Family! And here is Stitch Amigurumi inspired from the very cute Lilo and Stitch animated movie.
It’s been awhile since I’ve continued on with my Open Mouth Amigurumi series, and well I thought with his wide alien mouth, Stitch amigurumi would be the perfect candidate for my latest free crochet pattern!


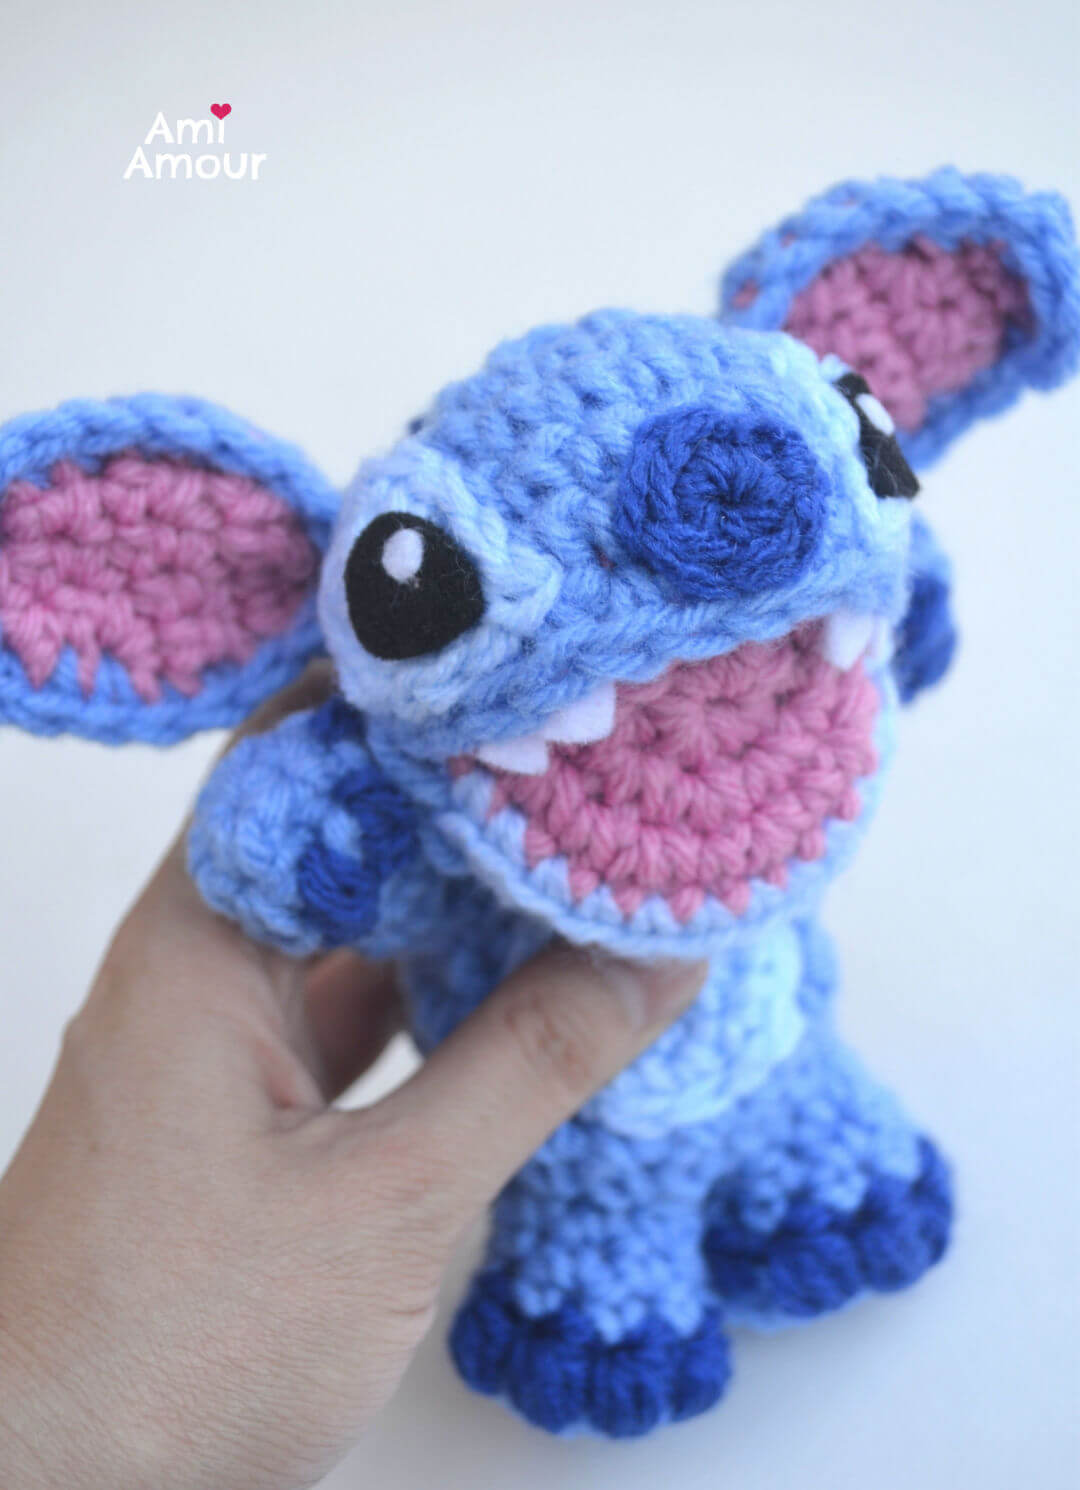
Just look how adorable he is with his open mouth and those cute little sharp teeth!

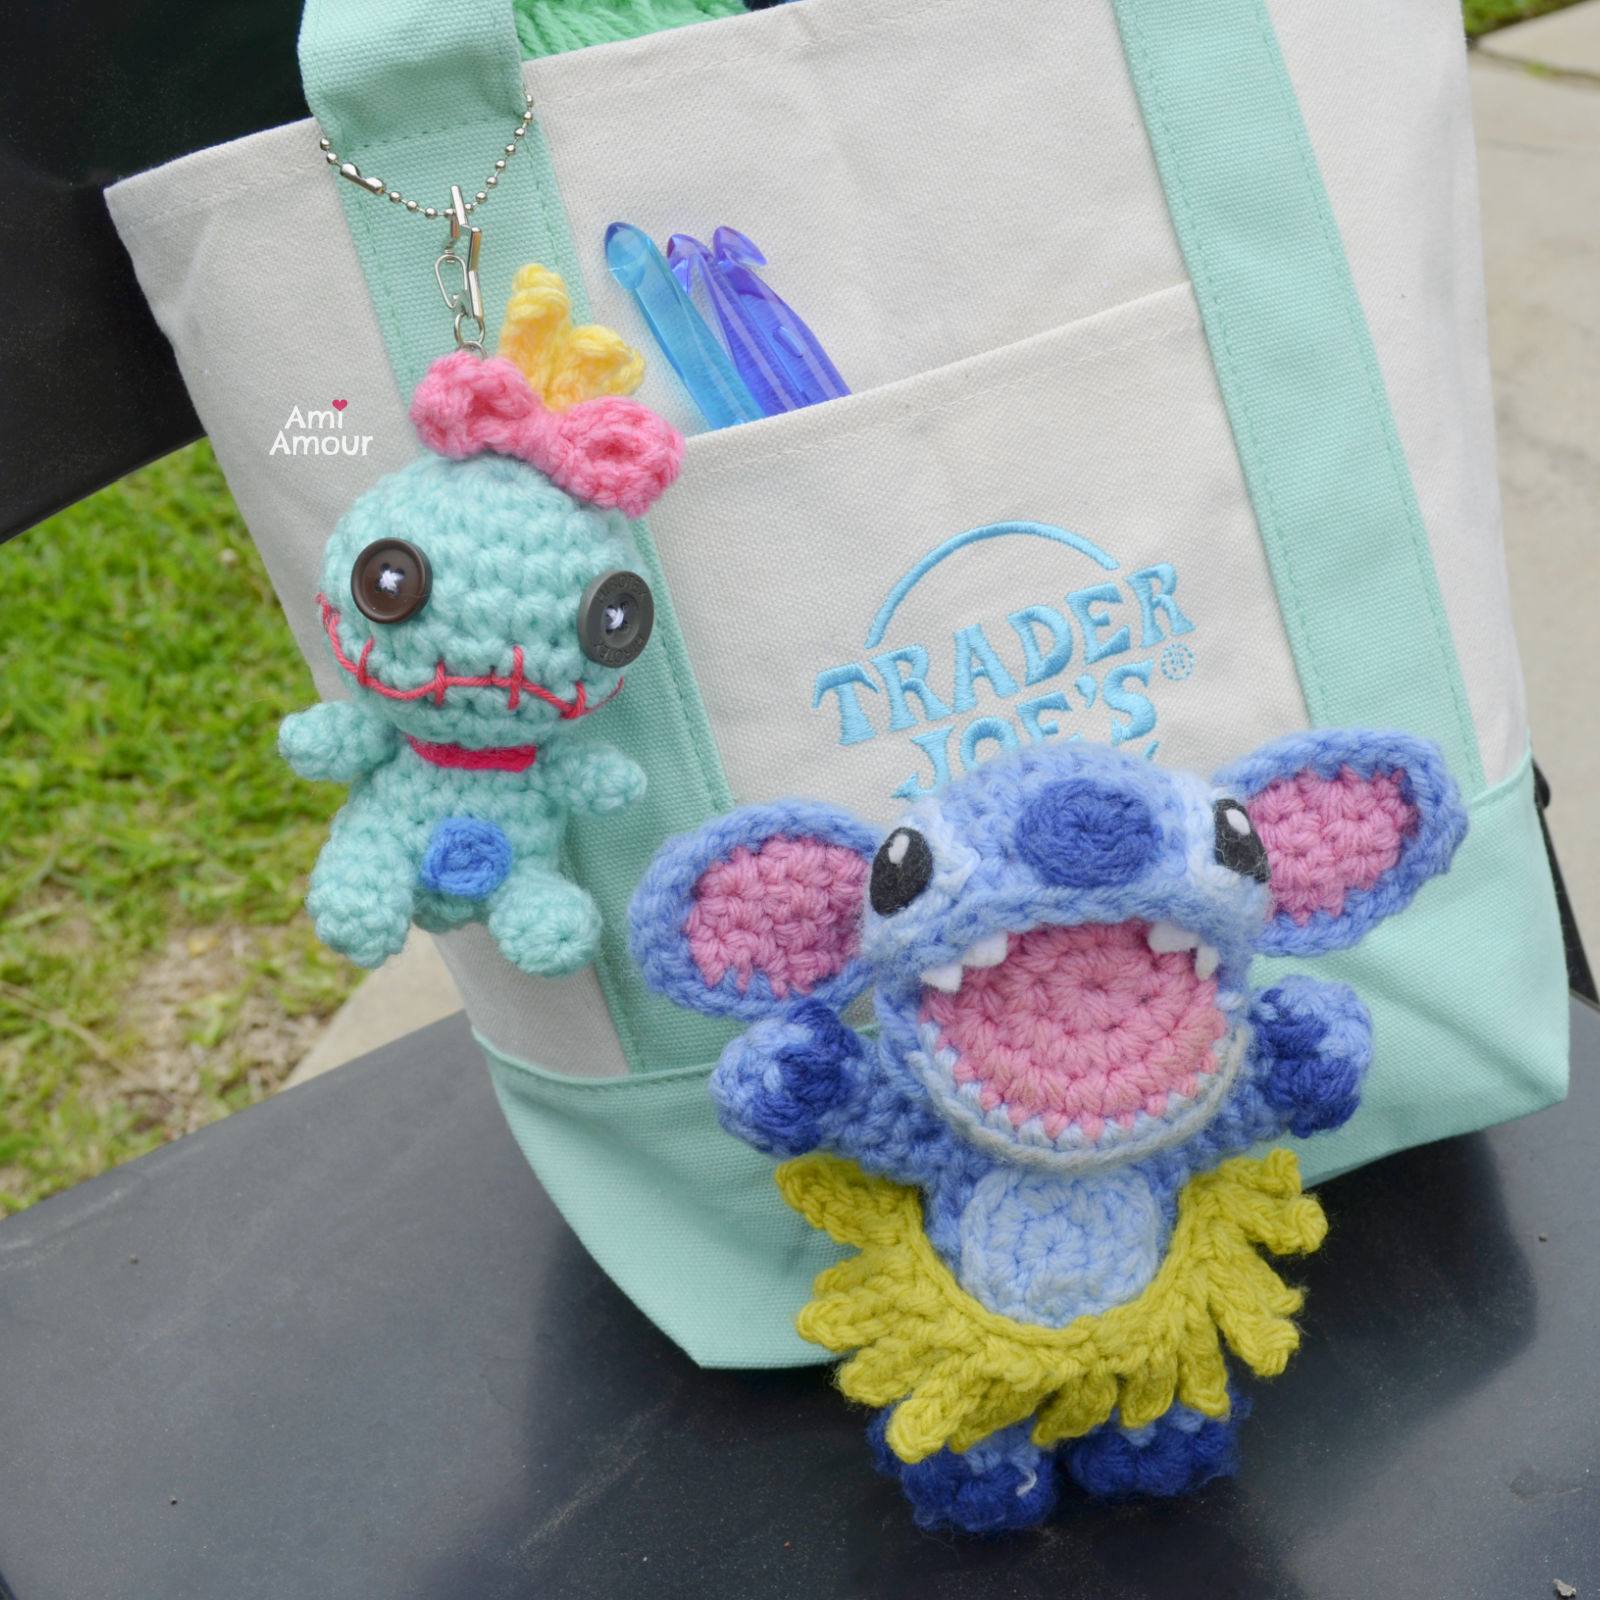
Here he is with his pal, Scrump. I just added Scrump amigurumi as another free crochet pattern on my blog, so be sure to make his companion too!
His other features include of course his wide ears, and his cute little paws with claws on them.

He also has dark blue body markings on his back.

I designed this Stitch Amigurumi so you can make him in different various poses with the same pattern.
Depending on how you sew him during the assembly, you can have pose him standing up with his arms stretched out.

He can also be sitting with all 4 limbs to the ground. He reminds me a bit of a puppy here!

Or you can also do a position where Stitch amigurumi is sitting down, but with hands to the side, as seen with Angel here. They make such a cute couple!

So have fun experimenting with all his different poses and let me know which one you chose to do. I must say, my favorite is the one standing with his arms raised. He already looks happy with the open mouth, but with his arms raised, he looks like he wants to give you a great big hug, or possibly, a great big scare!
And of course Stitch amigurumi really adores music and dancing, so here he is doing a little bit of hula dancing as well! I’ve also included the hula skirt as a bonus accessory crochet pattern in the written pattern below.

Here are some of my other Open Mouth Amigurumi patterns, you may enjoy making!
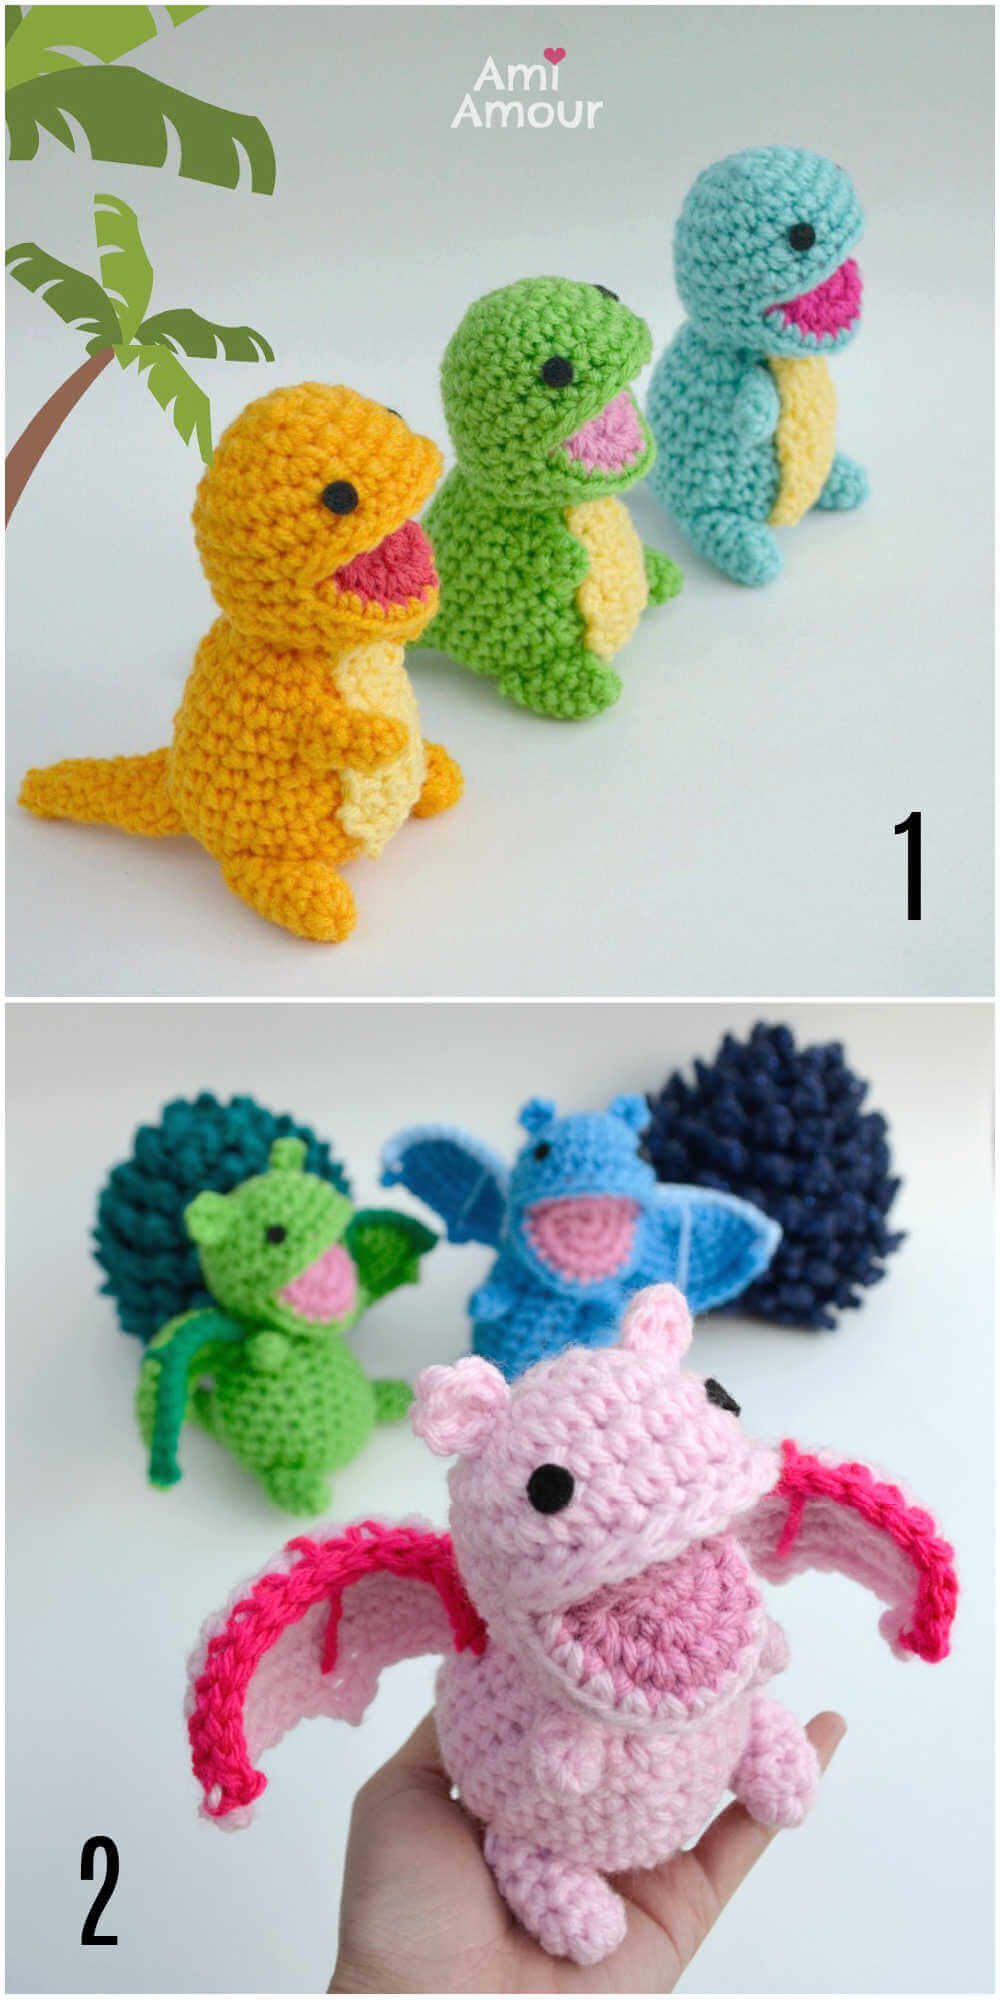
1. Dinosaur Amigurumi Pattern
2. Dragon Amigurumi Pattern
You may also enjoy these other Open Mouth Amigurumi Patterns as well:
3. Pascal Chameleon Pattern
4. Derpy Tiger Crochet Pattern
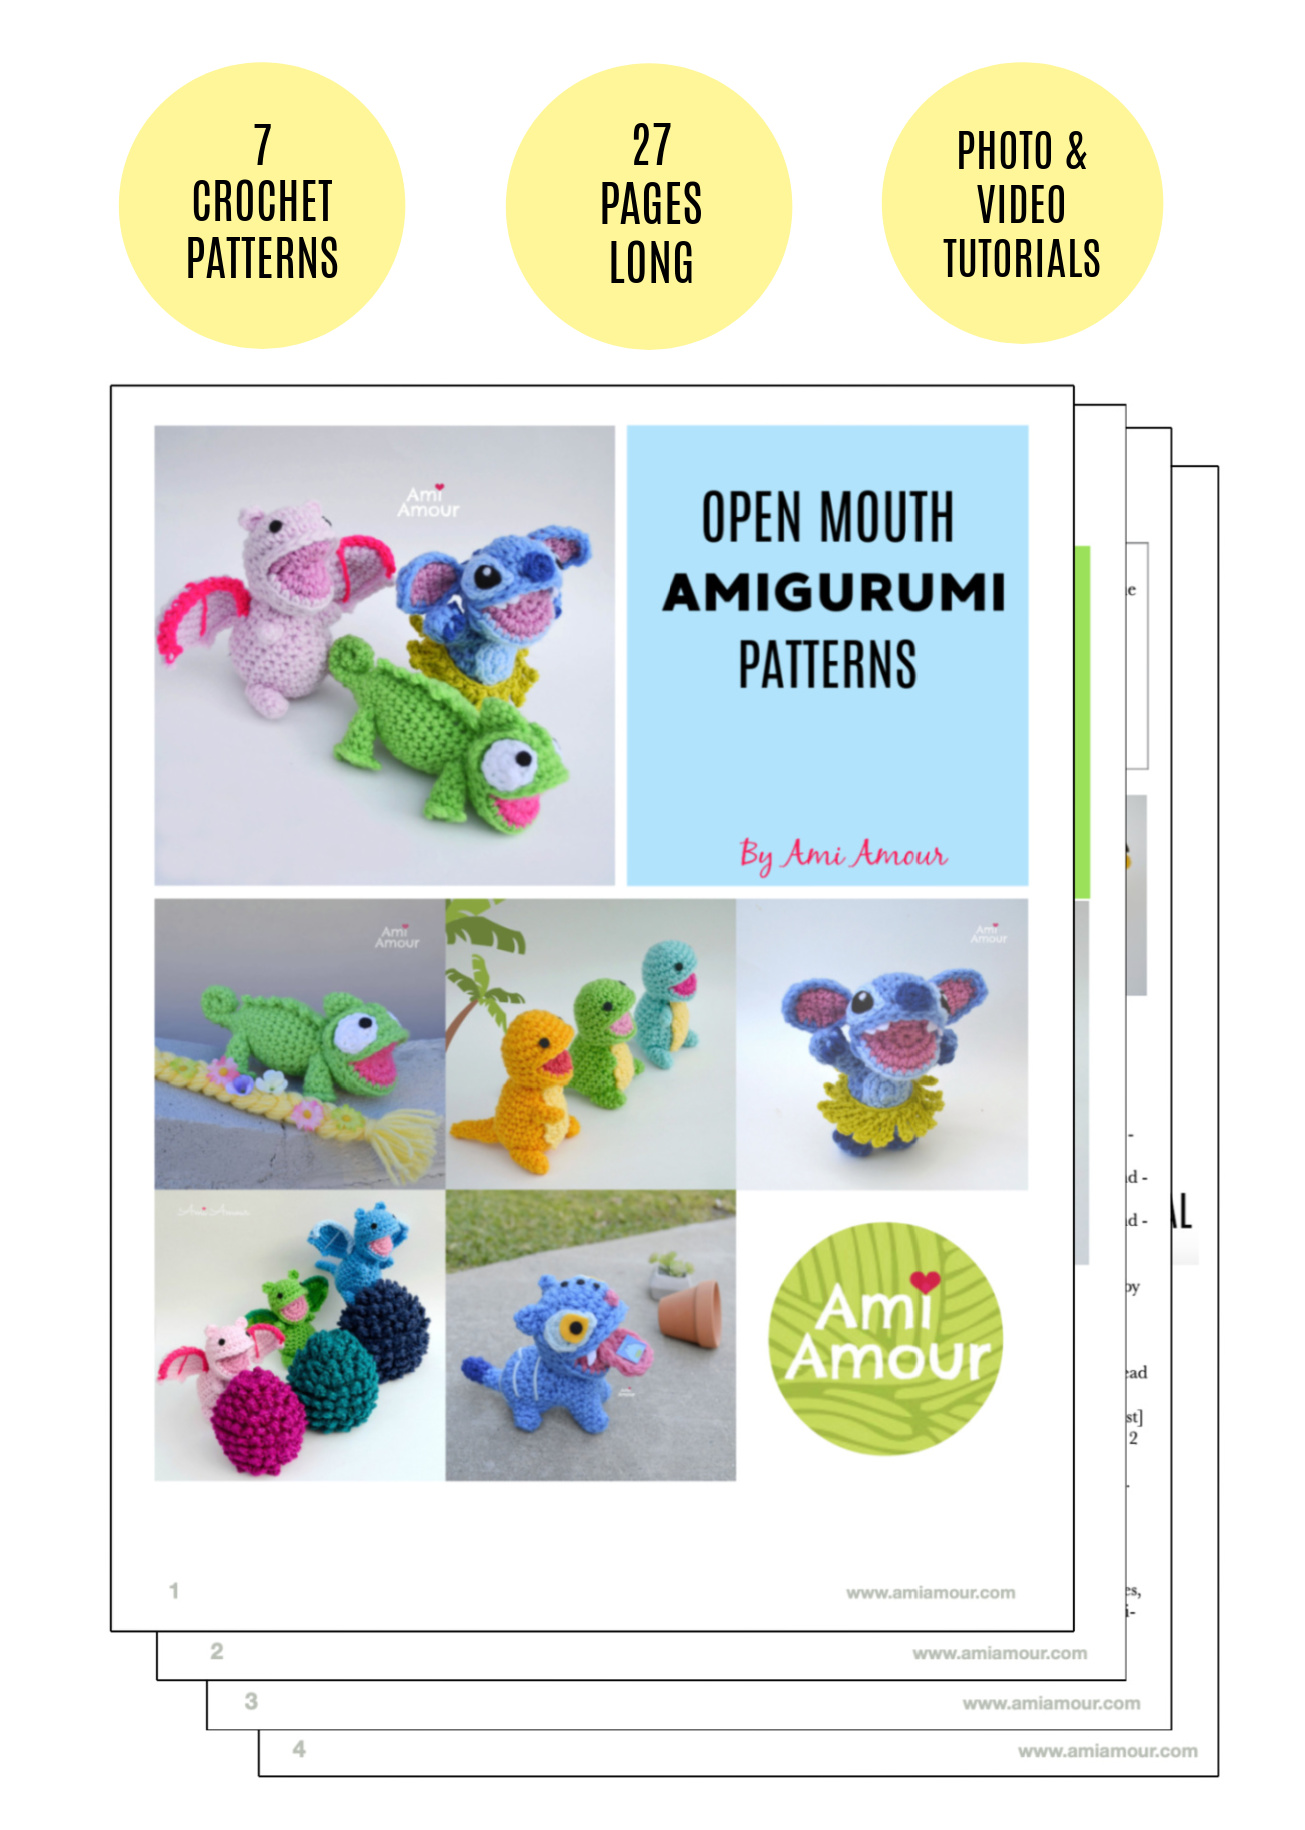
These patterns are all free on my blog, but I’ve also collected the patterns into an Open Mouth Amigurumi Patterns PDF E-book. So if you prefer an ad-free version that’s beautifully formatted, you can purchase the Pattern Set here in my Etsy shop.
It’s 27 pages long and has all the photos, photo tutorials, and links to video tutorials you’ll ever need all handy in one place. It’s a culmination of all my years spent designing and working with Open Mouth so I hope you will like and enjoy. Thank you for supporting my patterns. It means the world to me!
Lilo and Stitch Crochet Tutorial video
See Stitch in action and crochet along step by step with me.

*Disclosure: This post contains affiliate links. This means I may receive a small commission if you decide to purchase anything by clicking on one of these links.

Stitch Amigurumi – Free Crochet Pattern
LEVEL
Intermediate Crochet
CROCHET HOOK
5.0mm size
YARN
Red Heart Super Saver (acrylic, worsted weight yarn)
– Periwinkle
– Royal Blue
– Light Blue
– Light Raspberry
– Spring Green (optional, for Hula Skirt)
NOTIONS
– Yarn Needle
– Stitch Marker
– Scissors
– Black and White Felt (for the eyes)
This link will take you to black and white circle felt shapes in various sizes.
ABBREVIATIONS:
ch – chain
hdc – half double crochet
PS – Puff Stitch
sc – single crochet
sl st – slip stitch
sc2tog – single crochet 2 together (sc dec)
sPS – small Puff Stitch
st – stitch
SPECIAL STITCHES
Puff Stitch (PS):
[Yarn over, insert hook into specified stitch, yarn over and pull up a loop] Repeat 3 times. You should have 7 loops on the hook. Yarn over, and pull through all 7 loops. Ch 1 to close the Puff Stitch.
small Puff Stitch (sPS):
[Yarn over, insert hook into specified stitch, yarn over and pull up a loop] Repeat 2 times. You should have 5 loops on the hook. Yarn over, and pull through all 5 loops. Ch 1 to close the small Puff Stitch.

APPROXIMATE SIZE:
About 6 in / 15cm tall standing
PATTERN USAGE:
This free pattern is intended for personal use only.
HEAD
Please follow and complete the pattern for the OPEN MOUTH AMIGURUMI BASE first and then come back to finish the rest of the body.
NOTE: You will want to make the Head in a Blue color. When you get to Round 8, you will switch to a light blue color and continue with that color for the rest of the rounds.

BODY
With Light Periwinkle yarn
Round 1: 6 sc into magic ring.
Round 2: 2 sc in each st around – 12 sc.
Round 3: [2 sc in next st, sc in next st] around – 18 sc.
Round 4-5: Sc in each st around – 18 sc.
Round 6: [Sc2tog, sc in next 4 st] around – 15 sc.
Round 7: [Sc2tog, sc in next 3 st] around – 12 sc.
Round 8: Sc in each st around – 12 sc.
Round 9 [Sc2tog, sc in next st] around – 8 sc.
Fasten off, leaving a long tail.
FEET (make 2)
Round 1: With light periwinkle yarn, 6 sc into magic ring.
Round 2: 2 sc in each st around – 12 sc.
Round 3: With royal blue yarn, PS (Puff stitch) in next 3 st, sc in next st, with light periwinkle yarn (sc2tog, sc in next 2 st) 2 times – 13 st (Note: I count each Puff st to have 2 sts at the top.)
To see how I do Puff Stitches for the feet, you can see my video tutorial here.
Round 4: [Sc in next st, skip next st] 3 times, sc in next st, [sc2tog, sc in next st] 2 times – 8 sc.
Round 5-6: Sc in each st around – 8 sc.
Fasten off, leaving a long tail.
ARM (make 2)
Round 1: With light periwinkle yarn, 4 sc into magic ring.
Round 2: 2 sc in each st around – 8 sc.
Round 3: With royal blue yarn, sPS (small Puff Stitch) in next 3 st, sc in next st, with light periwinkle yarn, sc in next 4 st – 11 st (Note: I count each Puff st to have 2 sts at the top)
To see how I do small Puff Stitches for the arm, you can see my video tutorial here.
Round 4: (Sc in next st, skip next st) 3 times, sc in next st, sc2tog 2 times – 6 sc.
Round 5-7: Sc in each st around – 6 sc.
Fasten off, leaving a long tail.
TAIL
With light periwinkle yarn
Round 1: 5 sc into magic ring.
Round 2: Sc in each st around – 5 sc.
Fasten off, leaving a long tail.
BELLY PATCH
With light blue yarn
Round 1: 6 sc into magic ring.
Round 2: 2 sc in each st around – 12 sc.
Round 3: (2 sc in next st, sc in next st) 3 times only.
You will not finish the rest of the round.
Fasten off, leaving a long tail.
EYE PATCH (make 2)
With light blue yarn
Round 1: 8 sc into magic ring.
Round 2: Sc in next st, (hdc, ch 2, sl st in previous ch, hdc) in next st, sc in next 6 st.
Sl st to join to first st.
Fasten off, leaving a long tail.
NOSE
With royal blue yarn
Round 1: 6 sc into magic ring. Sl st to join to first sc.
Fasten off, leaving a long tail.
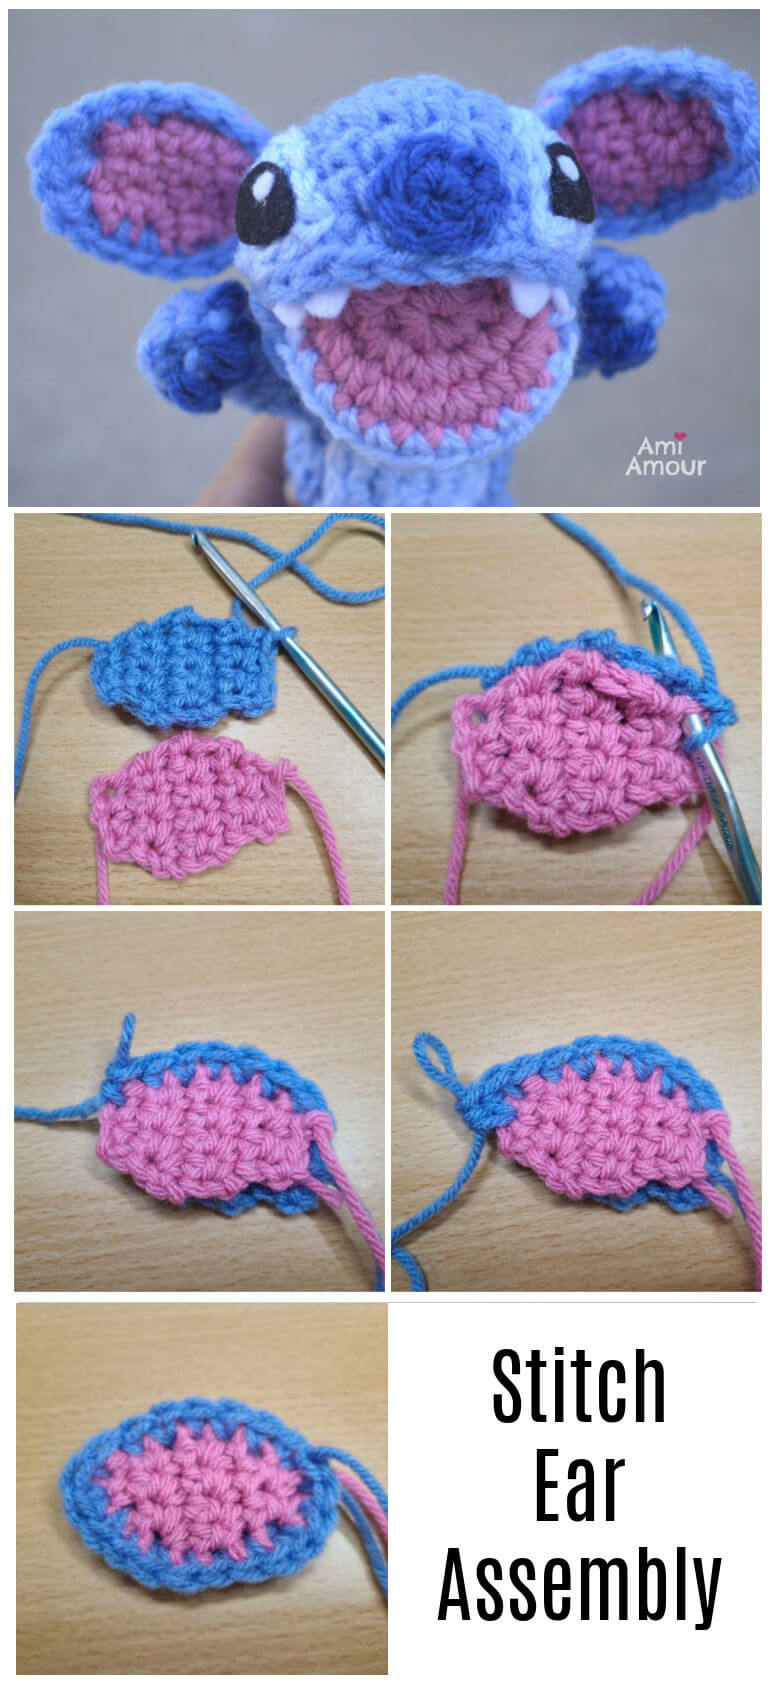
EAR (make 2)
With Light Raspberry yarn
Row 1: Ch 4, sc in 2nd ch from hook and in each ch across – 3 sc.
Row 2: Ch 1, turn, 2 sc in first st, sc in each st across – 4 sc.
Row 3: Ch 1, turn, 2 sc in first st, sc in each st across – 5 sc.
Row 4: Ch 1, turn, sc in each st across – 5 sc.
Row 5: Ch 1, turn, skip first st, sc in next 4 st across – 4 sc.
Row 6: Ch 1, turn, skip first st, sc in next 3 st across – 3 sc.
Row 7: Ch 1, turn, sc in each st across – 3 sc.
Fasten off.
Repeat Ear one more time to create another one in the color PERIWINKLE.
Lay the 2 layers and on top of each other with the pink on top.
We will crochet the following border through both layers.
EAR BORDER
With light periwinkle yarn
Fasten onto both layers with a sl st on the long side of the ear. Sc across 7 st, then do 2 hdc in in next st (note: this will be around where the tip of the ear is), sc around until you get to the beginning of the border. Sl st to first st and fasten off, leaving a long tail.
See photos below. You can also see the video tutorial for the ear border here.
HEAD TATTOO
With royal blue yarn
Ch 7, sl st in next 3 ch, ch 3, sc in previous 2 ch, sl st in next 2 ch, 2 hdc in last ch.
Continue on other side of chain, 2 hdc in next ch, sl st in next 2 ch, ch 3, sc in previous 2 ch, sl st in next 2 ch, ch 2, sl st in previous ch, sl st in next ch.
Fasten off, leaving a long tail.
BODY TATTOO
With royal blue yarn
Ch 9, sc in next ch, sl st in next 2 ch, ch 2, sc in previous ch, sl st in next 2 ch, ch 3, sc in previous 2 ch, sl st in next 2 ch, sc in last ch.
Continue on other side of chain, sc in next ch, sl st in next 2 ch, ch 3, sc in previous 2 ch, sl st in next 2 ch, ch 2, sc in previous ch, sl st in next 2 ch, sc in next ch, sl st in next 2 ch.
Fasten off, leaving a long tail.
CROCHET HULA SKIRT (optional)
With Spring Green yarn
Ch 24, sl st into 2nd ch from hook, (ch 5, sl st back previous 4 ch, sl st into next ch) repeat across.
Join the 2 ends together to make a circle skirt.
If you want you can sew the hula skirt to Stitch so it always stays on, or you can leave it as a hula skirt accessory that can be taken on or off.

LILO AND STITCH AMIGURUMI ASSEMBLY
You can also see my video tutorial for the assembly here.
1. Sew Head to Body
2. Sew Eye Patches to Head
3. Sew Nose onto Face
4. Cut 2 Teardrop Shapes with Black Felt for the Eyes
5. Glue Teardrop Shapes to Eye Patch with Fabri-tac Glue .
6. Cut 2 very small circle shapes from white Felt.
7. Glue the white circles wth Fabri-tac Glue onto the black teardrop shape. (See photos for placement)
8. Sew Belly Patch to Body.
9. Cut 4 small triangle shapes for the teeth.
10. Place glue only on the tip of one side of the triangle and glue the teeth under rim of upper mouth.
(This is optional. You don’t have to give Stitch teeth if you prefer not to.)
11. Stuff and Sew Feet to Body.
12. Stuff and Sew Arms to Body.
13 . Sew Tail to back of Body.
14. Sew Head Tattoo onto Back of Body.
15. Sew Back Tattoo onto Back of Body.
16. Cut and hide all ends.
17. Don’t forget to crochet Scrump, his lil pal (also another free pattern on my blog)!
18. Make sure you tag me with your projects on Instagram @ami_amour or Facebook. I’d love to see!

1 Comment
Cass
January 1, 2022 at 11:51 amI love this pattern, so many new things to try and links to specific parts of the video were so helpful. I’ve made this for a friends birthday and he’s almost too cute to give up! Thank you so much for this wonderful pattern, definitely the best I’ve seen, easy to follow and if you get a bit lost (I’m self taught so always learning!) it’s easy to pick it up with your helpful videos. I crocheted him standing up with his arms out wearing his grass skirt he is at maximum cuteness!