
“Welcome, player, to the crochet Squid Game! Here we play childhood games, but with a twist. One wrong misstep and you may not survive the game.
Pink soldiers are stationed about, watching your every step, making sure all the rules are followed, and making eliminations when necessary.
Players will compete while wearing green tracksuits until only one player remains. Winner takes the jackpot. Best of luck!”

Hey guys, I couldn’t help myself. This Squid Game TV show, so visually striking yet emotionally devastating, has inspired me to construct the characters in cute amigurumi form (help, I have an illness! :P).
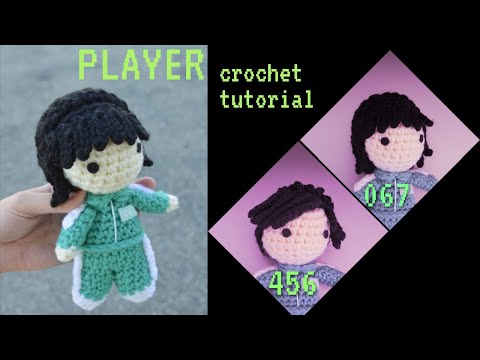
So here is my free pattern for crochet Squid Game Amigurumi!
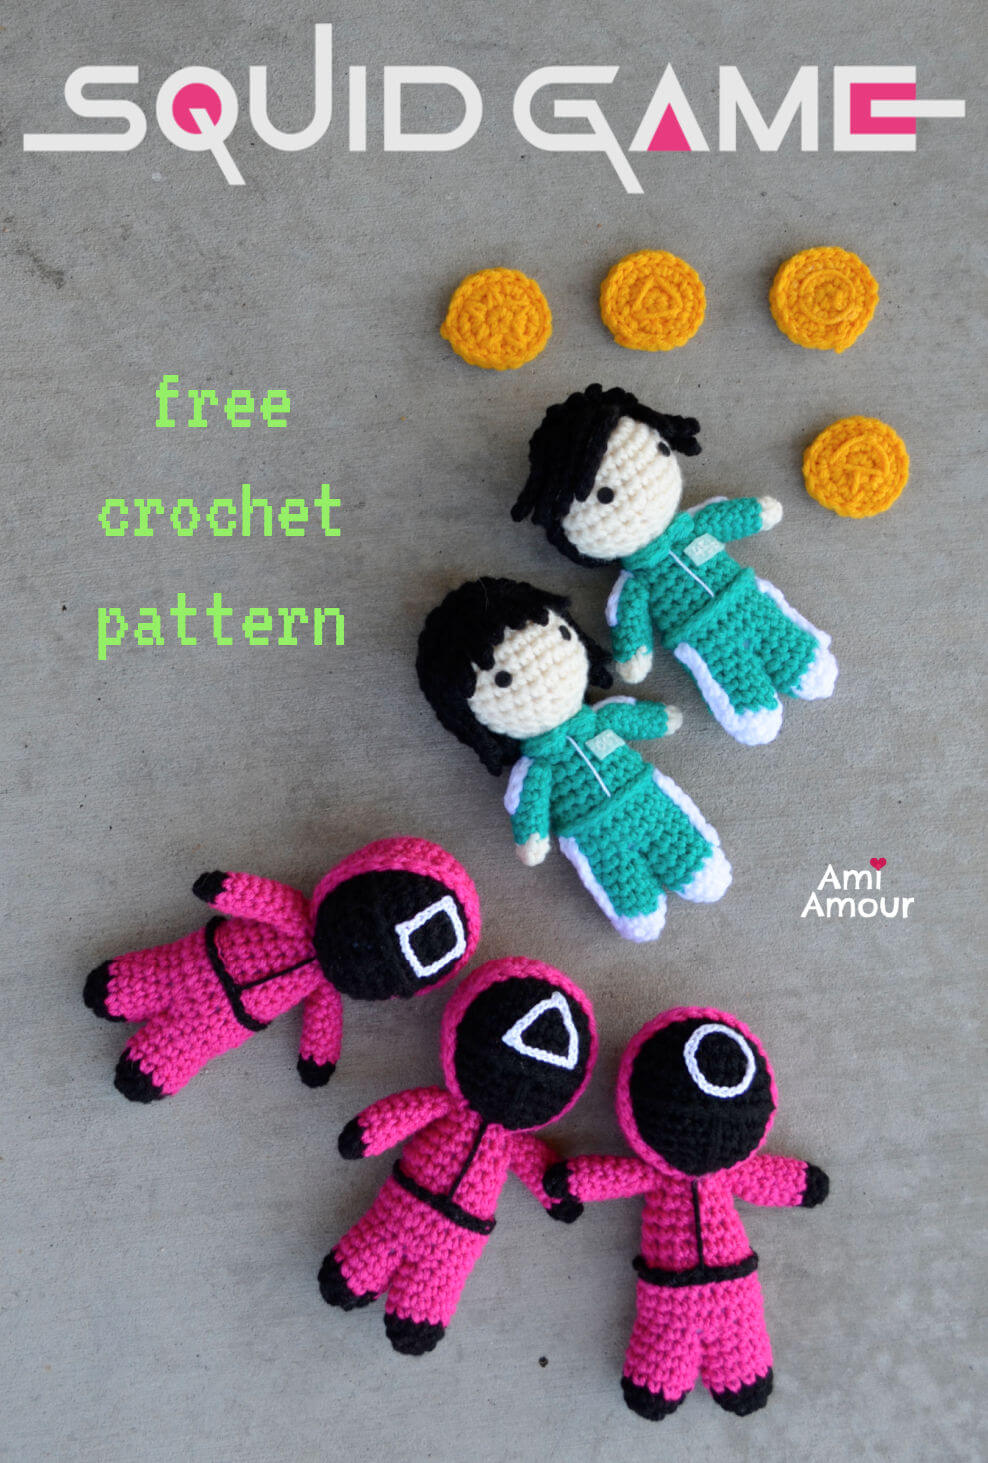
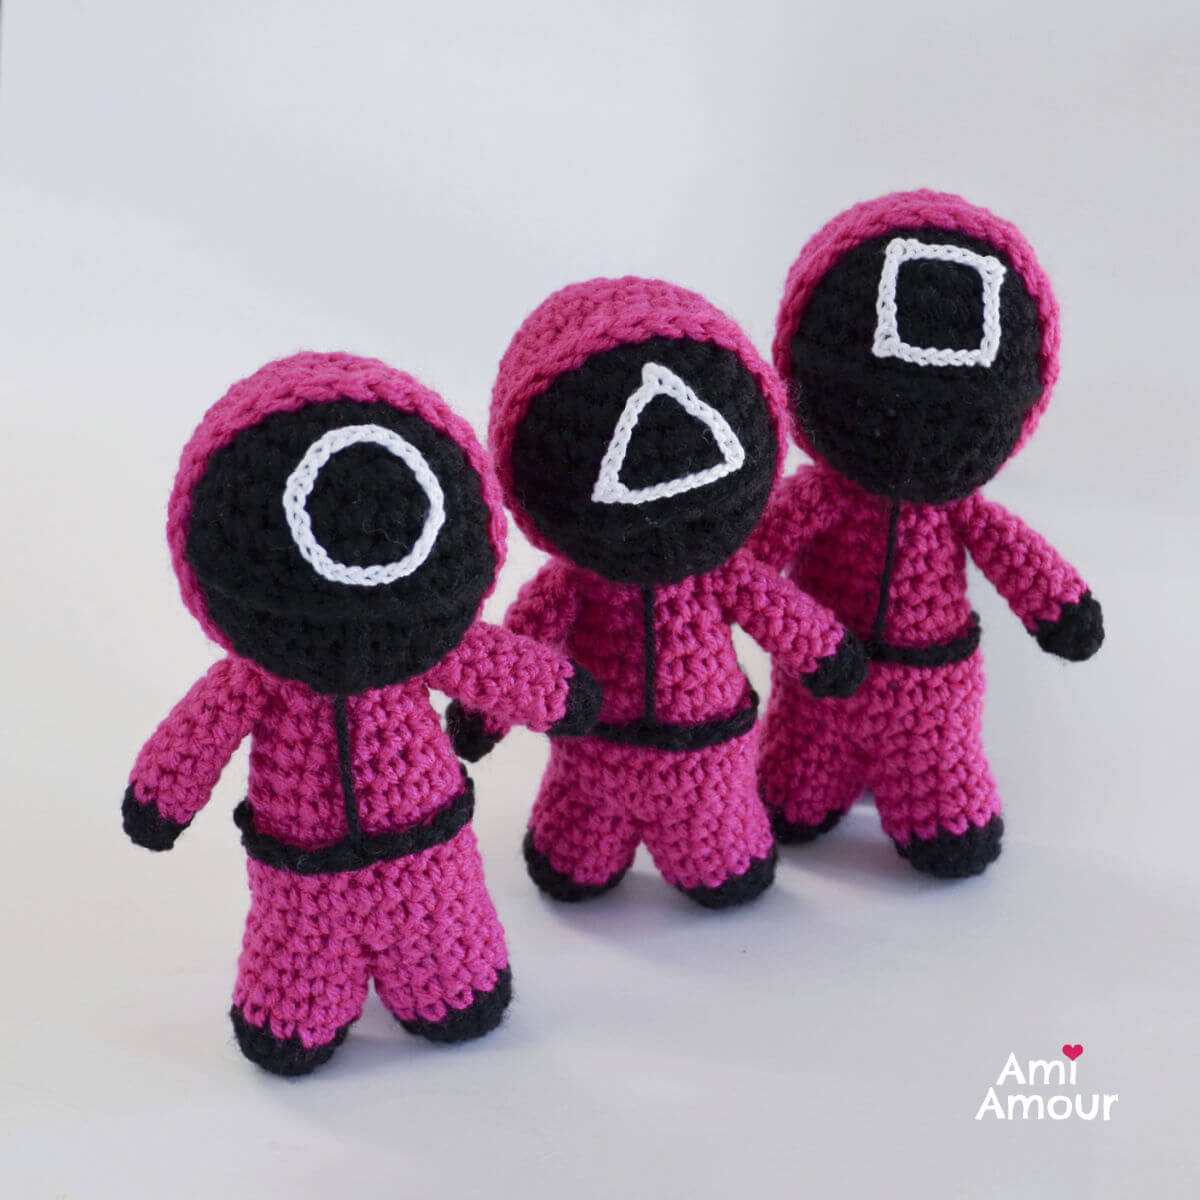
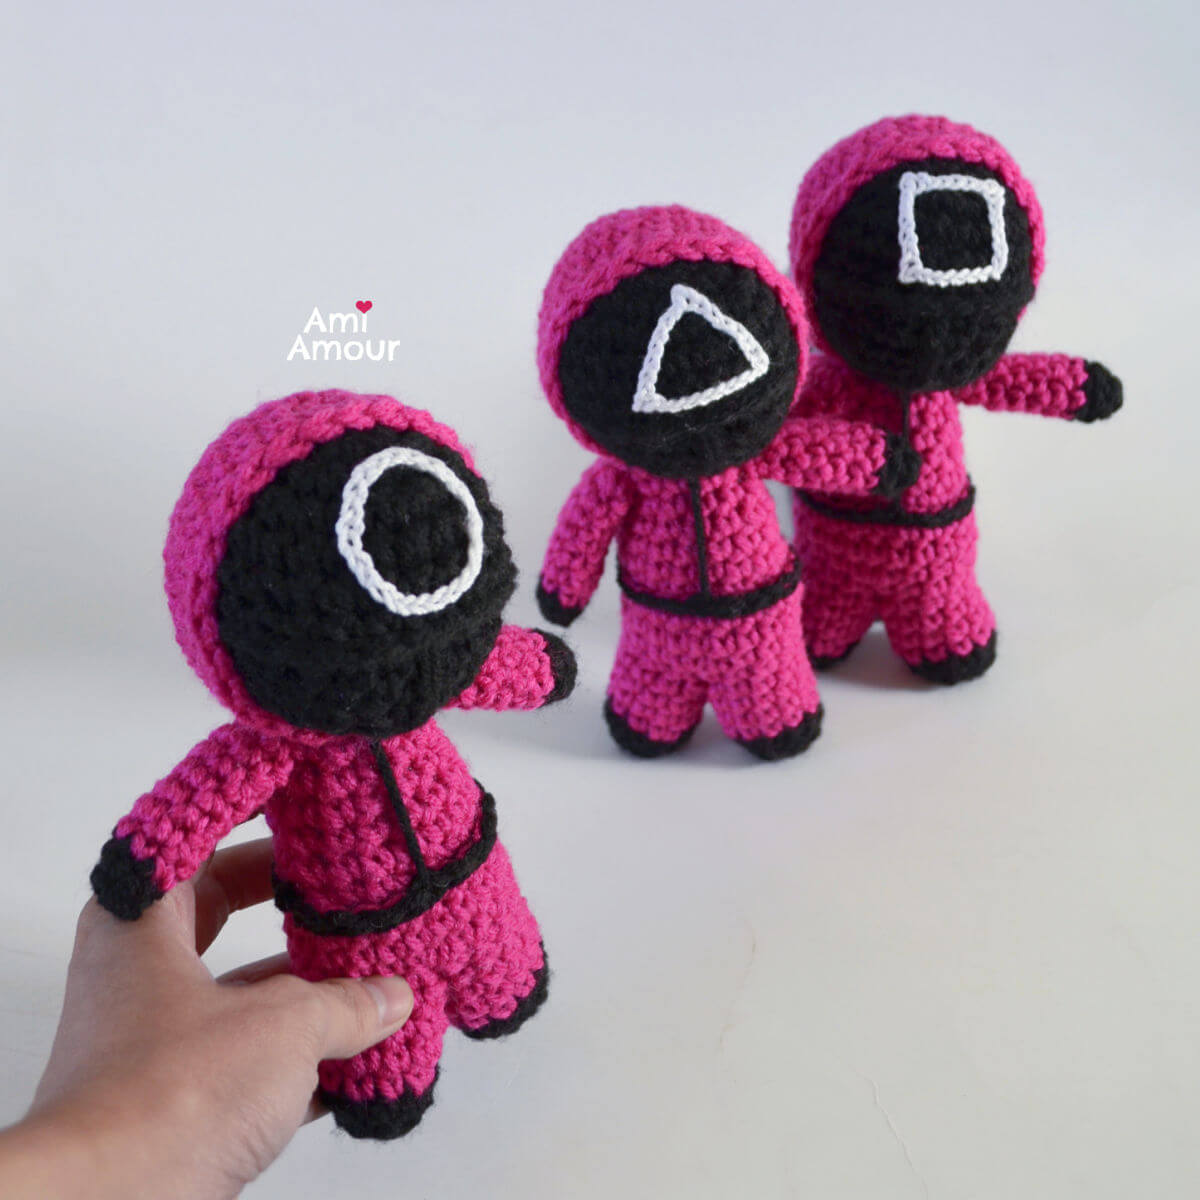
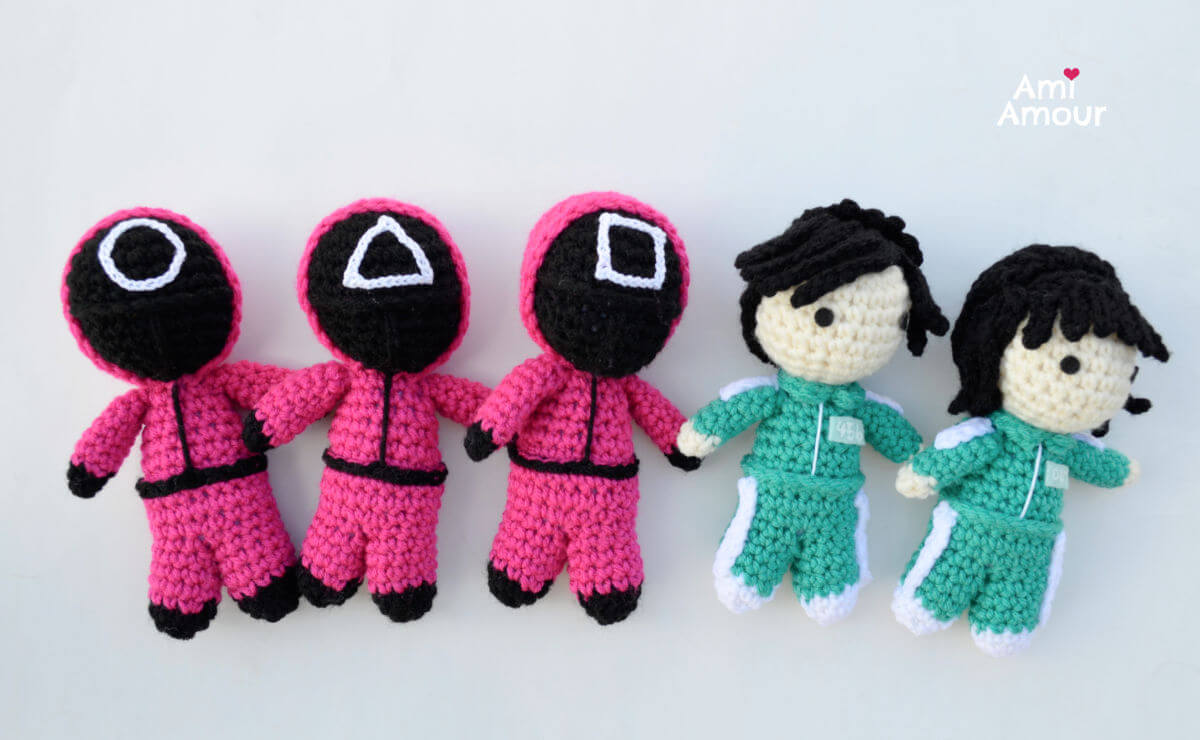
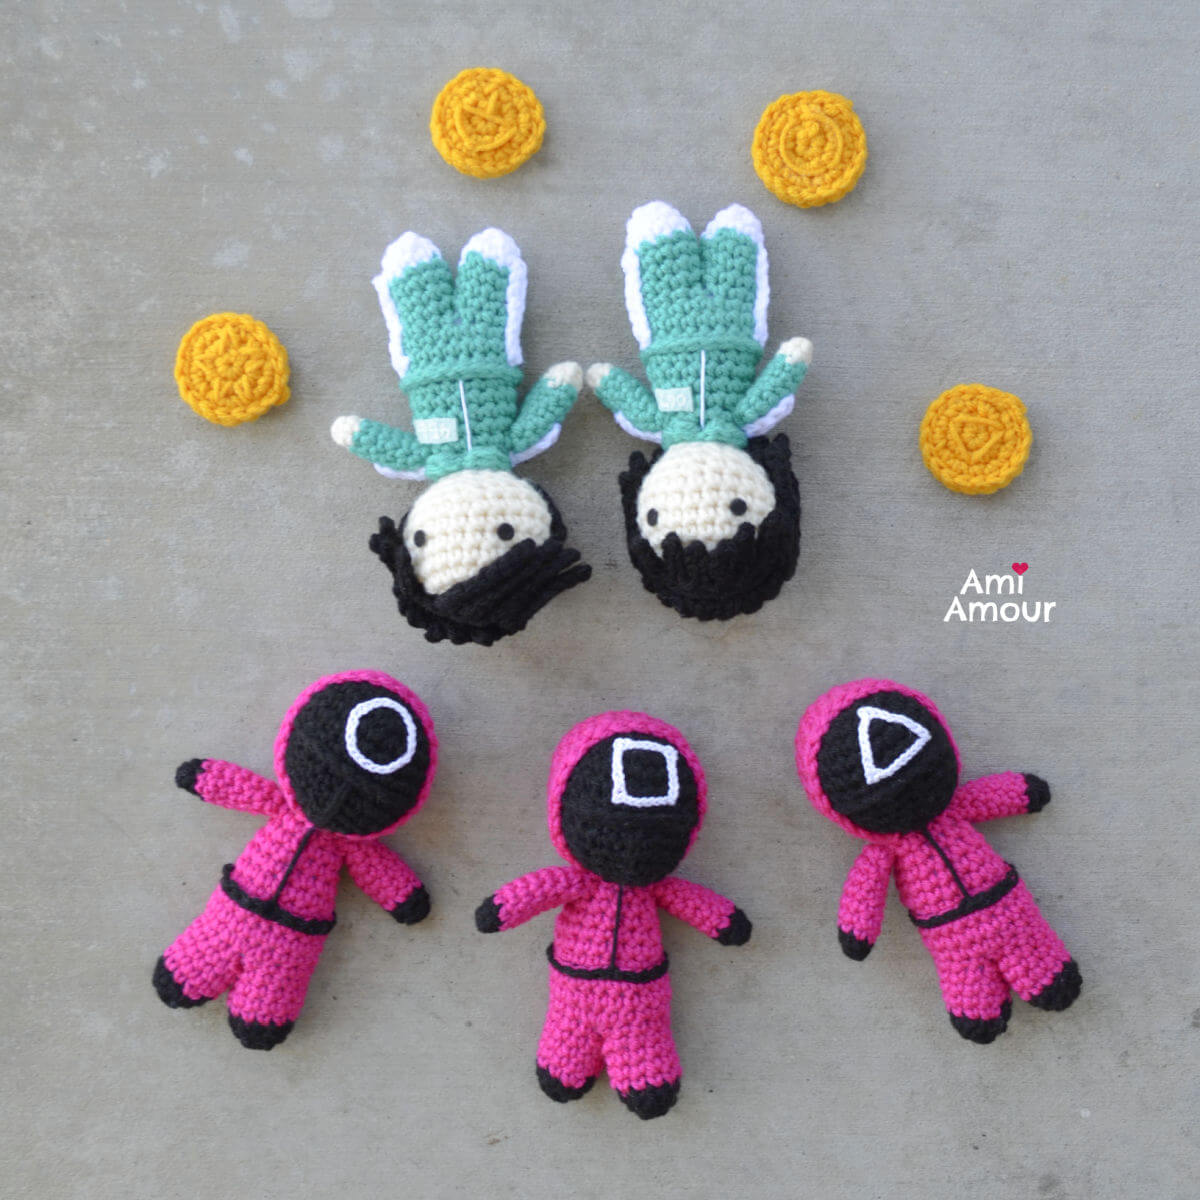
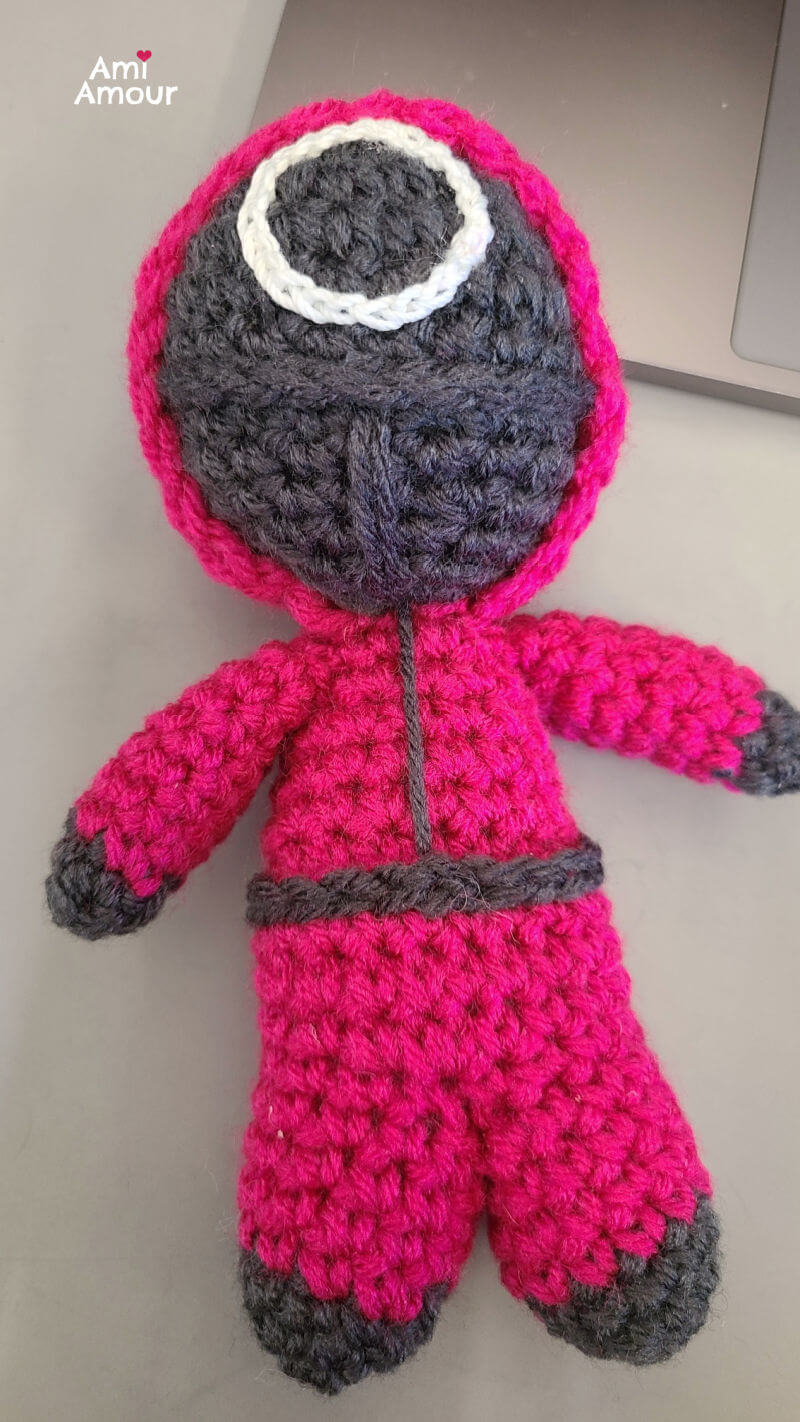
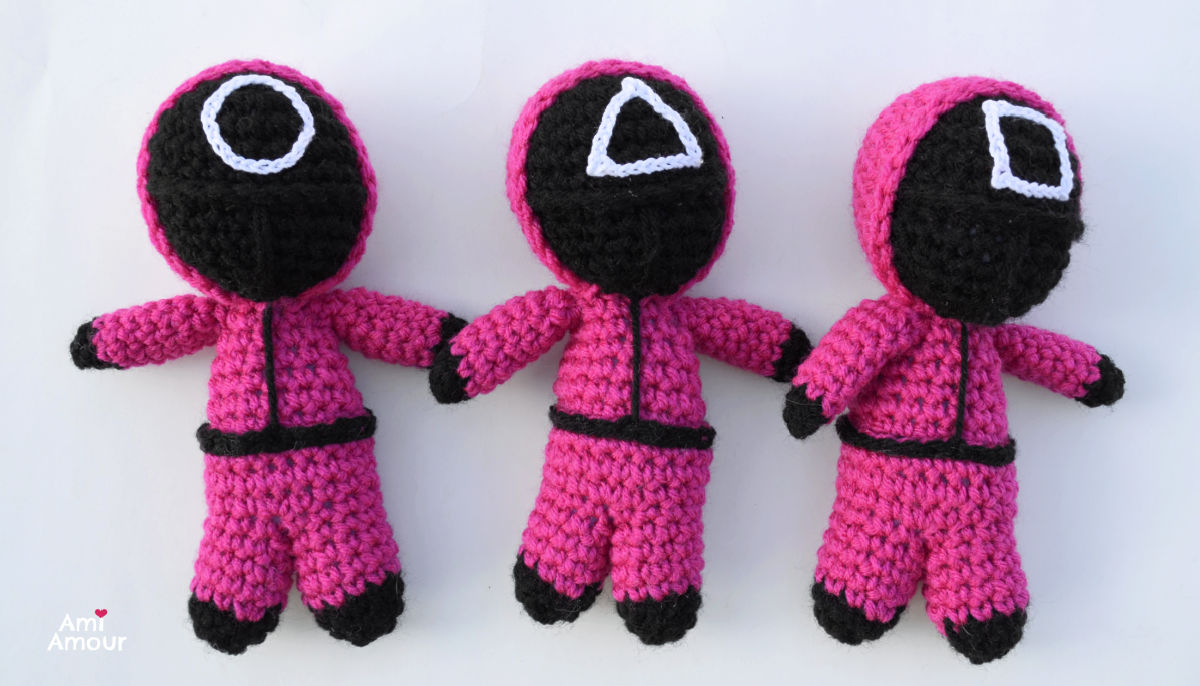
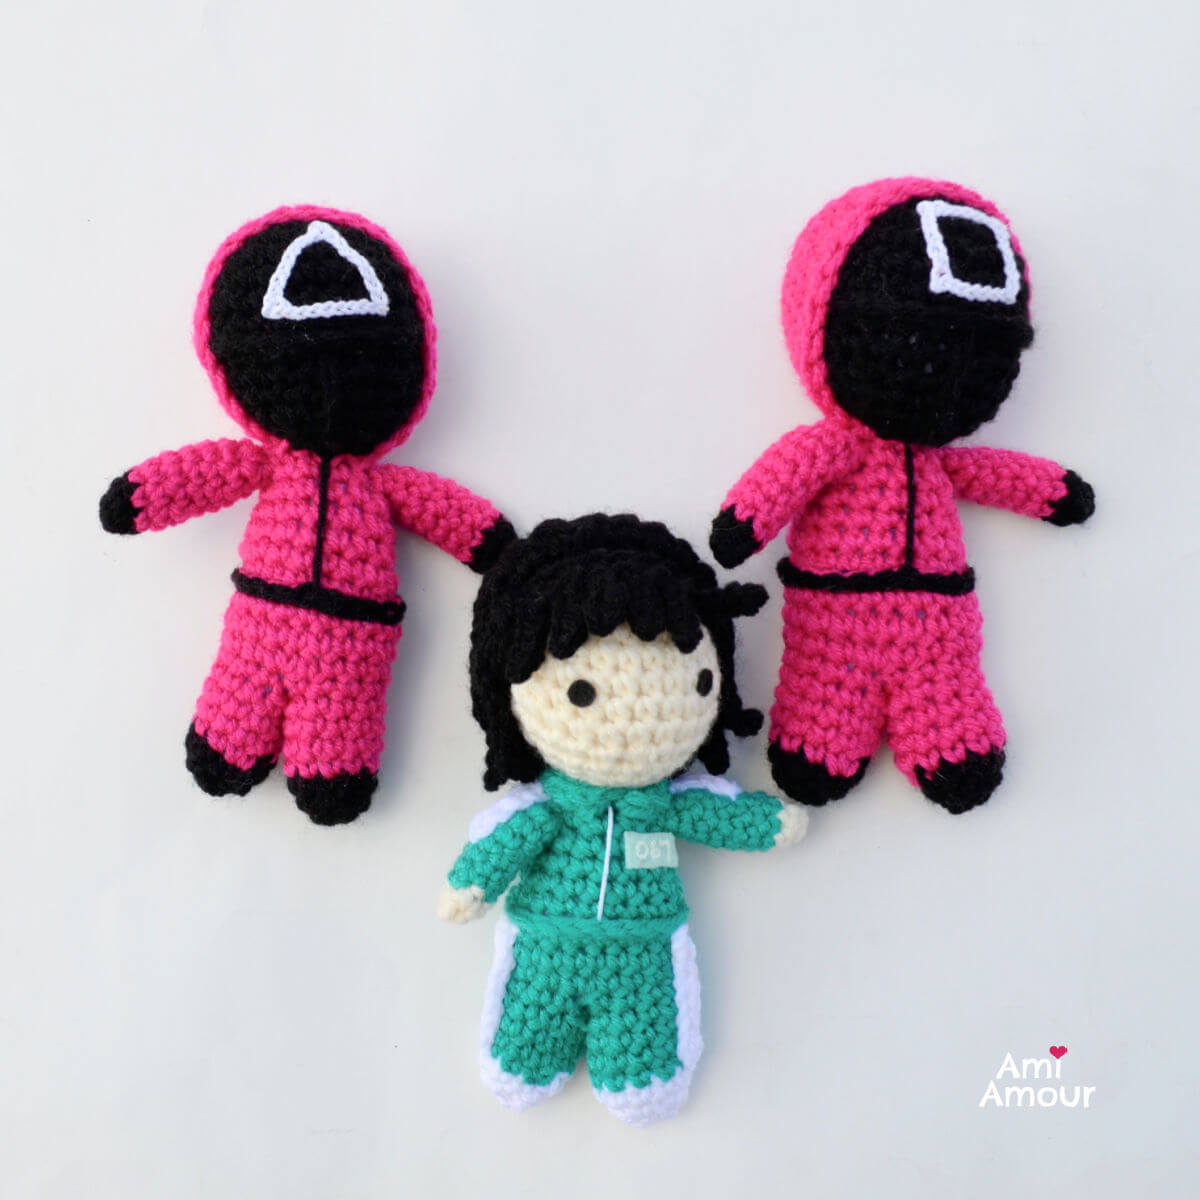
The Pink Soldiers wear jumpsuits with a hoodie that covers their entire body. On their face, they have a black mask. The shapes on their mask symbolize their ranking in the hierarchy. Circle, Triangle, and Square ranks from lowest to highest respectively.
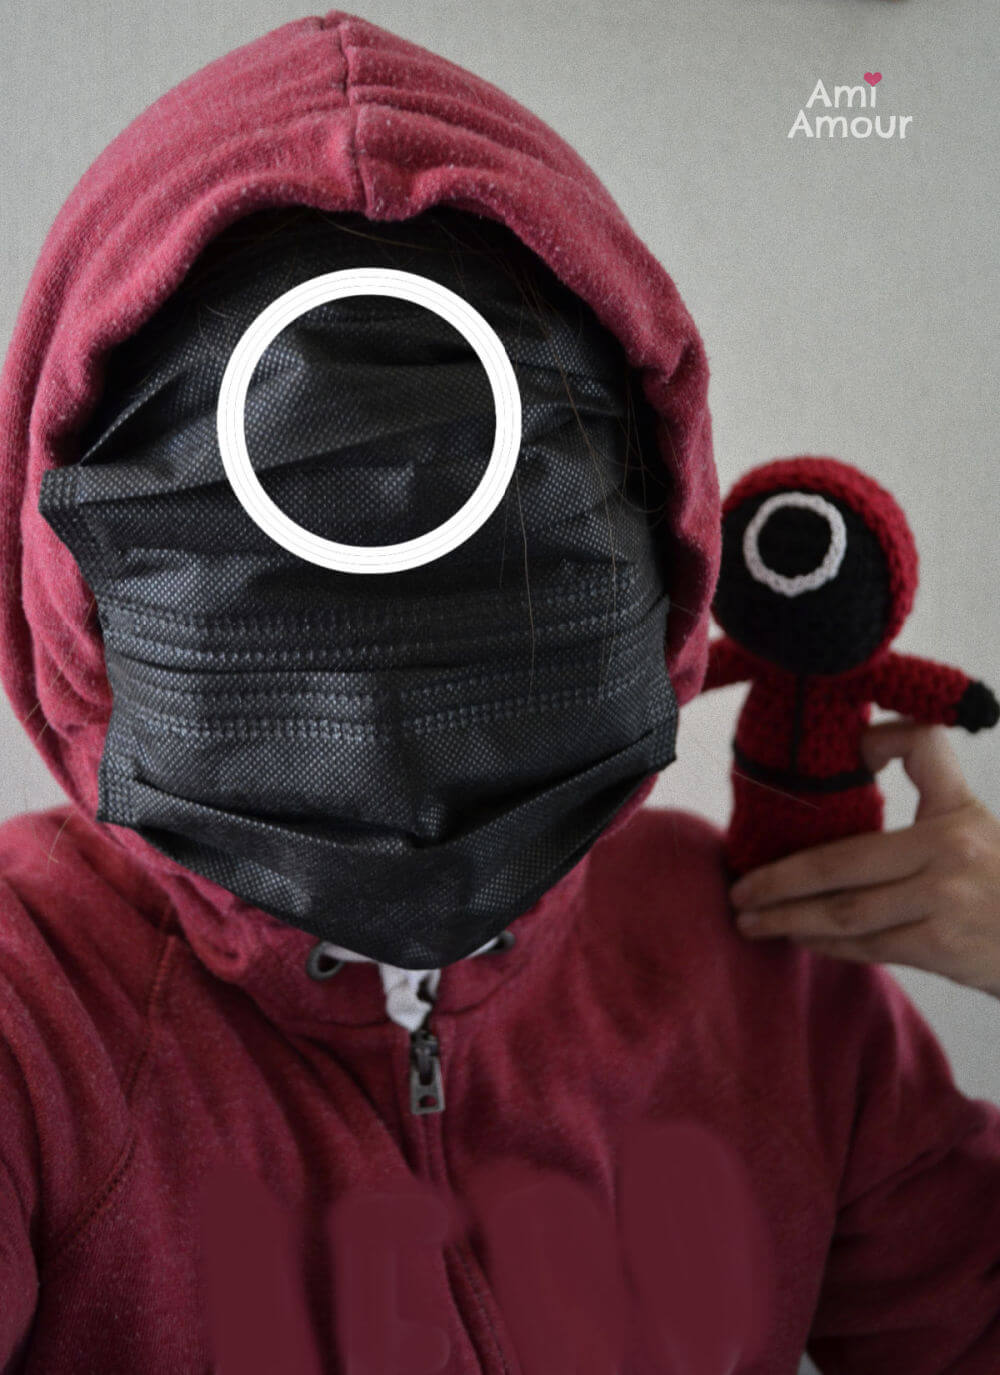
Here’s also a crochet Squid Game soldier I created in red. I had the hardest time deciding which yarn color I wanted to use! Pink or Red, which do you prefer?
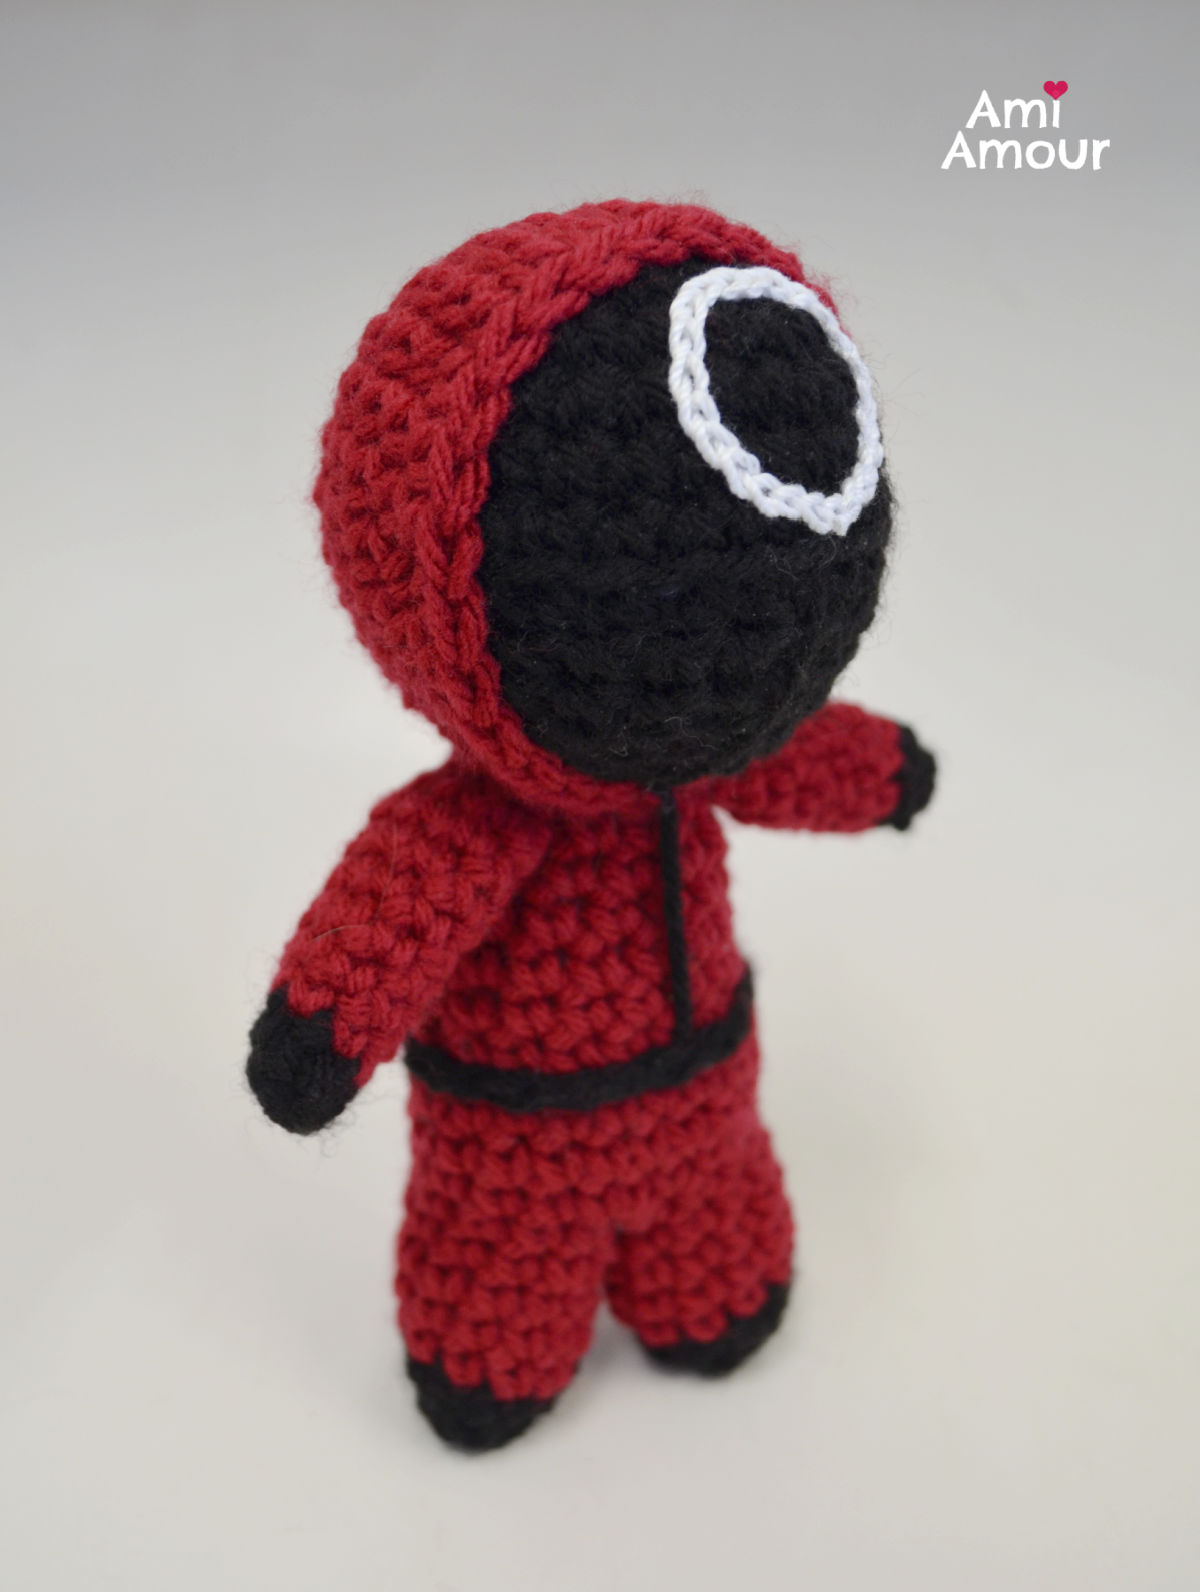
It was fun to pose with him for a selfie in a quick makeshift costume I made. You just need a red hoodie and 2 black facemasks, and you’re instantly a Squid Game Soldier. You just can’t see anything though! 😂
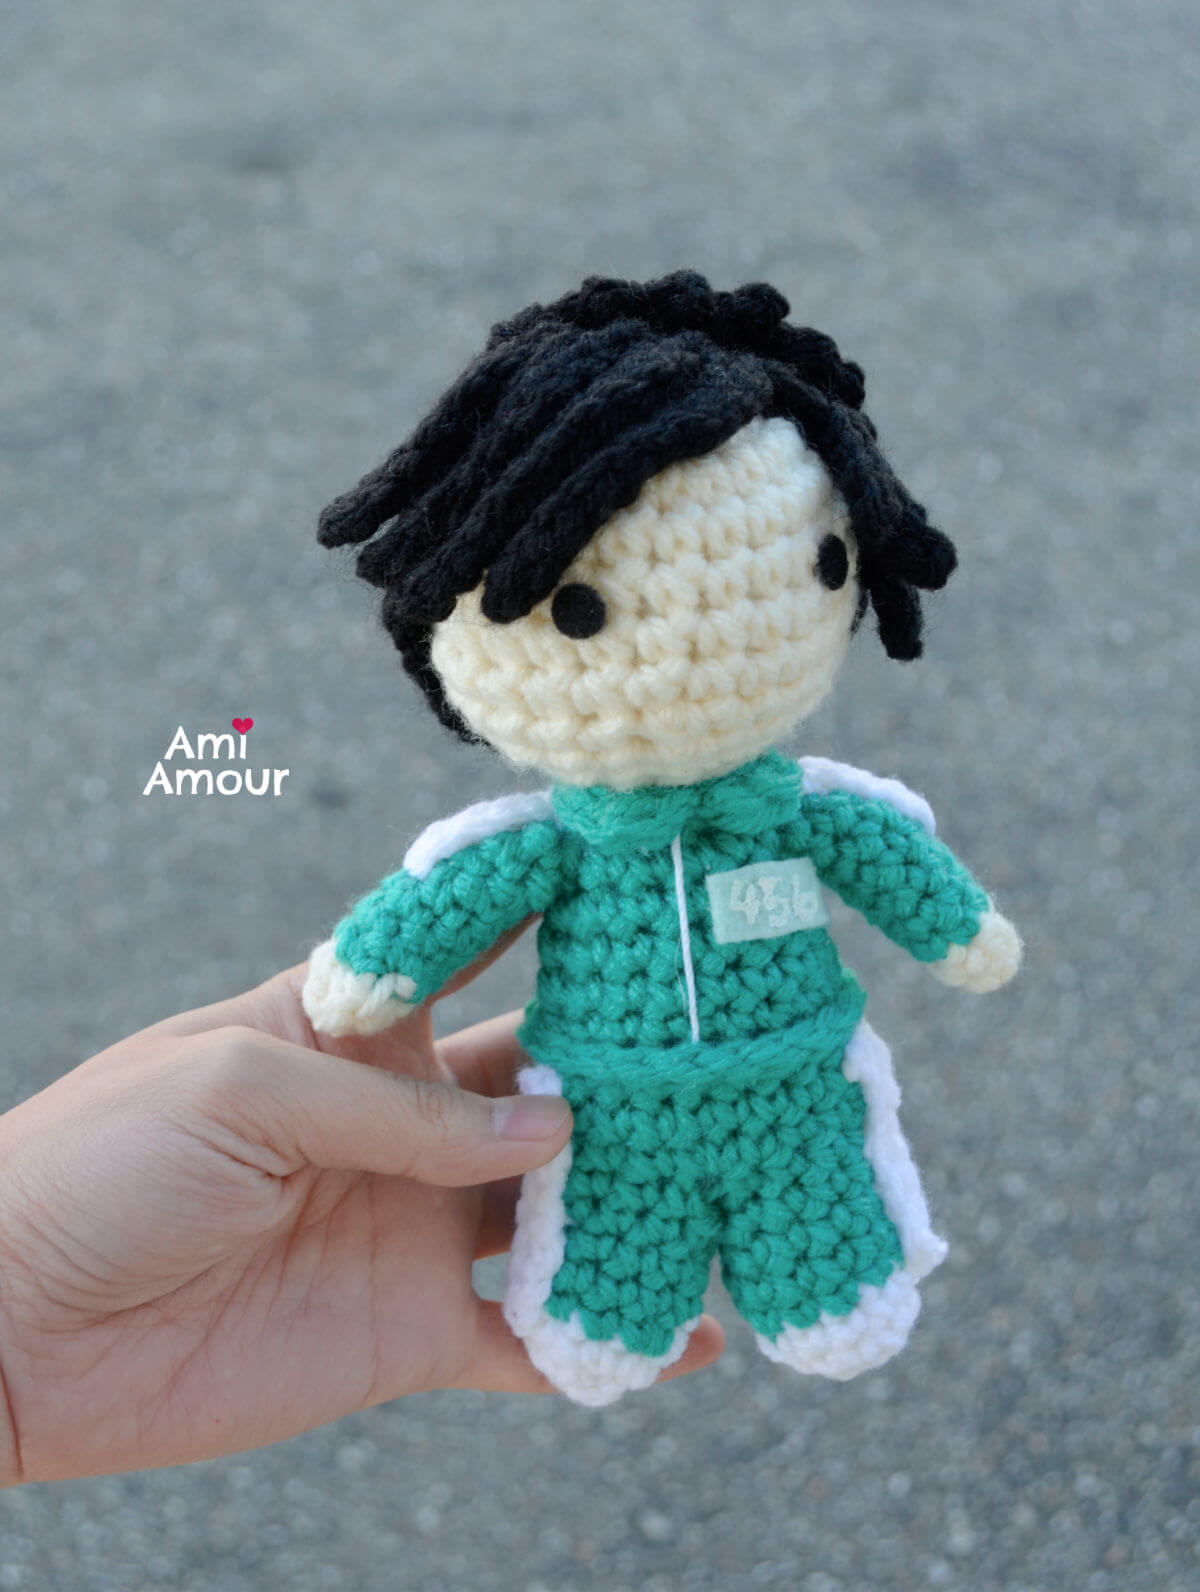
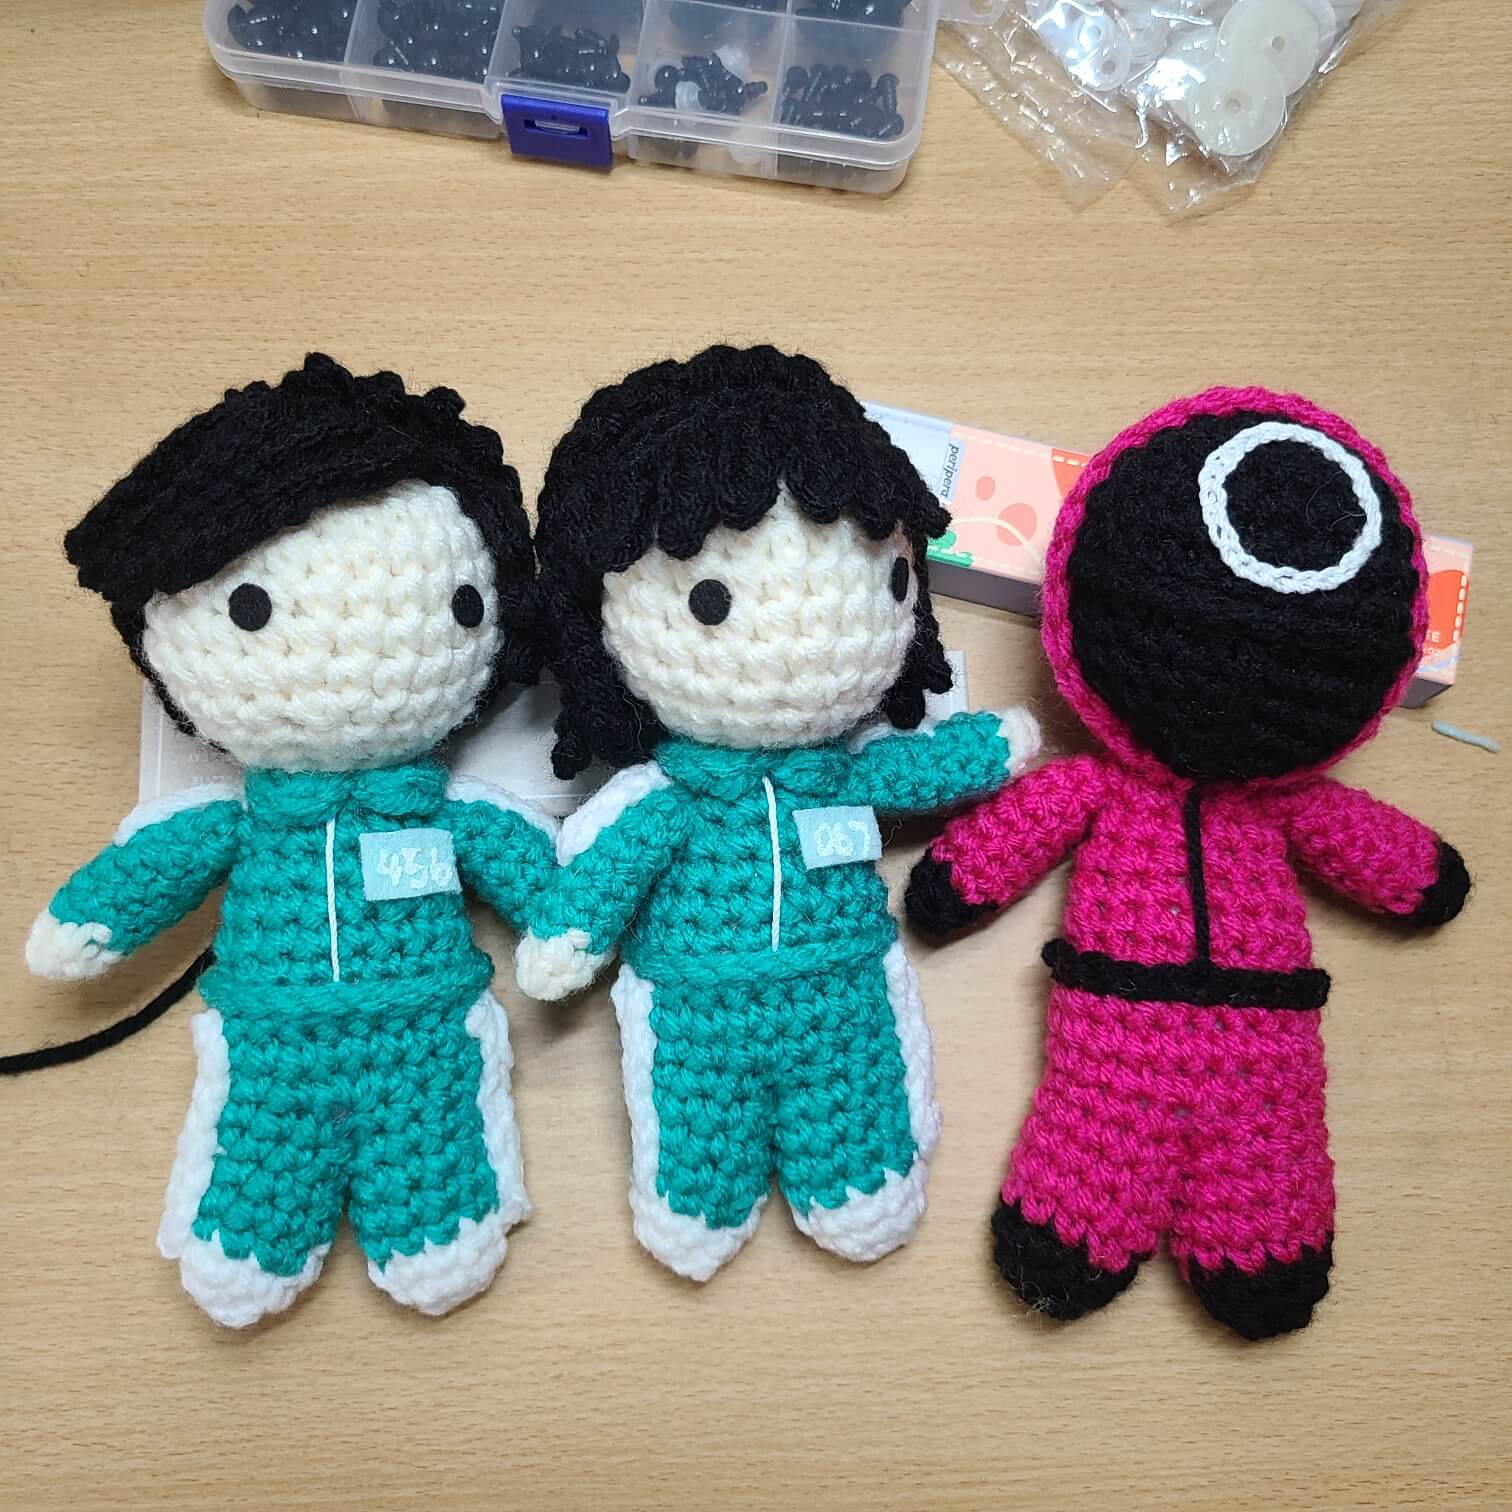
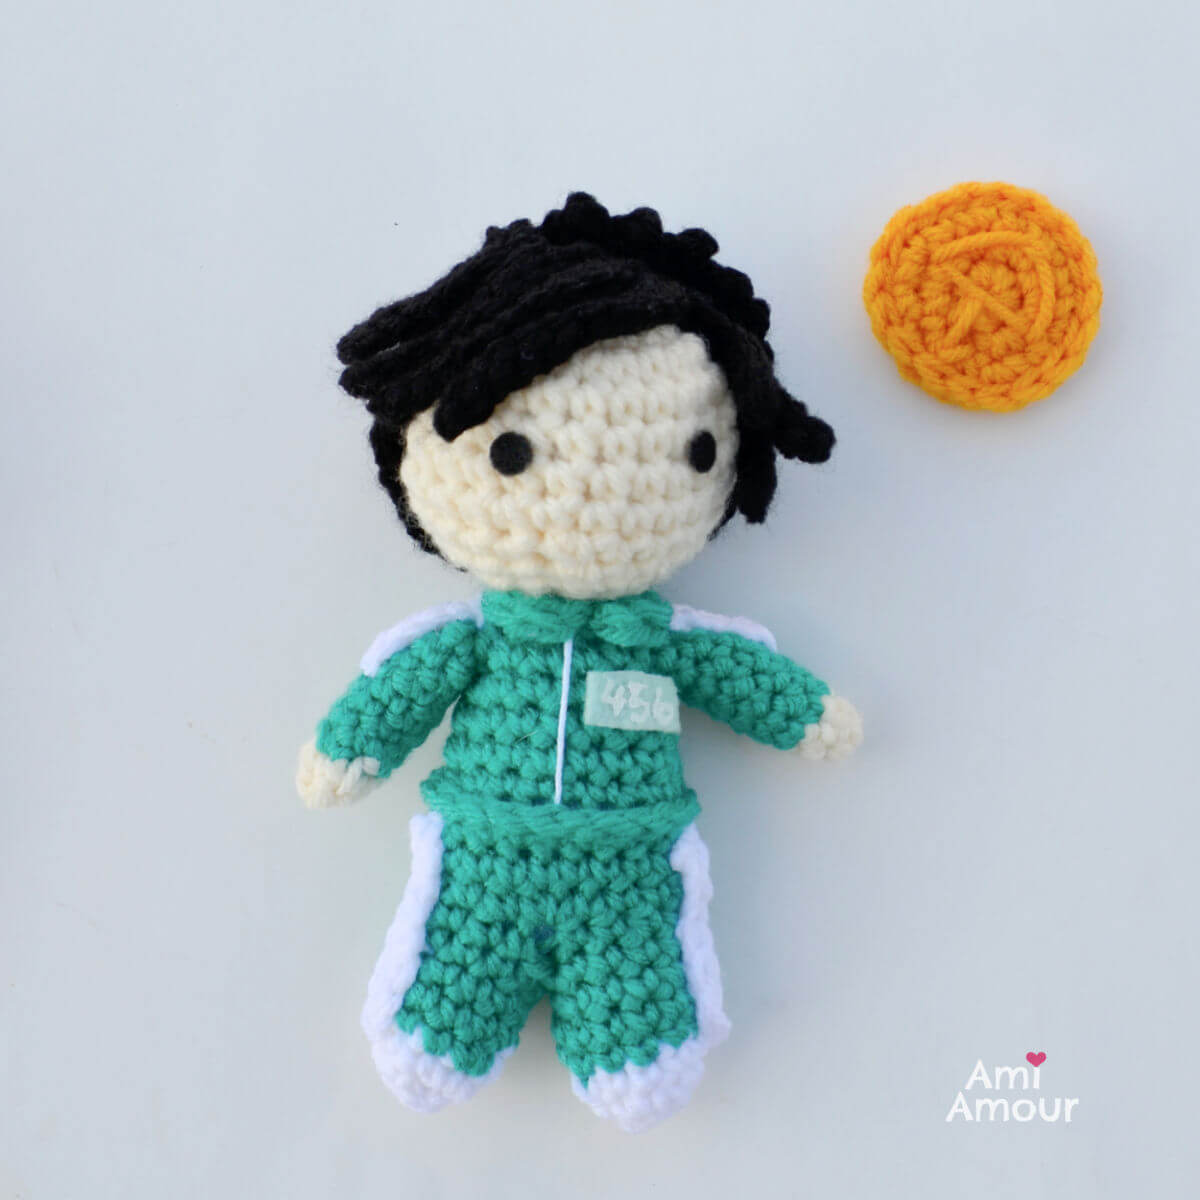
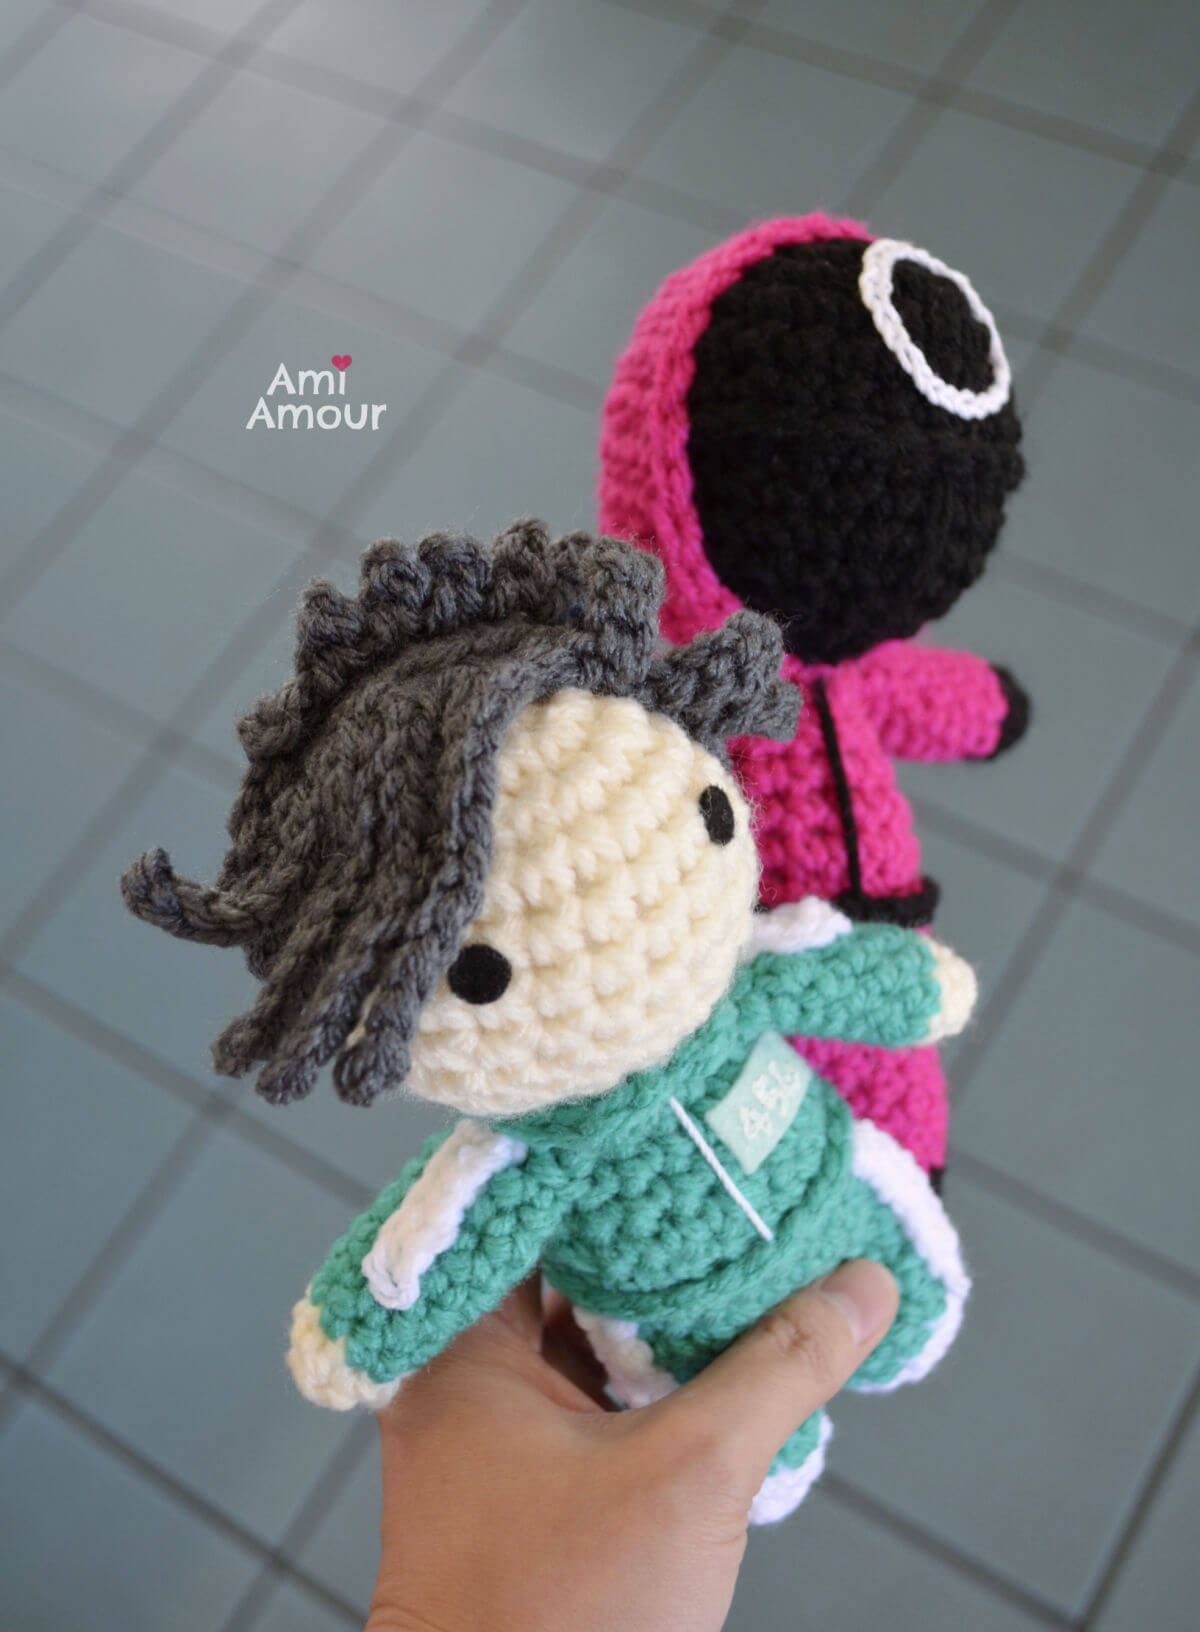
The crochet Squid Game Amigurumi Players all wear the green tracksuits which have white stripes on the side of the pants and on the arm sleeves. Here is our lead character, Player 456, Gi-hun.
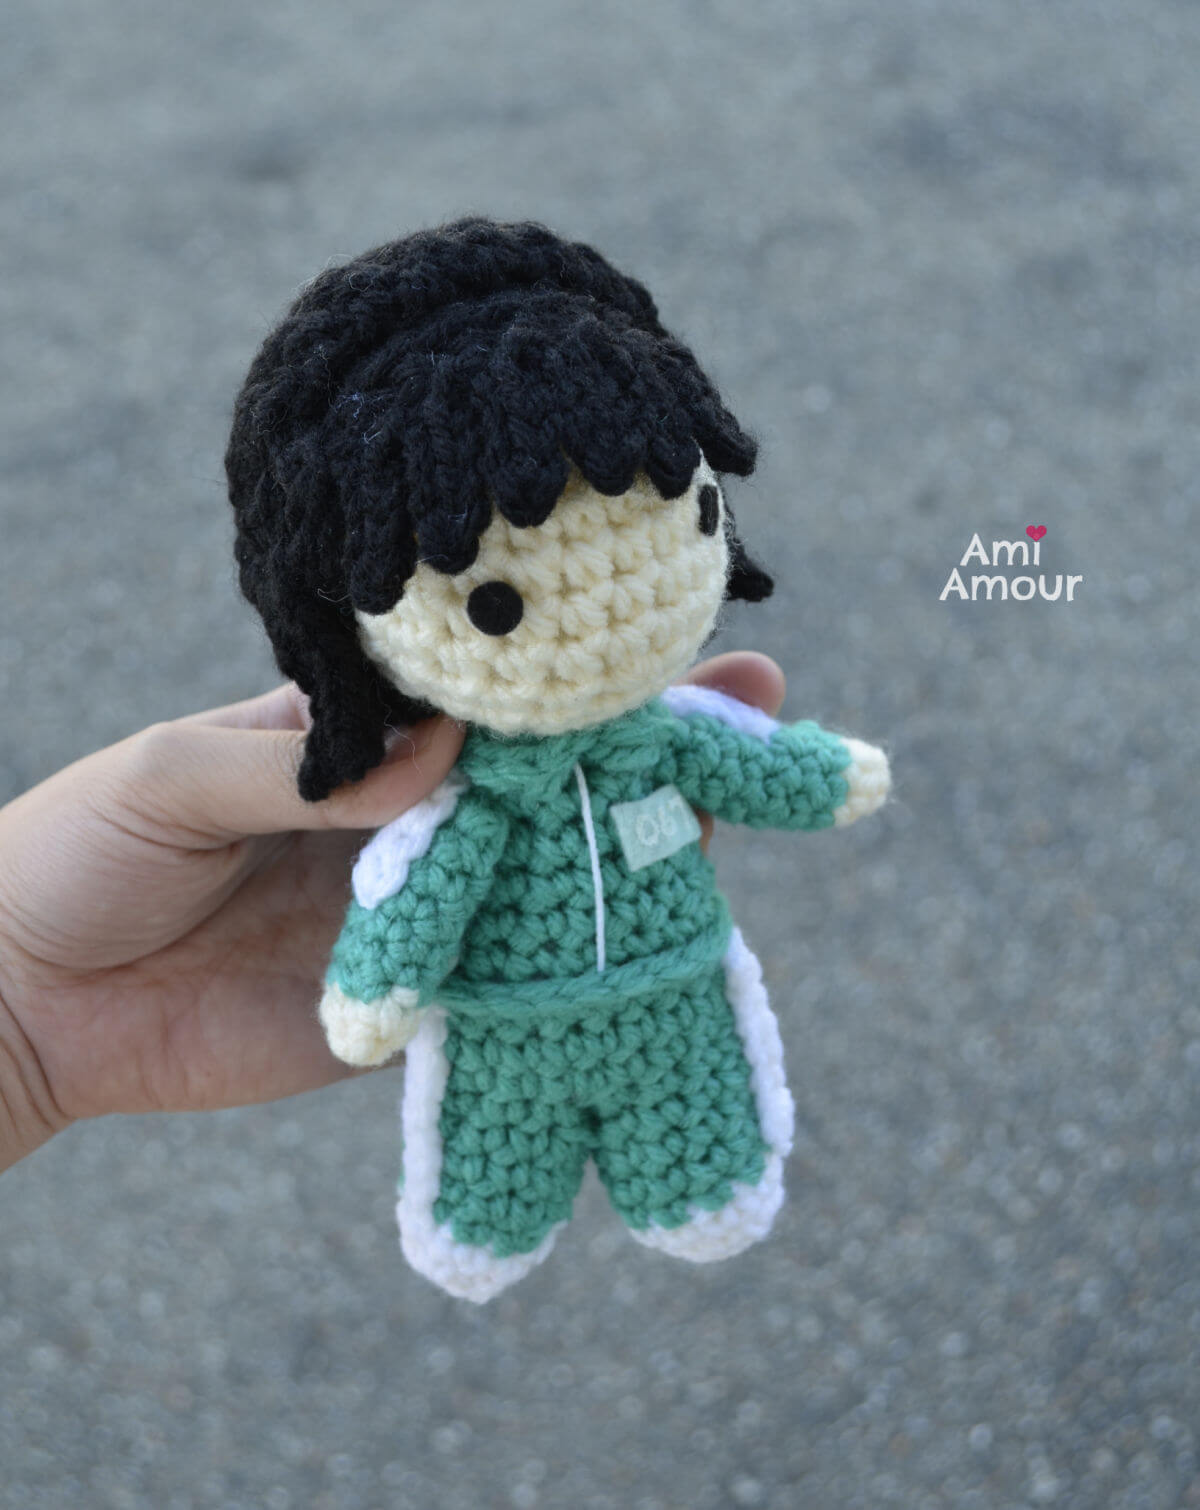
Next up, is my favorite character, Player 067, Sae-byeok. Did you know her name means dawn in Korean? My favorite part about her design has to be her crochet hair! It took some tries to get it right, but I’m happy with the way she turned out.
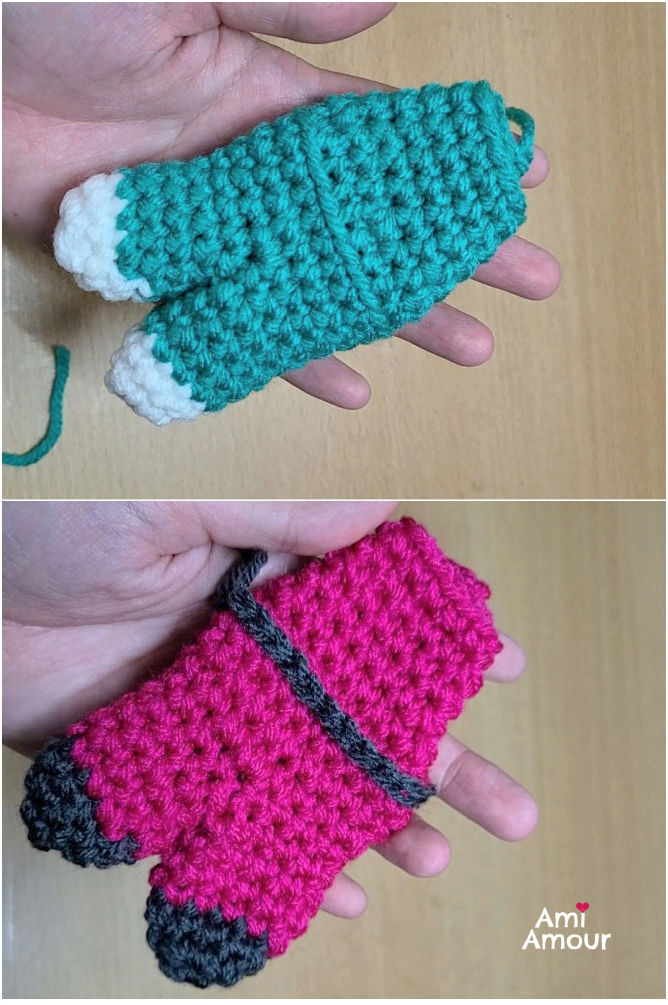
If you look close, you’ll be able to see that the base body for both the Soldier and the Player are the same except in a different color combination. It’s black and pink for the soldier and green and white for the Player. As a set, it gives the dolls a cohesive look.
Happy crocheting! Love to see how your projects turn out and if you survived the crochet Squid Game! You can tag me with your projects on Instagram @ami_amour.
If you like this pattern, here are some other free crochet patterns you might enjoy!
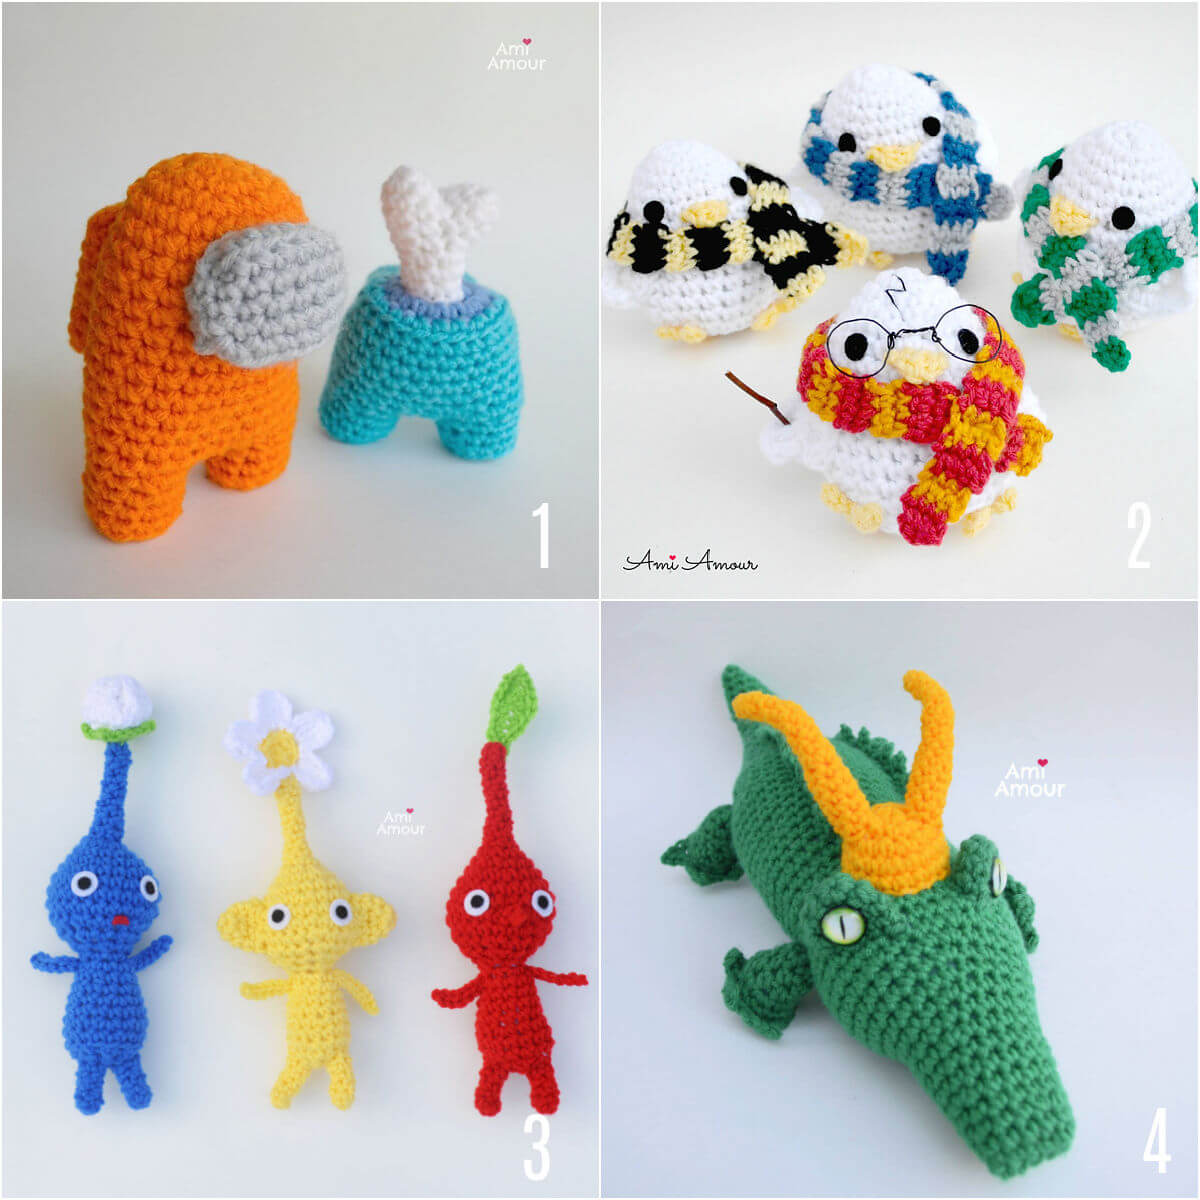
1. Among Us Amigurumi
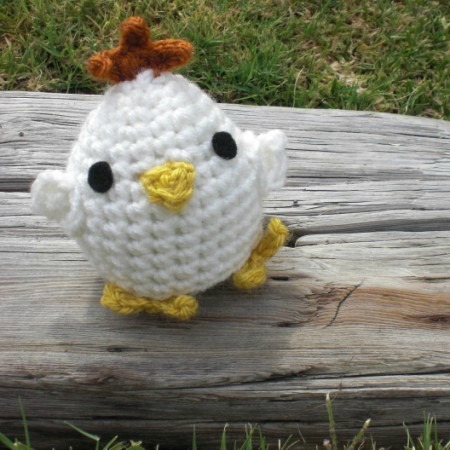
2. Wizarding Chick Amigurumi
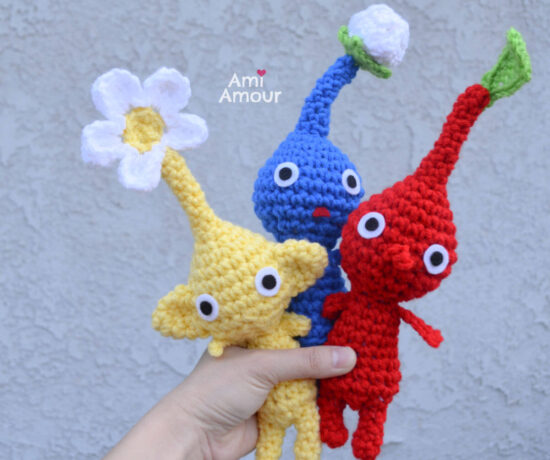
3. Pikmin Amigurumi
4. Alligator Loki Amigurumi
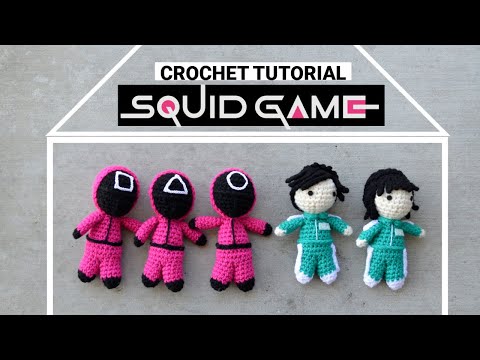
Squid Game – Crochet Tutorial Video
See the characters in action and crochet along with me!
*Disclosure: This post contains affiliate links. This means I may receive a small commission if you decide to purchase anything by clicking on one of these links.
Crochet Squid Game – Amigurumi Pattern
LEVEL: Intermediate
CROCHET HOOK:
4.00mm size
2.75mm size
YARN:
For Soldier
Worsted weight, acrylic yarn
– Red Heart Super Saver: Shocking Pink
– Red Heart Super Saver: Black
– Aunt Lydia’s Fashion Crochet Thread – Size 3 (White)
For Player
– Red Heart with Love: Jadeite
– Red Heart Super Saver: White
– Impeccable Loops and Threads: Aran
– Aunt Lydia’s Fashion Crochet Thread – Size 3 (White)
NOTIONS:
– Polyester Fiberfill
– Yarn Needle
– Stitch Marker
– Scissors
– Black Felt
– Mint Felt
– Fabri-tac Glue
– White Puffy Paint
ABBREVIATIONS:
ch – chain
dc – double crochet
hdc – half double crochet
sc – single crochet
sl st – slip stitch
sc2tog – single crochet 2 together (sc dec)
st – stitch
APPROXIMATE SIZE:
6in tall / 15cm tall
SQUID GAME SOLDIER
SOLDIER HEAD/MASK
With 4.00mm crochet hook
With black yarn
Round 1: 6 sc into magic ring.
Round 2: 2 sc in each st around – 12 sc.
Round 3: [2 sc in next st, sc in next st] around – 18 sc.
Round 4: [2 sc in next st, sc in next 2 st] around – 24 sc.
Round 5-7: Sc in each st around – 24 sc.
Round 8a: In Front loop only, sl st around – 24 sl st.
Round 8b: In Back Loop only, [Sc2tog, sc in next 4 st] around – 20 sc.
Round 9: Sc in each st around – 20 sc.
Round 10: [Sc2tog, sc in next 8 st] around – 18 sc.
Round 11: [Sc2tog, sc in next 4 st] around – 15 sc.
Round 12: [Sc2tog, sc in next 3 st] around – 12 sc.
Note: Stuff the Head
Round 13: Sc2tog around – 6 sc.
Fasten off, leaving a long tail.
Finish stuffing, sew closed.
HOODIE
With pink yarn (this is the color I used)
Round 1: 6 sc into magic ring.
Round 2: 2 sc in each st around – 12 sc.
Round 3: [2 sc in next st, sc in next st] around – 18 sc.
Round 4: [2 sc in next st, sc in next 2 st] around – 24 sc.
Round 5: [2 sc in next st, sc in next 7 st] around – 27 sc.
Round 6-10: Sc in each st around – 27 sc.
Fasten off, leaving a long tail.
Insert Head into Hoodie. Make sure the line in the middle of the head shows up in the middle portion of the head.
Sew Hoodie down around head. I like to sew around in the 2nd to last round of the Hoodie.
(Optional) With the leftover black yarn, on the bottom half off the face, embroider a line down the center to divide the bottom half of the mask in half.
SOLDIER BODY
Note: The body is created from bottom up, meaning we start with the legs first.
Round 1: With black yarn, 5 sc into magic ring.
Round 2: 2 sc in each st around – 10 sc.
Round 3: Sc in each st around – 10 sc.
Round 4: With pink yarn, [2 sc in next st, sc in next 4 st] around – 12 sc.
Round 5-7: Sc in each st around – 12 sc.
Fasten off.
You have created LEG A. Repeat Rounds 1-7 once more to create LEG B, but DO NOT FASTEN OFF this time. We will join the 2 legs together. Join Leg A and Join Leg B together across 4 stitches using single crochet. See photo tutorial below or video tutorial here.
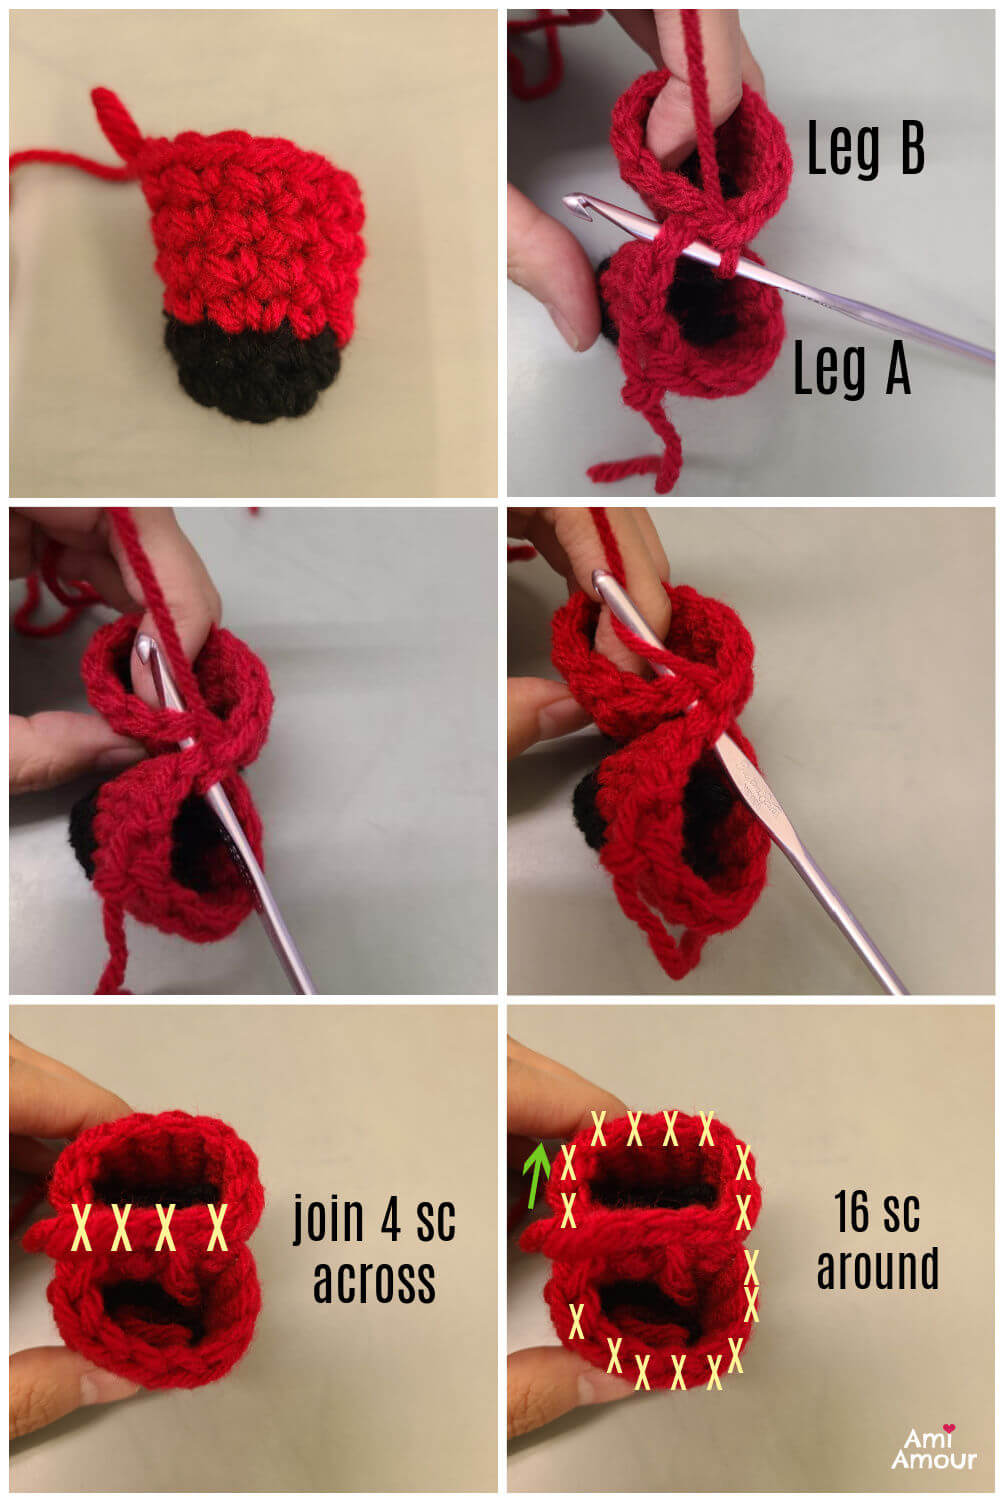
You should now have 16 sc around the circumference of the legs.
Round 8: Sc in each st around – 16 sc. [Note: See last photo from Leg Tutorial]
Round 9: [2 sc in next st, sc in next 3 st] around – 20 sc.
Round 10-11: Sc in each st around – 20 sc.
Now sc in next 5 st only. Move stitch marker to last st made. This will now be the end of the round.
Round 12: In Back Loop only, [Sc2tog, sc in next 8 st] around – 18 sc.
Round 13: [Sc2tog, sc in next 7 st] around – 16 sc.
Round 14: [Sc2tog, sc in next 6 st] around – 14 sc.
Round 15: Sc in each st around – 14 sc.
Round 16: [Sc2tog, sc in next 5 st] around – 12 sc.
Round 17: Sc in each st around – 12 sc.
Fasten off, leaving a long tail.
BELT
With black yarn
On the Body, go back to Round 12 (where we did back loop). There should be a ridge around the middle of the body.
Sl st onto the front loop and sl st around – 24 sl st.
Fasten off, leaving a long tail.
Using the tail, embroider a vertical black line on the torso to represent the zipper for the outfit.
ARM (make 2)
Round 1: With black yarn, 4 sc into magic ring.
Round 2: [2 sc in next st, sc in next st] around – 6 sc.
Round 3: With pink yarn, [2 sc in next st, sc in next 2 st] around – 8 sc.
Round 4-8: Sc in each st around – 8 sc.
Round 9: [Sc2tog, sc in next 2 st] around – 6 sc.
Fasten off, leaving a long tail.
SOLDIER RANKING SHAPES for HEAD
2.75mm crochet hook
With white cotton thread yarn, size 3.
Circle
With 2.75mm hook and cotton thread, size 3
Ch 24, sl st into first ch to join ends together.
Fasten off, leaving a long tail.
Triangle
With 2.75mm hook and cotton thread, size 3
Ch 10, sl st into previous ch, ch 9, sl st into previous ch, ch 8, sl st into first ch to join ends together.
Fasten off, leaving a long tail.
Square
With 2.75mm hook and cotton thread, size 3
Ch 8, sl st into previous ch, ch 7, sl st into previous ch,
Ch 7, sl st into previous ch, ch 6.
Fasten off, leaving a long tail.
Use the yarn needle to connect the ends together to create the square.
CROCHET SQUID GAME SOLDIER ASSEMBLY
1. Stuff BODY.
2. Stuff ARMS Lightly.
3. Sew Head on top of BODY.
4. Sew ARMS to BODY.
5. Glue desired SHAPE (circle, triangle, or square) to top of HEAD with Fabri-tac. (You can also sew on if you prefer, but glueing on will give you a cleaner look)
6. Hide all ends, cut all tails.
7. Tag me with your projects on Instagram @ami_amour or Facebook!
8. Continue on to make the Players!
SQUID GAME AMIGURUMI PLAYER (with Tracksuit)
PLAYER HEAD
With aran color yarn (or desired skin color)
Round 1: 6 sc into magic ring.
Round 2: 2 sc in each st around – 12 sc.
Round 3: [2 sc in next st, sc in next st] around – 18 sc.
Round 4: [2 sc in next st, sc in next 2 st] around – 24 sc.
Round 5-8: Sc in each st around – 24 sc.
Round 9: [Sc2tog, sc in next 4 st] around – 20 sc.
Round 10: [Sc2tog, sc in next 8 st] around – 18 sc.
Round 11: [Sc2tog, sc in next st] around – 12 sc.
Fasten off, leaving a long tail.
TRACKSUIT PLAYER BODY
The Squid Game Amigurumi Player Body is the same pattern as SOLDIER BODY above, except instead of pink and black, we have the colors green and white instead. So go ahead and follow the SOLDIER BODY pattern, but use the colors green and white instead. For the belt section in the middle of the body, you will slip stitch around with green yarn. For my amigurumi project, I used this yarn color Jadeite for the green parts.
Check the comparisons of the body side by side. It is the same except with a different color combo.
PLAYER ARM (make 2)
Same pattern as SOLDIER ARM except in the colors of aran and green instead.
TRACKSUIT COLLAR
With green yarn
Ch 15, 2 hdc into 2nd ch from hook, sl st in next 12 ch, (2 hdc, sl st) in last ch.
Fasten off, leaving a long tail.
PANT STRIPE (make 2)
With white yarn
Row 1: Ch 8, sl st back across – 7 sl st.
Fasten off, leaving a long tail.
SLEEVE STRIPE (make 2)
With white yarn
Row 1: Ch 5, sl st back across – 4 sl st.
Fasten off, leaving a long tail.
HAIR (GUY)
With black yarn (or desired hair color)
You can also follow along with the video tutorial here.
Round 1: 6 sc into magic ring.
Round 2: 2 sc in each st around – 12 sc.
Round 3: [2 sc in next st, sc in next st] around – 18 sc.
Round 4: [2 sc in nnext st, sc in next 2 st] around – 24 sc.
Round 5-6: Sc in each st around – 24 sc.
Round 7-8: In Back Loop only, sc in each st around – 24 sc.
Round 9: Sl st in next st, ch 8, sl st back 7 ch, sl st in next st,
ch 10, sl st back 9 ch, sl st in next st,
[(ch 12, sl st back 11 ch), sl st in next st] 2 times, sl st in next st,
[(ch 5, sl st back 4 ch), sl st in next st] 3 times,
[ch 1, sl st in next st] 15 times.
Now you’ll want to surface slip stitch across 2 rounds to get back to the Front loop of Round 7.
Round 10: In Front Loop of Round 7, [(ch 2, sl st in previous ch), sl st in next st] 8 times.
Fasten off, leaving a super long tail.
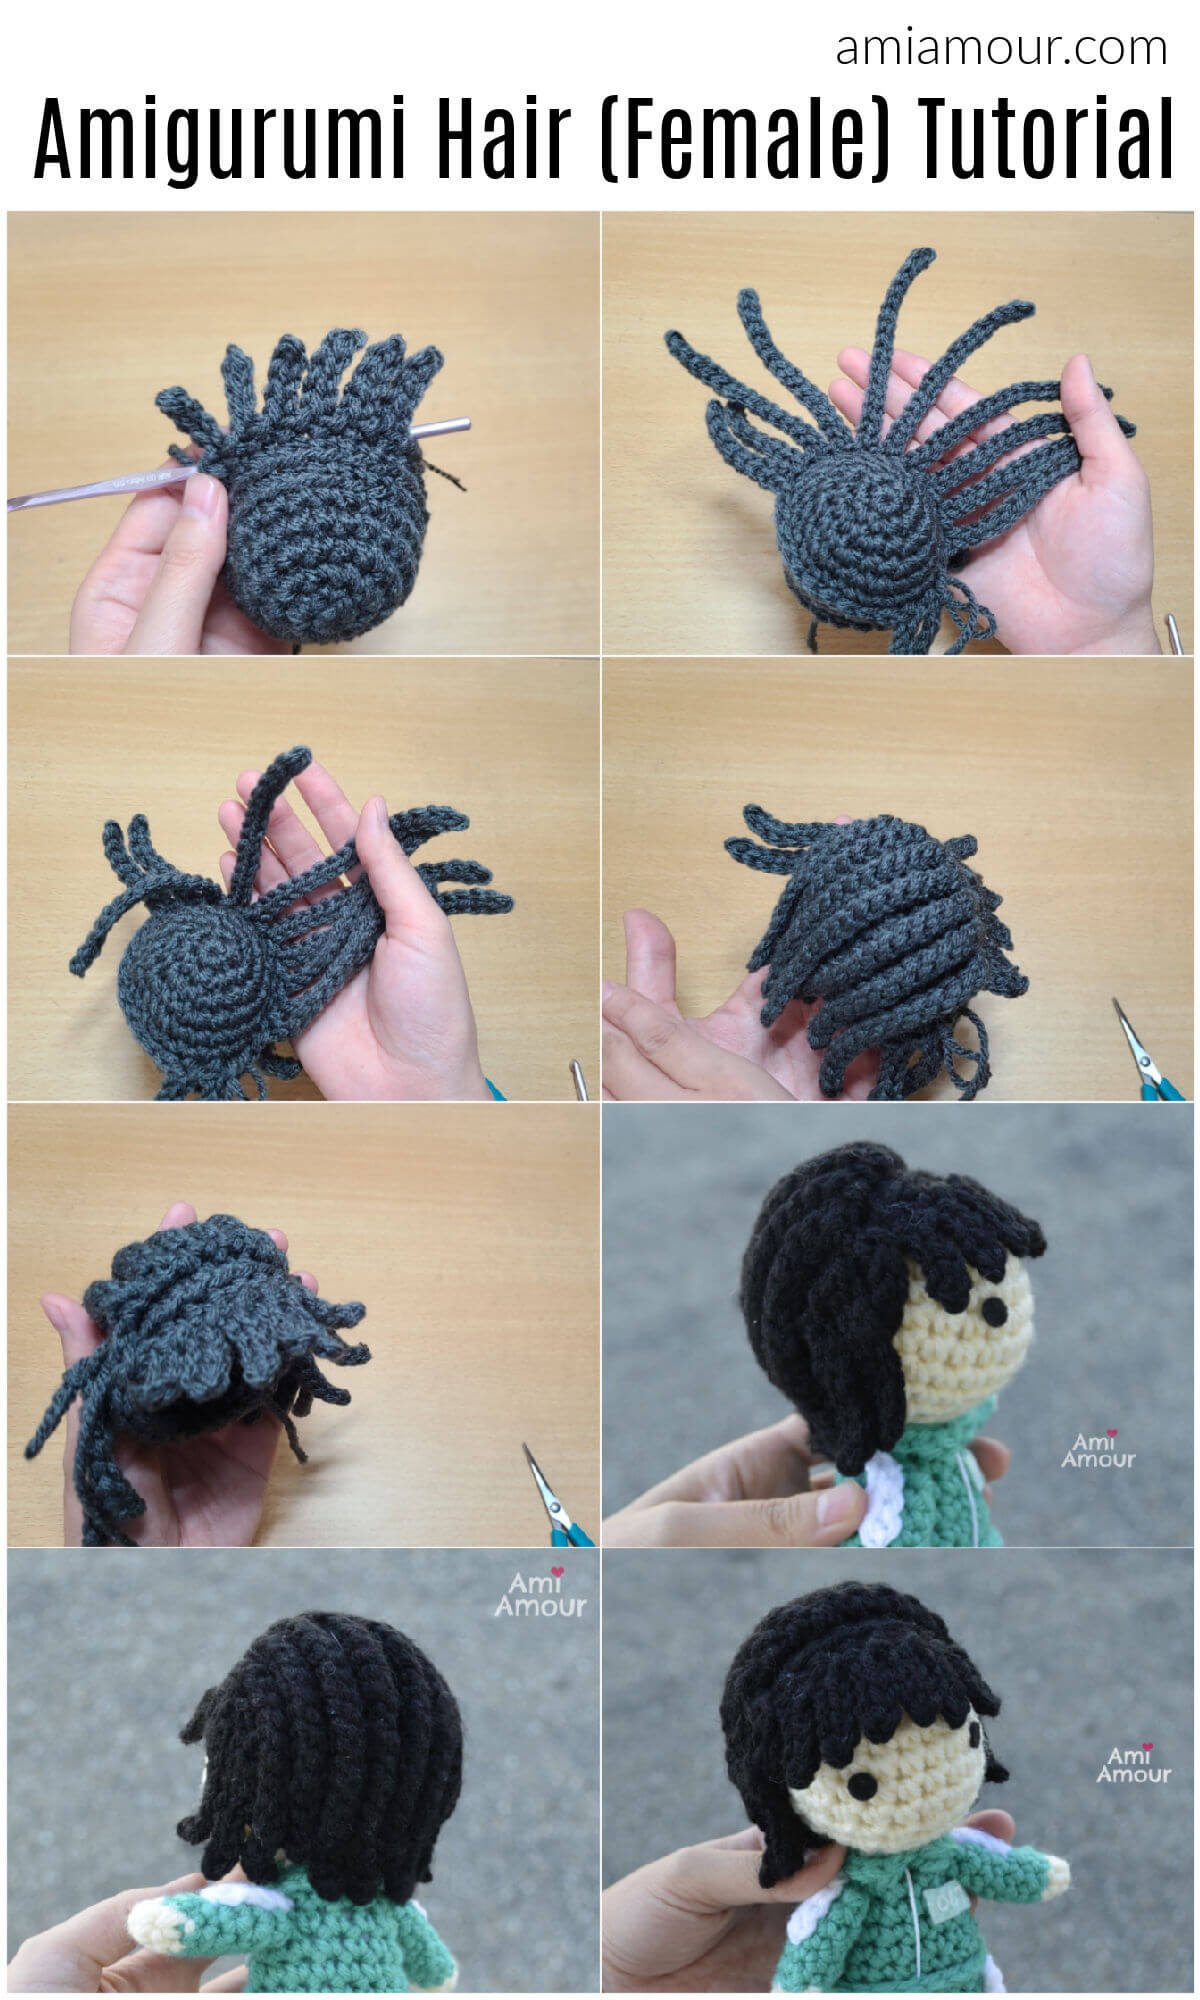
HAIR (GIRL)
With black yarn (or desired hair color)
See video tutorial here.
Repeat Round 1-8 of HAIR (GUY) pattern.
Round 9: Sl st in next st, [(ch 5, sl st back 4 ch), sl st in next st] 6 times, sl st in next 17 st.
Now you’ll want to surface slip stitch over across 2 rounds to get back to the Front loop of Round 7.
Round 10: In Front Loop of Round 7, [(ch 15, sl st back 14 ch), sl st in next st] 2 times,
[(ch 18, sl st back 17 ch), sl st in next st] 4 times,
[(ch 15, sl st back 14 ch), sl st in next st] 2 times,
[(ch 9, sl st back 8 ch), sl st in next st] 2 times,
sl st in next 10 st,
[(ch 9, sl st back 8 ch), sl st in next st] 2 times.
Fasten off, leaving a long tail.
You’ll need to flip the Round 10 hair over to cover the back of the head. Round 9 will be the hair bangs.
PLAYER AMIGURUMI ASSEMBLY
1. Stuff the Body.
2. Stuff the Head. (If you want to use safety eyes, you’ll want to have the eyes in between the 6th and 7th round down from the top of head, and 5 sts between the eyes)
3. Sew Head to Body.
4. Wrap the Tracksuit Collar around the Neck and sew into place.
5. Stuff Arms Lightly.
6. Sew Arms to Body.
7. With cotton thread, size 3, embroider a straight vertical line in the center of the tracksuit top.
8. Sew Pant Stripes to Side of Leg.
9. Sew Sleeve Stripes to top half of Arm.
10. If using felt eyes, glue eyes on with Fabri-tac.
Placement: Between Rounds 6 and 7 down from head. 5 sts between eyes.
11. Sew on Hair to top of Head. See tutorial for how to sew on and style.
12. With Mint Felt, write out the player’s number in small print with White Puffy Paint. Let dry for at least 4 hours before cutting out in the shape of a rectangle badge.
13. Glue Player Number Badge to right side of upper torso.
14. Hide and cut all ends.
15. Tag me with your projects on Instagram @ami_amour!
No Comments